2017 NISSAN FRONTIER instrument panel
[x] Cancel search: instrument panelPage 254 of 478
CAUTION
●Do not force the USB device into the
USB port. Inserting the USB device
tilted or up-side-down into the port may
damage the port. Make sure that the
USB device is connected correctly into
the USB port.
● Do not grab the USB port cover (if so
equipped) when pulling the USB device
out of the port. This could damage the
port and the cover.
● Do not leave the USB cable in a place
where it can be pulled unintentionally.
Pulling the cable may damage the port.
Refer to your device manufacturer’s owner infor-
mation regarding the proper use and care of the
device.
The USB port is located on the instrument panel.
Insert the USB device into the instrument panel.
When a compatible storage device is plugged
into the connection port, compatible audio files
on the storage device can be played through the
vehicle’s audio system.
Audio file operation
MEDIA button
Place the ignition switch in the ON or ACC
position and press the MEDIA button to switch to
the USB input mode. If a CD is playing or another
audio source is plugged in through the AUX IN
jack, the MEDIA button toggles between the
three sources.
Play information
Information about the audio files being played
can be displayed on the display screen of the
vehicle’s audio system. Depending on how the
audio files are encoded, information such as
Folder, Song and Artist will be displayed.
The track number and number of total tracks in
the folder are displayed on the screen as well.
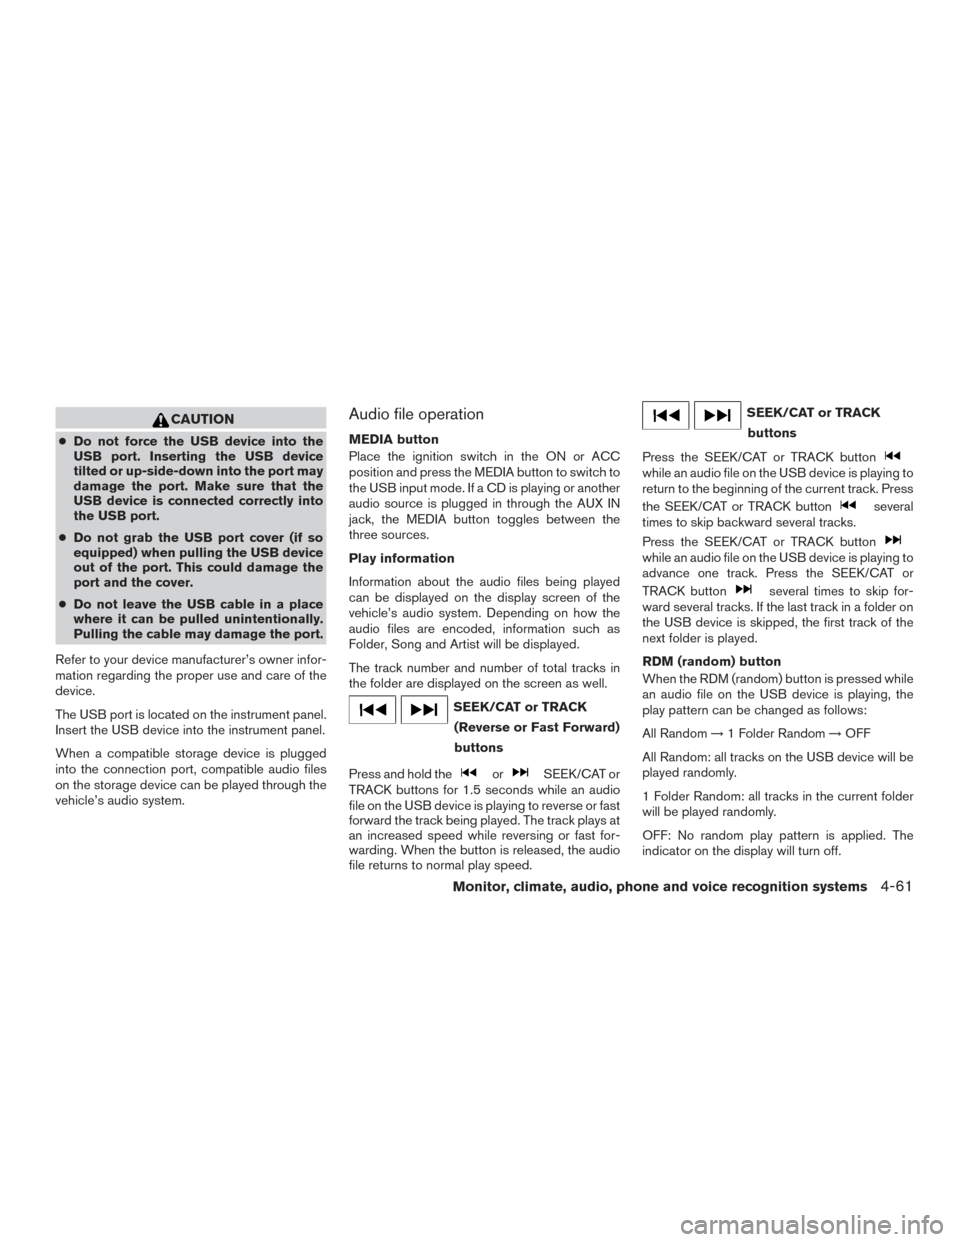
SEEK/CAT or TRACK (Reverse or Fast Forward)
buttons
Press and hold the
orSEEK/CAT or
TRACK buttons for 1.5 seconds while an audio
file on the USB device is playing to reverse or fast
forward the track being played. The track plays at
an increased speed while reversing or fast for-
warding. When the button is released, the audio
file returns to normal play speed.
SEEK/CAT or TRACK
buttons
Press the SEEK/CAT or TRACK button
while an audio file on the USB device is playing to
return to the beginning of the current track. Press
the SEEK/CAT or TRACK button
several
times to skip backward several tracks.
Press the SEEK/CAT or TRACK button
while an audio file on the USB device is playing to
advance one track. Press the SEEK/CAT or
TRACK button
several times to skip for-
ward several tracks. If the last track in a folder on
the USB device is skipped, the first track of the
next folder is played.
RDM (random) button
When the RDM (random) button is pressed while
an audio file on the USB device is playing, the
play pattern can be changed as follows:
All Random →1 Folder Random →OFF
All Random: all tracks on the USB device will be
played randomly.
1 Folder Random: all tracks in the current folder
will be played randomly.
OFF: No random play pattern is applied. The
indicator on the display will turn off.
Monitor, climate, audio, phone and voice recognition systems4-61
Page 256 of 478
CAUTION
●Do not force the USB device into the
USB port. Inserting the USB device
tilted or up-side-down into the port may
damage the port. Make sure that the
USB device is connected correctly into
the USB port.
● Do not grab the USB port cover (if so
equipped) when pulling the USB device
out of the port. This could damage the
port and the cover.
● Do not leave the USB cable in a place
where it can be pulled unintentionally.
Pulling the cable may damage the port.
Refer to your device manufacturer’s owner infor-
mation regarding the proper use and care of the
device.
The USB port is located on the instrument panel.
Insert the USB device into the instrument panel.
When a compatible storage device is plugged
into the connection port, compatible audio files
on the storage device can be played through the
vehicle’s audio system.
Audio file operation
AUX (auxiliary) button
Place the ignition switch in the ON or ACC
position and press the AUX button to switch to
the USB input mode. If another audio source is
playing and a USB connection port device is
inserted, press the AUX button until the center
display changes to the USB memory mode.
If the system has been turned off while the USB
memory was playing, press the ON-OFF button
to restart the USB memory.
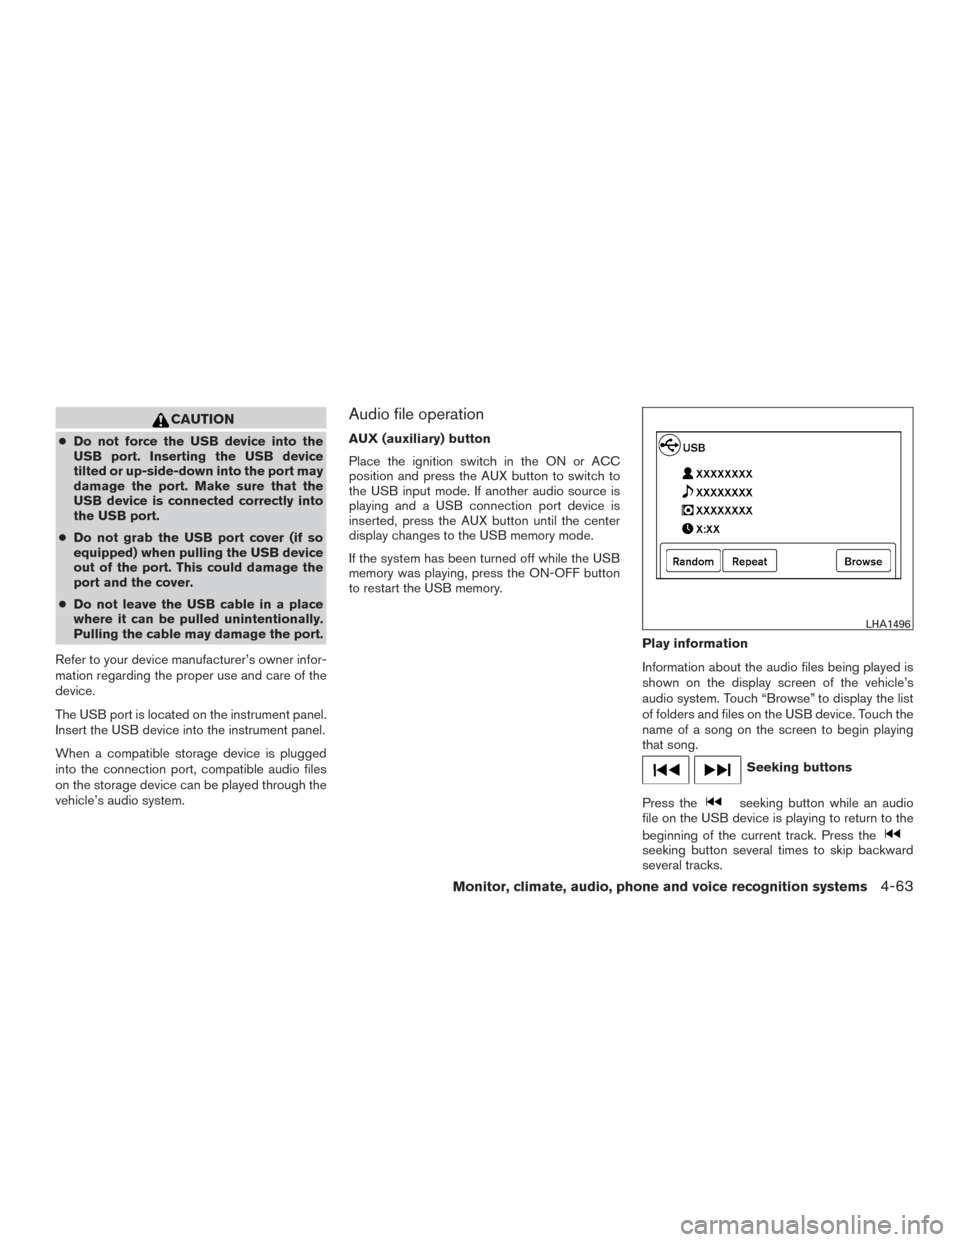
Play information
Information about the audio files being played is
shown on the display screen of the vehicle’s
audio system. Touch “Browse” to display the list
of folders and files on the USB device. Touch the
name of a song on the screen to begin playing
that song.
Seeking buttons
Press the
seeking button while an audio
file on the USB device is playing to return to the
beginning of the current track. Press the
seeking button several times to skip backward
several tracks.
LHA1496
Monitor, climate, audio, phone and voice recognition systems4-63
Page 257 of 478
Press theseeking button while an audio
file on the USB device is playing to advance one
track. Press the
seeking button several
times to skip forward several tracks. If the last
track in a folder on the USB device is skipped, the
first track of the next folder is played.
Random and repeat play mode
While files on a USB device are playing, the play
pattern can be altered so that songs are repeated
or played randomly.
Random
Touch the “Random” key to apply a random play
pattern to the USB device. When the random
mode is active, the
icon is displayed to the
left of the song title or album name to denote
which random pattern is applied. To cancel Ran-
dom mode, touch the “Random” key until
no
icon is displayed.
Repeat
Touch the “Repeat” key to apply a repeat play
pattern to the USB device. When the repeat
mode is active, the
icon is displayed to the
left of the song title or album name to denote
which repeat pattern is applied. To cancel repeat
mode, touch the “Repeat” key until no
icon
is displayed.
iPod® PLAYER OPERATION (models
without Navigation System) (if so
equipped)
Connecting a device to the USB
connection port
WARNING
Do not connect, disconnect, or operate the
USB device while driving. Doing so can be
a distraction. If distracted you could lose
control of your vehicle and cause an acci-
dent or serious injury.
CAUTION
● Do not force the USB device into the
USB port. Inserting the USB device
tilted or up-side-down into the port may
damage the port. Make sure that the
USB device is connected correctly into
the USB port.
● Do not grab the USB port cover (if so
equipped) when pulling the USB device
out of the port. This could damage the
port and the cover.
● Do not leave the USB cable in a place
where it can be pulled unintentionally.
Pulling the cable may damage the port.
Refer to your device manufacturer’s owner infor-
mation regarding the proper use and care of the
device.
The USB port is located on the instrument panel.
Insert the USB device into the instrument panel.
When a compatible storage device is plugged
into the connection port, compatible audio files
on the storage device can be played through the
vehicle’s audio system.
LHA4319
4-64Monitor, climate, audio, phone and voice recognition systems
Page 260 of 478
CAUTION
●Do not force the USB device into the
USB port. Inserting the USB device
tilted or up-side-down into the port may
damage the port. Make sure that the
USB device is connected correctly into
the USB port.
● Do not grab the USB port cover (if so
equipped) when pulling the USB device
out of the port. This could damage the
port and the cover.
● Do not leave the USB cable in a place
where it can be pulled unintentionally.
Pulling the cable may damage the port.
Refer to your device manufacturer’s owner infor-
mation regarding the proper use and care of the
device.
The USB port is located on the instrument panel.
Insert the USB device into the instrument panel.
When a compatible storage device is plugged
into the connection port, compatible audio files
on the storage device can be played through the
vehicle’s audio system.
Compatibility
The following models are compatible: ● iPod® Classic 5th generation (firmware ver-
sion 1.3.0 or later)
● iPod® Classic 6th generation (firmware ver-
sion 2.0.1 or later)
● iPod® Classic 7th generation (firmware ver-
sion 2.0.4 or later)
● iPod® Touch 2nd generation (firmware ver-
sion 4.2.1 or later)*
● iPod® Touch 3rd generation (firmware ver-
sion 5.1 or later)
● iPod® Touch 4th generation (firmware ver-
sion 5.1 or later)
● iPod® nano - 1st generation (firmware ver-
sion 1.3.1 or later)
● iPod® nano - 2nd generation (firmware ver-
sion 1.1.3 or later)
● iPod® nano - 3rd generation (firmware ver-
sion 1.1.3 or later)
● iPod® nano - 4th generation (firmware ver-
sion 1.0.4 or later) ●
iPod® nano - 5th generation (firmware ver-
sion 1.0.2 or later)
● iPod® nano - 6th generation (firmware ver-
sion 1.1 or later)
● iPhone® 3G (firmware version 4.2.1 or later)
● iPhone® 3GS (firmware version 5.1 or later)
● iPhone® 4 (firmware version 5.1 or later)
● iPhone® 4S (firmware version 5.1 or later)
* Some features of this iPod® may not be fully
functional.
Make sure that your iPod® firmware is updated to
the version indicated above.
Monitor, climate, audio, phone and voice recognition systems4-67
Page 315 of 478
OFF: For driving up and down longslopes where engine braking is nec-
essary push the overdrive switch
once. The O/D OFF indicator light
in the instrument panel comes on at
this time.
When cruising at a low speed or climbing a
gentle slope, you may feel uncomfortable shift
shocks as the transmission shifts into and out of
overdrive repeatedly. In this case, depress the
overdrive switch to turn the overdrive off. The
O/D OFF indicator light in the instrument panel
comes on at this time.
When driving conditions change, depress the
overdrive switch to turn the overdrive on.
Remember not to drive at high speeds for ex-
tended periods of time with the overdrive off. This
reduces fuel economy.
MANUAL TRANSMISSION (if so
equipped)
WARNING
●Do not downshift abruptly on slippery
roads. This may cause a loss of control.
● Do not over-rev the engine when shift-
ing to a lower gear. This may cause a
loss of control or engine damage.
CAUTION
●Do not rest your foot on the clutch pedal
while driving. This may cause clutch
damage.
● Fully depress the clutch pedal before
shifting to help prevent transmission
damage.
● Stop your vehicle completely before
shifting into R (Reverse) .
● When the vehicle is stopped with the
engine running (for example, at a stop
light) , shift to N (Neutral) and release
the clutch pedal with the foot brake
applied.
Shifting
To change gears, or when upshifting or down-
shifting, depress the clutch pedal fully, shift into
the appropriate gear, then release the clutch
slowly and smoothly.
To ensure smooth gear changes, fully depress
the clutch pedal before operating the shift lever. If
the clutch pedal is not fully depressed before the
transmission is shifted, a gear noise may be
heard. Transmission damage could occur.
Start the vehicle in 1st gear and shift to 2nd, 3rd,
4th, 5th and 6th gear in sequence according to
vehicle speed.
5 - speed
WSD0154
5-18Starting and driving
Page 318 of 478
PRECAUTIONS ON CRUISE
CONTROL
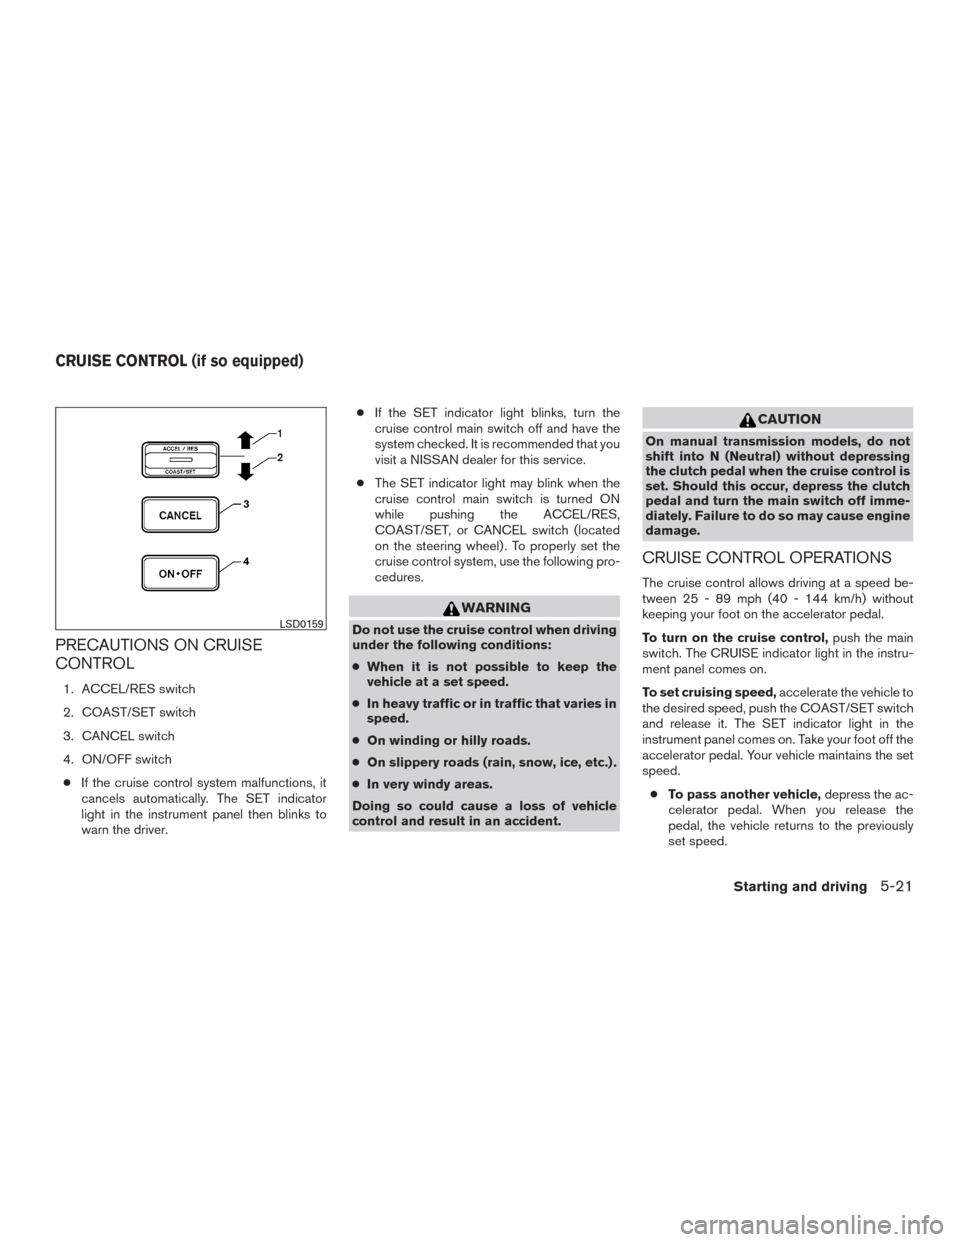
1. ACCEL/RES switch
2. COAST/SET switch
3. CANCEL switch
4. ON/OFF switch● If the cruise control system malfunctions, it
cancels automatically. The SET indicator
light in the instrument panel then blinks to
warn the driver. ●
If the SET indicator light blinks, turn the
cruise control main switch off and have the
system checked. It is recommended that you
visit a NISSAN dealer for this service.
● The SET indicator light may blink when the
cruise control main switch is turned ON
while pushing the ACCEL/RES,
COAST/SET, or CANCEL switch (located
on the steering wheel) . To properly set the
cruise control system, use the following pro-
cedures.
WARNING
Do not use the cruise control when driving
under the following conditions:
●When it is not possible to keep the
vehicle at a set speed.
● In heavy traffic or in traffic that varies in
speed.
● On winding or hilly roads.
● On slippery roads (rain, snow, ice, etc.) .
● In very windy areas.
Doing so could cause a loss of vehicle
control and result in an accident.
CAUTION
On manual transmission models, do not
shift into N (Neutral) without depressing
the clutch pedal when the cruise control is
set. Should this occur, depress the clutch
pedal and turn the main switch off imme-
diately. Failure to do so may cause engine
damage.
CRUISE CONTROL OPERATIONS
The cruise control allows driving at a speed be-
tween 25 - 89 mph (40 - 144 km/h) without
keeping your foot on the accelerator pedal.
To turn on the cruise control, push the main
switch. The CRUISE indicator light in the instru-
ment panel comes on.
To set cruising speed, accelerate the vehicle to
the desired speed, push the COAST/SET switch
and release it. The SET indicator light in the
instrument panel comes on. Take your foot off the
accelerator pedal. Your vehicle maintains the set
speed.
● To pass another vehicle, depress the ac-
celerator pedal. When you release the
pedal, the vehicle returns to the previously
set speed.
LSD0159
CRUISE CONTROL (if so equipped)
Starting and driving5-21
Page 319 of 478
●The vehicle may not maintain the set speed
when going up or down steep hills. If this
happens, drive without the cruise control.
To cancel the preset speed, use one of the
following three methods.
● Push the CANCEL button; the SET indicator
light in the instrument panel goes out.
● Tap the brake pedal; the SET indicator light
goes out.
● Turn the main switch off. Both the CRUISE
indicator light and SET indicator light in the
instrument panel go out.
The cruise control is automatically canceled and
the SET light in the instrument panel goes out if: ● you depress the brake or clutch pedal (if so
equipped) while pushing the ACCEL/RES
or COAST/SET switch. The preset speed is
deleted from memory.
● the vehicle slows down more than 8 mph
(13 km/h) below the set speed.
● you depress the clutch pedal (manual trans-
mission) , or move the shift lever to N (Neu-
tral) (automatic transmission) . To reset at a faster cruising speed,
use one of
the following three methods.
● Depress the accelerator pedal. When the
vehicle attains the desired speed, push and
release the COAST/SET switch.
● Push and hold the ACCEL/RES switch.
When the vehicle attains the speed you de-
sire, release the switch.
● Push and release the ACCEL/RES switch.
Each time you do this, the set speed in-
creases by about 1 mph (1.6 km/h).
To reset at a slower cruising speed, use one
of the following three methods.
● Lightly tap the brake pedal. When the ve-
hicle attains the desired speed, push the
COAST/SET switch and release it.
● Push and hold the COAST/SET switch. Re-
lease the switch when the vehicle slows to
the desired speed.
● Push and release the COAST/SET switch.
Each time you do this, the set speed de-
creases by about 1 mph (1.6 km/h).
To resume the preset speed, push and re-
lease the ACCEL/RES switch. The vehicle re-
turns to the last set cruising speed when the
vehicle speed is over 25 mph (40 km/h).CAUTION
During the first 1,200 miles (2,000 km),
follow these recommendations to obtain
maximum engine performance and ensure
the future reliability and economy of your
new vehicle. Failure to follow these rec-
ommendations may result in shortened
engine life and reduced engine
performance.
● Avoid driving for long periods at constant
speed, either fast or slow, and do not run the
engine over 4,000 RPM.
● Do not accelerate at full throttle in any gear.
● Avoid quick starts.
● Avoid hard braking as much as possible.
● Do not tow a trailer for the first 500 mi
(805 km) . Your engine, axle or other parts
could be damaged.
BREAK-IN SCHEDULE
5-22Starting and driving
Page 328 of 478
●When the warning light comes on, the
2WD mode may be engaged even if the
4WD shift switch is in 4H. Be especially
careful when driving. If corresponding
parts are malfunctioning, the 4WD
mode will not be engaged even if the
4WD shift switch is shifted.
● Do not drive the vehicle in the 4H or 4LO
position on dry hard surface roads. Driv-
ing on dry, hard surfaces in 4H or 4LO
may cause unnecessary noise, tire wear
and increased fuel consumption.
If the 4WD warning light turns on when
you are driving on dry hard surface
roads:
– in the 4H position, shift the 4WD shift switch to 2WD.
– in the 4LO position for automatic transmission vehicles, stop the ve-
hicle and shift the shift lever to the N
position with the brake pedal de-
pressed and shift the 4WD shift
switch to 2WD. – in the 4LO position for manual trans-
mission vehicles, stop the vehicle
and shift the shift lever to the N po-
sition with the clutch pedal de-
pressed and shift the 4WD shift
switch to 2WD.
● If the warning light is still on after the
above operation, have your vehicle
checked as soon as possible. It is rec-
ommended that you visit a NISSAN
dealer for this service.
● The transfer case may be damaged if
you continue driving with the warning
light blinking. The E-Lock system can provide additional trac-
tion and should only be used when a vehicle has
become or is becoming stuck. This system oper-
ates by electronically “locking” the two rear drive
wheels together, allowing them to turn at the
same speed. The system is used when it is not
possible to free a stuck vehicle even when using
the 4LO position (4-wheel drive vehicles) .
When added traction is required, activate the
E-Lock system by pushing the switch ON. For
additional information, refer to “Electronic locking
rear differential (E-Lock) system switch” in the
“Instruments and controls” section of this manual.
Once the system fully engages, the indicator light
in the instrument panel will remain ON. When the
system is activated, both rear wheels will engage,
providing added traction.
The rear wheels may momentarily slip or move to
engage the system, and the system will only
engage up to approximately 4 mph (7 km/h).
Once the vehicle is free, the system should be
turned OFF and driving resumed.
The Anti-Lock Brake (ABS) system is disabled
and the ABS light illuminates when the E-Lock
system is ON. Also, the Vehicle Dynamic Control
(VDC) system is disabled and the
light
illuminates when the E-Lock system is ON.
ELECTRONIC LOCKING REAR
DIFFERENTIAL (E-Lock) SYSTEM (if
so equipped)
Starting and driving5-31