2017 NISSAN ARMADA air condition
[x] Cancel search: air conditionPage 106 of 614
If any of the following conditions occur, the air
bag and/or pretensioner systems needs servi-
cing.
.The supplemental air bag warning light
remains on after approximately 7 seconds.
. The supplemental air bag warning light
flashes intermittently.
. The supplemental air bag warning light does
not come on at all.
It is recommended you visit a NISSAN dealer for
these services.
Unless checked and repaired, the supplemental
restraint system (air bag system) and/or the
pretensioners may not function properly.
For additional information, see “Supplemental
restraint system” (P.1-52) .
WARNING
If the supplemental air bag warning
light is on, it could mean that the front
air bag, side air bag, curtain air bag
systems and/or pretensioner systems
will not operate in an accident. To help
avoid injury to yourself or others, have
your vehicle checked. It is recom-
mended you visit a NISSAN dealer for
this service.
Vehicle Dynamic Control (VDC)
warning light
When the ignition switch is in the ON position,
the Vehicle Dynamic Control (VDC) warning
light illuminates and then turns off.
The light will blink when the VDC system or the
traction control system is operating, thus alerting
the driver that the vehicle is nearing its traction
limits. The road surface may be slippery.
When the VDC warning light illuminates when
the VDC system is turned on, this light alerts the
driver to the fact that the VDC system’s fail-safe
mode is operating, for example the VDC or hill
start assist system may not be functioning
properly. Have the system checked. It is
recommended you visit a NISSAN dealer for
this service. If a malfunction occurs in the
system, the VDC system function will be
canceled but the vehicle is still driveable. For
additional information, see “Vehicle Dynamic
Control (VDC) system” (P.5-138) .
INDICATOR LIGHTS
Automatic Transmission (AT) posi-
tion indicator light
When the ignition switch is placed in the ON
position, the indicator shows the shift lever
position.
In the manual shift mode, when the transmission
does not shift to the selected gear due to a
transmission protection mode, the AT position
indicator light will blink and a buzzer will sound.
See “Automatic transmission” (P.5-18) for
further details.
Blind Spot Intervention (BSI) ON
indicator light (green; if so equipped)
The light comes on in green when the Blind Spot
Intervention (BSI) system is turned on. The light
turns off when the system is turned off.
NOTE:
This light is common with the BSW/BSI
system warning light (orange) . (See “Blind
Spot Warning (BSW)/Blind Spot Interven-
tion (BSI) system warning light” (P.2-12) .)
For more details, see “Blind Spot Intervention
�Š
(BSI)” (P.5-43) .
Instruments and controls2-17
Page 117 of 614
2-28Instruments and controls
trip odometer?Distance to empty (dte) ?
Outside air temperature (ICY) ?Setting ?
Warning check
1. Current and average fuel consumption
The current and average fuel consumption mode
shows the current and average fuel consump-
tion.
2. Average fuel consumption (MPG or l
(liter)/100 km) and speed (MPH or km/h)
Fuel consumption:
The average fuel consumption mode shows the
average fuel consumption since the last reset.
Resetting is done by pushing the
switch*Bfor longer than 1 second. (The average speed is
also reset at the same time.)
The display is updated every 30 seconds. At
about the first 1/3 mile (500 m) after a reset, the
display shows “——”.
Speed:
The average speed mode shows the average
vehicle speed since the last reset. Resetting is
done by pushing the
switch*Bfor longer
than 1 second. (The average fuel consumption is
also reset at the same time.)
The display is updated every 30 seconds. The
first 30 seconds after a reset, the display shows
“——”.
3. Elapsed time and trip odometer
(MILES or km)
Elapsed time:
The elapsed time mode shows the time since
the last reset. The displayed time can be reset
by pushing the
switch*Bfor longer than 1
second. (The trip odometer is also reset at the
same time.)
Trip odometer:
The trip odometer mode shows the total
distance the vehicle has been driven since the
last reset. Resetting is done by pushing the
switch*Bfor longer than 1 second. (The
elapsed time is also reset at the same time.)
4. Distance to empty (dte — MILES or
km)
The distance to empty (dte) mode provides you
with an estimation of the distance that can be
driven before refueling. The dte is constantly
being calculated, based on the amount of fuel in
the fuel tank and the actual fuel consumption.
The display is updated every 30 seconds.
The dte mode includes a low range warning
feature. If the fuel level is low, the warning is
displayed on the screen.
When the fuel level drops even lower, the dte
display will change to “——”. .
If the amount of fuel added is small, the
display just before the ignition switch is
pushed to the OFF position may continue to
be displayed.
. When driving uphill or rounding curves, the
fuel in the tank shifts, which may momenta-
rily change the display.
5. Outside air temperature (ICY — 8For
8C)
The outside air temperature is displayed in 8For
8C in the range of �í22 to 1318F(�í30 to 558C) .
The outside air temperature mode includes a low
temperature warning feature. If the outside air
temperature is below 378F(3 8C) , the warning is
displayed on the screen.
The outside temperature sensor is located in
front of the radiator. The sensor may be affected
by road or engine heat, wind directions and
other driving conditions. The display may differ
from the actual outside temperature or the
temperature displayed on various signs or bill-
boards.
Page 137 of 614
2-48Instruments and controls
SIC4455
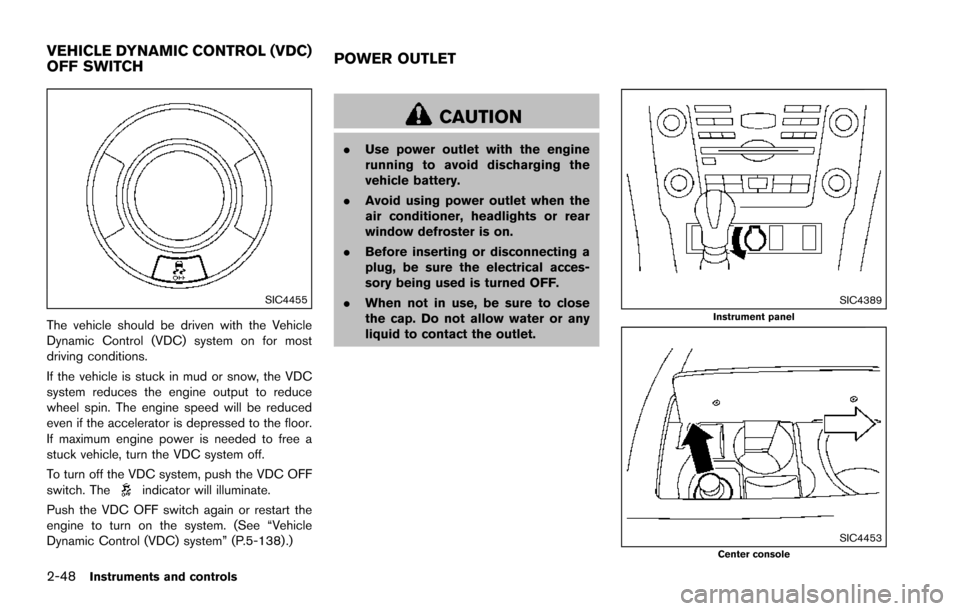
The vehicle should be driven with the Vehicle
Dynamic Control (VDC) system on for most
driving conditions.
If the vehicle is stuck in mud or snow, the VDC
system reduces the engine output to reduce
wheel spin. The engine speed will be reduced
even if the accelerator is depressed to the floor.
If maximum engine power is needed to free a
stuck vehicle, turn the VDC system off.
To turn off the VDC system, push the VDC OFF
switch. The
indicator will illuminate.
Push the VDC OFF switch again or restart the
engine to turn on the system. (See “Vehicle
Dynamic Control (VDC) system” (P.5-138) .)
CAUTION
. Use power outlet with the engine
running to avoid discharging the
vehicle battery.
. Avoid using power outlet when the
air conditioner, headlights or rear
window defroster is on.
. Before inserting or disconnecting a
plug, be sure the electrical acces-
sory being used is turned OFF.
. When not in use, be sure to close
the cap. Do not allow water or any
liquid to contact the outlet.
SIC4389Instrument panel
SIC4453Center console
VEHICLE DYNAMIC CONTROL (VDC)
OFF SWITCH POWER OUTLET
Page 152 of 614
SIC3243
Sunshade
The sunshade will open automatically when the
moonroof is opened. However, it must be closed
manually.
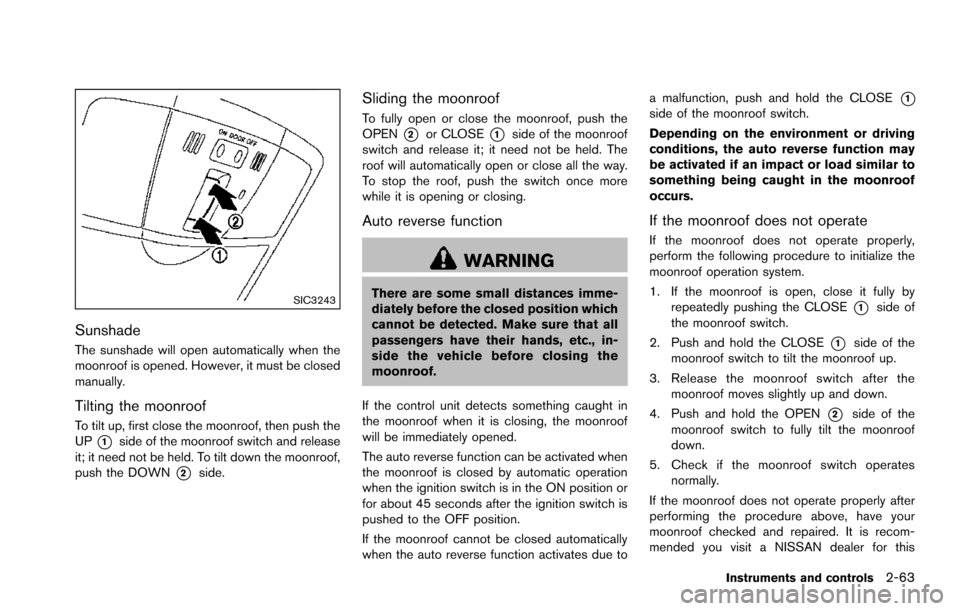
Tilting the moonroof
To tilt up, first close the moonroof, then push the
UP
*1side of the moonroof switch and release
it; it need not be held. To tilt down the moonroof,
push the DOWN
*2side.
Sliding the moonroof
To fully open or close the moonroof, push the
OPEN
*2or CLOSE*1side of the moonroof
switch and release it; it need not be held. The
roof will automatically open or close all the way.
To stop the roof, push the switch once more
while it is opening or closing.
Auto reverse function
WARNING
There are some small distances imme-
diately before the closed position which
cannot be detected. Make sure that all
passengers have their hands, etc., in-
side the vehicle before closing the
moonroof.
If the control unit detects something caught in
the moonroof when it is closing, the moonroof
will be immediately opened.
The auto reverse function can be activated when
the moonroof is closed by automatic operation
when the ignition switch is in the ON position or
for about 45 seconds after the ignition switch is
pushed to the OFF position.
If the moonroof cannot be closed automatically
when the auto reverse function activates due to a malfunction, push and hold the CLOSE
*1side of the moonroof switch.
Depending on the environment or driving
conditions, the auto reverse function may
be activated if an impact or load similar to
something being caught in the moonroof
occurs.
If the moonroof does not operate
If the moonroof does not operate properly,
perform the following procedure to initialize the
moonroof operation system.
1. If the moonroof is open, close it fully by
repeatedly pushing the CLOSE
*1side of
the moonroof switch.
2. Push and hold the CLOSE
*1side of the
moonroof switch to tilt the moonroof up.
3. Release the moonroof switch after the moonroof moves slightly up and down.
4. Push and hold the OPEN
*2side of the
moonroof switch to fully tilt the moonroof
down.
5. Check if the moonroof switch operates normally.
If the moonroof does not operate properly after
performing the procedure above, have your
moonroof checked and repaired. It is recom-
mended you visit a NISSAN dealer for this
Instruments and controls2-63
Page 168 of 614
WARNING
.Radio waves could adversely affect
electric medical equipment. Those
who use a pacemaker should con-
tact the electric medical equipment
manufacturer for the possible influ-
ences before use.
. The Intelligent Key transmits radio
waves when the buttons are
pushed. The FAA advises that the
radio waves may affect aircraft na-
vigation and communication sys-
tems. Do not operate the
Intelligent Key while on an airplane.
Make sure the buttons are not
operated unintentionally when the
unit is stored during a flight.
The Intelligent Key system can operate all the
door locks using the remote controller function
or pushing the request switch on the vehicle
without taking the key out from a pocket or
purse. The operating environment and/or condi-
tions may affect the Intelligent Key system
operation.
Be sure to read the following before using the
Intelligent Key system.
CAUTION
. Be sure to carry the Intelligent Key
with you when operating the vehi-
cle.
. Never leave the Intelligent Key in
the vehicle when you leave the
vehicle.
The Intelligent Key is always communicating with
the vehicle as it receives radio waves. The
Intelligent Key system transmits weak radio
waves. Environmental conditions may interfere
with the operation of the Intelligent Key system
under the following operating conditions.
. When operating near a location where
strong radio waves are transmitted, such
as a TV tower, power station and broad-
casting station.
. When in possession of wireless equipment,
such as a cellular telephone, transceiver,
and CB radio.
. When the Intelligent Key is in contact with or
covered by metallic materials.
. When any type of radio wave remote control
is used nearby.
. When the Intelligent Key is placed near an
electric appliance such as a personal computer.
. When the vehicle is parked near a parking
meter.
In such cases, correct the operating conditions
before using the Intelligent Key function or use
the mechanical key.
Although the life of the battery varies depending
on the operating conditions, the battery’s life is
approximately 2 years. If the battery is dis-
charged, replace it with a new one.
Since the Intelligent Key is continuously receiv-
ing radio waves, if the key is left near equipment
which transmits strong radio waves, such as
signals from a TV and personal computer, the
battery life may become shorter.
For information regarding replacement of a
battery, see “Intelligent Key battery replacement”
(P.8-21) .
As many as 4 Intelligent Keys can be registered
and used with one vehicle. For information about
the purchase and use of additional Intelligent
Keys, contact a NISSAN dealer.
CAUTION
. Do not allow the Intelligent Key,
which contains electrical compo-
nents, to come into contact with
Pre-driving checks and adjustments3-7
INTELLIGENT KEY SYSTEM
Page 176 of 614
WARNING
The Intelligent Key transmits radio
waves when the buttons are pushed.
The FAA advises that radio waves may
affect aircraft navigation and commu-
nication systems. Do not operate the
Intelligent Key while on an airplane.
Make sure the buttons are not operated
unintentionally when the unit is stored
for a flight.
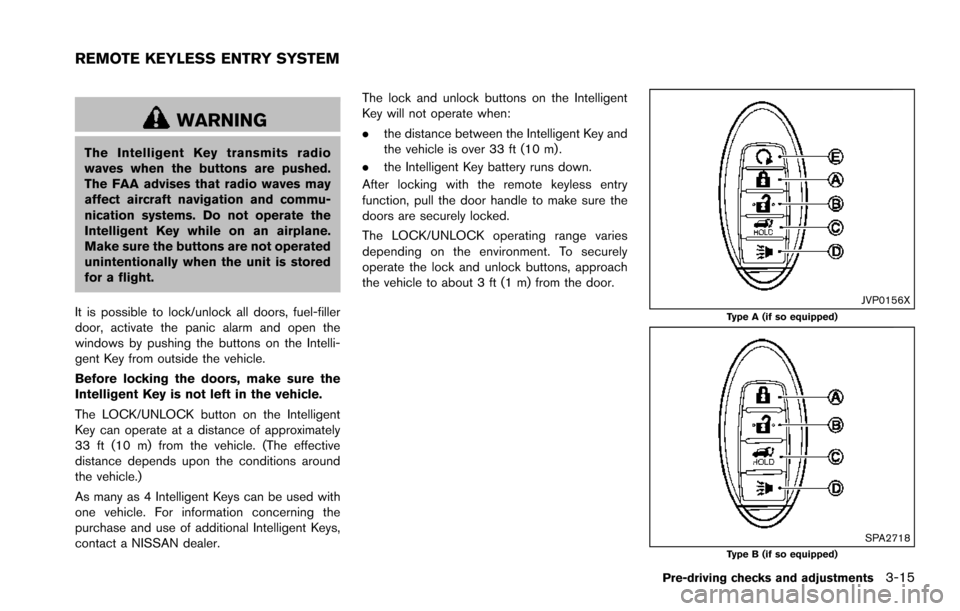
It is possible to lock/unlock all doors, fuel-filler
door, activate the panic alarm and open the
windows by pushing the buttons on the Intelli-
gent Key from outside the vehicle.
Before locking the doors, make sure the
Intelligent Key is not left in the vehicle.
The LOCK/UNLOCK button on the Intelligent
Key can operate at a distance of approximately
33 ft (10 m) from the vehicle. (The effective
distance depends upon the conditions around
the vehicle.)
As many as 4 Intelligent Keys can be used with
one vehicle. For information concerning the
purchase and use of additional Intelligent Keys,
contact a NISSAN dealer. The lock and unlock buttons on the Intelligent
Key will not operate when:
.
the distance between the Intelligent Key and
the vehicle is over 33 ft (10 m) .
. the Intelligent Key battery runs down.
After locking with the remote keyless entry
function, pull the door handle to make sure the
doors are securely locked.
The LOCK/UNLOCK operating range varies
depending on the environment. To securely
operate the lock and unlock buttons, approach
the vehicle to about 3 ft (1 m) from the door.
JVP0156XType A (if so equipped)
SPA2718Type B (if so equipped)
Pre-driving checks and adjustments3-15
REMOTE KEYLESS ENTRY SYSTEM
Page 180 of 614
WARNING
To avoid risk of injury or death, do not
use the remote engine start function
when the vehicle is in an enclosed area
such as a garage.
JVP0445X
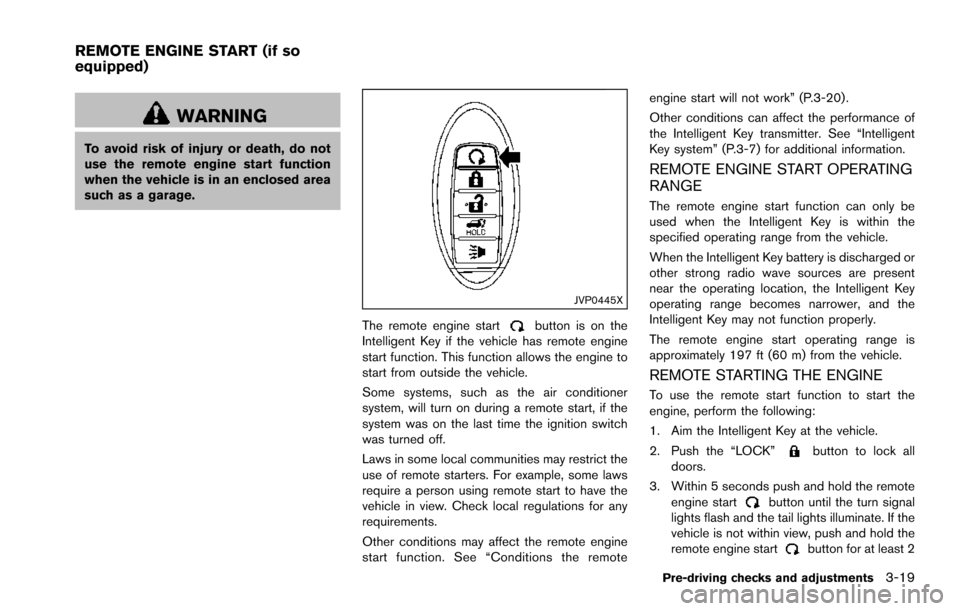
The remote engine startbutton is on the
Intelligent Key if the vehicle has remote engine
start function. This function allows the engine to
start from outside the vehicle.
Some systems, such as the air conditioner
system, will turn on during a remote start, if the
system was on the last time the ignition switch
was turned off.
Laws in some local communities may restrict the
use of remote starters. For example, some laws
require a person using remote start to have the
vehicle in view. Check local regulations for any
requirements.
Other conditions may affect the remote engine
start function. See “Conditions the remote engine start will not work” (P.3-20) .
Other conditions can affect the performance of
the Intelligent Key transmitter. See “Intelligent
Key system” (P.3-7) for additional information.
REMOTE ENGINE START OPERATING
RANGE
The remote engine start function can only be
used when the Intelligent Key is within the
specified operating range from the vehicle.
When the Intelligent Key battery is discharged or
other strong radio wave sources are present
near the operating location, the Intelligent Key
operating range becomes narrower, and the
Intelligent Key may not function properly.
The remote engine start operating range is
approximately 197 ft (60 m) from the vehicle.
REMOTE STARTING THE ENGINE
To use the remote start function to start the
engine, perform the following:
1. Aim the Intelligent Key at the vehicle.
2. Push the “LOCK”
button to lock all
doors.
3. Within 5 seconds push and hold the remote engine start
button until the turn signal
lights flash and the tail lights illuminate. If the
vehicle is not within view, push and hold the
remote engine start
button for at least 2
Pre-driving checks and adjustments3-19
REMOTE ENGINE START (if so
equipped)
Page 181 of 614
3-20Pre-driving checks and adjustments
seconds.
The following events will occur when the engine
starts:
. The front parking lights will turn on and
remain on as long as the engine is running.
. The doors will be locked and the air
conditioner system may turn on.
. The engine will continue to run for about 10
minutes. Repeat the steps to extend the time
for an additional 10 minutes. See “Extending
engine run time” (P.3-20) .
Depress and hold the brake pedal, then place
the ignition switch in the ON position before
driving. For further instructions, see “Driving the
vehicle” (P.5-17) .
EXTENDING ENGINE RUN TIME
The remote engine start function can be
extended one time by performing the steps
listed in “Remote starting the engine” (P.3-19) .
Run time will be calculated as follows:
. The first 10 minute run time will start when
the remote engine start function is per-
formed.
. The second 10 minutes will start immedi-
ately when the remote engine start function
is performed. For example, if the engine has
been running for 5 minutes, and 10 minutes
are added, the engine will run for a total of 15 minutes.
. Extending engine run time will count to-
wards the two remote start limit.
A maximum of two remote starts, or a single start
with an extension, are allowed between ignition
cycles.
The ignition switch must be cycled to the ON
position and then back to the OFF position
before the remote engine start procedure can be
used again.
CANCELING A REMOTE START
To cancel a remote start, perform one of the
following:
. Aim the Intelligent Key at the vehicle and
push and hold the remote engine start
button until the front parking lights turn off.
. Turn on the hazard indicator flashers.
. Cycle the ignition switch ON and then OFF.
. The extended engine run time has expired.
. The first 10 minute timer has expired.
. The engine hood has been opened.
. The shift lever is moved out of the P (Park)
position.
. The theft alarm sounds due to illegal entry
into the vehicle.
. The ignition switch is pushed without an
Intelligent Key in the vehicle. .
The ignition switch is pushed with an
Intelligent Key in the vehicle but the brake
pedal is not depressed.
CONDITIONS THE REMOTE ENGINE
START WILL NOT WORK
The remote engine start will not operate if any of
the following conditions are present:
.The ignition switch is placed in the ON
position.
. The hood is not securely closed.
. The hazard indicator flashers are on.
. The engine is still running. The engine must
be completely stopped. Wait at least 6
seconds if the engine goes from running to
off. This is not applicable when extending
engine run time.
. The remote engine start
button is not
pushed and held for at least 2 seconds.
. The remote engine start
button is not
pushed and held within 5 seconds of
pushing the “LOCK”
button.
. The brake pedal is depressed.
. The doors are not closed and locked.
. The liftgate is open.
. The Intelligent Key system warning light
remains on in the vehicle information display.
. An Intelligent Key is left inside the vehicle.