2017 MITSUBISHI OUTLANDER SPORT change time
[x] Cancel search: change timePage 208 of 399
Bluetooth® 2.0 interface (if so equipped)
Features and controls 5-145
5
6. The voice guide will say “Please say a 4- digit pairing code.” Say a 4-digit number.When the confirmation function is on, the system will confirm whether the number said is acceptable. Answer “Yes.”Answer “No” to return to the pairing code selection.
7. The voice guide will say “Start pairing procedure on the device. See the device manual for instructions.” Enter in the Bluetooth
® device the 4-digit number you
have registered in Step 6.
8. The voice guide will say “Please say the name of the device after the beep.” You can assign a desired name for the Blue- tooth
® device and register it as a device
tag. Say the name you want to register after the beep. 9. The voice guide will say “Pairing com- plete,” and the pairing process will end.
NOTE
If 7 devices have already been paired, the voice guide will say “Maximum devices paired” and then the system will end the pairing process. To register a new device, delete one device and then repeat the pairingprocess. (Refer to “Selecting a device: Deleting a device” on page 5-147.)NOTE
Some Bluetooth
® devices require a specific
pairing code. Please refer to the device man- ual for pairing code requirements.
The pairing code entered here is only used for the Bluetooth
® connection certification.
It is any 4-digit number the user would like to select. Remember the pairing code as it needs to be keyed into the Bluetooth
® device later in the
pairing process. Depending on the connection settings of the Bluetooth
® device, this code may have to be
entered each time you connect the Blue- tooth
® device to the Bluetooth
® 2.0 inter-
face. For the default connection settings, refer to the instructions for the device.NOTE
Depending on the Bluetooth
® device, it may
take a few minutes to pair it with the Blue- tooth
® 2.0 interface.
If the Bluetooth
® 2.0 interface cannot recog-
nize the Bluetooth
® device, the voice guide
will say “Pairing has timed out” and the pair-ing process will be cancelled. Confirm that the device you are pairing sup- ports Bluetooth
®, and try pairing it again.
NOTE
If you enter the wrong number, the voice guide will say “Pairing failed” and the pair- ing process will be cancelled. Confirm the number is right, and try pairing it again.NOTE
When the confirmation function is on, after repeating the device tag you have said, the voice guide will ask “Is this correct?” Answer “Yes.”To change the device tag, answer “No” and then say the device tag again.NOTE
BK0239500US.book
145 ページ 2016年5月13日 金曜日 午前8時53分
Page 216 of 399
Bluetooth® 2.0 interface (if so equipped)
Features and controls 5-153
5
N00565900010
At any time during a call, you can mute the vehicle microphone. Pressing the SPEECH button and then saying “Mute” during a call will turn ON the mute function and mute the microphone.Saying “Mute off” in the same way will turn off the mute function and cancel the mute on the microphone.
N00566600014
The Bluetooth
® 2.0 interface can switch
between hands-free mode (hands-free calls) and private mode (calls using cellular phone). If you press the SPEECH button and say“Transfer call” during a hands-free call, you can stop the hands-free mode and talk in pri- vate mode. To return to hands-free mode, press the SPEECH button again and say “Transfer call.”
N00566000018
The Bluetooth
® 2.0 interface has 2 types of
unique phonebooks that are different from thephonebook stored in the cellular phone. They
are the vehicle phonebook and the mobile phonebook. These phonebooks are used to register tele- phone numbers and make calls to desirednumbers via voice recognition function.
N00566101146
This phonebook is us
ed when making calls
with the voice recognition function. Up to 32 names can be registered in the vehi- cle phonebook per language.Also, each entry has 4 locations associated with: home, work, mobile and other. You can register one telephone number for each loca-tion. You can register a desired name as a name for any phonebook entry registered in the vehicle phonebook.Names and telephone numbers can be changed later on. The vehicle phonebook can be used with all paired cellular phones.
N00580500062
You can register a telephone number in the vehicle phonebook in the following 2 ways: Reading out a telephone number, and select-ing and transferring 1 phonebook entry from the phonebook of the cellular phone.
N00580600092
1. Press the SPEECH button (except for vehicles with Mitsubishi Multi-Commu-nication System) or PICK-UP button (for vehicles with Mitsubishi Multi-Commu- nication System).2. Say “Phonebook.” 3. The voice guide will say “Select one of the following: new entry, edit number,edit name, list names, delete, erase all, or import contact.” Say “New entry.” 4. The voice guide will say “Name please.”Say your preferred name to register it.
Mute function
Switching between hands-free mode and private mode
Phonebook function
NOTE
Disconnecting the battery cable will not delete information registered in the phone- book.
Vehicle phonebook
To register a telephone number in the vehicle phonebook
To register by reading out a tele- phone number
BK0239500US.book
153 ページ 2016年5月13日 金曜日 午前8時53分
Page 218 of 399
Bluetooth® 2.0 interface (if so equipped)
Features and controls 5-155
5
2. Say “Phonebook.” 3. The voice guide will say “Select one of the following: new entry, edit number, edit name, list names, delete, erase all, orimport contact.” Say “Import contact.” 4. The voice guide will say “Would you like to import a single entry or all contacts?”Say “Single entry.” The Bluetooth
® 2.0 interface will become
ready to receive transferred phonebookdata. 5. After the voice guide says “Ready to receive a contact from the phone. Only ahome, a work, and a mobile number can be imported,” the Bluetooth
® 2.0 inter-
face will receive the phonebook data from the Bluetooth
® compatible cellular phone.
6. Operate the Bluetooth
® compatible cellu-
lar phone to set it up so that the phone- book entry you want to register in the vehicle phonebook can be transferred to the Bluetooth
® 2.0 interface.
7. When the reception is complete, the voice guide will say “
8. The voice guide will say “Adding
10. The voice guide will say “Would you like
to import another contact?”Answer “Yes” if you want to continue with the registration. You can continue to register a new phonebook entry from Step5. Answer “No,” the system will return to the main menu.
N00579800052
You can change or delete a name or tele- phone number registered in the vehicle phonebook.You can also listen to the list of names regis- tered in the vehicle phonebook.
NOTE
If the maximum number of entries are already registered, the voice guide will say“The phonebook is full. Would you like to delete a name?” Say “Yes” if you want to delete a registered name.If you say “No,” the system will return to the main menu.
NOTE
If the Bluetooth
® 2.0 interface cannot recog-
nize the Bluetooth
® compatible cellular
phone or the connection takes too much time, the voice guide will say “Import con- tact has timed out” and then the system will cancel the registration. In such case, start over again from Step 1. Pressing the HANG-UP button or pressing and holding the SPEECH button will cancelthe registration.NOTE
If the entered name is already used for another phonebook entry or similar to a name used for another phonebook entry, that name cannot be registered.
To change the content registered in the vehicle phonebook NOTE
The system must have at least one entry.
BK0239500US.book
155 ページ 2016年5月13日 金曜日 午前8時53分
Page 230 of 399
HomeLink® Wireless Control System (if so equipped)
Features and controls 5-167
5
3. Press and hold the hand-held transmitter button while watching the indicator light(A). Continue pressing the button until theindicator light (A) changes from slowly flashing orange to either rapidly flashing green (rolling code) or continuously litgreen (fixed code). Now you may release the hand-held transmitter button.
4. Press the HomeLink
® button that was just
programmed and observe the indicatorlight. • If the indicator light continuously illumi- nates green, programming is completeand your device should operate when the HomeLink
® button is pressed and
released.• If the indicator light rapidly flashesgreen, firmly press, hold for 2 seconds and release the programmed HomeLink
®
button. Repeat the “press/hold/release” sequence a second time, and, depending on the brand of the garage door opener (or other rolling code equipped device),repeat this sequence a third time to com- plete the programming process. At this point if your device operates, program-ming is complete.
• If the device does not operate, continue with “Programming a new HomeLink
®”
steps 5 to 7 to complete the program- ming of a rolling code equipped device.
5. At the garage door opener receiver (motor-head unit) in the garage, locate the “Learn” or “Smart” button. This can usu-ally be found where the hanging antenna wire is attached to the motor-head unit (see the garage door opener manual toidentify the “Learn” button.)6. Firmly press and release the “Learn” or “Smart” button. (The name and color of the button may vary by manufacturer.)There are typically 30 seconds to initiate step 7. 7. Return to the vehicle and firmly press,hold for 2 seconds and release the pro- grammed HomeLink
® button. Repeat the
“press/hold/release” sequence a secondtime, and, depending on the brand of the garage door opener (or other rolling code equipped device), repeat this sequence athird time to complete the programming process. HomeLink
® should now activate your
rolling code equipped device.
NOTE
Some hand-held transmitters may actually train better from a distance of 6 to 12 inches (15 to 20 cm). Keep this in mind if you havedifficulty with the programming process.
NOTE
Some devices may require you to replace this “Programming a new HomeLink
®” step 3
with procedures noted in the “Gate operator / Canadian programming” section. If the indi- cator light does not change to rapidly flash-ing green or continuously lit green after performing these steps, contact HomeLink
®
at www.homelink.com
BK0239500US.book
167 ページ 2016年5月13日 金曜日 午前8時53分
Page 231 of 399
HomeLink® Wireless Control System (if so equipped) 5-168 Features and controls
5
N00584800034
Canadian radio-frequency laws require trans- mitter signals to “time-out” (or quit) after several seconds of transmission - which may not be long enough for HomeLink
® to pick
up the signal during programming. Similar tothis Canadian law, some U.S. gate operators are designed to “time-out” in the same man- ner.The indicator LED on the hand-held transmit- ter will go off when the device times out indi- cating that it has finished transmitting.If you live in Canada or
you are having diffi-
culties programming a gate operator or garage door opener by using the “Program-ming” procedures, replace “Programming a new HomeLink
®” step 3 with the following:
3. Press and release - every 2 seconds (“cycle”) your hand-held transmitter until the HomeLink
® indicator light changes from
slowly flashing orange to either rapidly flash-ing green (rolling code) or continuously lit green (fixed code). Now you may release the hand-held transmitter button.Proceed with “Programming a new Home- Link
®” step 4 to complete.
N00584900035
The HomeLink
® has the capability of receiv-
ing garage door status from compatible garage door opener systems. Check your garage door opener manual for the available feature and HomeLink
® compatibility. Also
for a listing of compatible systems contact HomeLink
® at: www.homelink.com
1. Within 5 seconds after successfully pro- gramming the garage door opener (refer to “Programming a new HomeLink
®”
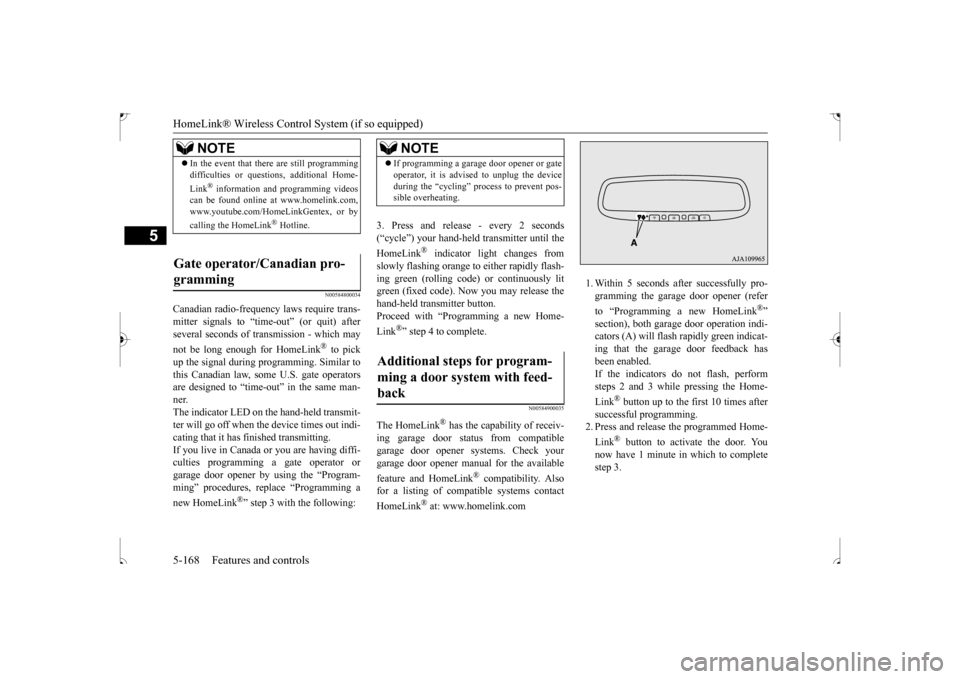
section), both garage door operation indi- cators (A) will flash rapidly green indicat- ing that the garage door feedback hasbeen enabled. If the indicators do not flash, perform steps 2 and 3 while pressing the Home- Link
® button up to the first 10 times after
successful programming. 2. Press and release the programmed Home- Link
® button to activate the door. You
now have 1 minute in which to complete step 3.
NOTE
In the event that there are still programming difficulties or questions, additional Home- Link
® information and programming videos
can be found online at www.homelink.com, www.youtube.com/HomeLinkGentex, or by calling the HomeLink
® Hotline.
Gate operator/Canadian pro- gramming
NOTE
If programming a garage door opener or gate operator, it is advised to unplug the device during the “cycling” process to prevent pos- sible overheating.
Additional steps for program- ming a door system with feed-back
BK0239500US.book
168 ページ 2016年5月13日 金曜日 午前8時53分
Page 233 of 399
Interior lights 5-170 Features and controls
5
1. Press and hold the 2 outer HomeLink
®
buttons for at least 10 seconds. The indi- cator will change from continuous yellow to rapidly flashing green.2. Release both buttons. 3. HomeLink
® is now in the train (or learn-
ing) mode and can be programmed at any time beginning with “Programming a new HomeLink
®” step 1.
N00585400037
To reprogram a HomeLink
® button, complete
the following. 1. Press and hold the desired HomeLink
®
button. Do not release the button. 2. The indicator light will begin to slowlyflash orange after 20 seconds. The Home- Link
® button can be released at this point.
Proceed with “Programming a new HomeLink
®” step 2.
N00585600039
Your HomeLink
® system operates on a radio
frequency subject to Federal Communica- tions Commission (FCC) Rules (For vehiclessold in U.S.A.) and Industry Canada Rules (For vehicles sold in Canada). This device complies with Part 15 of the FCC Rules andRSS- 210 of the Industry Canada Rules. Operation is subject to the following two con- ditions. This device may not cause harmful inter- ference. This device must accept any interference that may be received, including interfer-ence that may cause undesired operation.
This equipment complies with FCC radiation exposure limits set forth for an uncontrolledenvironment. End Users must follow the spe-cific operating instructions for satisfying RF exposure compliance. This transmitter must be at least 12 inches (20 cm) from the userand must not be co-located or operating in conjunction with any other antenna or trans- mitter.The term “IC:” before the certification/regis- tration number only signifies that Industry Canada technical specifications were met.
N00525300562
NOTE
Do not hold for longer than 20 seconds.
Reprogramming a single HomeLink
® button
NOTE
If you do not complete the programming of a new device to the button, it will revert to the previously stored programming. For questions or comments, visit www.homelink.com,www.youtube.com/HomeLinkGentex, or by calling the HomeLink
® Hotline.
General information
CAUTION The transmitter has been tested and complies with FCC and IC rules. Changes or modifications not expressly approved by the party responsible for com- pliance could void the user’s authority tooperate the device.
Interior lights
NOTE
Be aware that leaving the light illuminated with the engine off may run the battery down. Never leave the vehicle without checkingthat the light is off.
BK0239500US.book
170 ページ 2016年5月13日 金曜日 午前8時53分
Page 262 of 399
Manual air conditioning-Type 1 (if so equipped)
Comfort controls 7-5
7
N00736700151
To change the amount of air flowing from the vents, turn the mode selection dial. Refer to“Changing the mode selection” on page 7-2.
N00736800383
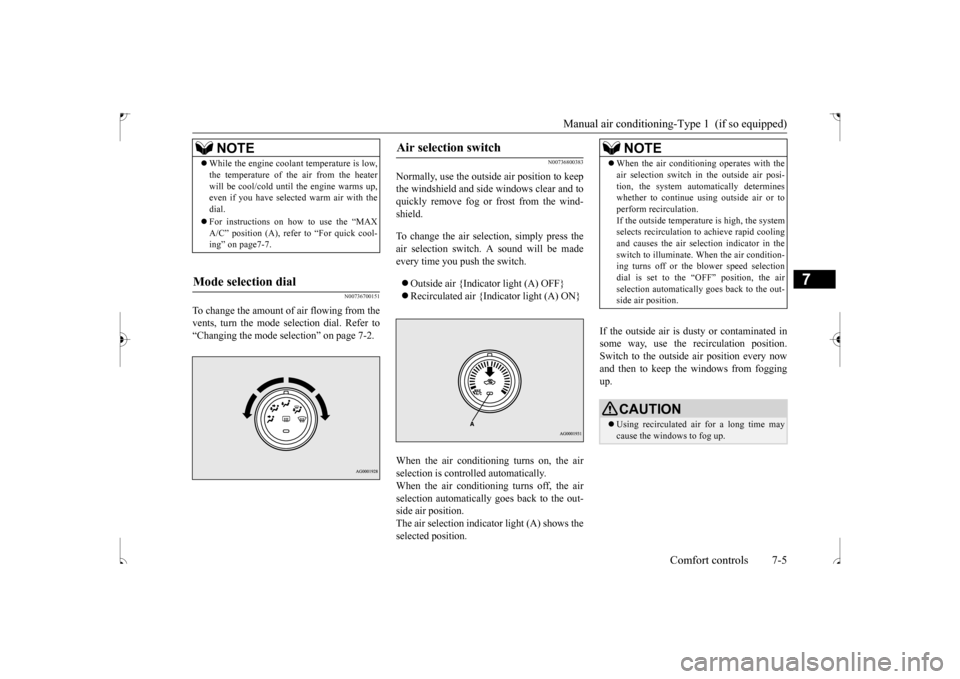
Normally, use the outside air position to keepthe windshield and side windows clear and toquickly remove fog or frost from the wind- shield. To change the air selection, simply press the air selection switch. A sound will be madeevery time you push the switch. Outside air {Indicator light (A) OFF} Recirculated air {Indicator light (A) ON}
When the air conditioning turns on, the air selection is controlled automatically.When the air conditioning turns off, the air selection automatically goes back to the out- side air position.The air selection indicator light (A) shows the selected position.
If the outside air is dusty or contaminated in some way, use the recirculation position.Switch to the outside air position every now and then to keep th
e windows from fogging
up.
NOTE
While the engine coolant temperature is low, the temperature of the air from the heater will be cool/cold until the engine warms up, even if you have selected warm air with the dial. For instructions on how to use the “MAX A/C” position (A), refer to “For quick cool-ing” on page7-7.
Mode selection dial
Air selection switch
NOTE
When the air conditioning operates with the air selection switch in
the outside air posi-
tion, the system automatically determines whether to continue using outside air or to perform recirculation.If the outside temperature is high, the system selects recirculation to achieve rapid cooling and causes the air selection indicator in theswitch to illuminate. When the air condition- ing turns off or the blower speed selection dial is set to the “OFF” position, the airselection automatically goes back to the out- side air position.CAUTION Using recirculated air for a long time may cause the windows to fog up.
BK0239500US.bo
ok 5 ページ 2016年5月13日 金曜日 午前8時53分
Page 263 of 399
Manual air conditioning-T
ype 1 (if so equipped)
7-6 Comfort controls
7
N00702101067
You can change the following functions to match your preference. Enable automatic air control:
When the air conditioning operates, the air selection switch will be automatically controlled. Disable automatic air control: Even when the air conditioning operates,the air selection switch will not be auto- matically controlled. Changing the settings Press the air selection switch for about 10seconds or longer.When the setting has changed, the system will beep and the indicator light will flash. • When the setting has changed fromenabled to disabled, the system will beep three times and the indicator will flash three times.• When the setting has changed from dis- abled to enabled, the system will beep two times and the indicator light willflash three times.
N00731001491
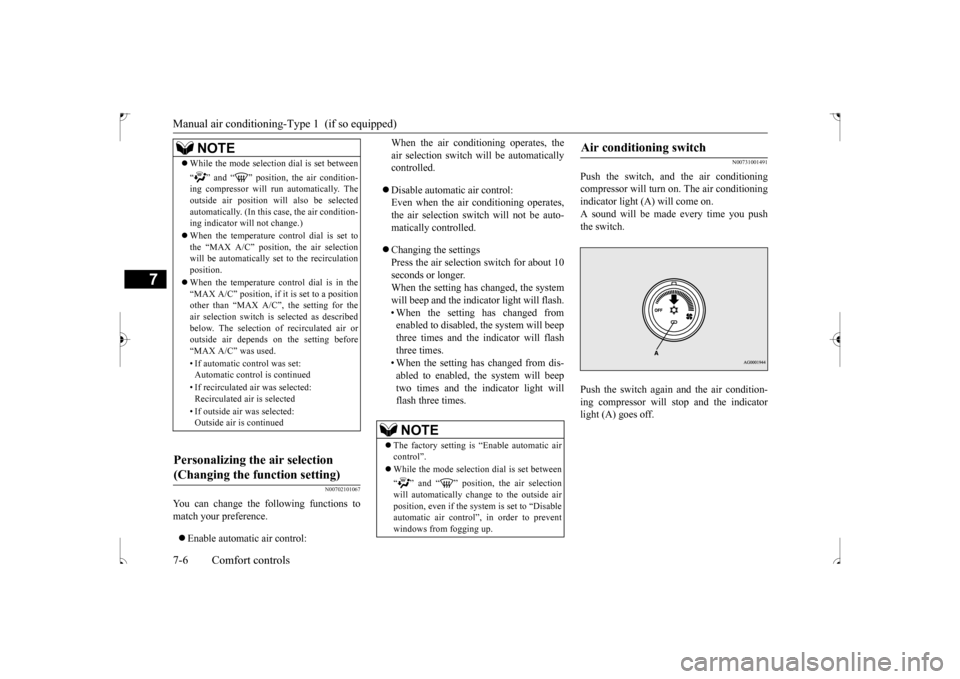
Push the switch, and the air conditioningcompressor will turn on. The air conditioningindicator light (A) will come on. A sound will be made every time you push the switch. Push the switch again and the air condition- ing compressor will stop and the indicator light (A) goes off.
NOTE
While the mode selection dial is set between “ ” and “ ” position, the air condition- ing compressor will run automatically. The outside air position will also be selectedautomatically. (In this case, the air condition- ing indicator will not change.) When the temperature control dial is set to the “MAX A/C” position, the air selection will be automatically set to the recirculationposition. When the temperature control dial is in the “MAX A/C” position, if it is set to a position other than “MAX A/C”, the setting for the air selection switch is selected as describedbelow. The selection of recirculated air or outside air depends on the setting before “MAX A/C” was used. • If automatic control was set: Automatic control is continued • If recirculated air was selected: Recirculated air is selected • If outside air was selected: Outside air is continued
Personalizing the air selection (Changing the function setting)
NOTE
The factory setting is “Enable automatic air control”. While the mode selection dial is set between “ ” and “ ” position, the air selection will automatically change to the outside air position, even if the sy
stem is set to “Disable
automatic air control”, in order to preventwindows from fogging up.
Air conditioning switch
BK0239500US.bo
ok 6 ページ 2016年5月13日 金曜日 午前8時53分