2017 MITSUBISHI OUTLANDER Vehicle care
[x] Cancel search: Vehicle carePage 297 of 521
Warning lights 5-216 Features and controls
5
N00520300147 N00520401552
This light comes on when the ignition switch is turned to the “ON” position (engine off) orthe operation mode is put in ON. When the engine is started, the light should go off a few seconds later. A warning is alsodisplayed in the multi information display. The warning light also illuminates after start- ing the engine under the following condi-tions. When the parking brake is still applied. When the brake fluid level is low. When the brake system circuit is not working properly.
When the vehicle is moving at more than 5 mph (8 km/h) and parking brake applied, abuzzer will sound to inform the driver that the parking brake is not properly release. Before driving, be sure
that the parking brake
is fully released and
brake warning light is
off.
N00591200030
This warning light will illuminate when there is a fault in the Electric parking brake system. Normally, this warning light illuminateswhen the operation mode is put in ON, and goes off in a few seconds.
NOTE
The ECO drive assist is displayed only when vehicle is driven with
the selector lever in
the “D” (DRIVE) positi
on or when vehicle is
driven in the sport mode (for vehicles equipped with sportroni
c steering wheel pad-
dle shifter).
Warning lights Brake warning light (red) and buzzer
CAUTION If the brake warning light and the Anti-lock braking system warning
light are illuminated
at the same time, the braking force distribu- tion function will not ope
rate, so the vehicle
may be destabilized
during sudden braking
under the following conditions.• When the brake warn
ing light does not go
out even when the parking brake is released.• When the brake warning light stays onwhile driving.• If the above occurs,
avoid sudden braking
and high-speed driving. Park the vehicle in a safe place, and contact an authorized Mit-subishi Motors dealer or a repair facility of your choice as soon as possible.
The vehicle should be bro
ught to a halt in the
following manner when
brake performance
is deteriorated.• Confirm that the vehicle slows down whenyou press down on the brake pedal harderthan usual. In some cases, the brake pedal may go all the way to the floor.
• Should the brakes fail, use engine braking to reduce your speed and observe the fol-lowings.[Vehicles with the parking brake of the lever type] Carefully pull the parking brake lever.[Vehicles with the Electric parking brake] Keep pulling the Electric parking brake switch. (Refer to “Electric parking brake” Depress the brake peda
l to illuminate the
stop lights to alert
the vehicles behind you.
Electric parking brake warning light (yellow)
(if so equipped)
BK0239700US.book 216 ページ 2016年6月16日 木曜日 午前10時58分
Page 301 of 521

Combination headlights and dimmer switch 5-220 Features and controls
5
N00558601113
If there is a fault in the charging system, the warning display is displayed on the informa- tion screen in the multi information display.The warning light in the instrument cluster also illuminates.
N00558701101
If the engine oil pressure drops while the engine is running, the warning display is dis-played on the information screen in the multi information display.
N00522501892
• Confirm that the vehicle slows down when you press down on the brake pedal harderthan usual. In some cases, the brake pedalmay go all the way to the floor.• Should the brakes fail, use engine brakingto reduce your speed and observe the fol- lowings. [Vehicles with the parking brake of thelever type] Carefully pull the parking brake lever. [Vehicles with the Electric parking brake]Keep pulling the Electric parking brake switch. (Refer to “Electric parking brake” Depress the brake peda
l to illuminate the
stop lights to alert th
e vehicles behind you.
Charging system warning dis- play
CAUTION
CAUTION If warnings are displa
yed while the engine is
running, park your vehicl
e in a safe place as
soon as possible and c
ontact an authorized
Mitsubishi Motors dealer
or a repair facility
of your choice to have the system checked.
Oil pressure warning display
CAUTION If the vehicle is driven while the engine oil is low, or the oil level is normal but the warn-ing is displayed, th
e engine may overheat
and damage may result. If the warning is displayed while the engine is running, park your ve
hicle in a safe place
as soon as possible and
check the engine oil
level.
If this warning display comes on when the engine oil level is pr
oper, have your vehicle
checked at an authorized Mitsubishi Motorsdealer or a repair fa
cility of your choice.
NOTE
The oil pressure wa
rning display does not
show the amount of oil. The oil level must be checked using the dipstick.
Combination headlights and dimmer switch Headlights
NOTE
Do not leave the headli
ghts and other lights
on for a long period of time when the engine is not running. The battery will run down.CAUTION
BK0239700US.book 220 ページ 2016年6月16日 木曜日 午前10時58分
Page 320 of 521
Heated steering wheel switch (if so equipped)
Features and controls 5-239
5
N00589100032
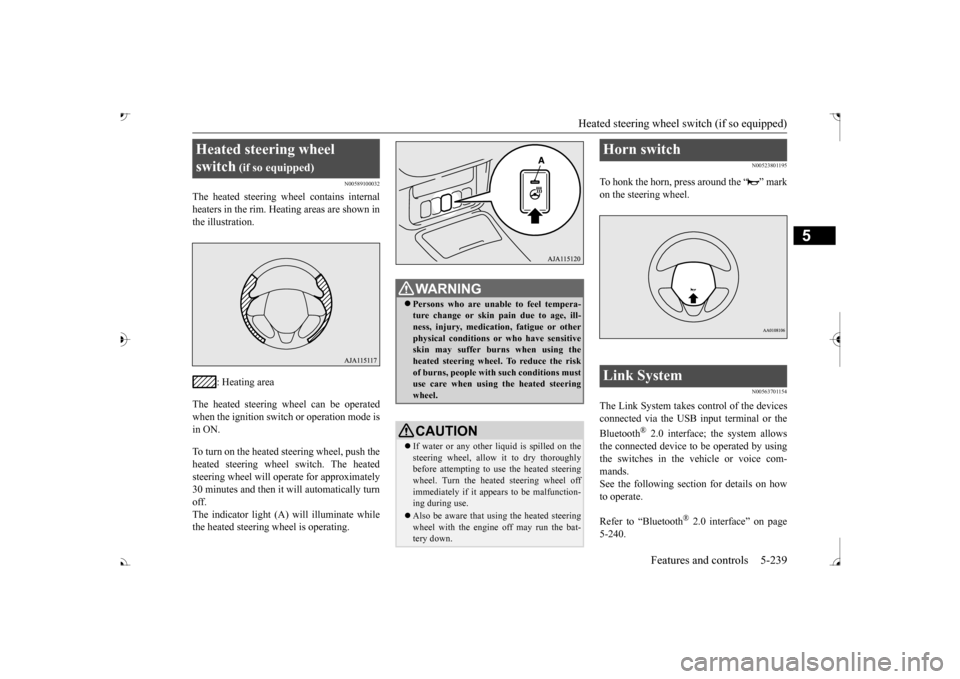
The heated steering wh
eel contains internal
heaters in the rim. Heating areas are shown in the illustration.
: Heating area
The heated steering wheel can be operated when the ignition switch or operation mode is in ON. To turn on the heated steering wheel, push the heated steering wheel switch. The heated steering wheel will ope
rate for approximately
30 minutes and then it
will automatically turn
off. The indicator light (A) will illuminate while the heated steering wheel is operating.
N00523801195
To honk the horn, press around the “ ” markon the steering wheel.
N00563701154
The Link System takes control of the devicesconnected via the USB input terminal or the Bluetooth
® 2.0 interface; the system allows
the connected device to be operated by using the switches in the vehicle or voice com-mands. See the following section for details on how to operate. Refer to “Bluetooth
® 2.0 interface” on page
5-240.
Heated steering wheel switch
(if so equipped)
Persons who are unable
to feel tempera-
ture change or skin
pain due to age, ill-
ness, injury, medicati
on, fatigue or other
physical conditions or
who have sensitive
skin may suffer burns when using theheated steering wheel. To reduce the risk of burns, people with such conditions must use care when using the heated steeringwheel.CAUTION If water or any other li
quid is spilled on the
steering wheel, allow it to dry thoroughly before attempting to use the heated steering wheel. Turn the heated steering wheel offimmediately if it appe
ars to be malfunction-
ing during use. Also be aware that us
ing the heated steering
wheel with the engine off may run the bat- tery down.
Horn switch Link System
BK0239700US.book 239 ページ 2016年6月16日 木曜日 午前10時58分
Page 345 of 521
USB input terminal 5-264 Features and controls
5
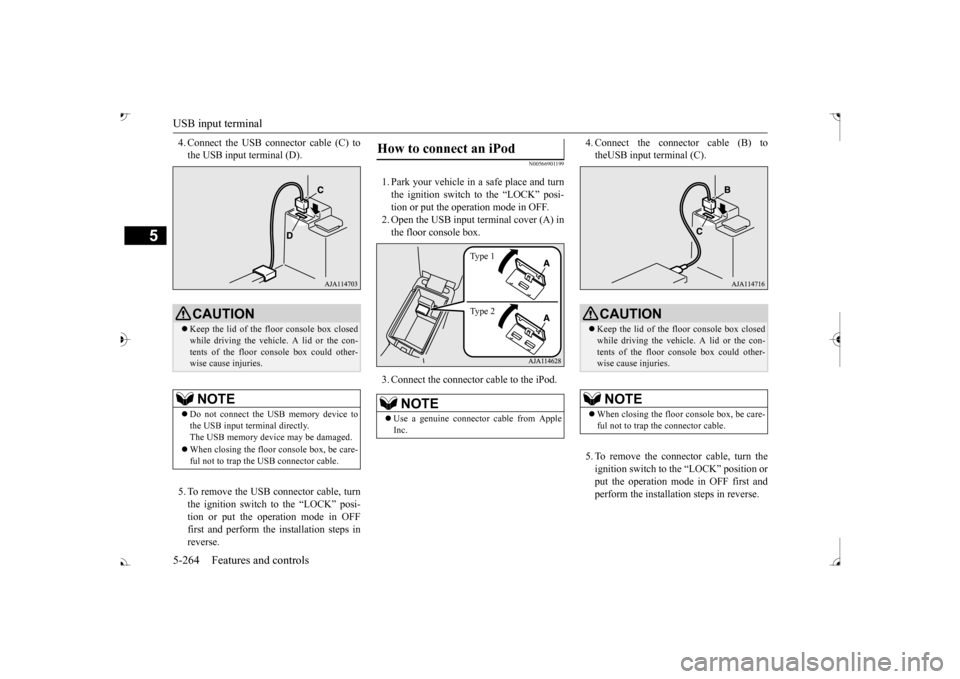
4. Connect the USB connector cable (C) to the USB input terminal (D). 5. To remove the USB connector cable, turn the ignition switch to the “LOCK” posi- tion or put the operation mode in OFFfirst and perform the installation steps in reverse.
N00566901199
1. Park your vehicle in
a safe place and turn
the ignition switch to the “LOCK” posi-tion or put the operation mode in OFF. 2. Open the USB input terminal cover (A) in the floor console box. 3. Connect the connector cable to the iPod.
4. Connect the connector cable (B) to theUSB input terminal (C). 5. To remove the connect
or cable, turn the
ignition switch to the “LOCK” position orput the operation mode in OFF first and perform the installation steps in reverse.
CAUTION Keep the lid of the floor console box closed while driving the vehicle. A lid or the con- tents of the floor console box could other- wise cause injuries.NOTE
Do not connect the US
B memory device to
the USB input term
inal directly.
The USB memory devi
ce may be damaged.
When closing the floor
console box, be care-
ful not to trap the USB connector cable.
How to connect an iPod
NOTE
Use a genuine connector
cable from Apple
Inc.
Ty p e 1 Ty p e 2
CAUTION Keep the lid of the floor console box closed while driving the vehicle. A lid or the con- tents of the floor console box could other- wise cause injuries.NOTE
When closing the floor
console box, be care-
ful not to trap the connector cable.
BK0239700US.book 264 ページ 2016年6月16日 木曜日 午前10時58分
Page 361 of 521
Bottle holders 5-280 Features and controls
5
N00537001228
This cup holder is located in the second row seat arm rest. Pull the arm rest down to use the cup holder.
N00532401041
The cup holder is located at the right side of the third row seat.
N00527301420
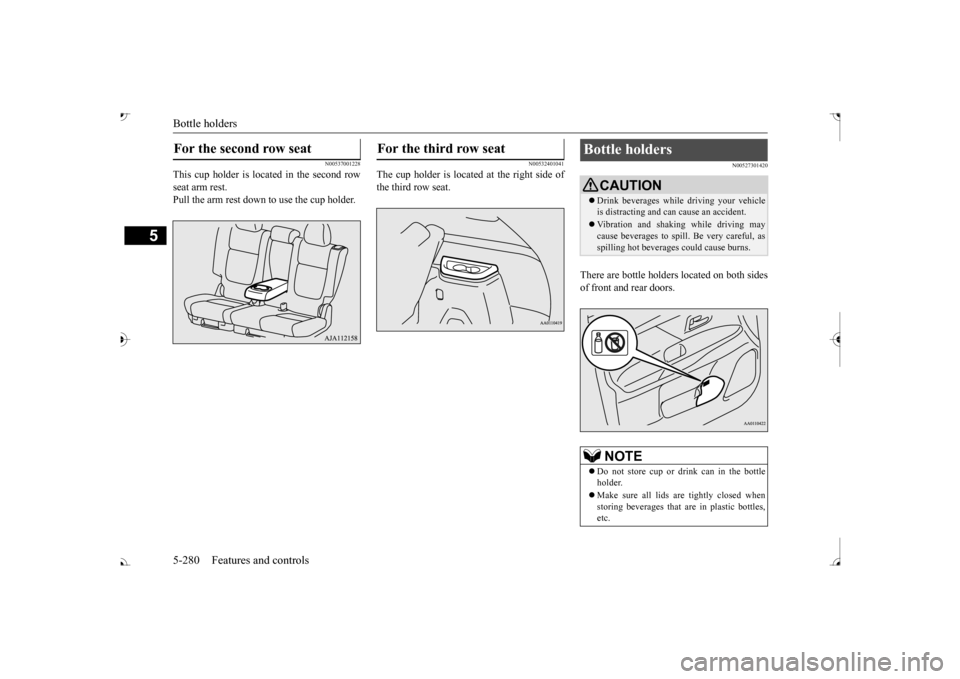
There are bottle holders located on both sides of front and rear doors.
For the second row seat
For the third row seat
Bottle holders
CAUTION Drink beverages while
driving your vehicle
is distracting and ca
n cause an accident.
Vibration and shaking while driving may cause beverages to spill.
Be very careful, as
spilling hot beverage
s could cause burns.
NOTE
Do not store cup or drink can in the bottle holder. Make sure all lids ar
e tightly closed when
storing beverages that
are in plastic bottles,
etc.
BK0239700US.book 280 ページ 2016年6月16日 木曜日 午前10時58分
Page 367 of 521
Driving precaution 6-2 Driving safety
6
N00629301092
Your vehicle has been designed for both nor- mal and occasional off-road use. However, avoid driving the vehicle through areas wherethe tires may get stuck in deep sand or mud as your vehicle is designe
d primarily for use on
pavement, unlike a conventional off-roadvehicle. Keep in mind that 2-wheel drive vehicles are less capable than 4-wh
eel drive vehicles for
driving on muddy, slippery, wet or snow-cov- ered roads. Utility vehicles have
higher ground clearance
and a narrower track, which enables them toperform in a wide variety of off-road situa- tions. Because of the higher ground clear- ance, these vehicles have a higher center ofgravity, which makes them handle differently than ordinary vehicles when driving on pave- ment. They are not designed to maneuver orcorner at the same speed on pavement as con- ventional 2-wheel driv
e passenger cars any
more than low-slung sports cars are designed
to perform satisfactorily in off-road condi- tions.Always drive safely
and steer the vehicle
carefully. Avoid operating the vehicle in a manner that might require sharp turns orabrupt maneuvers. As wi
th other vehicles of
this type, failure to operate this vehicle cor- rectly can result in lo
ss of control or vehicle
rollover. In a rollover crash, an unbelted person is sig- nificantly more likely to die than a person wearing a seat belt. Be
fore starting the vehi-
cle, always make cert
ain that you and all your
passengers are properly wearing their seat belts (with children in the rear seat, in appro- priate restraints).
N00628801191
Fuel economy is depe
ndent on many factors.
Your personal driving habits can have a sig-nificant effect on your fuel consumption. Several recommendations
for achieving the
greatest fuel economy are listed below. Whenever accelerating from a stop, always accelerate
slowly and smoothly.
When parked for even a short period, do not idle the engine. Shut it off. Plan your trips to avoid unnecessary stops.
Keep your tires inflated to the recom- mended pressures. When driving a 4-wheel drive vehicle on highways or dry improved roads, set the drive mode to “4WD ECO” or “4WDAUTO” (Electronically controlled 4WD), or “AWC ECO” or “NORMAL” (S- AW C ) . For freeway driving, maintain a speed of approximately 50 mph (80 km/h) when traffic, roadway and weather conditions safely permit. Keep your air filter clean and your vehicle lubricated according
to the recommenda-
tions in this manual. Always keep your ve
hicle well main-
tained. A poorly maintained engine wastes fuel and costs money. Never overload your vehicle.
N00628900049
Drunk driving is one of the most frequent causes of accidents.Your driving ability ca
n be seriously impaired
even with blood alcohol levels far below the legal minimum. If you
have been drinking,
don’t drive. Ride with a designated non- drinking driver, call a cab or a friend, or use public transportation. Drinking coffee or tak-ing a cold shower will not make you sober.
Driving precaution
WA R N I N G Utility vehicles have
a significantly higher
rollover rate than othe
r types of vehicles.
Avoid abrupt maneuvers and excessive speed. Always buckle up.
Fuel economy
Driving, alcohol and drugs
BK0239700US.book 2 ページ 2016年6月16日 木曜日 午前10時58分
Page 371 of 521

Parking 6-6 Driving safety
6
On snowy roads, ice can form on the braking system, making the brakes less effective. While driving in such conditions, pay closeattention to surrounding
vehicles and to the
condition of the road surface. From time to time, lightly depress the brake pedal andcheck how effective the brakes are. It is important to take
advantage of the engine
braking by downshifting while driving on steep downhill roads in order to prevent thebrakes from overheating.
N00629601385
When parking on a hill, set the parking brake,and turn the front wheels toward the curb on a downhill, or away from
the curb on an uphill.
If necessary, apply chocks to the wheels.Be sure that the parki
ng brake is firmly set
when parked and that the selector lever is in the “P” (PARK) position.
When parking on a hill, it is important to set the parking brake befo
re moving the selector
lever to the “P” (PARK) position. This pre- vents loading the parking brake against the transaxle. When this ha
ppens, it is difficult to
move the selector lever out of the “P” Never leave the engine running while you take a short nap or rest. Also, never leave the engine running in a closed or poorly venti- lated place. Your front bumper can be damaged if you scrape it over curbs or parking stop blocks.Be careful when traveling up or down steep slopes where your bumper can scrape the road.
Always carry the key and lock all doors and the liftgate when leaving the vehicle unat- tended. Always try to park your vehicle in a well litarea. Move effort could be required to turn the steering wheel. Refer to “Electric power steering system(EPS)” on page 5-99.
N00629901434
It is very important to know how muchweight your vehicle can carry. This weight is called the vehicle ca
pacity weight and
includes the weight of
all occupants, cargo
(including the roof load), non-factory-
When driving in cold weather When driving downhill Parking Parking on a hill
Parking with the engine run- ning
WA R N I N G Leaving the engine ru
nning risks injury or
death from accidentally moving the selec- tor lever or the accumulation of toxicexhaust fumes in the passenger compart- ment.
Where you park
WA R N I N G Do not park your vehicle in areas where combustible materials
such as dry grass or
leaves can come in contact with a hotexhaust, since a fire could occur.
When leaving the vehicle Do not keep the steering wheel fully turned for a long time Loading information
BK0239700US.book 6 ページ 2016年6月16日 木曜日 午前10時58分
Page 376 of 521
Trailer towing
Driving safety 6-11
6
N00630601112
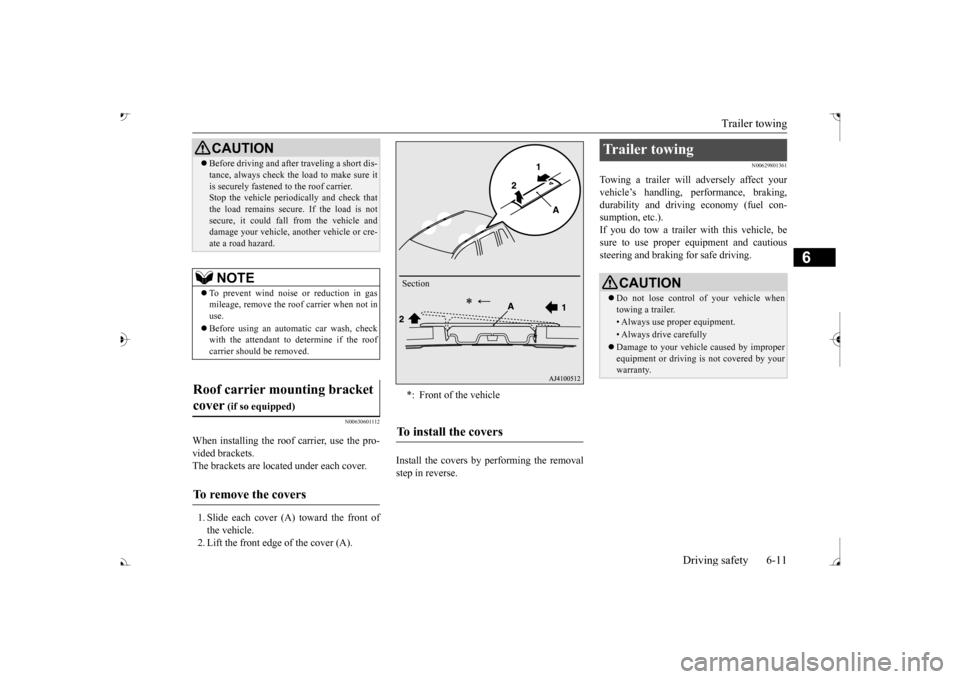
When installing the roof carrier, use the pro- vided brackets. The brackets are located under each cover. 1. Slide each cover (A) toward the front of the vehicle. 2. Lift the front edge of the cover (A).
Install the covers by performing the removal step in reverse.
N00629801361
Towing a trailer will adversely affect yourvehicle’s handling, performance, braking, durability and driving economy (fuel con-sumption, etc.). If you do tow a trailer
with this vehicle, be
sure to use proper e
quipment and cautious
steering and braking for safe driving.
Before driving and after traveling a short dis- tance, always check the load to make sure itis securely fastened to the roof carrier.Stop the vehicle periodi
cally and check that
the load remains secure. If the load is not secure, it could fall from the vehicle anddamage your vehicle,
another vehicle or cre-
ate a road hazard.NOTE
To prevent wind noise or reduction in gas mileage, remove the roof carrier when not in use. Before using an automatic car wash, check with the attendant to determine if the roofcarrier should be removed.
Roof carrier mounting bracket cover
(if so equipped)
To remove the covers
CAUTION
*: Front of the vehicleTo install the covers
Section
Trailer towing
CAUTION Do not lose control of your vehicle when towing a trailer.• Always use proper equipment.• Always drive carefully Damage to your vehicle caused by improper equipment or driving is not covered by your warranty.
BK0239700US.book 11 ページ 2016年6月16日 木曜日 午前10時58分