2017 MITSUBISHI OUTLANDER Vehicle care
[x] Cancel search: Vehicle carePage 42 of 521
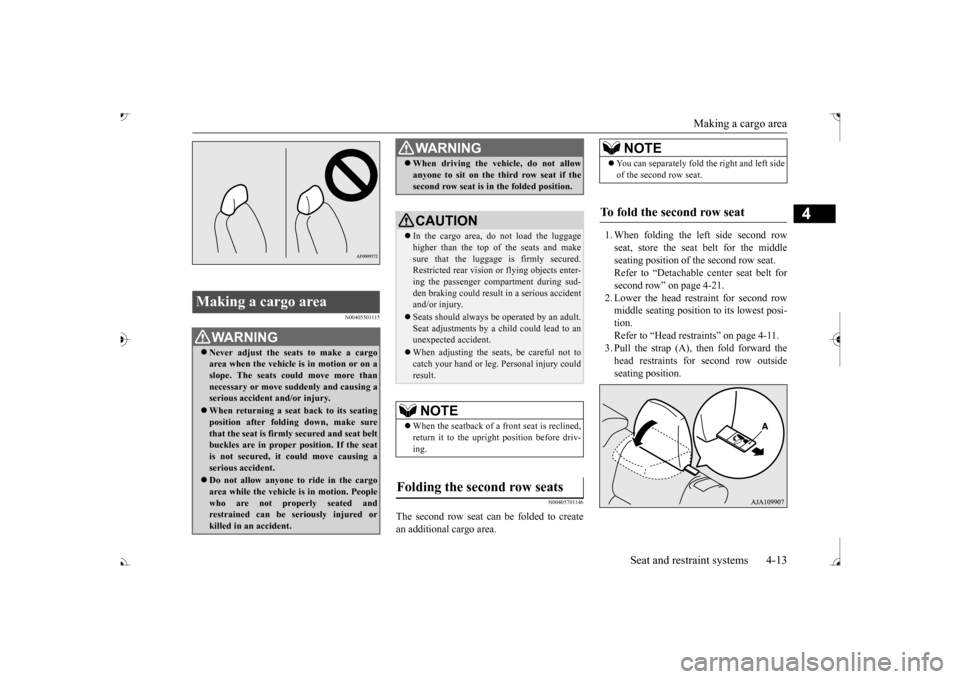
Making a cargo area
Seat and restraint systems 4-13
4
N00405501115
N00405701146
The second row seat can be folded to create an additional cargo area.
1. When folding the left side second row seat, store the seat belt for the middle seating position of the second row seat.Refer to “Detachable
center seat belt for
second row” on page 4-21. 2. Lower the head restraint for second rowmiddle seating position to its lowest posi- tion. Refer to “Head restraints” on page 4-11.3. Pull the strap (A), then fold forward the head restraints for second row outside seating position.
Making a cargo area
WA R N I N G Never adjust the seats to make a cargo area when the vehicle is in motion or on a slope. The seats co
uld move more than
necessary or move su
ddenly and causing a
serious accident
and/or injury.
When returning a seat back to its seating position after fold
ing down, make sure
that the seat is firmly secured and seat beltbuckles are in proper position. If the seat is not secured, it could move causing a serious accident. Do not allow anyone to ride in the cargo area while the vehicle
is in motion. People
who are not properly seated and restrained can be seriously injured or killed in an accident.
When driving the vehicle, do not allow anyone to sit on the third row seat if thesecond row seat is in the folded position.CAUTION In the cargo area, do not load the luggage higher than the top of the seats and makesure that the luggage is firmly secured. Restricted rear vision or
flying objects enter-
ing the passenger compartment during sud-den braking could result
in a serious accident
and/or injury. Seats should always be
operated by an adult.
Seat adjustments by a child could lead to an unexpected accident. When adjusting the seats, be careful not to catch your hand or leg.
Personal injury could
result.NOTE
When the seatback of a front seat is reclined, return it to the upright
position before driv-
ing.
Folding the second row seats
WA R N I N G
NOTE
You can separately fold
the right and left side
of the second row seat.
To fold the second row seat
BK0239700US.book 13 ページ 2016年6月16日 木曜日 午前10時58分
Page 45 of 521
Making a flat seat 4-16 Seat and restraint systems
4
N00409800021
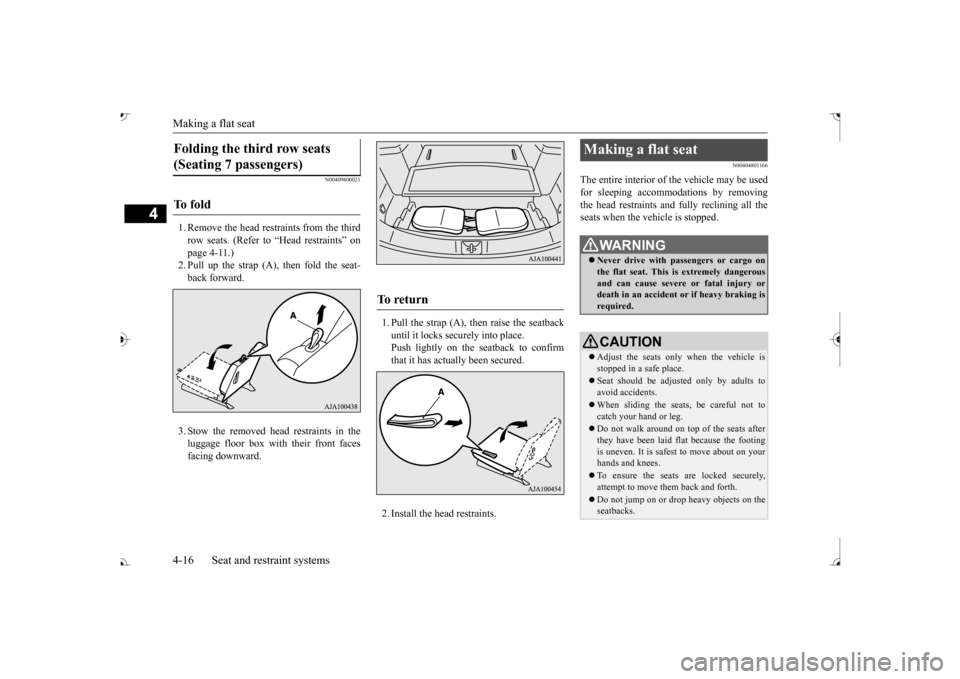
1. Remove the head restraints from the third row seats. (Refer to “Head restraints” on page 4-11.)2. Pull up the strap (A), then fold the seat- back forward. 3. Stow the removed head restraints in the luggage floor box with their front faces facing downward.
1. Pull the strap (A), then raise the seatback until it locks securely into place.Push lightly on the seatback to confirm that it has actually been secured. 2. Install the head restraints.
N00404801166
The entire interior of the vehicle may be used for sleeping accommoda
tions by removing
the head restraints and fully reclining all theseats when the vehicle is stopped.
Folding the third row seats (Seating 7 passengers) To f o l d
To r e t u r n
Making a flat seat
WA R N I N G Never drive with passengers or cargo on the flat seat. This is extremely dangerousand can cause severe or fatal injury or death in an accident
or if heavy braking is
required.CAUTION Adjust the seats only when the vehicle is stopped in a safe place. Seat should be adjusted only by adults to avoid accidents. When sliding the seat
s, be careful not to
catch your hand or leg. Do not walk around on top of the seats after they have been laid flat because the footingis uneven. It is safest to move about on your hands and knees. To ensure the seats are locked securely, attempt to move them back and forth. Do not jump on or drop heavy objects on the seatbacks.
BK0239700US.book 16 ページ 2016年6月16日 木曜日 午前10時58分
Page 47 of 521
Seat belts 4-18 Seat and restraint systems
4
N00406001511
Seat belts are in
stalled in your vehicle to help
reduce the risk of injury to the driver and pas- senger in the event of an accident. Alwaysuse the provided seat belts. Carefully review the
following information
for proper seat belt usage.Seat belts
WA R N I N G To help reduce the risk of injury or death in an accident, se
at belts and child
restraint systems must always be used. Refer to “Child restraint systems” on page4-27 for additional information. Never use one seat belt
for more than one
person. Never carry more peop
le in you
r vehicle
than there are seat belts. Always adjust the seat
belt for a snug fit.
Always place the shou
lder belt over your
shoulder and across
your chest. Never put
it behind you or under your arm. Always wear the lap be
lt as low as possible
across your hips, not around your waist.
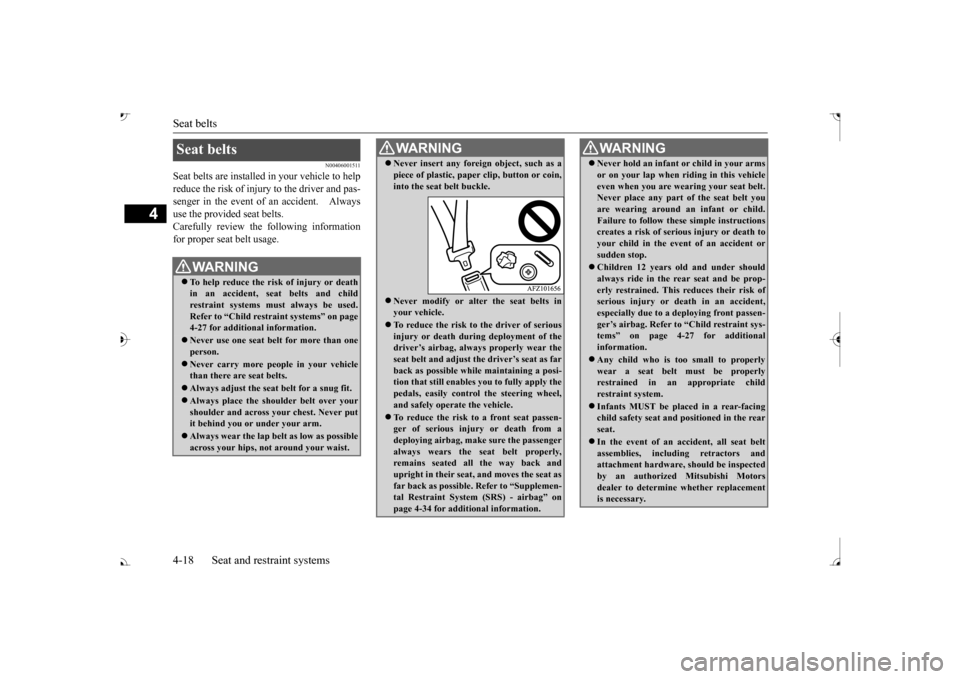
Never insert any foreig
n object, such as a
piece of plastic, paper clip, button or coin,into the seat belt buckle. Never modify or alter the seat belts in your vehicle. To reduce the risk to the driver of serious injury or death durin
g deployment of the
driver’s airbag, always
properly wear the
seat belt and adjust th
e driver’s seat as far
back as possible while maintaining a posi- tion that still enables
you to fully apply the
pedals, easily control the steering wheel, and safely operate the vehicle. To reduce the risk to a front seat passen- ger of serious injury or death from a deploying airbag, make sure the passengeralways wears the seat belt properly, remains seated all the way back and upright in their seat,
and moves the seat as
far back as possible. Refer to “Supplemen- tal Restraint System (SRS) - airbag” on page 4-34 for additional information.WA R N I N G
Never hold an infant
or child in your arms
or on your lap when ri
ding in this vehicle
even when you are we
aring your seat belt.
Never place any part of the seat belt you are wearing around an infant or child. Failure to follow these simple instructionscreates a risk of serious injury or death to your child in the event of an accident or sudden stop. Children 12 years ol
d and under should
always ride in the re
ar seat and be prop-
erly restrained. This reduces their risk of serious injury or de
ath in an accident,
especially due to a deploying front passen-ger’s airbag. Refer to
“Child restraint sys-
tems” on page 4-
27 for additional
information. Any child who is too small to properly wear a seat belt
must be properly
restrained in an appropriate child restraint system. Infants MUST be plac
ed in a rear-facing
child safety seat and
positioned in the rear
seat. In the event of an ac
cident, all seat belt
assemblies, including retractors andattachment hardware, should be inspected by an authorized
Mitsubishi Motors
dealer to determine whether replacementis necessary.WA R N I N G
BK0239700US.book 18 ページ 2016年6月16日 木曜日 午前10時58分
Page 55 of 521

Seat belt pre-tensioner
and force limiter systems
4-26 Seat and restraint systems
4
The driver and front pa
ssenger seat belts are
equipped with a seat belt pre-tensioner sys- tem. In a moderate-to-severe frontal or sidecollision or when a rollover or overturning of the vehicle is detected, the pre-tensioner sys- tem operates simultaneous
ly with the deploy-
ment of the front airb
ags, side airbags or
curtain airbags. The seat belt pre-tensi
oners are located in the
driver’s and front passenger’s seat belt retrac- tors (A) and in the front
passenger se
at’s final
anchor (B). When activated, the pre-tension- ers quickly draw back seat belt webbing and increase seat belt performance. The seat belt pre-tens
ioner system includes
the following components:
The airbag control unit monitors the readiness of the electronic parts of the system whenever the ignition switch or the operation mode is under the following conditions. These includeall of the items listed
above and all related
wiring. [Except for vehicles
equipped with the
F. A . S . T. - k e y ] The ignition switch is in the “ON” or “START” position. [Vehicles equipped with the F.A.S.T.-key] The operation mode is in ON.
The seat belt pre-tens
ioners will operate
under the same conditions
as the airbag con-
trol unit. When the seat belt pre-tensioners activate, some smoke is released
and a loud noise will
be heard. The smoke is
not harmful, but care
should be taken not to in
tentionally inhale it,
as it may cause some
temporary irritation to
people with respiratory problems.Even in the event of a severe impact, the pre- tensioners will
not operate if the seat belts are
not fastened. The seat be
lt pre-tensioners may
not activate in certai
n collisions, even though
the vehicle may appear
to be severely dam-
aged. Such non-activation does not mean that something is wrong with
the seat belt pre-ten-
sioner system, but rather that the collisionforces were not severe
enough to activate the
system.
Pre-tensioner system
1- SRS warning light 2- Front impact sensors 3- Seat belt
pre-tensioner
4- Airbag control unit5- Side impact sensors 6- Seat belt
buckle switches
WA R N I N GThe seat belt pre-tensioner system is designed to work only
once. After the seat
belt pre-tensioners have been activated, they will not work again. They must promptly be replaced and the entire seatbelt pre-tensioner system inspected by an authorized Mitsubis
hi Motors dealer.
BK0239700US.book 26 ページ 2016年6月16日 木曜日 午前10時58分
Page 75 of 521

Supplemental Restraint System (SRS) - airbag 4-46 Seat and restraint systems
4
N00419201315
The curtain airbags are contained in the front pillar, the rear pillar and the side sections of the roof.The curtain airbag is designed to inflate only on the side of the vehi
cle that is impacted,
even with no passenger in the seat.Also, when the airbag control unit detects rollover of the vehicle, the curtain airbags will deploy.Curtain airbag system
WA R N I N G The side airbags and curtain airbags can cause serious injury
or death to anyone
too close to the airbag when it deploys. Toreduce the risk of in
jury from a deploying
side airbag or curtai
n airbag, dr
iver and
front passenger must be properlyrestrained and seated well back, upright, and in the middle of the seat. Do not lean against the door.WA R N I N G In order to reduce the risk of injury from a deploying side airb
ag, do not allow any
second row seat passengers to hold onto the back of either front seat. Special careshould be taken with children.
Do not place any obje
cts around the area
where the side airbags deploy. Suchobjects can interfere with proper side air-bag deployment, and cause injury during deployment of the side airbag. Do not place stickers,
labels or additional
trim on the back of either front seat. They can interfere with proper side airbagdeployment. Do not attach a microphone (A) or any other object around
the part where the
curtain airbag (B) depl
oys, such as on the
windshield, side door
glass or front and
rear pillars and roof
side rail. When the
curtain airbag inflates, the microphone or other object may be
hurled with great
force or the curtain airbag may not inflate correctly, resulting
in death or serious
injury.WA R N I N G
BK0239700US.book 46 ページ 2016年6月16日 木曜日 午前10時58分
Page 84 of 521
Break-in recommendations
Features and controls 5-3
5
N00508701366
Advanced automobile
manufacturing tech-
niques permit you to operate your new vehi- cle without requiring a long break-in periodof low-speed driving. However, you can add to the future perfor- mance and economy of your vehicle byobserving the following precautions during the first 300 miles (500 km). Drive your vehicle at m
oderate speeds during
the break-in period. Avoid revving the engine. Avoid rough driving such as sudden starts, sudden accelerati
on, prolonged high-
speed driving and sudden braking. These actions would have a detrimental effect onthe engine and lead to increased fuel and oil consumption; th
is could ultimately
result in the malfunction of engine com-ponents. Be particularly careful to avoid full acceleration while in low shift posi- tion (low gears). Do not overload the vehicle. Stay within the seating capacity. (Refer to “Cargo load precautions” on page 6-10.) Refrain from towing a trailer or other vehicle (Refer to “T
railer towing” on page
6-11).
N00508801716
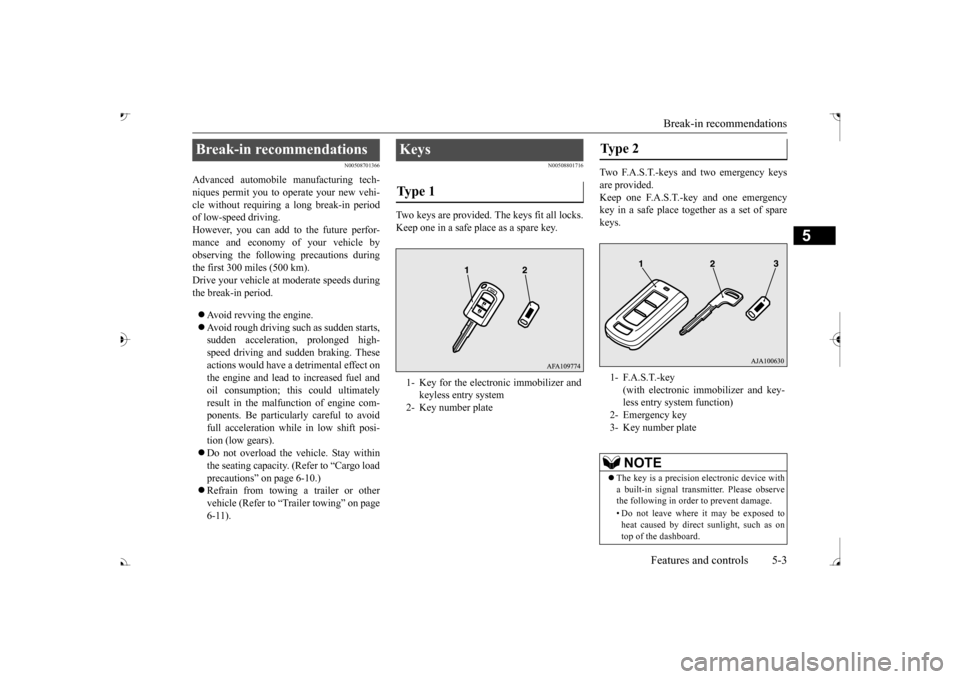
Two keys are provided. The keys fit all locks.Keep one in a safe place as a spare key.
Two F.A.S.T.-keys and two emergency keys are provided. Keep one F.A.S.T.-key and one emergency key in a safe pl
ace together as a set of spare
keys.
Break-in recommendations
Keys Ty p e 1 1- Key for the electronic immobilizer and
keyless entry system
2- Key number plate
Type 2 1- F.A.S.T.-key
(with electronic im
mobilizer and key-
less entry system function)
3- Key number plate
NOTE
The key is a precision
electronic device with
a built-in signal transm
itter. Please observe
the following in order to prevent damage. • Do not leave where it may be exposed to heat caused by direct
sunlight, such as on
top of the dashboard.
BK0239700US.book 3 ページ 2016年6月16日 木曜日 午前10時58分
Page 94 of 521
Free-hand Advanced Securi
ty Transmitter (F.A.S.T.-key) (if so equipped)
Features and controls 5-13
5
8. Check the keyless entry system to see that it works.
N00503101163
The Free-hand Advanced Security Transmit-ter (F.A.S.T.-key) enables the doors and theliftgate to be locked
and unlocked, the engine
to be started and the operation mode to be changed simply by carrying it.The F.A.S.T.-key can also be used as the remote control transmitter of the keyless entry system.Refer to “Free-hand
Advanced Security
Transmitter (F.A.S.T.-key): Keyless entry
system” on page 5-30.
NOTE
You may purchase a replacement battery at an electric appliance store. An authorized Mitsubish
i Motors dealer can
replace the battery for you if you prefer.CAUTION When the remote control transmitter case is opened, be careful to keep water, dust, etc. out. Also, do not touch the internal compo-nents.
Free-hand Advanced Secu- rity Transmitter (F.A.S.T.-key)
(if so equipped)
The F.A.S.T.-key must be carried by the driver. The F.A.S.T.-key is required for vehicle operations such as locking and unlocking the doors
and the liftgate,
starting the engine and changing the operation mode. When leaving the vehi- cle, make sure you are carrying the F.A.S.T.-key and then lock the vehicle.
WA R N I N G Individuals who use
implantable pace-
makers or implanta
ble cardiovascular-
defibrillators should keep away from the external and internal
transmitters. The
electromagnetic w
aves used in the
F.A.S.T.-key may affe
ct the operation of
implantable pacemakers and implantablecardiovascular-defibrillators.
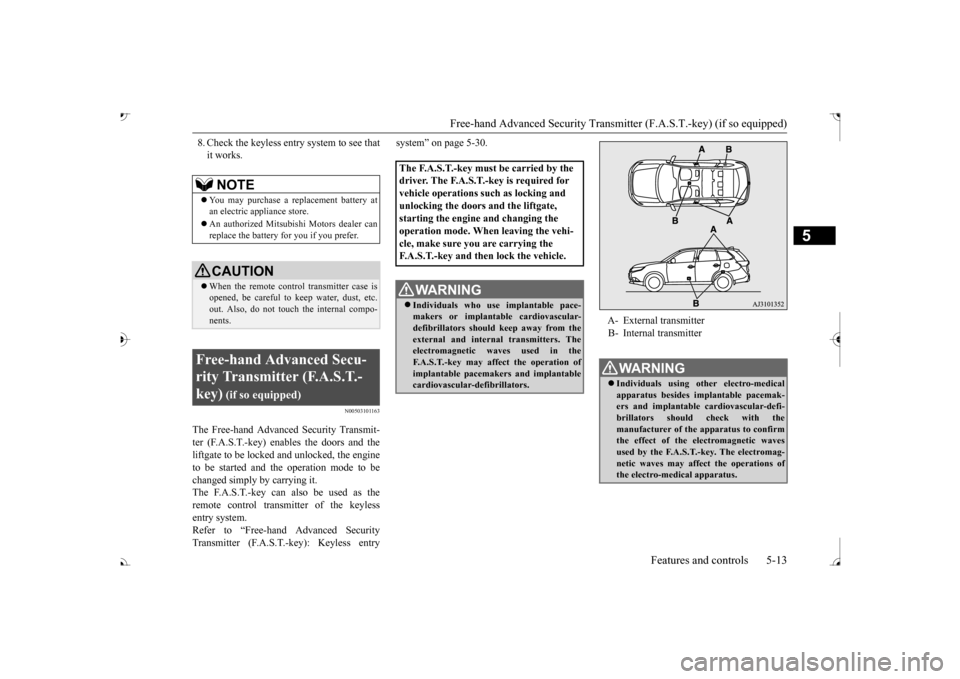
A- External transmitter B- Internal transmitterWA R N I N G Individuals using ot
her electro-medical
apparatus besides implantable pacemak- ers and implantable
cardiovascular-defi-
brillators should
check with the
manufacturer of the apparatus to confirm the effect of the el
ectromagnetic waves
used by the F.A.S.T.-key. The electromag-netic waves may affect
the operations of
the electro-medical apparatus.
BK0239700US.book 13 ページ 2016年6月16日 木曜日 午前10時58分
Page 100 of 521
Free-hand Advanced Securi
ty Transmitter (F.A.S.T.-key) (if so equipped)
Features and controls 5-19
5
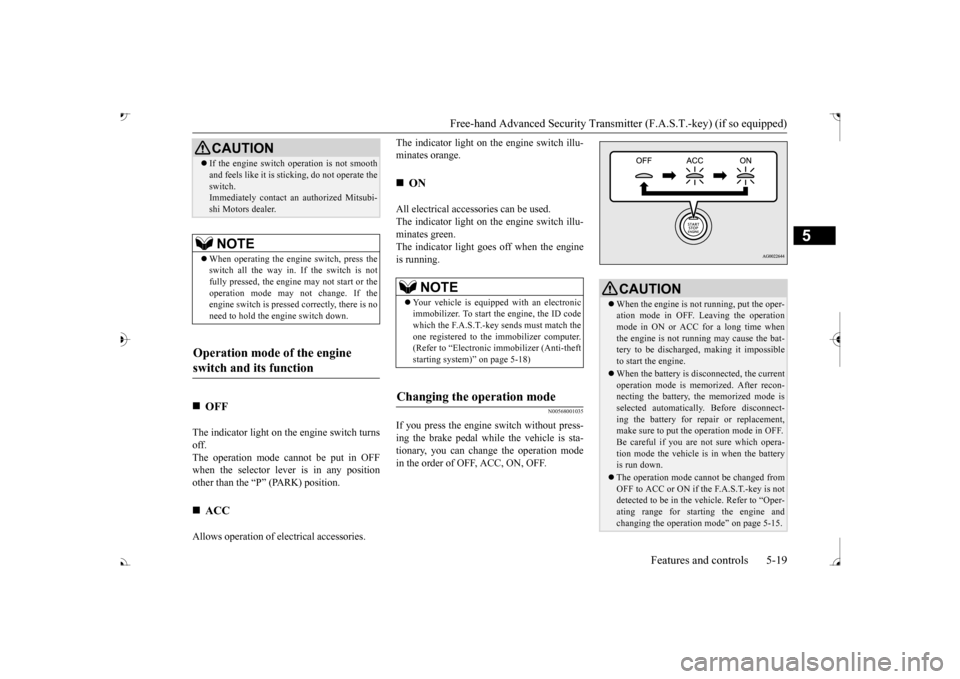
The indicator light on the engine switch turns off. The operation mode cannot be put in OFF when the selector lever is in any positionother than the “P” (PARK) position. Allows operation of el
ectrical accessories.
The indicator light on
the engine switch illu-
minates orange. All electrical accessories can be used. The indicator light on
the engine switch illu-
minates green.The indicator light goes off when the engine is running.
N00568001035
If you press the engine
switch without press-
ing the brake pedal whil
e the vehicle is sta-
tionary, you can change the operation modein the order of OFF, ACC, ON, OFF.
If the engine switch
operation is not smooth
and feels like it is st
icking, do not operate the
switch.Immediately contact an authorized Mitsubi- shi Motors dealer.NOTE
When operating the engi
ne switch, press the
switch all the way in. If the switch is not fully pressed, the engine may not start or theoperation mode may
not change. If the
engine switch is presse
d correctly, there is no
need to hold the e
ngine switch down.
Operation mode of the engine switch and its function
OFF
ACC CAUTION
ON NOTE
Your vehicle is equippe
d with an electronic
immobilizer. To start
the engine, the ID code
which the F.A.S.T.-key sends must match theone registered to the immobilizer computer. (Refer to “Electronic immobilizer (Anti-theft starting system)” on page 5-18)
Changing the operation mode
CAUTION When the engine is not running, put the oper- ation mode in OFF. Leaving the operationmode in ON or ACC for a long time when the engine is not running may cause the bat- tery to be discharged
, making it impossible
to start the engine. When the battery is disconnected, the current operation mode is memo
rized. After recon-
necting the battery, the memorized mode is selected automaticall
y. Before disconnect-
ing the battery for re
pair or replacement,
make sure to put the operation mode in OFF. Be careful if you are not sure which opera-tion mode the vehicle is in when the battery is run down. The operation mode cannot be changed from OFF to ACC or ON if the F.A.S.T.-key is not detected to be in the
vehicle. Refer to “Oper-
ating range for star
ting the engine and
changing the operation mode” on page 5-15.
BK0239700US.book 19 ページ 2016年6月16日 木曜日 午前10時58分