2017 MITSUBISHI OUTLANDER III steering wheel
[x] Cancel search: steering wheelPage 411 of 521
Listen to Satellite Radio (if so equipped) 7-28 Comfort controls
7
During RBDS broadcast
reception,
select
CAT (category content) to perform a collec-tive search for stations. 1. During FM reception, press the CAT key. This switches to the CAT selection mode. 2. Press the CAT key to select CAT. 3. Press the SCAN key. When a broadcast station is received, thisis played for 5 seconds, then the product searches for the next station.
N00717000096
This section explains how to listen to satellite radio. Press the RADIO key to switch the band. Switches between SIR1, SIR2, SIR3, and SIR4 bands. The selected band is in
dicated on the display.
Press the key or key to select the sta- tion.
10 seconds after reception, CAT search mode will be cancelled. To receive a different station, press the key or key again.
CAT Scan
NOTE
Press this key again while receiving the sta- tion to return to normal reception.NOTE
Listen to Satellite Radio
(if so
equipped)
NOTE
A subscription is required to listen to satel- lite radio. Sate
llite radio cannot be received
after the free trial period has expired. If no subscription has been made when the free trial period expires, the display will alternate between
“CALL” and “888-539-
SIRI”.
NOTE
Bands switch in the order AM, FM1, FM2, SIR1, SIR2*, SIR3*, and SIR4*. Switch satellite radi
o bands by holding down
the button, button on the steering wheel audio remote control switch.
*:If no signal is received, bands will not be switched.
Select a Station
key
Go down one step from the channel being received.
key
Go up one step from the channel being received.
key
(Hold down)
While the key is held down, it will cycle down through the channels being received.
key
(Hold down)
While the key is held down, it will cycle up through the channels being received.
NOTE
When cycling up/down through channels, the channel number display
in the upper level of
the display changes. When channel number “
000” is selected, the
SIRIUS ID (12 digi
ts) is displayed.
BK0239700US.book 28 ページ 2016年6月16日 木曜日 午前10時58分
Page 437 of 521
If the vehicle breaks down 8-2 For emergencies
8
N00836301230
If your vehicle breaks down on the road, move to the shoulder and turn on the hazard warning flashers. If there is no shoulder, orthe shoulder is not safe, drive in the right lane slowly with the hazard
lights flashing, until
you come to a safe stopping place. Keep theflashers flashing. If the engine stops, there will be no power assist to the steering and brakes, making these difficult to use. The brake booster will not work, so the brakes will not grip well. The brake pedal will be harder to press than usual. Since there is no power steering assist, the steering wheel will be hard to turn.
Get help from your passengers, bystanders, etc. to push the vehicle
and move it to a safe
area.
N00836401778
If the engine cannot be started because the battery is weak or de
ad, you can start it with
the battery from anothe
r vehicle using jumper
cables. 1. Take off any metal jewelry such as watch bands or bracelets th
at might create an
accidental electrical contact. 2. Position the vehi
cles close enough
together so that the jumper cables canreach, but be sure the vehicles aren’t touching each other.
3. Set the parking brake firmly on your vehi- cle and move the selector lever into the “P” (PARK) position. 4. Set the parking brake firmly on the othervehicle. Put the automatic transaxle in “P”5. Turn the ignition switch (the engine switch) on each vehicle to the “LOCK” or “OFF” position. 6. Make sure your battery electrolyte is at the proper level. (Refer to “Battery” on page 9-13.)
If the vehicle breaks down If the engine stops/fails When the engine fails at the intersection
Jump-starting the engine
WA R N I N G To reduce the risk of igniting flammable gas that may be emitted from the battery,carefully read this section before jump- starting the vehicle. Do not try to start you
r vehicle by pushing
or towing. This can cause an accident resulting in serious
injury or death and
can damage the vehicle.NOTE
Do not use jumper cables if they have dam- age or corrosion.
CAUTION Check the other vehicle.
It must have a 12-
volt battery. If the other system isn’t 12-volt,both systems can be damaged.NOTE
Turn off all lights, heat
er, and othe
r electrical
loads. This will avoid sparks and help saveboth batteries.
BK0239700US.book 2 ページ 2016年6月16日 木曜日 午前10時58分
Page 442 of 521
How to change a tire
For emergencies 8-7
8
6. Get the jack, bar and wheel nut wrench ready.(Refer to “Jack and t
ools” on page 8-5.)
N00849600315
The compact spare tire is stowed below the luggage compartment fl
oor. It is designed to
save space in the luggage compartment. Itslighter weight makes it easier to use if a flat tire occurs.
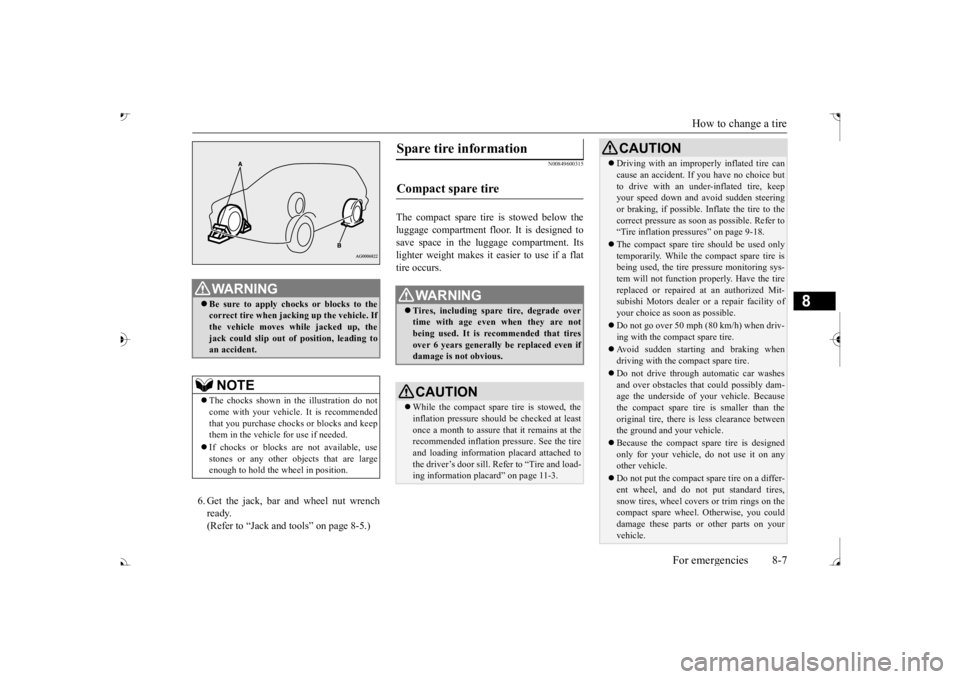
WA R N I N G Be sure to apply choc
ks or blocks to the
correct tire when jacking up the vehicle. Ifthe vehicle moves while jacked up, the jack could slip out of
position, leading to
an accident.NOTE
The chocks shown in the illustration do not come with your vehicl
e. It is recommended
that you purchase chocks or blocks and keep them in the vehicle for use if needed. If chocks or blocks
are not available, use
stones or any other obj
ects that are large
enough to hold the wheel in position.
Spare tire information Compact spare tire
WA R N I N G Tires, including spar
e tire, degrade over
time with age even when they are not being used. It is recommended that tiresover 6 years generally
be replaced even if
damage is not obvious.CAUTION While the compact spare tire is stowed, the inflation pressure shoul
d be checked at least
once a month to assure that it remains at the recommended inflation pressure. See the tire and loading informati
on placard attached to
the driver’s door sill. Refer to “Tire and load-ing information placard” on page 11-3.
Driving with an imprope
rly inflated tire can
cause an accident. If
you have no choice but
to drive with an under-inflated tire, keepyour speed down and avoid sudden steering or braking, if possible. Inflate the tire to the correct pressure as s
oon as possible. Refer to
“Tire inflation pressures” on page 9-18. The compact spare tire should be used only temporarily. While the compact spare tire is being used, the tire pr
essure monitoring sys-
tem will not function pr
operly. Have the tire
replaced or repaired at an authorized Mit- subishi Motors dealer or
a repair facility of
your choice as soon as possible. Do not go over 50 mph (80 km/h) when driv- ing with the compact spare tire. Avoid sudden starting and braking when driving with the compact spare tire. Do not drive through automatic car washes and over obstacles that
could possibly dam-
age the underside of your vehicle. Because the compact spare tire is smaller than the original tire, there is less clearance betweenthe ground and your vehicle. Because the compact spare tire is designed only for your vehicle, do not use it on any other vehicle. Do not put the compact spare tire on a differ- ent wheel, and do not put standard tires, snow tires, wheel covers
or trim rings on the
compact spare wheel. Otherwise, you could damage these parts or other parts on your vehicle.CAUTION
BK0239700US.book 7 ページ 2016年6月16日 木曜日 午前10時58分
Page 446 of 521
How to change a tire
For emergencies 8-11
8
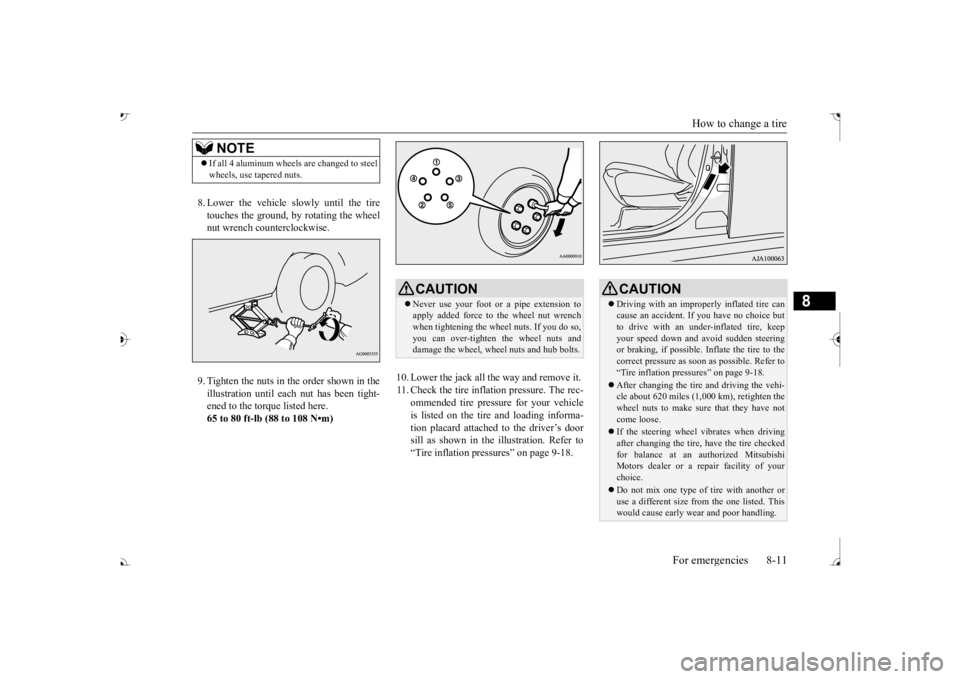
8. Lower the vehicle slowly until the tire touches the ground, by rotating the wheel nut wrench counterclockwise. 9. Tighten the nuts in the order shown in the illustration until each
nut has been tight-
ened to the torque listed here.65 to 80 ft-lb (88 to 108 N•m)
10. Lower the jack all the way and remove it. 11. Check the tire inflation pressure. The rec-
ommended tire pressure for your vehicleis listed on the tire
and loading informa-
tion placard attached to the driver’s door sill as shown in the illustration. Refer to“Tire inflation pressures” on page 9-18.
NOTE
If all 4 aluminum wheels are changed to steel wheels, use tapered nuts.
CAUTION Never use your foot or a pipe extension to apply added force to the wheel nut wrenchwhen tightening the wheel nuts. If you do so, you can over-tighten the wheel nuts and damage the wheel, wheel nuts and hub bolts.
CAUTION Driving with an imprope
rly inflated tire can
cause an accident. If
you have no choice but
to drive with an under-inflated tire, keep your speed down and avoid sudden steering or braking, if possible. Inflate the tire to thecorrect pressure as s
oon as possible. Refer to
“Tire inflation pressures” on page 9-18. After changing the tire
and driving the vehi-
cle about 620 miles (1,000 km), retighten the wheel nuts to make sure
that they have not
come loose. If the steering wheel vibrates when driving after changing the tire, have the tire checked for balance at an authorized Mitsubishi Motors dealer or a repair facility of yourchoice. Do not mix one type of tire with another or use a different size from the one listed. This would cause ea
rly wear and poor handling.
BK0239700US.book 11 ページ 2016年6月16日 木曜日 午前10時58分
Page 471 of 521
Tires 9-18 Vehicle care and maintenance
9
The treadwear grade is a comparative rating based on the wear rate of
the tire when tested
under controlled conditions on a specified government test course
. For example, a tire
graded 150 would wear one and one-half (11/2) times as well on the government course
as a tire graded 100.
The relative performance
of tires depends upon the actual conditions of their use, however, and may depart signifi-cantly from the norm due to variations in driving habits, service
practices and differ-
ences in road characteristics and climate. The traction grades, from highest to lowest, are AA, A, B and C. Those grades represent the tire’s ability to stop on wet pavement as measured under contro
lled conditions on
specified government te
st surfaces of asphalt
and concrete. A tire
marked C may have poor
traction performance.
The temperature grades are A (the highest), B and C, representing the ti
re’s resistance to the
generation of heat and it
s ability to dissipate
heat when tested un
der controlled conditions
on a specified indoor
laboratory test wheel.
Sustained high temperature can cause the material of the tire to
degenerate and reduce
tire life, and excessive temperature can leadto sudden tire failure. The grade C corre- sponds to a level of performance which all passenger car tires must
meet under the Fed-
eral Motor Vehicle Safety Standard No. 109. Grades B and A represent higher levels ofperformance on the laboratory test wheel than the minimum required by law.
N00939301997
Proper tire inflation pre
ssure is essential for
the safe and satisfac
tory operation of your
vehicle. The wrong tire pressure will causeproblems in three major areas: Safety Too little pressure increases flexing in the tire and can cause tire failure. Too muchpressure can cause a tire to lose its ability to cushion shock. Objects on the road and potholes could then ca
use tire damage that
may result in tire failure.
Economy The wrong tire pressure can cause unevenwear patterns in the tire tread. These abnormal wear patterns will reduce the tread life, and the tire will have to bereplaced sooner. Too little pressure also makes it harder for the tire to roll, and this uses up more fuel. Ride comfort and vehicle stability The superior riding ex
perience built into
your vehicle partly depends on the correct tire pressure. Too mu
ch pressure gives an
uncomfortable and ja
rring ride. Too little
pressure feels as if your vehicle is slow to respond. Unequal tire pressures can make steeringyour vehicle uneven
and unpredictable.
The tire pressure for your vehicle under nor- mal driving conditions is
listed on the placard
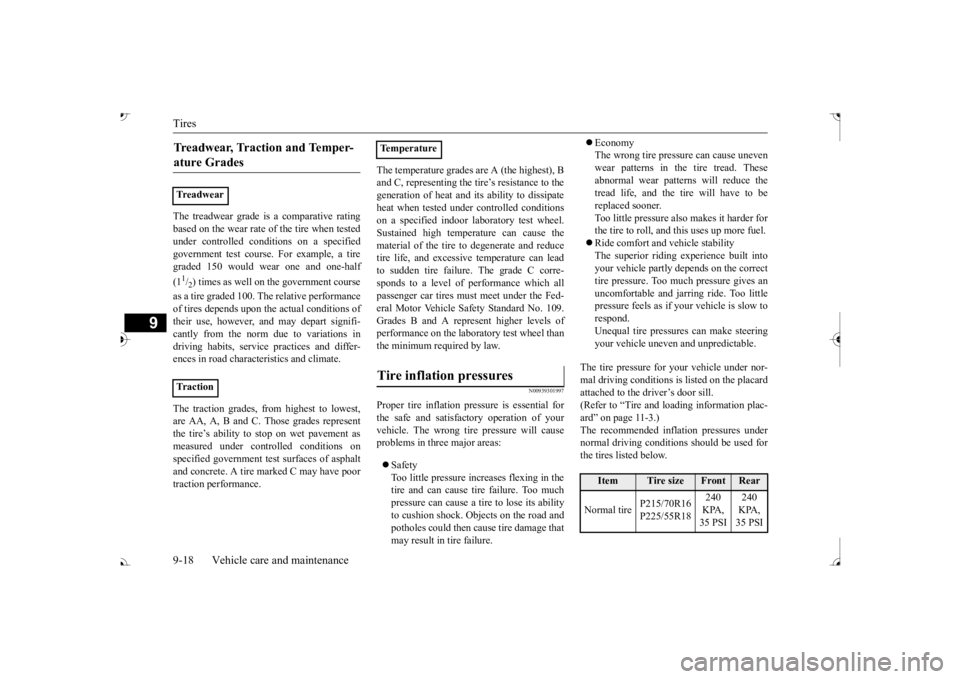
attached to the driver’s door sill.(Refer to “Tire and loading information plac- ard” on page 11-3.) The recommended inflation pressures undernormal driving conditions should be used for the tires listed below.
Treadwear, Traction and Temper- ature Grades Treadwear Tr a c t i o n
TemperatureTire inflation pressures
Item
Tire size
Front
Rear
Normal tire
P215/70R16 P225/55R18
240 KPA, 35 PSI
240 KPA, 35 PSI
BK0239700US.book 18 ページ 2016年6月16日 木曜日 午前10時58分
Page 477 of 521
General maintenance 9-24 Vehicle care and maintenance
9
there are other parts which do not usually need regular maintenance.But, if any of these parts stops working prop- erly, your vehicle performance could suffer. Have these items ch
ecked if you notice a
problem with them. If you have any questions, see your autho- rized Mitsubishi Motors
dealer for assistance.
N00941600059
Good brakes are essential for safe driving. Check the brake pads for wear. For goodbraking performance, re
place the brake pads
with the same type pads as the originals.
N00941700076
Brake hoses and tubing should be checkedfor: Severe surface cracking, scuffing or worn spots. If the fabric casing of the hose isshowing through any cracks or worn spots in the rubber hose cover, the hose should be replaced. The brakes can fail if thehose wears through. Improper installation
may cause twisting,
or wheel, tire or chassis interference.
N00941800093
Check the following parts for damage andgrease leaks: Ball joint boots of the suspension and steering linkage Bellows on both ends of the drive shaft
N00942201118
The best way to keep carbon monoxide gas from entering inside your
vehicle is to have
the engine exhaust syst
em properly serviced.
Have a competent mechanic inspect the com- plete exhaust
system and nearby body areas
for broken, damaged, de
teriorated, or mispo-
sitioned parts if you not
ice any of the follow-
ing: A change in the sound of the exhaust sys- tem The smell of exhaust fumes inside the vehicle
The underside or rear of the vehicle is damaged
Also check the exhaust system each time the vehicle is raised for l
ubrication, oil changes,
or required service. Any open seams or loose connections could le
t dangerous exhaust
fumes seep into the luggage and passenger compartments. Check for holes or exhaust gas leaks caused by corrosion or damage. Check the joints and connections for looseness or exhaust gas leaks. Check the rubber hangers and brackets for damage.
N00942300079
The timing belt should
be replaced with a
new one at the mileage listed in the “WAR- RANTY AND MAINTENANCE MAN-UAL”.
Brake hoses
Ball joint, steering linkage seals, drive shaft boots Exhaust system
WA R N I N G Carbon monoxide gas
from your vehicle’s
exhaust is poisonous. Breathing thesefumes can cause unconsciousness or death.
Check for any of the following conditions: Timing belt
BK0239700US.book 24 ページ 2016年6月16日 木曜日 午前10時58分
Page 481 of 521
Fuses 9-28 Vehicle care and maintenance
9
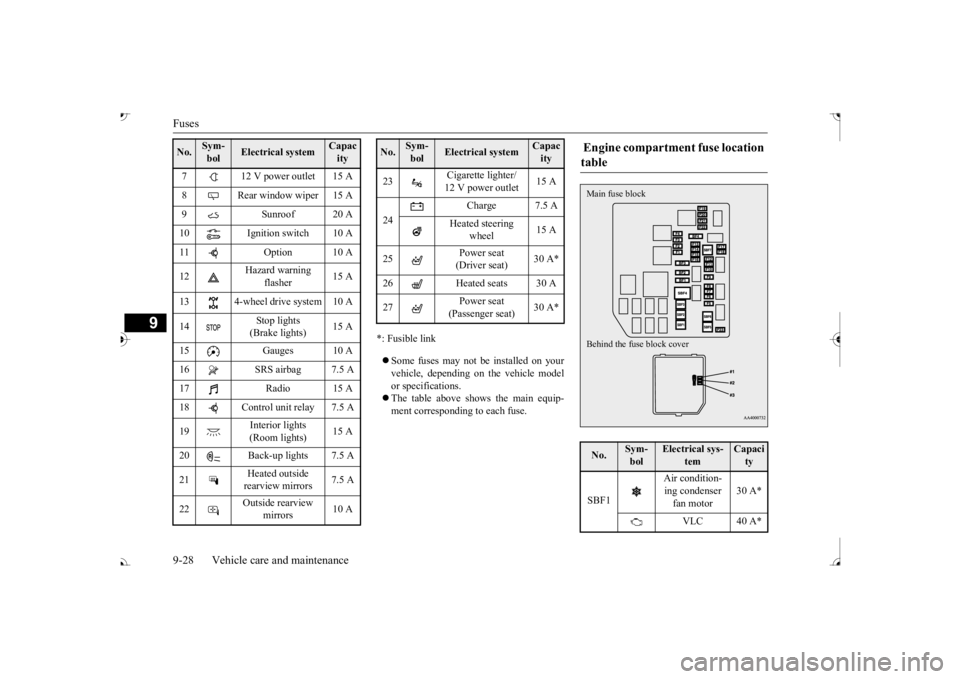
*: Fusible link Some fuses may not be installed on your vehicle, depending on
the vehicle model
or specifications. The table above show
s the main equip-
ment corresponding to each fuse.
7 12 V power outlet 15 A 8 Rear window wiper 15 A 9 Sunroof 20 A 10 Ignition switch 10 A11 Option 10 A 12
Hazard warning
flasher
15 A
13 4-wheel drive system 10 A 14
Stop lights (Brake lights)
15 A
15 Gauges 10 A 16 SRS airbag 7.5 A 17 Radio 15 A18 Control unit relay 7.5 A 19
Interior lights (Room lights)
15 A
20 Back-up lights 7.5 A 21
Heated outside rearview mirrors
7.5 A
22
Outside rearview
mirrors
10 A
No.
Sym- bol
Electrical system
Capacity
23
Cigarette lighter/ 12 V power outlet
15 A
24
Charge 7.5 A
Heated steering
wheel
15 A
25
Power seat (Driver seat)
30 A*
26 Heated seats 30 A 27
Power seat (Passenger seat)
No.
Sym- bol
Electrical system
Capacity
Engine compartment fuse location table No.
Sym- bol
Electrical sys-
tem
Capacity
SBF1
Air condition- ing condenser fan motor
30 A*
VLC 40 A*
Behind the fuse block cover Main fuse block
BK0239700US.book 28 ページ 2016年6月16日 木曜日 午前10時58分
Page 514 of 521
Alphabetical index
12-1
12
Numerics
12 V power outlets
............................
5-267
4-wheel drive operation
.......................
5-88
A
Accessory (installation)
.........................
3-6
Active stability control (ASC)
............
5-100
Adaptive Cruise C
ontrol System (ACC)
.......
5-106 Air cleaner filter
...................................
9-9
Air conditioner
Dual-zone automatic climate control air conditioner
.....................................
7-5
Important air condi
tioning operating tips
..
7-13
Air purifier
.........................................
7-14
Airbag
...............................................
4-34
All-wheel drive operation
....................
5-88
Aluminum wheels
...............................
9-43
AM/FM radio
.....................................
7-14
Anti-lock braking system
.....................
5-97
Arm rest
.............................................
4-10
Assist grip
........................................
5-283
Audio
AM/FM radio
.................................
7-14
CD player
......................................
7-14
Troubleshooting
.............................
7-47
Automatic high beam system
..............
5-224
Automatic transaxle
............................
5-67
Fluid
.....................................
9-11
, 11-7
Selector le
ver operation
..................
5-68
Selector lever positions
...................
5-71
Sports mode
...................................
5-72
B
Back-up light
Bulb capacity
.................................
9-32
Replacement
..................................
9-38
Ball joint, steering linka
ge seals, drive shaft
boots
...............................................
9-24
Battery
..............................................
9-13
Charging system warning light
.......
5-217
Checking battery
electrolyte level
....
9-13
Disconnection and connection
.........
9-14
During cold weather
.......................
9-13
Specification
..................................
11-6
Blind Spot Warning (BSW)
................
5-131
Bluetooth® 2.0 interface
....................
5-240
Bottle holders
....................................
5-280
Brake
Fluid
.....................................
9-12
, 11-7
Brake assist
........................................
5-96
Braking
Anti-lock braking system
................
5-97
Braking
...........................................
6-5
Hose
..............................................
9-24
Pad wear alarm
...............................
5-93
Parking brake
.................................
5-53
Pedal
.............................................
5-92
Pedal free play
................................
9-21
Power brakes
..................................
5-92
Service brake
..................................
5-92
Warning lights and buzzer
.............
5-216
Break-in recommendations
....................
5-3
Bulb capacity
......................................
9-32
C
California Perchl
orate Materials
Requirements
.....................................
3-7
Capacities
..........................................
11-7
Card holder
............................
5-266
, 5-277
Cargo area cover
...............................
5-281
Cargo loads
........................................
6-10
Cargo room light
...............................
5-275
Bulb capacity
.................................
9-33
Catalytic converter
................................
9-2
Cautions on the handling of all-wheel drive vehicles
............................................
5-91
CD player
...........................................
7-14
Certification label
...............................
11-3
Charging system warning light
...........
5-217
Child restraint systems
........................
4-27
Child safety locks for rear door
............
5-37
BK0239700US.book 1 ページ 2016年6月16日 木曜日 午前10時58分