2017 MITSUBISHI iMiEV light
[x] Cancel search: lightPage 121 of 296
Theft-alarm system
Features and controls 5-13
5
The alarm will be activated if the following occurs while the vehicle is parked and the system is armed. One of the doors and the liftgate is opened without using the keyless entry system.
When the alarm is activated: 1. The headlights blink
on and off for 3 min-
utes. After 3 minutes the headlights automati- cally shut off.
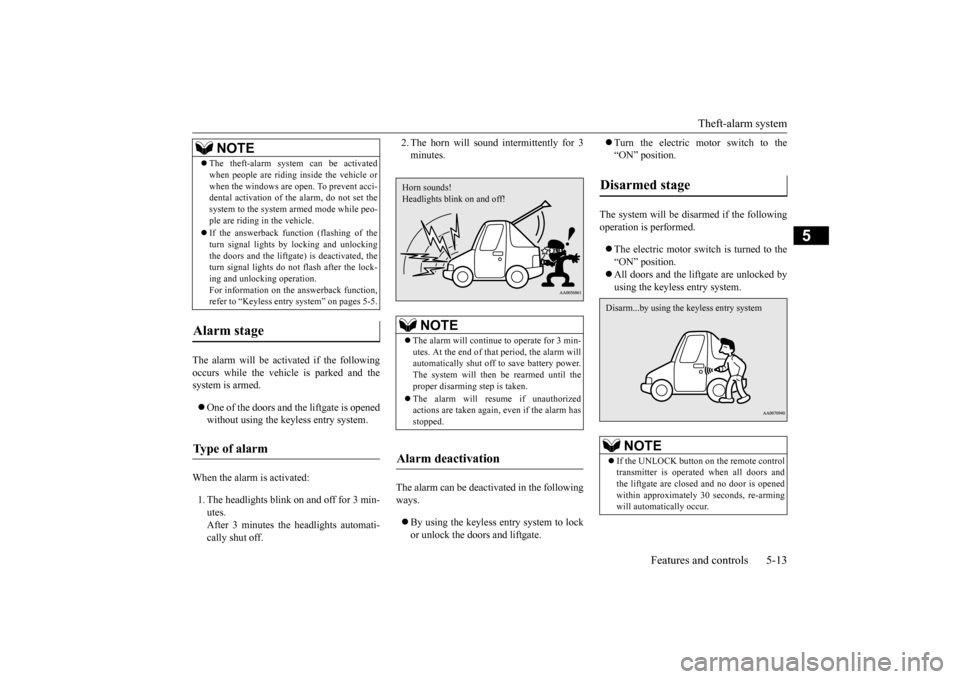
2. The horn will sound intermittently for 3 minutes.
The alarm can be deactivated in the following ways. By using the keyless entry system to lock or unlock the doors and liftgate.
Turn the electric motor switch to the “ON” position.
The system will be disarmed if the following operation is performed. The electric motor switch is turned to the “ON” position. All doors and the lift
gate are unlocked by
using the keyless entry system.
The theft-alarm system can be activated when people are riding inside the vehicle orwhen the windows are open. To prevent acci-dental activati
on of the alarm, do not set the
system to the system armed mode while peo- ple are riding in the vehicle. If the answerback function (flashing of the turn signal lights by locking and unlockingthe doors and the liftgate
) is deactivated, the
turn signal lights do not flash after the lock- ing and unlocking operation.For information on the answerback function, refer to “Keyless entry system” on pages 5-5.
Alarm stage Type of alarm
NOTE
NOTE
The alarm will continue
to operate for 3 min-
utes. At the end of that
period, the alarm will
automatically shut off
to save battery power.
The system will then be rearmed until the proper disarming step is taken. The alarm will resu
me if unauthorized
actions are taken again, even if the alarm has stopped.
Alarm deactivation Horn sounds! Headlights blink on and off!
Disarmed stage
NOTE
If the UNLOCK button on the remote control transmitter is operated when all doors and the liftgate are closed and no door is opened within approximately
30 seconds, re-arming
will automatically occur.Disarm...by using the keyless entry system
BK0220401US.book 13 ページ 2015年6月3日 水曜日 午前7時42分
Page 122 of 296
Power window control 5-14 Features and controls
5
Use the following proce
dure to test the sys-
tem: 1. Lower the driver’s window. 2. Arm the system as explained in “Armedstage”. 3. Make sure that the theft-alarm indicator comes on and flashes for approximately20 seconds. 4. Wait a few seconds and then unlock the driver’s side door by using the inside doorlock knob. Open the door. 5. Make sure that the horn sounds intermit- tently and the headlights blink when adoor is opened. 6. Disarm the system
by unlocking all doors
and the liftgate by using the keyless entrysystem.
N00510801410
The amount of time afte
r unlocking until the
vehicle relocks automatically can beadjusted. See a certified i-MiEV dealer fordetails. Once the system has been disarmed, it can- not be rearmed except
by repeating the arm-
ing procedure.
Testing the theft-alarm system
NOTE
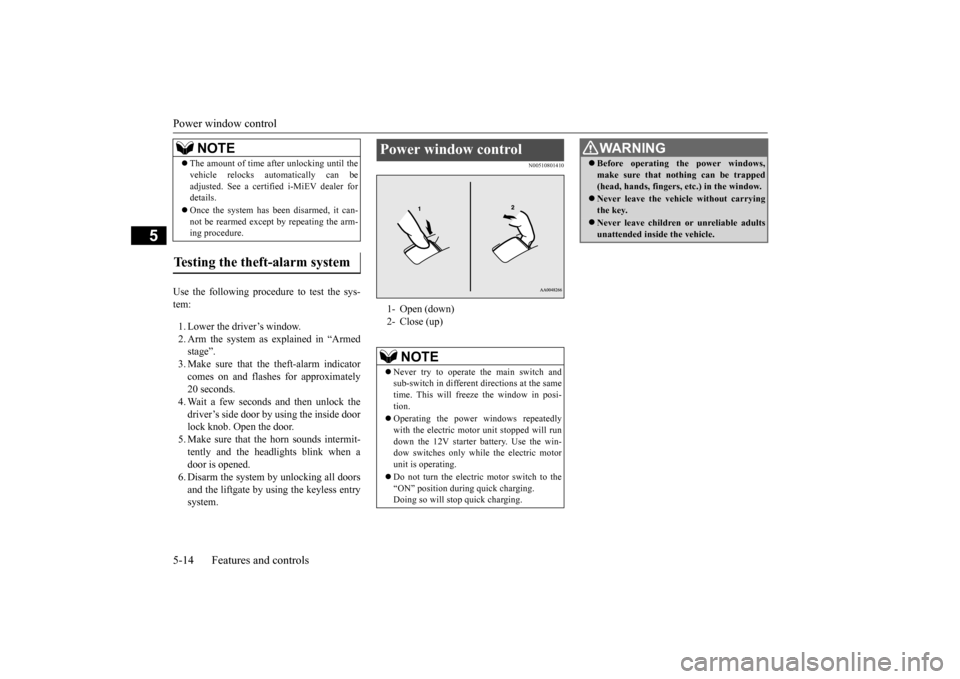
Power window control 1- Open (down) 2- Close (up)
NOTE
Never try to operate the main switch and sub-switch in different directions at the same time. This will free
ze the window in posi-
tion. Operating the power
windows repeatedly
with the electric moto
r unit stopped will run
down the 12V starter battery. Use the win- dow switches only while the electric motor unit is operating. Do not turn the electric motor switch to the “ON” position during quick charging.Doing so will stop quick charging.
WA R N I N G Before operating the power windows, make sure that nothing can be trapped(head, hands, fingers, etc.) in the window. Never leave the vehi
cle without carrying
the key. Never leave children
or unreliable adults
unattended inside the vehicle.
BK0220401US.book 14 ページ 2015年6月3日 水曜日 午前7時42分
Page 123 of 296

Power window control
Features and controls 5-15
5
N00548700127
The main switch located on the driver’s door can be used to opera
te all the windows.
A window can be opened
or closed by operat-
ing the corresponding switch. Press the switch down to open the window,and pull up the switch to close it. If the driver’s door window switch is fully pressed down, the driver’s door window auto- matically opens completely. If you want to stop the window movement,operate the switch lightly in the reverse direc- tion.
N00548800115
Each sub-switch can be
used for it’s own pas-
senger door window, unless the driver’s win-dow lock switch is activated.
N00548900145
The power windows can be run up or downwhen the electric motor switch is in the “ON” The door windows can be opened or closedfor a 30-second period after the electric motor switch is turned to the “ACC” or “LOCK” position. However, once the driver’s door orthe front passenger’s door is opened, the power windows cannot be operated.
N00549000156
When this switch is in the lock mode, the pas-senger door switches cannot be used to open or close the door windows, and the mainswitch will open or close only the driver’s door window. To unlock the switch, press it again.
Main switch 1- Driver’s door window switch2- Front passenger door window switch3- Left rear door window switch 4- Right rear door window switch 5- Lock switch
Sub switch 1- Close2- OpenPower window timer function
Lock switch 1- Lock 2- UnlockWA R N I N G Before driving with a child in the vehicle, be sure to lock the window switch to make it inoperative. Children tampering withthe switch could easily trap their hands or heads in the window.
BK0220401US.book 15 ページ 2015年6月3日 水曜日 午前7時42分
Page 124 of 296
Parking brake 5-16 Features and controls
5
N00511400386
To park the vehicle, first bring it to a com- plete stop, fully engage the parking brake, and set the selector le
ver to “P” (PARK) posi-
tion.
When parking on a hill, apply the parking brake and turn the front wheels toward the curb on a downhill grade, away from the curb on an uphill grade.
N00511600287
Adjust the inside rearview mirror only after making any seat adjustme
nts so as to have a
clear view to the rear of the vehicle. Adjust the inside mirror to maximize the view through the rear window. It is possible to move the mirror up and down to adjust its position.
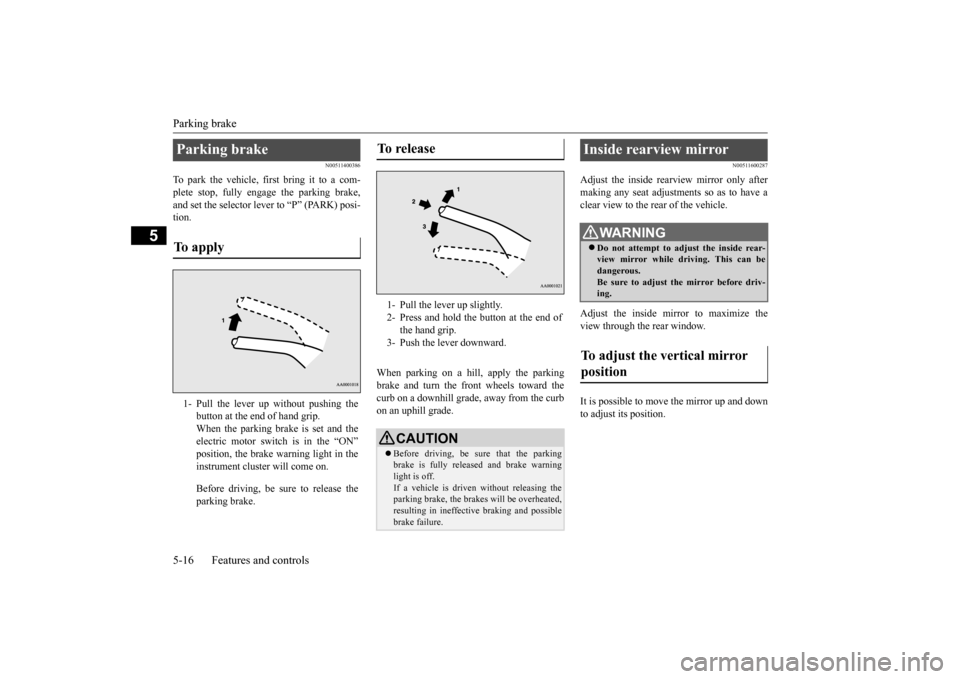
Parking brake To apply 1- Pull the lever up without pushing the
button at the end of hand grip. When the parking brake is set and the electric motor switch is in the “ON” instrument cluster will come on. Before driving, be sure to release the parking brake.
To release 1- Pull the lever up slightly. 2- Press and hold the button at the end of
the hand grip.
3- Push the lever downward. CAUTION Before driving, be sure that the parking brake is fully released and brake warning light is off.If a vehicle is driven without releasing the parking brake, the brak
es will be overheated,
resulting in ineffective braking and possiblebrake failure.
Inside rearview mirror
WA R N I N G Do not attempt to adjust the inside rear- view mirror while driving. This can be dangerous. Be sure to adjust the mirror before driv-ing.
To adjust the vertical mirror position
BK0220401US.book 16 ページ 2015年6月3日 水曜日 午前7時42分
Page 125 of 296
Outside rearview mirrors
Features and controls 5-17
5
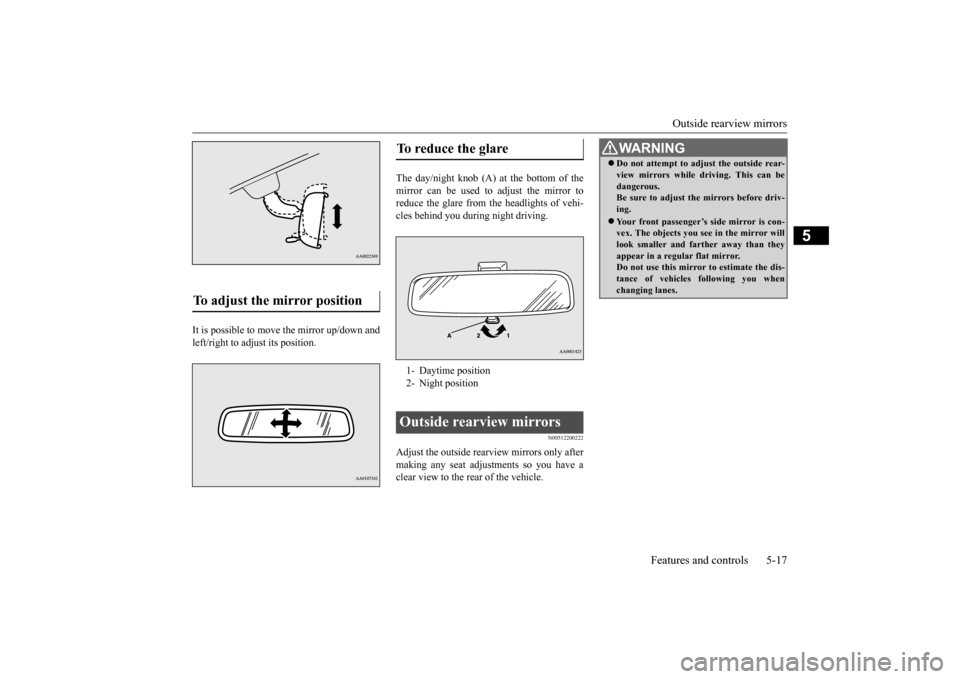
It is possible to move the mirror up/down and left/right to adjust its position.
The day/night knob (A) at the bottom of the mirror can be used to adjust the mirror to reduce the glare from the headlights of vehi-cles behind you during night driving.
N00512200222
Adjust the outside rearview mirrors only after making any seat adjustments so you have a clear view to the rear of the vehicle.
To adjust the mirror position
To reduce the glare 1- Daytime position2- Night positionOutside rearview mirrors
WA R N I N G Do not attempt to adjust the outside rear- view mirrors while driving. This can bedangerous.Be sure to adjust the mirrors before driv- ing. Your front passenger’s side mirror is con- vex. The objects you see in the mirror will look smaller and fa
rther away than they
appear in a regular flat mirror. Do not use this mirror to estimate the dis- tance of vehicles following you whenchanging lanes.
BK0220401US.book 17 ページ 2015年6月3日 水曜日 午前7時42分
Page 126 of 296
Electric motor switch 5-18 Features and controls
5
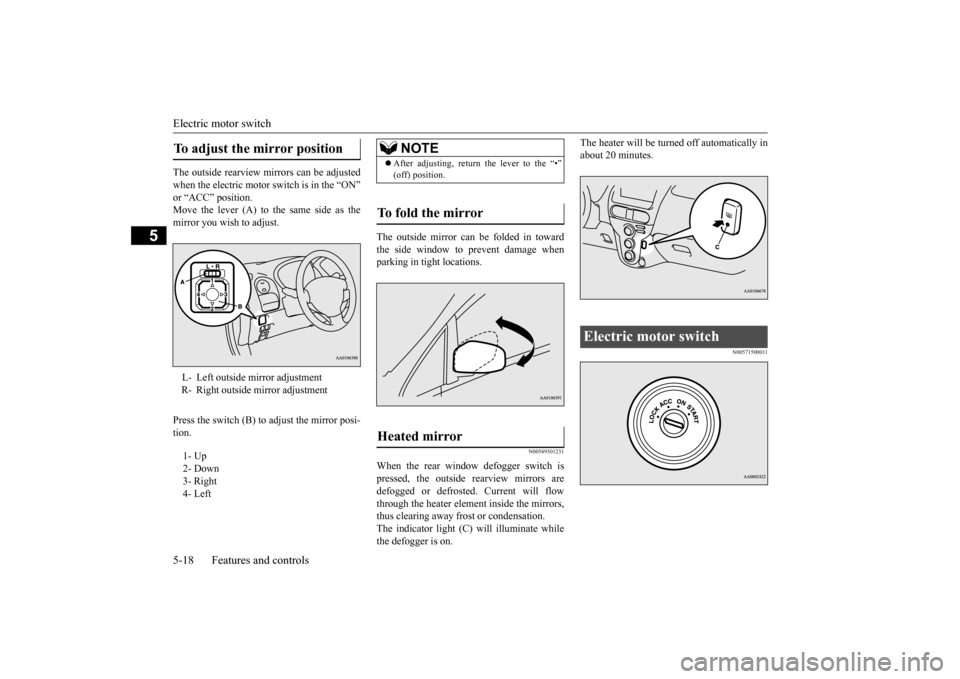
The outside rearview mirrors can be adjusted when the electric motor switch is in the “ON” Move the lever (A) to the same side as themirror you wish to adjust. Press the switch (B) to adjust the mirror posi- tion.
The outside mirror can be folded in toward the side window to prevent damage when parking in tight locations.
N00549301231
When the rear window defogger switch ispressed, the outside
rearview mirrors are
defogged or defrosted. Current will flow through the heater element inside the mirrors,thus clearing away
frost or condensation.
The indicator light (C) will illuminate while the defogger is on.
The heater will be turned off automatically in about 20 minutes.
N00571500011
To adjust the mirror position L- Left outside mirror adjustmentR- Right outside mirror adjustment 1- Up 2- Down 3- Right 4- Left
NOTE
After adjusting, return the lever to the “•”
To fold the mirror Heated mirror
Electric motor switch
BK0220401US.book 18 ページ 2015年6月3日 水曜日 午前7時42分
Page 128 of 296
Steering wheel lock 5-20 Features and controls
5
N00571700013
If the driver’s door is opened while the elec- tric motor switch is in the “LOCK” or “ACC”
N00512500209
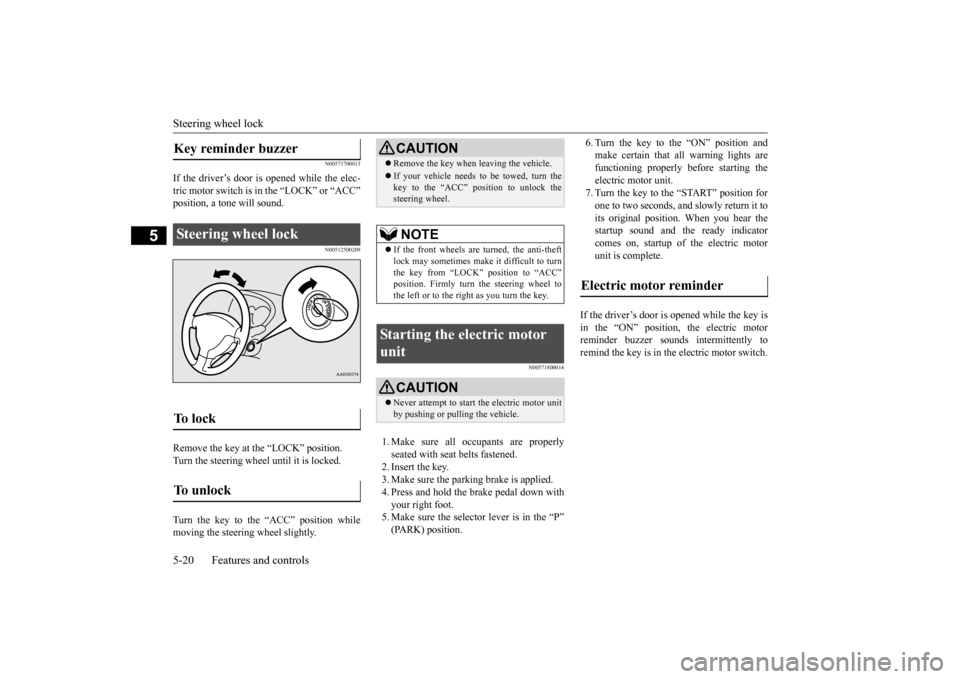
Remove the key at
the “LOCK” position.
Turn the steering wheel until it is locked. Turn the key to the “ACC” position while moving the steering
wheel slightly.
N00571800014
1. Make sure all occupants are properly seated with seat belts fastened. 2. Insert the key. 3. Make sure the parking brake is applied.4. Press and hold the brake pedal down with your right foot. 5. Make sure the selector
lever is in the “P”
6. Turn the key to the “ON” position and make certain that all warning lights arefunctioning properly before starting the electric motor unit. 7. Turn the key to the “START” position forone to two seconds, and
slowly return it to
its original position. When you hear the startup sound and the ready indicatorcomes on, startup of the electric motor unit is complete.
If the driver’s door is opened while the key is in the “ON” position, the electric motorreminder buzzer sounds
intermittently to
remind the key is in the electric motor switch.
Key reminder buzzer Steering wheel lock To l o c k To u n l o c k
CAUTION Remove the key when leaving the vehicle.If your vehicle needs to be towed, turn the key to the “ACC” position to unlock the steering wheel.NOTE
If the front wheels are turned, the anti-theft lock may sometimes make it difficult to turnthe key from “LOCK” position. Firmly turn the steering wheel to the left or to the right as you turn the key.
Starting the electric motor unit
CAUTION Never attempt to start the electric motor unit by pushing or pulling the vehicle.
Electric motor reminder
BK0220401US.book 20 ページ 2015年6月3日 水曜日 午前7時42分
Page 132 of 296
Service brake 5-24 Features and controls
5
When the vehicle sp
eed is approximately
2-22 mph (3-35 km/h).
The system will not operate under the follow- ing conditions: When the vehicle sp
eed is approximately
2 mph (3 km/h) or less and the brake pedal is depressed. When the vehicle sp
eed is approximately
22 mph (35 km/h) or more. When the selector lever is in the “P”
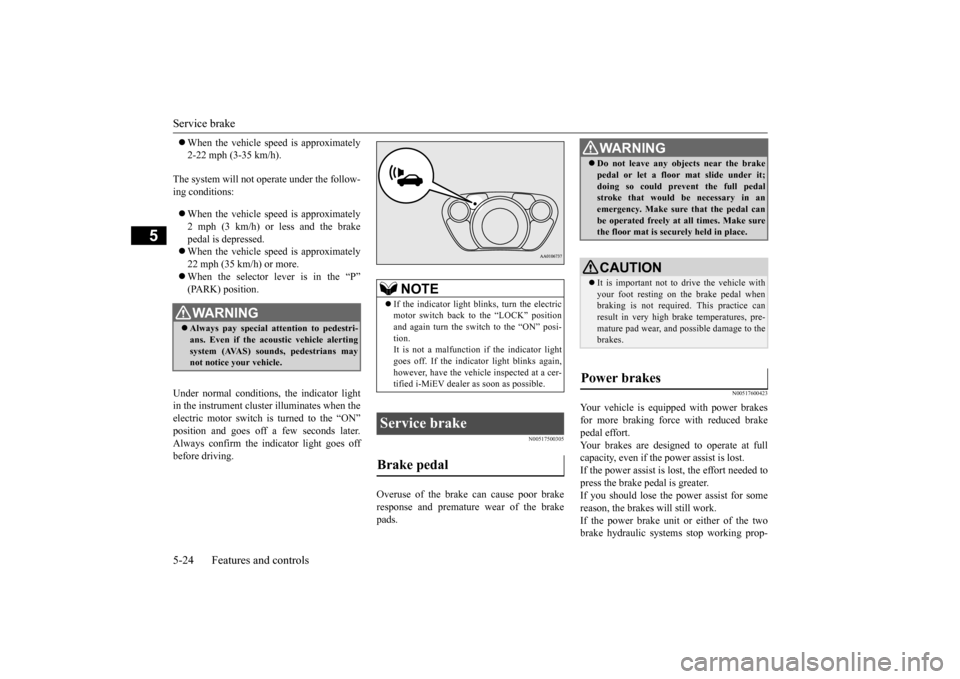
Under normal conditions, the indicator light in the instrument cluster illuminates when theelectric motor switch is turned to the “ON”
few seconds later.
Always confirm the indicator light goes offbefore driving.
N00517500305
Overuse of the brake can cause poor brakeresponse and premature wear of the brakepads.
N00517600423
Your vehicle is equipped with power brakesfor more braking force with reduced brakepedal effort. Your brakes are designed to operate at full capacity, even if the power assist is lost.If the power assist is lost, the effort needed to press the brake pedal is greater. If you should lose the power assist for somereason, the brakes will still work. If the power brake unit or either of the two brake hydraulic systems stop working prop-
WA R N I N G Always pay special attention to pedestri- ans. Even if the acou
stic vehicle alerting
system (AVAS) sounds, pedestrians may not notice your vehicle.
NOTE
If the indicator light blinks, turn the electric motor switch back to the “LOCK” positionand again turn the switch to the “ON” posi- tion. It is not a malfunction if the indicator lightgoes off. If the indica
tor light blinks again,
however, have the vehicl
e inspected at a cer-
tified i-MiEV dealer as soon as possible.
Service brake Brake pedal
WA R N I N G Do not leave any obje
cts near the brake
pedal or let a floor
mat slide under it;
doing so could prevent the full pedalstroke that would be necessary in an emergency. Make sure that the pedal can be operated freely at
all times. Make sure
the floor mat is securely held in place.CAUTION It is important not to drive the vehicle with your foot resting on the brake pedal when braking is not required.
This practice can
result in very high brake temperatures, pre- mature pad wear, and pos
sible damage to the
brakes.
Power brakes
BK0220401US.book 24 ページ 2015年6月3日 水曜日 午前7時42分