2017 MERCEDES-BENZ METRIS instrument cluster
[x] Cancel search: instrument clusterPage 55 of 318
Occupant Classification System (OCS)
operation
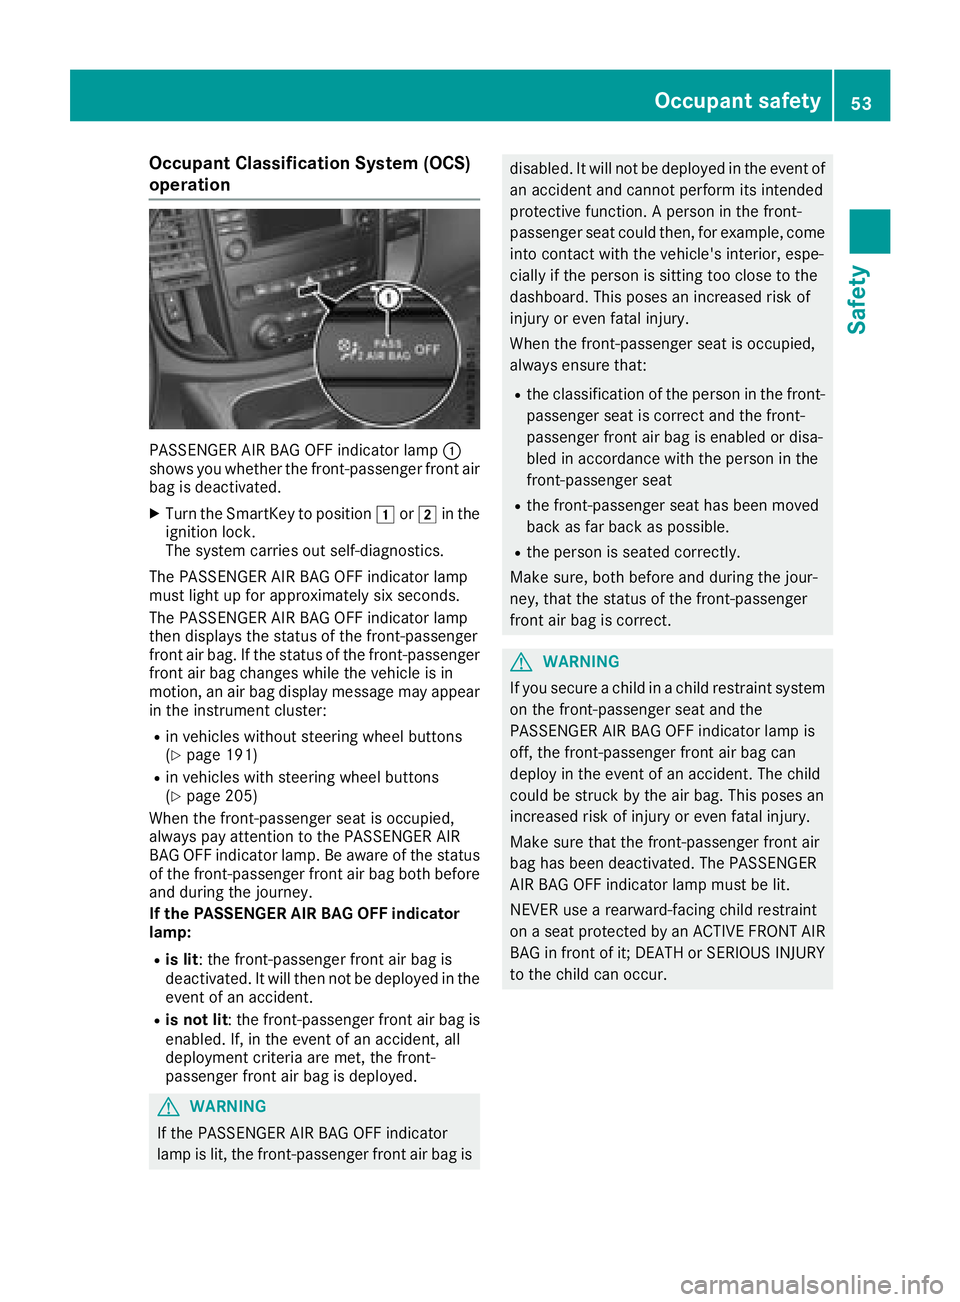
PASSENGER AIR BAG OFF indicator lamp:
shows you whether the front-passenger front air
bag is deactivated.
XTurn the SmartKey to position 1or2 in the
ignition lock.
The system carries out self-diagnostics.
The PASSENGER AIR BAG OFF indicator lamp
must light up for approximately six seconds.
The PASSENGER AIR BAG OFF indicator lamp
then displays the status of the front-passenger
front air bag. If the status of the front-passenger
front air bag changes while the vehicle is in
motion, an air bag display message may appear
in the instrument cluster:
Rin vehicles without steering wheel buttons
(Ypage 191)
Rin vehicles with steering wheel buttons
(Ypage 205)
When the front-passenger seat is occupied,
always pay attention to the PASSENGER AIR
BAG OFF indicator lamp. Be aware of the status
of the front-passenger front air bag both before
and during the journey.
If the PASSENGER AIR BAG OFF indicator
lamp:
Ris lit : the front-passenger front air bag is
deactivated. It will then not be deployed in the
event of an accident.
Ris not lit : the front-passenger front air bag is
enabled. If, in the event of an accident, all
deployment criteria are met, the front-
passenger front air bag is deployed.
GWARNING
If the PASSENGER AIR BAG OFF indicator
lamp is lit, the front-passenger front air bag is
disabled. It will not be deployed in the event of an accident and cannot perform its intended
protective function. A person in the front-
passenger seat could then, for example, come
into contact with the vehicle's interior, espe-
cially if the person is sitting too close to the
dashboard. This poses an increased risk of
injury or even fatal injury.
When the front-passenger seat is occupied,
always ensure that:
Rthe classification of the person in the front-passenger seat is correct and the front-
passenger front air bag is enabled or disa-
bled in accordance with the person in the
front-passenger seat
Rthe front-passenger seat has been moved
back as far back as possible.
Rthe person is seated correctly.
Make sure, both before and during the jour-
ney, that the status of the front-passenger
front air bag is correct.
GWARNING
If you secure a child in a child restraint system on the front-passenger seat and the
PASSENGER AIR BAG OFF indicator lamp is
off, the front-passenger front air bag can
deploy in the event of an accident. The child
could be struck by the air bag. This poses an
increased risk of injury or even fatal injury.
Make sure that the front-passenger front air
bag has been deactivated. The PASSENGER
AIR BAG OFF indicator lamp must be lit.
NEVER use a rearward-facing child restraint
on a seat protected by an ACTIVE FRONT AIR
BAG in front of it; DEATH or SERIOUS INJURY
to the child can occur.
Occupant safety53
Safety
Z
Page 56 of 318

GWARNING
If you secure a child in a forward-facing child
restraint system on the front-passenger seat
and you position the front-passenger seat too close to the dashboard, the child could, in the
event of an accident:
Rcome into contact with the vehicle's inte-
rior if the PASSENGER AIR BAG OFF indi-
cator lamp is lit, for example
Rbe struck by the air bag if the PASSENGER
AIR BAG OFF indicator lamp is off
This poses an increased risk of injury or even
fatal injury.
Move the front-passenger seat as far back as
possible. Always make sure that the shoulder
belt strap is correctly routed from the vehicle
belt sash guide to the shoulder belt guide on
the child restraint system. The shoulder belt
strap must be routed forwards and down-
wards from the vehicle belt sash guide. If nec- essary, adjust the vehicle belt sash guide and
the front-passenger seat accordingly. Always
observe the child restraint system manufac-
turer's installation instructions.
If OCS determines that:
RThe front-passenger seat is unoccupied, the
PASSENGER AIR BAG OFF indicator lamp
lights up after the system self-test and
remains lit. This indicates that the front-
passenger front air bag is deactivated.
RThe front-passenger seat is occupied by a
child of up to twelve months old, in a standard
child restraint system, the PASSENGER AIR
BAG OFF indicator lamp lights up after the
system self-test and remains lit. This indi-
cates that the front-passenger front air bag is
deactivated.
But even in the case of a twelve-month-old
child, in a standard child restraint system, the
PASSENGER AIR BAG OFF indicator lamp can
go out after the system self-test. This indi-
cates that the front-passenger front air bag is
activated. The result of the classification is
dependent on, among other factors, the child
restraint system and the child's stature. It is
recommended that you install the chi
ld
restraint system on a suitable rear seat.
RThe front-passenger seat is occupied by a
person of smaller stature (e.g. a teenager or
small adult), the PASSENGER AIR BAG OFF
indicator lamp lights up and remains lit after
the system self-test depending on the result
of the classification or, alternatively, goes out.
-If the PASSENGER AIR BAG OFF indicator
lamp is off, move the front-passenger seat
as far back as possible. Alternatively, a per-
son of smaller stature can sit on a rear seat.
-If the PASSENGER AIR BAG OFF indicator
lamp is lit, a person of smaller stature
should not use the front-passenger seat.
RThe front-passenger seat is occupied by an
adult or a person of adult stature, the
PASSENGER AIR BAG OFF indicator lamp
goes out after the system self-test. This indi-
cates that the front-passenger front air bag is
activated.
If children are traveling in the vehicle, be sure to
observe the notes on "Children in the vehicle"
(
Ypage 58).
When the occupant classification system (OCS)
is malfunctioning, the red 6restraint system
warning lamp in the instrument cluster and the
PASSENGER AIR BAG OFF indicator lamp light
up simultaneously. The front-passenger front air bag is deactivated in this case and does not
deploy during an accident. Have the Occupant
Classification System (OCS) checked and
repaired immediately at a qualified specialist
workshop. Mercedes-Benz recommends that
you visit a Mercedes-Benz Commercial Van Cen-
ter.
If the front-passenger seat, the seat cover or theseat cushion are damaged, have the necessary
repair work carried out at a qualified specialist
workshop. Mercedes-Benz recommends that
you visit a Mercedes-Benz Commercial Van Cen-
ter.
For safety reasons, Mercedes-Benz recom-
mends that you only use seat accessories that
have been approved by Mercedes-Benz.
If the driver's air bag depl oys, thi
s does not
mean that the front-passenger front air bag will
also deploy. The Occupant Classification Sys-
tem (OCS) categorizes the occupant on the
front-passenger seat. Depending on that result,
the front-passenger front air bag is either ena-
bled or deactivated.
54Occupant safety
Safety
Page 66 of 318

the electric sliding door using the corresponding
ÅorÆ sliding door button in the center
console (
Ypage 77).
Pets in the vehicle
GWARNING
If you leave animals unattended or unsecured
in the vehicle, they could press buttons or
switches, for example.
As a result, they could:
Ractivate vehicle equipment and become
trapped, for example
Ractivate or deactivate systems, thereby
endangering other road users
Unsecured animals could also be flung around
the vehicle in the event of an accident or sud-
den steering or braking, thereby injuring vehi-
cle occupants. There is a risk of an accident
and injury.
Never leave animals unattended in the vehi-
cle. Always secure animals properly during
the journey, e.g. use a suitable animal trans-
port box.
Driving safety systems
Overview
In this section, you will find information about
the following driving safety systems:
REBD ( Electronic Brake Force Distribution)
RABS ( Anti-lock Braking System)
RBAS ( Brake Assist System)
RESP®(E lectronic Stability Program)
Important safety notes
If you fail to adapt your driving style or if you are
inattentive, the driving safety systems can nei-
ther reduce the risk of accident nor override the
laws of physics. Driving safety systems are
merely aids designed to assist driving. You are
responsible for the distance to the vehicle in
front, for vehicle speed, braking in good time
and for staying in your lane. Always adapt your driving style to the prevailing road and weather
conditions and maintain a sufficient, safe dis-
tance from other road users. Drive carefully.
Please note that the driving safety systems
described only work optimally when:
Rthere is adequate contact between the tires
and the road surface
Ryou use winter tires (M+S tires), with snow
chains if necessary, when the road conditions
are wintry
Rthe speed information determined by the
vehicle is within the legally prescribed display
accuracy
Pay particular attention to the information
regarding tires, tire tread and winter operation
under "Wheels and tires" (
Ypage 277).
ABS (Anti-lock Braking System)
General notes
ABS regulates brake pressure in such a way that the wheels do not lock when you brake. This
allows you to continue steering the vehicle when
braking.
The ò warning lamp in the instrument cluster
lights up when the ignition is switched on. The
lamp goes out when the engine starts running.
Important safety notes
Observe the important safety guidelines for the
driving safety system (Ypage 64).
ABS works from a speed of about 5 mph
(8 km/h), regardless of road-surface conditions. ABS works on slippery surfaces, even when you
only brake gently.
GWARNING
If ABS is faulty, the wheels could lock when
braking. The steerability and braking charac-
teristics may be severely impaired. Addition-
ally, further driving safety systems are deac-
tivated. There is an increased danger of skid-
ding and accidents.
Drive on carefully. Have ABS checked imme-
diately at a qualified specialist workshop.
If ABS is malfunctioning, the òwarning lamp
(
Ypage 222) lights up while the engine is run-
ning and the display shows a message:
64Driving safet ysystem s
Safety
Page 68 of 318
put is also modified to keep the vehicle on the
desired course within physical limits. ESP®can
also stabilize the vehicle during braking.
ESP
®also monitors traction, i.e. power trans-
mission between the tires and the road surface.
The integrated traction control supports you
when pulling away or accelerating on wet, slip-
pery or slick roads. Should the drive wheels spin,
traction control brakes them individually. In
addition, greater drive torque is transmitted to
the wheel or wheels with traction. If traction on
the road surface is not sufficient, even ESP
®will
not allow you to pull away without difficulty. The
type of tires and total weight of the vehicle as
well as the gradient of the road also play a cru-
cial role. Traction control remains active if you
deactivate ESP
®.
If the h warning lamp in the instrument clus-
ter goes out before beginning the journey, ESP
®
is automatically active.
The h warning lamp in the instrument cluster
flashes when ESP
®intervenes:
XDo not deactivate ESP®under any circum-
stances.
Xwhen driving off, apply as little throttle as
possible.
Xadapt your speed and driving style to the pre-
vailing road conditions.
Important safety notes
Observe the important safety guidelines for the
driving safety system (Ypage 64).
GWARNING
If ESP
®is malfunctioning it will not provide
any vehicle stabilization. There is an increased
risk of skidding or of an accident.
Exercise caution when continuing to drive.
Have ESP
®checked at a qualified specialist
workshop.
!Do not run the vehicle on a roller dynamom-
eter (e.g. for performance tests). If you must
operate the vehicle on a roller dynamometer,
please consult a qualified specialist workshop
in advance. You could otherwise damage the
drive train or the brake system.
If ESP
®is malfunctioning, the hwarning
lamp (Ypage 222) lights up continuously while the engine is running and the display shows a
message.
Ron vehicles without steering wheel buttons
(Ypage 194)
Ron vehicles with steering wheel buttons
(Ypage 208)
ESP®is deactivated if the åwarning lamp in
the instrument cluster is lit when the engine is
running.
Only use wheels with the recommended tire
sizes. Only then will ESP
®function properly.
Deactivating or activating ESP®
GWARNING
If you deactivate ESP
®, ESP®no longer sta-
bilizes the vehicle. There is an increased risk
of skidding and an accident.
Only deactivate ESP
®in the situations descri-
bed in the following.
It may be best to deactivate ESP
®in the follow-
ing situations:
Rwhen using snow chains
Rin deep snow
Ron sand or gravel
Activate ESP®as soon as the situations descri-
bed above no longer apply. Otherwise, ESP®
assistance for stabilizing the vehicle will remain significantly reduced, even if the vehicle starts
to skid.
If you deactivate ESP
®:
Rthe å warning lamp in the instrument clus-
ter lights up
Rthe ÷ warning lamp in the instrument clus-
ter flashes if the wheels are spinning
RESP®assistance for stabilizing the vehicle in
the lower speed range up to approximately
37 mph (60 km/h) is significantly reduced
Rengine torque is no longer limited and the
drive wheels are able to spin. The spinning of
the wheels results in a cutting action for bet-
ter traction on loose surfaces
Rtraction control is still activated
RESP®still provides support when you brake
66Driving safety systems
Safety
Page 69 of 318

Depending on the equipment in the vehicle, you
can activate or deactivate ESP®when the
engine is running by using the åbutton or by
using the on-board computer:
Ron vehicles without steering wheel buttons
(Ypage 174)
Ron vehicles with steering wheel buttons
(Ypage 184)
å button (equipment-dependent)
XTo activate/deactivate: when the engine is
running, press the åbutton.
The å warning lamp in the instrument
cluster lights up when ESP
®is deactivated.
Trailer stabilization
Observe the important safety guidelines for the
driving safety system (Ypage 64).
GWARNING
If road and weather conditions are poor,
trailer stabilization will not be able to prevent
the vehicle/trailer combination from swerv-
ing. Trailers with a high center of gravity can
tip over before ESP
®can detect this. There is
a risk of an accident.
Always adapt your driving style to the prevail-
ing road and weather conditions.
ESP
®trailer stabilization counteracts critical
driving situations in good time and thereby pro- vides considerable assistance when driving with
a trailer. Trailer stabilization is part of ESP
®.
If the sensor system and evaluation logic detect
trailer swinging movements, ESP
®trailer stabi-
lization firstly brakes individual vehicle wheels in
a targeted manner. It thus counteracts swinging
movements. If the swinging movements do not
stop, the vehicle is braked until the vehicle/ trailer combination is stabilized. If necessary,
the vehicle's engine output is limited.
If your vehicle with trailer (vehicle/trailer com-
bination) starts to swerve, you will be able to
stabilize the vehicle/trailer combination only by
braking. ESP
®trailer stabilization helps you to
stabilize the vehicle/trailer combination in this
s
ituation.
ESP
®trailer stabilization is activated above
speeds of about 40 mph (65 km/h).
If ESP
®is switched off or deactivated because of
a malfunction, the trailer stabilization system
will not function.
Crosswind Assist
Observe the important safety guidelines for the
driving safety system (Ypage 64).
Strong crosswind gusts can impair the road-
holding of your vehicle when driving straight
ahead. The Crosswind Assist function integra-
ted in ESP
®reduces these impairments.
Depending on the direction and intensity of the
side wind, Crosswind Assist intervenes auto-
matically. ESP
®intervenes with stabilizing brak-
ing to assist you in keeping the vehicle in the
lane. When Crosswind Assist intervenes, the
display shows the traffic sign for strong side
winds and the Crosswind Assist
message.
Crosswind Assist is activated automatically
above a vehicle speed of approx. 50 mph
(80 km/h) when the vehicle is driving straight
ahead or cornering gently.
Crosswind Assist does not react:
Rin the event of severe jolts and vibrations, e.g.
when driving over uneven surfaces or pot-
holes
Rwhen grip is reduced, e.g. on snow or ice or
when hydroplaning
Crosswind Assist does not work if ESP
®is deac-
tivated or disabled because of a malfunction.
Theft deterrent locking system
Immobilizer
XTo activate: remove the key from the ignition
lock.
XTo deactivate: turn the key to position 2in
the ignition lock.
Theft deterrent locking system67
Safety
Z
Page 96 of 318

Useful information
This Operator's Manual describes all models as
well as standard and optional equipment of your
vehicle that were available at the time of going
to print. Country-specific variations are possi-
ble. Note that your vehicle may not be equipped
with all of the described functions. This also
applies to systems and functions relevant to
safety.
Read the information on qualified specialist
workshops (
Ypage 31).
Exterior lighting
Important safety notes
For reasons of safety, Mercedes-Benz recom-
mends that you drive with the lights switched on
even during the daytime. There may be differ-
ences in operation due to legal requirements
and voluntary recommendations in some coun-
tries.
Light switch
Operation
1W Left-hand standing lamps
2XRight-hand standing lamps
3TParking lamps, license plate and
instrument cluster lighting
4$ Lights off and daytime running lamps
à With light sensor: automatic head-
lamp mode, controlled by the light sensor
5L Low-beam or high-beam headlamps
BNFront fog lamp
CRRear fog lamp
If you hear a warning tone when you leave the
vehicle, the lights may still be switched on.
XTurn the light switch to the $orÃ
position.
The exterior lighting (except the parking lamps
and standing lamps) switches off automatically
if you:
Rremove the key from the ignition lock
Ropen the driver's door with the key in position
0 in the ignition lock
94Exterior lighting
Lights and windshield wipers
Page 97 of 318

Low-beam headlamps
When the ignition is switched on and the light
switch is in theLposition, the parking lamps
and low-beam headlamps are switched on even
if the light sensor does not sense dark ambient
light. This is particularly useful when there is fog
or rain.
XTo switch on: turn the key to position 2in the
ignition lock or start the engine.
XTurn the light switch to the Lposition.
The L indicator lamp in the instrument
cluster lights up.
Daytime running lamps
XTo switch on: turn the light switch to the
$ orà position.
Automatic headlamp mode
GWARNING
When the light switch is set to Ã, the low-
beam headlamps may not be switched on
automatically if there is fog, snow or other
causes of poor visibility due to the weather
conditions such as spray. There is a risk of an
accident.
In such situations, turn the light switch to
L.
Automatic headlamp mode is only a driving aid.
You are responsible for the vehicle lighting at all
times.
When the parking lamps and low-beam head-
lamps are switched on, the green T(parking
lamps) and L(low-beam headlamps) indica-
tor lamps in the instrument cluster light up.
à is the preferred light switch setting. The
light setting is automatically selected according
to the brightness of the ambient light (excep-
tion: poor visibility due to weather conditions,
such as fog, snow or spray):
RKey in position 1in the ignition lock: the
standing lamps are switched on or off auto-
matically depending on the brightness of the
ambient light.
RWhen the engine is on: depending on the
ambient light, the daytime running lamps or
the parking lamps and low-beam headlamps
are switched on/off automatically.
XTo switch on automatic headlamp mode:
turn the light switch to Ã.
Fog lamps/rear fog lamp
You can only switch the fog lamps on or off
manually in vehicles which have fog lamps
installed.
Front fog lamps help you to see and be seen in
conditions of poor visibility due to fog or pre-
cipitation. They can only be operated together
with the parking lamps or with the low-beam
headlamps.
The rear fog lamp improves visibility of your
vehicle for the traffic behind in the event of
heavy fog. Observe the legal requirements of the
country you are currently in when using the rear
fog lamp.
XTurn the light switch to LorÃ.
XTurn the key to position 2in the ignition lock
or start the engine.
XTo switch the front foglamps on/off: press
the N button.
When the green Nindicator lamp in the
instrument cluster goes on, the fog lamps are
switched on.
XTo switch the rear foglamp on/off: press
the R button.
When the yellow Rindicator lamp in the
instrument cluster goes on, the rear fog lamp is switched on.
Standing lamps
!If the battery charge is very low, the stand-
ing lamps will switch off automatically to ena-
ble the next engine start. Always park your
vehicle in accordance with legal regulations,
in a secure and adequately lit location. Avoid leaving the Tparking lamps on for several
hours. If possible, switch on the right Xor
left W standing lamp.
Switching on the standing lamps ensures that
the corresponding side of the vehicle is illumi-
nated.
Exterior lighting95
Lights and windshield wipers
Z
Page 98 of 318

Switching on the standing lamps:
XTurn the key to position0(Ypage 121) in the
ignition lock or remove the key.
XRight-hand standing lamp: turn the light
switch to position X.
XLeft-hand standing lamp: turn the light
switch to position W.
Combination switch
Turn signal lamps
:To indicate a right turn
;To indicate a left turn
XTo indicate: press the combination switch in
desired direction :or; until it engages.
The combination switch automatically returns
to its original position after large steering
movements.
XTo indicate briefly: press the combination
switch briefly in desired direction :or;.
The corresponding turn signal flashes three
times.
High-beam headlamps and high-beam
flasher
:High-beam headlamps
;High-beam flasher
XTo switch on the high-beam headlamps:
turn the light switch to LorÃ.
XPress the combination switch forwards :.
The K indicator lamp in the instrument
cluster lights up.
iIn the Ãposition, the high-beam head-
lamps are only switched on when it is dark and
the engine is running.
XTo switch off the high-beam headlamps:
move the combination switch back to its nor-
mal position.
The K indicator lamp in the instrument
cluster goes out.
XTo operate the headlamp flasher: turn the
key to position 1or 2in the ignition lock.
XPull the combination switch briefly in direc-
tion of arrow ;.
Hazard warning lamps
GWARNING
If you open the rear doors 90°, the rear lights are no longer visible. The vehicle will then be
difficult for other road users to see or will not
be seen by them at all, particularly if it is dark
or visibility is poor. There is a risk of an acci-
dent.
You should therefore ensure in this and simi-
lar situations that the vehicle is visible from
the rear in accordance with the relevant
national regulations, by using the warning tri-
angle, for instance.
96Exterior lighting
Lights and windshield wipers