2017 MERCEDES-BENZ GLC-Class ECO mode
[x] Cancel search: ECO modePage 7 of 178

B
Back button......................................... 21
Blootooth®
Connecting a different mobile
phone .............................................. 95
Bluetooth
®
Activating audio mode ................... 153
Activating/deactivating ................... 40
Audio device mode and searching
for mobile phones .......................... 157
Basic display (audio mode) ............ 153
Connecting audio devices .............. 154
De-authorizing (de-registering) a
device ............................................ 157
Device list ...................................... 154
Displaying connection details .......... 96
Displaying details ........................... 155
Entering the passcode ..................... 94
External authorization (audio
device) ........................................... 154
General information ......................... 40
Increasing the volume using
COMAND ....................................... 156
Interface .......................................... 91
Introduction ..................................... 91
Playback options ........................... 156
Preparation .................................... 152
Reconnecting an audio device ....... 156
Searching for a mobile phone .......... 93
Selecting a playback option ........... 156
Selecting a track ............................ 155
Starting and stopping playback ..... 155
Starting playback if the Blue-
tooth
®audio device has been
stopped ......................................... 155
Telephony ........................................ 92
Telephony notes .............................. 91
Burmester
®surround sound sys-
tem
Balance/fader ............................... 167
Calling up the sound menu ............ 166
Equalizer ........................................ 166
Equipment ..................................... 166
Surround sound ............................. 167
Buttons and controller ........................ 21
C
Call lists
Displaying details ........................... 110
Opening and selecting an entry ..... 110
Saving an entry in the address
book .............................................. 111
Calling up the compass display ......... 88
Car pool lanes ...................................... 56
Category list (music search) ............ 148
CD
Inserting ........................................ 144
Notes on discs ............................... 143
Characters
Entering (navigation) ........................ 31
Climate control
Calling up climate control
(COMAND) ....................................... 48
Calling up the climate control bar
(COMAND) ....................................... 48
COMAND ......................................... 48
Cooling with air dehumidification
(COMAND) ....................................... 49
Ionization (COMAND) ....................... 49
Overview .......................................... 47
Perfume atomizer (COMAND) .......... 49
Setting the air distribution
(COMAND) ....................................... 48
Setting the airflow (COMAND) ......... 48
Setting the climate mode
(COMAND) ....................................... 49
Setting the temperature
(COMAND) ....................................... 48
Switching ionization on/off
(COMAND) ....................................... 49
Switching on/off (COMAND) ..... 49, 50
Climate control bar
Calling up ......................................... 48
COMAND
Basic display menu .......................... 29
Basic functions ................................ 28
Controller ......................................... 21
Display ............................................. 20
Selecting operating mode ................ 29
Settings ......................................... 129
Switching on/off .............................. 28
COMAND display
Cleaning instructions ....................... 20
Index5
Page 13 of 178

Setting route options (avoiding:
highways, toll roads, tunnels, fer-
ries) ................................................. 55
Setting the route type (short
route, fast route, dynamic route or
economic route) ............................... 55
Starting calculation .......................... 59
Route guidance
Canceling/continuing ...................... 74
Freeway information ........................ 73
General notes .................................. 71
Lane recommendations ................... 72
Off-road ........................................... 76
Traffic reports .................................. 77
S
Safety notesAudio CD/DVD and MP3 mode ..... 142
Using the telephone ......................... 91
Satellite radio
Displaying information ................... 139
Overview ........................................ 137
Presets menu view ......................... 138
Registering .................................... 136
Switching to ................................... 137
SatRadio
Channel list updates ...................... 140
Memory functions .......................... 138
Music and sports alerts ................. 138
Notes ............................................. 136
Selecting a category ...................... 137
Selecting a channel ....................... 137
Tagging music tracks ..................... 139
SD card
Inserting ........................................ 145
Inserting/removing ........................ 144
Removing ....................................... 145
Searching for a gas station
When the fuel level is low ................ 66
Seat-belt adjustment function
Activating/deactivating
(COMAND) ....................................... 45
Selecting stations
Radio ............................................. 133
Sending DTMF tones ........................... 99
Setting access data
Online and Internet ........................ 122 Setting the language
COMAND ......................................... 41
Setting the night design ..................... 35
Setting the text reader speed ............ 38
Setting the volume
Telephone calls ................................ 28
Setting the waveband
Radio ............................................. 132
Settings
Sound settings ............................... 165
Short message
see Text messages (SMS)
SIRIUS weather display
5-day forecast ................................ 168
Daily forecast ................................. 168
Detail information .......................... 169
Information chart ........................... 168
Selecting a location for the
weather forecast ............................ 169
Switching on/off ........................... 168
Weather map ................................. 171
Sound
Switching on/off .............................. 28
Sound settings
Balance/fader ............................... 165
Calling up the sound menu ............ 165
Equalizer ........................................ 165
Sound system
see Burmester
®surround sound system
Speed dial
Deleting ......................................... 112
Setting up ...................................... 112
State
/province
Selecting .......................................... 58
Stop function
Video DVD ..................................... 163
Storing stations
Radio ............................................. 134
Street name announcements
Switching on/off (COMAND) ........... 56
Switching between summer time
and standard time ............................... 36
Switching on media mode
Using the Media button ................. 141
Via the device list .......................... 142
Via the main function bar ............... 141
Index11
Page 15 of 178

TimeSetting ............................................. 37
Setting summer/standard time ....... 36
Setting the format ............................ 37
Setting the time ............................... 37
Setting the time zone ....................... 36
Setting the time/date format .......... 37
Switching automatic time on/off ..... 36
Touchpad
Calling up quick access for audio
and telephone .................................. 24
Changing the input language for
handwriting recognition ................... 27
Changing the station/music
track ................................................ 28
Character suggestions ..................... 26
Deleting characters ......................... 26
Entering a space .............................. 26
Entering characters ......................... 26
Gesture control ................................ 24
Handwriting recognition ................... 26
Operating the touchpad ................... 24
Overview .......................................... 23
Quick access for audio and tele-
phone .............................................. 28
Switching ......................................... 23
Switching input line ......................... 27
Track
Selecting (CD, DVD, MP3) .............. 146
Traffic reports
Calling up a list ................................ 78
Real-time traffic report .................... 78
U
Updating the digital map .................... 86
USB audio mode
Selecting a track ............................ 146
USB devices
Connecting to the Media Inter-
face ............................................... 145
see Audio CD/DVD and MP3 mode
V
Vehicle Data acquisition ............................... 16
Vehicle settings
Calling up ......................................... 44 Video
see Video DVD
Video DVD
Control option ................................ 160
DVD menu ..................................... 162
DVD's control menu ...................... 162
Full-screen mode ........................... 161
Function restrictions ...................... 160
Menu options ................................. 161
Notes on discs ............................... 159
Overview ........................................ 160
Overview of DVD functions ............ 162
Pause function ............................... 163
Picture settings .............................. 161
Playing conditions .......................... 160
Safety notes .................................. 159
Selecting a scene/chapter ............ 163
Stop function ................................. 163
Switching to ................................... 160
Video menu ................................... 162
Voice Control System
Settings ........................................... 38
see Voice Control System
Volume, adjusting
Navigation messages ....................... 28
W
Weather map (SIRIUS)Activating/deactivating display
levels ............................................. 172
Calling up ....................................... 171
Legend ........................................... 174
Moving ........................................... 171
Showing/hiding the menu ............. 171
Storm overview .............................. 175
Storm watch areas ......................... 174
Time stamp .................................... 174
Weather memory (SIRIUS)
Selecting an area ........................... 171
Storing an area .............................. 171
Web browser
Entering a web address ................. 127
WiFi
Activating ......................................... 38
Changing the name of the SSID ....... 40
Connecting the device ..................... 39
Connecting via security key ............. 39
Index13
Page 24 of 178

XTo exit the menu:briefly press the%
button.
The multimedia system changes to the next
higher menu level in the current operating
mode.
XTo call up the basic display: press the%
button for longer than two seconds.
The multimedia system changes to the basic
display of the current operating mode.
Controller
The controller in the center console lets you:
Rselect menu items on the display
Renter characters
Rselect a destination on the map
Rsave entries
The controller can be:
Rturned 3
Rslid left or right 1
Rslid forwards or back 4
Rslid diagonally2
Rpressed briefly or pressed and held 7
Favorites button
With the favorites button, you can select, add or
edit favorites.
XPress the favorites button on the controller.
The favorites are displayed.
XTo select a favorite: turn and press the con-
troller.
Other functions (
Ypage 33).
Touchpad
Multimedia system with touchpad: alternatively,
you can use the touchpad to select and enter
information (
Ypage 23).
Multifunction steering wheel
:Multifunction display
;Right control panel
=Left control panel
Left control panel
òRCalls up the main menu
9
:Press briefly:
RScrolls in lists
RSelects a menu or function
RIn the Radio/Mediamenu: opens
the track or station list and selects
a station, an audio track or a video
scene
RIn the Telephonemenu: switches
to the phone book and selects a
name or a telephone number
9
:Press and hold:
RScrolls quickly through all lists
RIn the Radio/Mediamenu: selects
a station, audio track or video
scene using rapid scrolling
RIn the Telephonemenu: starts
rapid scrolling if the phone book is
open
22Overview
Overview and operation
Page 31 of 178

iIf the audio output is switched off, the status
line will show the 8symbol. If you switch
the media source or change the volume, the
sound is automatically switched on.
Switching navigation announcements
off and on again
XTo switch off navigation announcements:
press the thumbwheel to the right of the con- troller during the announcement.
The Spoken driving recommendations
have been deactivated.message
appears.
XTo switch navigation announcements on
again: switch the multimedia system off and
then on again (
Ypage 28).
or
XStart a new route calculation (Ypage 59).
or
XWhile route guidance is active, show the
menu and select +(Ypage 74).
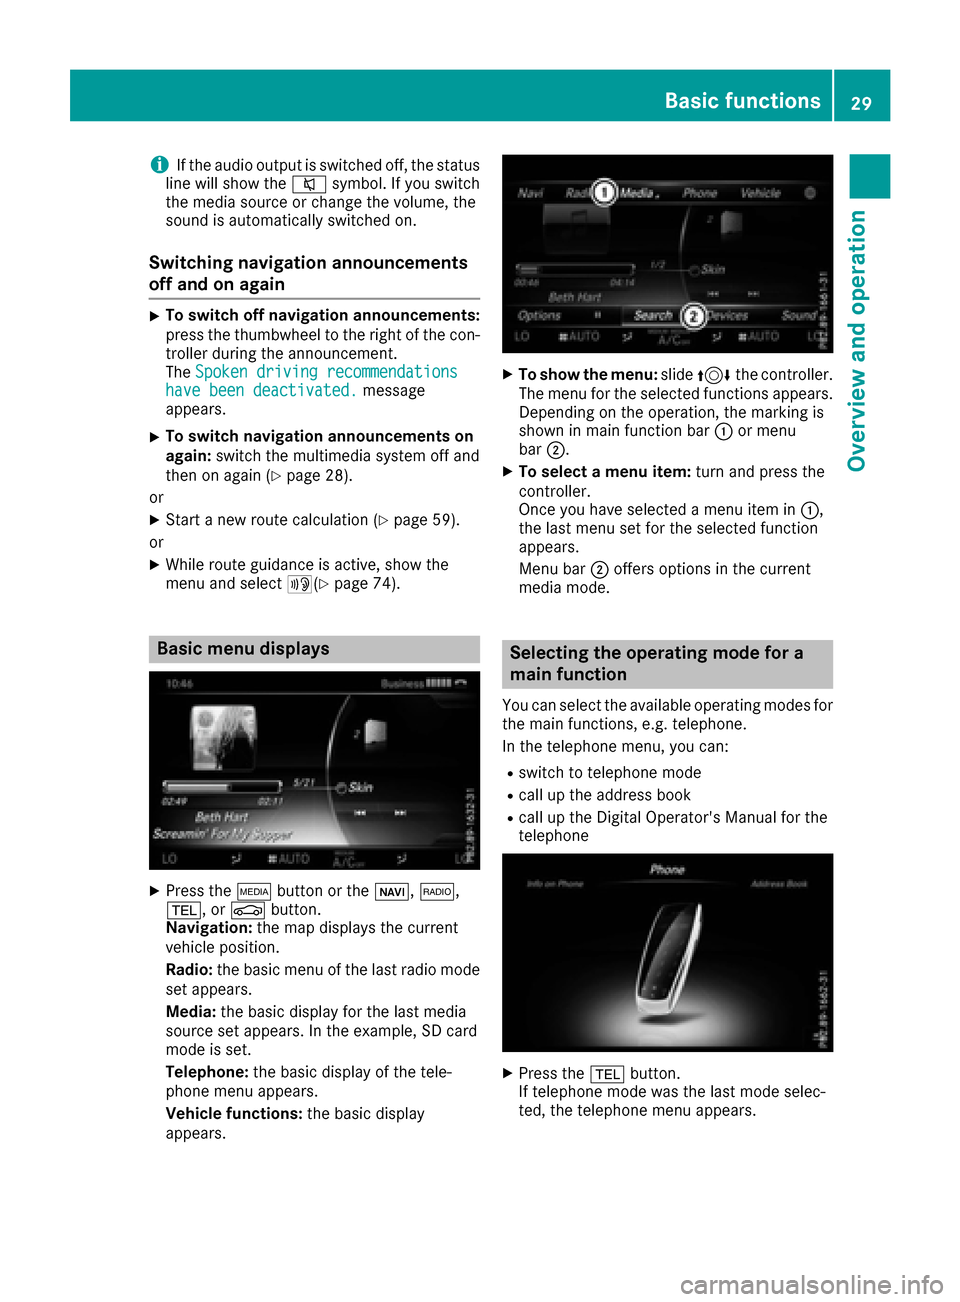
Basic menu displays
XPress theÕbutton or the ß,$,
%, or Øbutton.
Navigation: the map displays the current
vehicle position.
Radio: the basic menu of the last radio mode
set appears.
Media: the basic display for the last media
source set appears. In the example, SD card
mode is set.
Telephone: the basic display of the tele-
phone menu appears.
Vehicle functions: the basic display
appears.
XTo show the menu: slide4 the controller.
The menu for the selected functions appears.
Depending on the operation, the marking is
shown in main function bar :or menu
bar ;.
XTo select a menu item: turn and press the
controller.
Once you have selected a menu item in :,
the last menu set for the selected function
appears.
Menu bar ;offers options in the current
media mode.
Selecting the operating mode for a
main function
You can select the available operating modes for
the main functions, e.g. telephone.
In the telephone menu, you can:
Rswitch to telephone mode
Rcall up the address book
Rcall up the Digital Operator's Manual for the
telephone
XPress the %button.
If telephone mode was the last mode selec-
ted, the telephone menu appears.
Basic functions29
Overview and operation
Page 37 of 178

Your multimediasyste mequipment
These operatin ginstruction sdescribe all th e
standar dan doptional equipment of your multi-
media system, as available at th etime of going
to press. Country-specifi cdifference sare pos -
sible. Bear in min dthat your vehicle may no t
feature all function sdescribed here. Thi salso
applies to safety-relevan tsystems an dfunc-
tions.
Read th einformation on qualifie dspecialis t
workshop sin th evehicle Operator's Manual.
Important safet ynotes
GWARNING
If you operat emobile communication equip-
men twhil edriving, you will be distracted from
traffic conditions. You could also los econtro l
of th evehicle. There is aris kof an accident.
Only operat ethis equipment when th evehicle
is stationary.
You mus tobserv eth elegal requirements fo rth e
country in whic hyou are currentl ydrivin gwhen
operatin gmobile communication sequipment in
th evehicle.
Display settings
Setting th ebrightness
The brightness detecte dby th edisplay ligh tsen -
sor affects th esetting option sfo rthis function .
XPress theØ button.
or
XPress Vehicl ein themain function bar .
The vehicle men uis displayed.
XTo switch to th emen ubar :slid e6 thecon-
troller.
XTo selec tSystem Settings:turn an dpress
th econtroller .
A men uappears .
XTo selec tDispla y:turn an dpress th econ-
troller.
A men uappears .
XSelectBrightness.
A contro lappears .
XSelectth edesire dbrightness.
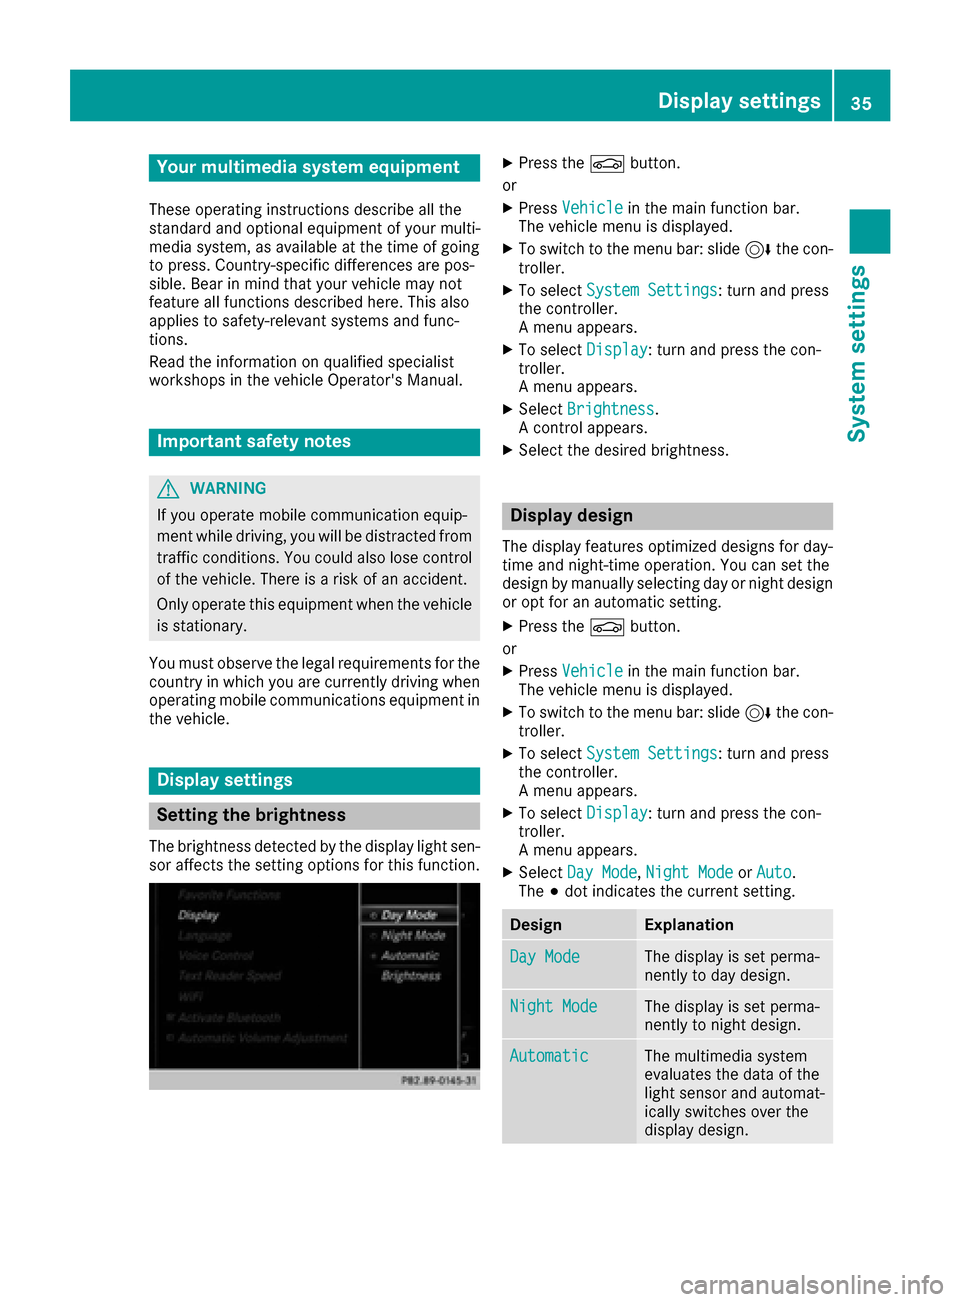
Display design
The display feature soptimize ddesign sfo rday-
time an dnight-time operation .You can set th e
design by manually selecting day or night design
or opt fo ran automatic setting .
XPress theØ button.
or
XPress Vehicl ein themain function bar .
The vehicle men uis displayed.
XTo switch to th emen ubar :slid e6 thecon-
troller.
XTo selec tSystem Settings:turn an dpress
th econtroller .
A men uappears .
XTo selec tDispla y:turn an dpress th econ-
troller.
A men uappears .
XSelectDa yMode,Nigh tModeor Auto.
The #dot indicates th ecurren tsetting .
DesignExplanation
DayModeThe display is set perma-
nently to day design .
NightModeThe display is set perma-
nently to night design .
AutomaticThe multimedia syste m
evaluates th edat aof th e
ligh tsensor an dautomat -
ically switches over th e
display design .
Display settings35
System settings
Z
Page 48 of 178

Exterior lighting switch-off delay time
If you switch on theExterior LightingDelayed Switch-offfunction, the exterior
lighting is switched on for a short time after the
engine is switched off. The light switch must be
set to Ã; see the vehicle Operator's Manual.
The exterior lighting remains on for 60 seconds
after the engine is switched off. If you close all
the doors and the tailgate, the exterior lighting
switches off after the set time.
XCall up Vehicle Settings(Ypage 44).
XTo select Exterior Lighting DelayedSwitch-off: turn and press the controller.
The setting element is active.
XTo change the delayed switch-off time: turn
and press the controller.
360° camera
General notes
The 360° camera covers the immediate sur-
roundings of the vehicle and assists you, for
instance when parking or at exits with reduced
visibility.
The 360° camera is only an aid. It is not a
replacement for your attention to your immedi-
ate surroundings. You are always responsible
for safe maneuvering and parking. Make sure
that no persons or animals are in the maneu-
vering range.
For more information on the 360° camera see
the vehicle Operator's Manual.
Displaying the 360° camera image
The 360° camera image can be displayed if:
Ryour vehicle is equipped with a 360° camera
Rthe 360°Camerafunction is switched on (see
the vehicle Operator's Manual)
XPress the Øbutton.
or
XPress Vehiclein the main function bar.
The vehicle menu is displayed.
XTo select 360° Camera: turn and press the
controller.
The 360° camera image appears in split
screen mode. You will see the previous view on the display if,
when the function is switched on:
Ryou turn the SmartKey to position
1in the
ignition lock
Ryou select transmission position P
Rwhen you are driving at moderate speeds
Switching the display off manually
XTo select &: slide 6and press the con-
troller.
Switching the display on automatically
XYou can automatically switch the 360° Cam-
era display using reverse gear (Ypage 46).
Switching automatic mode of the
360° camera on/off
This function activates the 360° camera when
reverse gear is engaged.
XPress the Øbutton.
or
XPress Vehiclein the main function bar.
The vehicle menu is displayed.
XTo switch to the menu bar: slide6the
controller.
XTo select System Settings: turn and press
the controller.
XTo select 360° Camera: turn and press the
controller.
The menu 360° Camera
appears.
XSelectActivation by R gear.
The function is switched on Oor off ª,
depending on the previous status.
Opening the camera cover for clean-
ing
XTo select Open Camera Coverin the 360°
camera menu: turn the controller and press to
confirm.
The Please Wait...
message appears for
approximately three seconds.
The camera cover opens.
The camera cover closes automatically if:
Rthe ignition is switched off
Rthe vehicle exceeds a moderate speed
46360° camera
Vehicle functions
Page 49 of 178

Rear view camera
General notes
The rear view camera covers the immediate sur-
roundings behind the vehicle and assists you
when parking.
The rear view camera is only an aid. It is not a
replacement for your attention to your immedi-
ate surroundings. You are always responsible
for safe maneuvering and parking. When maneu-
vering or parking, make sure that there are no
persons, animals or objects in the area in whichyou are maneuvering.
You can find further information about the rear
view camera in the vehicle Operator's Manual.
Switching automatic mode of the rear
view camera on/off
This function activates the rear view camera
when reverse gear is engaged.
XPress the Øbutton.
or
XPress Vehiclein the main function bar.
The vehicle menu is displayed.
XSlide 6the controller.
XTo select System Settings: turn and press
the controller.
XSelect Rear View Camera.
XSelectActivation by R gear.
The function is switched on Oor off ª,
depending on the previous status.
When you start the vehicle and engage
reverse gear, the camera cover opens auto-
matically if the function is activated. The area
behind the vehicle is shown with guide lines in
the display; see the vehicle Operator's Man-
ual.
For further information on the rear view camera;
see the vehicle Operator's Manual.
Object detection
The rear view camera can detect moving and
stationary objects. If, for example, a pedestrian
or another vehicle is detected, these objects are
marked with bars. The system is able to detect
and mark stationary objects when your vehicle
is moving. Moving objects will always be detec-
ted and marked. Switching object detection on/off
XTo select
ObjectDetectionin the rear view
camera menu: turn and press the controller.
The function is switched on Oor off ª,
depending on the previous status.
Opening the camera cover for clean-
ing
XTo select Open Camera Coverin the rear
view camera menu: turn and press the con-
troller.
The Please Wait...
message appears for
approximately three seconds.
The camera cover opens.
The camera cover closes automatically if:
Rthe ignition is switched off
Rthe vehicle pulls away
Climate control settings
Overview
You can adjust the climate control settings
using the climate control bar (Ypage 48) or
the climate control menu (Ypage 48).
You can set the most important climate control
functions, such as temperature (
Ypage 48),
airflow (Ypage 48) and air distribution
(Ypage 48) using the climate control bar. The
climate control bar is visible in most displays.
You can find all available climate control func-
tions in the climate control menu. You can use
the climate control bar (
Ypage 48) to switch
to the climate control menu.
Climate control settings47
Vehicle functions
Z