2017 MERCEDES-BENZ GLC-Class transmission
[x] Cancel search: transmissionPage 4 of 178

Index....................................................... 4
Introduction......................................... 15
Operating safety .................................... 15
Data stored in the vehicle ...................... 16
Information on copyright ...................... .18
Your multimedia system equipment ...... 18
Overview and operation .....................19
Overview ................................................ 19
Touchpad .............................................. .23
Basic functions ...................................... 28
Character entry (telephony) ................... 30
Character entry (navigation) .................. 31
Favorites ................................................ 33
System settings .................................. 35
Your multimedia system equipment ...... 35
Important safety notes .......................... 35
Display settings ..................................... 35
Time settings .........................................3 6
Text reader settings ...............................3 8
Voice Control System settings ............... 38
Wi-Fi ...................................................... 38
Bluetooth
®settings ............................... 40
Automatic volume adjustment ............... 40
Setting the system language .................4 1
Callin g up and editing the Favorites
function ................................................ .41
Importing/exporting data ...................... 42
Reset function ....................................... 43
Vehicle functions ................................ 44
Your multimedia system equipment ...... 44
Important safety notes .......................... 44
Vehicle settings .....................................4 4
360° camera ......................................... 46
Rear view camera .................................. 47
Climate control settings ........................ 47
DYNAMIC SELECT .................................. 50
Navigation ........................................... 53
Your multimedia system equipment ...... 53
Introduction ...........................................5 3Basic settings ........................................ 55
Destination entry ................................... 57
Personal POIs and routes ...................... 67
Route guidance ...................................... 71
Real-time traffic reports ......................... 77
Storing destinations ............................... 80
Map functions ........................................ 82
Navigation functions .............................. 87
Problems with the navigation system .... 89
Telephone
............................................ 91
Your multimedia system equipment ...... 91
Important safety notes .......................... 91
General notes ........................................ 91
Telephone menu .................................... 92
Connecting/disconnecting a mobile
phone .................................................... 92
Reception and transmission volume ...... 96
Using the telephone .............................. 97
Mobile phone voice recognition ........... 100
Phone book ......................................... 101
Address book ...................................... 104
Call lists ............................................... 110
Speed dial lists .................................... 112
Messages (text messages and e-
mails) ................................................... 113
Online and Internet functions ..........120
Your multimedia system equipment .... 120
Important safety notes ........................ 120
General notes ...................................... 120
Conditions for access .......................... 120
Setting up an Internet connection
(Canada) .............................................. 121
Establishing/ending the connection .... 124
Mercedes-Benz Apps ........................... 125
Mercedes-Benz Companion ................. 125
Web browser .......................................1 27
Radio.................................................. 132
Your multimedia system equipment .... 132
Switching on the radio ......................... 132
Overview .............................................. 132
Setting the waveband .......................... 132
Station ................................................. 133
Tagging music tracks ........................... 135
2Contents
Page 14 of 178

System settingsAutomatic volume adjustment ......... 40
Bluetooth
®....................................... 40
Date .................................................3 6
Importing/exporting data ................ 42
Language .........................................4 1
Text reader speed ............................3 8
Time .................................................3 6
Time zone ........................................3 6
Voice Control System ...................... 38
T
Telephone
Accepting a call (COMAND) .............9 7
Adding a call .................................... 98
Adjusting the volume for calls .......... 28
Authorizing a mobile phone (con-
necting) ............................................ 94
Call lists ......................................... 110
Call waiting .................................... 100
Calling up the telephone menu ........ 92
Calls with several participants ......... 99
Conference calls .............................. 99
Connecting a mobile phone (gen-
eral information) .............................. 92
De-authorizing (disconnecting) a
mobile phone ................................... 96
Deleting a speed dial preset .......... 112
Deleting messages ........................ 119
Displaying Bluetooth
®connection
details .............................................. 96
Downloading messages manually .. 114
E-mail ............................................. 113
E-mail requirements ....................... 113
E-mail settings ............................... 113
Ending an active call ...................... 100
Entering a number ........................... 97
Entering phone numbers .................. 97
Establishing the connection from
the mobile phone ............................. 95
Function restrictions ........................ 92
Functions available during a call ...... 98
General notes .................................. 91
Incoming call during an existing
call ................................................. 100
Making a call .................................... 97
Message conditions ....................... 113 Message settings ........................... 113
Operating options ............................ 91
Phone book .................................... 101
Reading messages ......................... 115
Reception and transmission vol-
ume ................................................. 96
Reconnecting a mobile phone
automatically ................................... 95
Redialing .......................................... 97
Rejecting a call (COMAND) .............. 97
Safety notes ..................................... 91
Sending DTMF tones ........................ 99
Setting up a speed dial .................. 112
Switching between cal
ls (
call wait-
ing) .................................................. 99
Switching between mobile
phones ............................................. 95
Switching the microphone on/off .... 99
Telephone menu overview ............... 92
Text message conditions ............... 113
Text message settings ................... 113
Text messages (SMS) .................... 113
Toggling ........................................... 99
Using the telephone ......................... 97
Writing e-mails ............................... 117
Writing text messages ................... 116
Telephone number
Entering ........................................... 97
Text messages (SMS)
Calling the sender .......................... 118
Calling up the settings menu ......... 113
Configuring the text messages
displayed ....................................... 113
Deleting ......................................... 119
Displaying details ........................... 116
Downloading manually ................... 114
Editing text templates .................... 118
Inbox .............................................. 115
Reading .......................................... 115
Reading aloud ................................ 115
Settings ......................................... 113
Storing sender in address book ..... 119
Storing the sender as a new
address book entry ........................ 118
Using a phone number in the text .. 118Using text templates ...................... 117
Writing ........................................... 116
12Index
Page 42 of 178
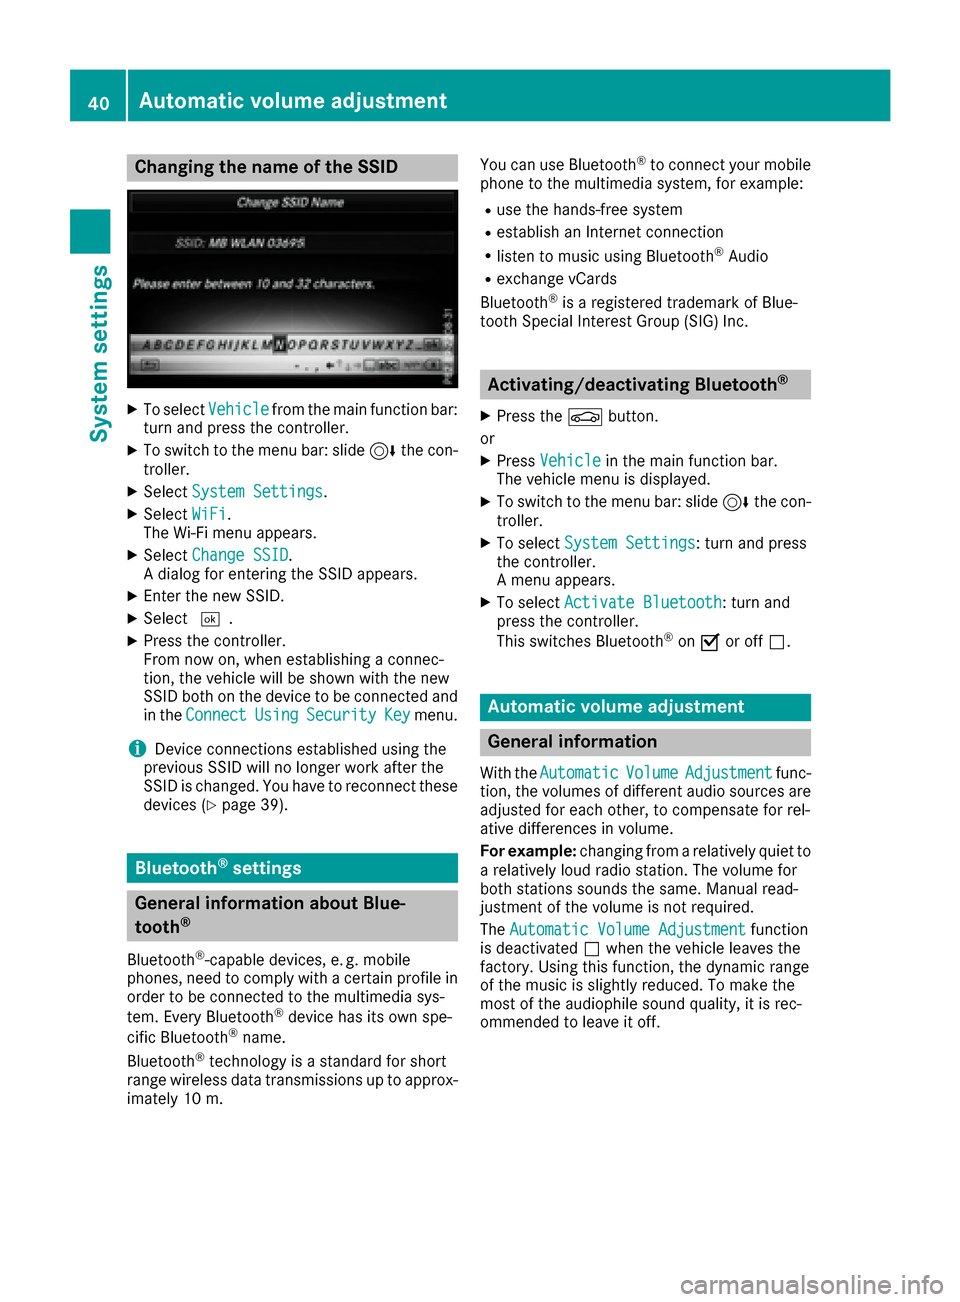
Changing the name of the SSID
XTo selectVehiclefrom the main function bar:
turn and press the controller.
XTo switch to the menu bar: slide 6the con-
troller.
XSelect System Settings.
XSelect WiFi.
The Wi-Fi menu appears.
XSelect Change SSID.
A dialog for entering the SSID appears.
XEnter the new SSID.
XSelect ¬.
XPress the controller.
From now on, when establishing a connec-
tion, the vehicle will be shown with the new
SSID both on the device to be connected and
in the Connect
UsingSecurityKeymenu.
iDevice connections established using the
previous SSID will no longer work after the
SSID is changed. You have to reconnect these
devices (
Ypage 39).
Bluetooth®settings
General information about Blue-
tooth®
Bluetooth®-capable devices, e. g. mobile
phones, need to comply with a certain profile in
order to be connected to the multimedia sys-
tem. Every Bluetooth
®device has its own spe-
cific Bluetooth®name.
Bluetooth®technology is a standard for short
range wireless data transmissions up to approx-
imately 10 m. You can use Bluetooth
®to connect your mobile
phone to the multimedia system, for example:
Ruse the hands-free system
Restablish an Internet connection
Rlisten to music using Bluetooth®Audio
Rexchange vCards
Bluetooth®is a registered trademark of Blue-
tooth Special Interest Group (SIG) Inc.
Activating/deactivating Bluetooth®
X
Press the Øbutton.
or
XPress Vehiclein the main function bar.
The vehicle menu is displayed.
XTo switch to the menu bar: slide 6the con-
troller.
XTo select System Settings: turn and press
the controller.
A menu appears.
XTo select Activate Bluetooth: turn and
press the controller.
This switches Bluetooth
®on O or off ª.
Automatic volume adjustment
General information
With the AutomaticVolumeAdjustmentfunc-
tion, the volumes of different audio sources are
adjusted for each other, to compensate for rel-
ative differences in volume.
For example: changing from a relatively quiet to
a relatively loud radio station. The volume for
both stations sounds the same. Manual read-
justment of the volume is not required.
The Automatic Volume Adjustment
function
is deactivated ªwhen the vehicle leaves the
factory. Using this function, the dynamic range
of the music is slightly reduced. To make the
most of the audiophile sound quality, it is rec-
ommended to leave it off.
40Automatic volume adjustment
System settings
Page 48 of 178
Exterior lighting switch-off delay time
If you switch on theExterior LightingDelayed Switch-offfunction, the exterior
lighting is switched on for a short time after the
engine is switched off. The light switch must be
set to Ã; see the vehicle Operator's Manual.
The exterior lighting remains on for 60 seconds
after the engine is switched off. If you close all
the doors and the tailgate, the exterior lighting
switches off after the set time.
XCall up Vehicle Settings(Ypage 44).
XTo select Exterior Lighting DelayedSwitch-off: turn and press the controller.
The setting element is active.
XTo change the delayed switch-off time: turn
and press the controller.
360° camera
General notes
The 360° camera covers the immediate sur-
roundings of the vehicle and assists you, for
instance when parking or at exits with reduced
visibility.
The 360° camera is only an aid. It is not a
replacement for your attention to your immedi-
ate surroundings. You are always responsible
for safe maneuvering and parking. Make sure
that no persons or animals are in the maneu-
vering range.
For more information on the 360° camera see
the vehicle Operator's Manual.
Displaying the 360° camera image
The 360° camera image can be displayed if:
Ryour vehicle is equipped with a 360° camera
Rthe 360°Camerafunction is switched on (see
the vehicle Operator's Manual)
XPress the Øbutton.
or
XPress Vehiclein the main function bar.
The vehicle menu is displayed.
XTo select 360° Camera: turn and press the
controller.
The 360° camera image appears in split
screen mode. You will see the previous view on the display if,
when the function is switched on:
Ryou turn the SmartKey to position
1in the
ignition lock
Ryou select transmission position P
Rwhen you are driving at moderate speeds
Switching the display off manually
XTo select &: slide 6and press the con-
troller.
Switching the display on automatically
XYou can automatically switch the 360° Cam-
era display using reverse gear (Ypage 46).
Switching automatic mode of the
360° camera on/off
This function activates the 360° camera when
reverse gear is engaged.
XPress the Øbutton.
or
XPress Vehiclein the main function bar.
The vehicle menu is displayed.
XTo switch to the menu bar: slide6the
controller.
XTo select System Settings: turn and press
the controller.
XTo select 360° Camera: turn and press the
controller.
The menu 360° Camera
appears.
XSelectActivation by R gear.
The function is switched on Oor off ª,
depending on the previous status.
Opening the camera cover for clean-
ing
XTo select Open Camera Coverin the 360°
camera menu: turn the controller and press to
confirm.
The Please Wait...
message appears for
approximately three seconds.
The camera cover opens.
The camera cover closes automatically if:
Rthe ignition is switched off
Rthe vehicle exceeds a moderate speed
46360° camera
Vehicle functions
Page 96 of 178
XTo selectConnect Device: turn and press
the controller.
The device list is displayed.
XTo select Search for Phones: turn and
press the controller.
A message is displayed that Bluetooth
®must
be activated on the mobile phone and must be
made visible to other devices.
XTo select StartSearch: press the controller.
The available mobile phones are displayed in
the device list.
The duration of the search depends on the num- ber of Bluetooth
®telephones within range and
their characteristics.
If a new phone is found, it appears in the device list with the Ïsymbol. You can now author-
ize (connect) the mobile phone found
(
Ypage 94).
If the maximum number of authorized devices in
the device list is reached, you will be requested
to de-authorize a mobile phone (
Ypage 96).
When you call up the device list again, de-
authorized devices will be removed from the list.
To update the device list, start the search again.
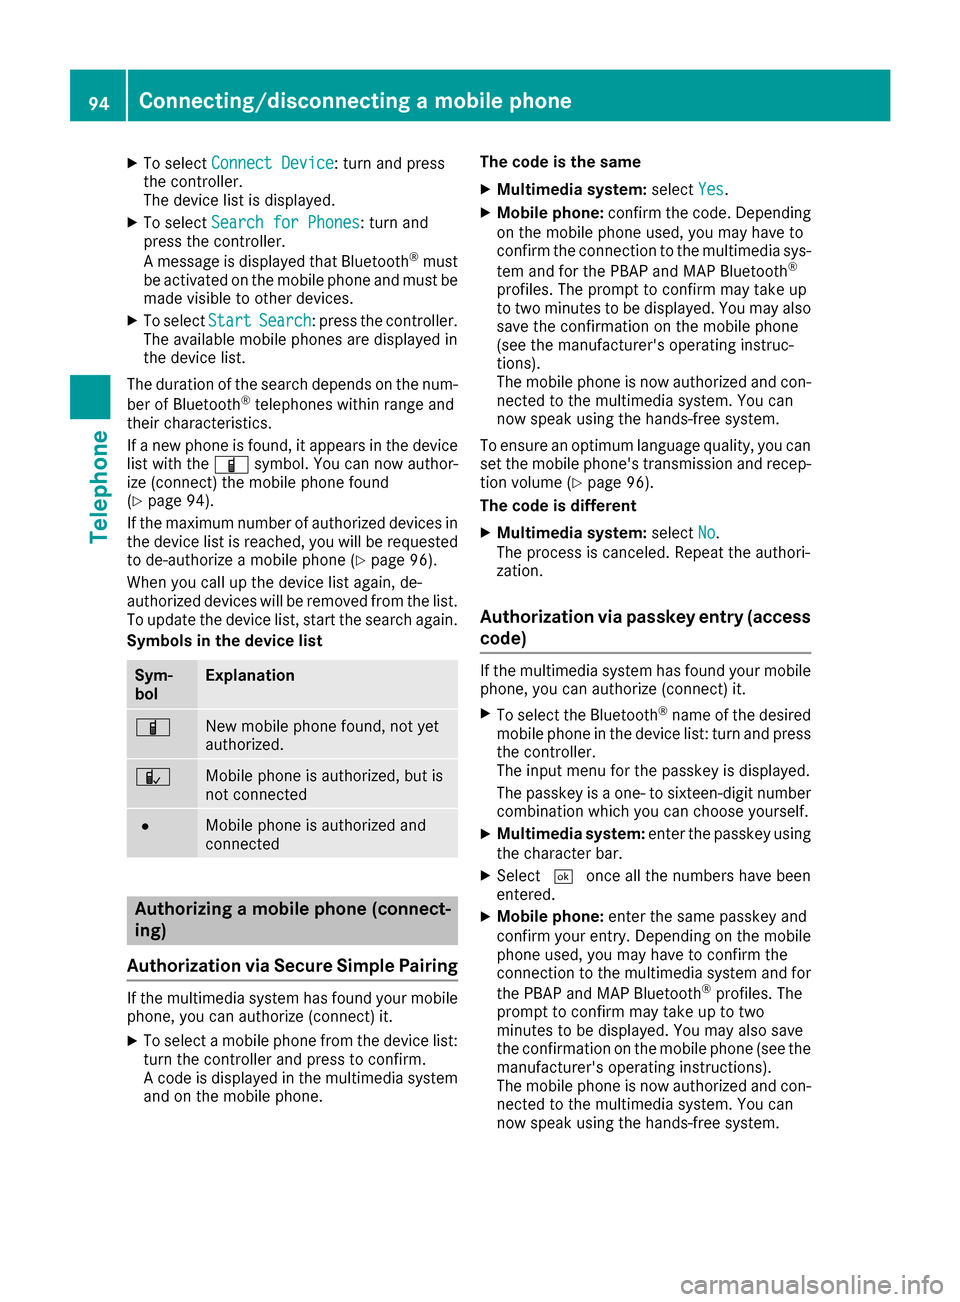
Symbols in the device list
Sym-
bolExplanation
ÏNew mobile phone found, not yet
authorized.
ÑMobile phone is authorized, but is
not connected
#Mobile phone is authorized and
connected
Authorizing a mobile phone (connect-
ing)
Authorization via Secure Simple Pairing
If the multimedia system has found your mobile
phone, you can authorize (connect) it.
XTo select a mobile phone from the device list: turn the controller and press to confirm.
A code is displayed in the multimedia system
and on the mobile phone. The code is the same
XMultimedia system:
selectYes.
XMobile phone: confirm the code. Depending
on the mobile phone used, you may have to
confirm the connection to the multimedia sys-
tem and for the PBAP and MAP Bluetooth
®
profiles. The prompt to confirm may take up
to two minutes to be displayed. You may also
save the confirmation on the mobile phone
(see the manufacturer's operating instruc-
tions).
The mobile phone is now authorized and con-
nected to the multimedia system. You can
now speak using the hands-free system.
To ensure an optimum language quality, you can
set the mobile phone's transmission and recep-
tion volume (
Ypage 96).
The code is different
XMultimedia system: selectNo.
The process is canceled. Repeat the authori-
zation.
Authorization via passkey entry (access
code)
If the multimedia system has found your mobile
phone, you can authorize (connect) it.
XTo select the Bluetooth®name of the desired
mobile phone in the device list: turn and press
the controller.
The input menu for the passkey is displayed.
The passkey is a one- to sixteen-digit number
combination which you can choose yourself.
XMultimedia system: enter the passkey using
the character bar.
XSelect ¬once all the numbers have been
entered.
XMobile phone: enter the same passkey and
confirm your entry. Depending on the mobile
phone used, you may have to confirm the
connection to the multimedia system and for
the PBAP and MAP Bluetooth
®profiles. The
prompt to confirm may take up to two
minutes to be displayed. You may also save
the confirmation on the mobile phone (see the
manufacturer's operating instructions).
The mobile phone is now authorized and con-
nected to the multimedia system. You can
now speak using the hands-free system.
94Connecting/disconnecting a mobile phone
Telephone
Page 97 of 178
To ensure an optimum language quality, you can
set the mobile phone's transmission and recep-
tion volume (
Ypage 96).
If the Authorization Failed
message
appears, you may have entered a different pass-
key or exceeded the prescribed time limit.
Repeat the procedure.
iSome mobile phones require a passkey with
four or more digits.
iIf you wish to re-authorize the mobile phone
after de-authorizing it, you can choose
another passkey for it.
Establishing the connection from the
mobile phone
The Bluetooth®device name of the multimedia
system is MB Bluetooth.
XMultimedia system: call up the telephone
menu.
XTo switch to the menu bar: slide 6the con-
troller.
XTo select Connect Device: turn and press
the controller.
The device list is displayed.
XTo select Connect via Phone: turn and
press the controller.
A message is displayed, stating that you can
start the search on your mobile phone.
XMobile phone: start the search for a Blue-
tooth®device (see manufacturer's operating
instructions).
The multimedia system is displayed with the
name MB Bluetooth
in the mobile phone's
device list.
XSelect MB Bluetooth.
A prompt appears in the multimedia system's
display asking if the mobile phone should be
authorized.
XMultimedia system: selectYes.
If No
is selected, the procedure is canceled.
If your mobile phone supports Secure Simple
Pairing, a code is now displayed on both devi-
ces.
The code is the same
XMultimedia system: selectYes.
XMobile phone: confirm the code. Depending
on the mobile phone used, you may have to
confirm the connection to the multimedia sys- tem and for the PBAP and MAP Bluetooth
®
profiles. The prompt to confirm may take up
to two minutes to be displayed. You may also
save the confirmation on the mobile phone
(see the manufacturer's operating instruc-
tions).
The mobile phone is now authorized and con-
nected to the multimedia system. You can
now speak using the hands-free system.
To ensure an optimum language quality, you can
set the mobile phone's transmission and recep-
tion volume (
Ypage 96).
The code is different
XMultimedia system: selectNo.
The process is canceled. Repeat the proce-
dure.
If your mobile phone does not support Secure
Simple Pairing, an input menu is displayed for
the passkey. The passkey is a one- to sixteen-
digit number combination which you can choose
yourself. Enter the same passkey in both the
multimedia system and on the mobile phone and
confirm. Depending on the mobile phone used,
you may have to confirm the connection to the
multimedia system and for the PBAP and MAP
Bluetooth
®profiles.
Reconnecting automatically
The multimedia system always searches for the
last connected mobile phone.
If no connection can be made to the most
recently connected mobile phone, the system
searches for the mobile phone that was con-
nected before that one.
Switching between mobile phones
If you have authorized more than one mobile
phone, you can switch between the individual
phones.
XTo call up the telephone menu: press the
% button.
XTo show the menu bar: slide 6the control-
ler.
Connecting/disconnecting a mobile phone95
Telephone
Z
Page 98 of 178
XTo selectConnect Device: turn and press
the controller.
The device list is displayed.
XTo select the desired mobile phone: turn and press the controller.
The selected mobile phone is searched for
and connected if it is within Bluetooth
®range
and if Bluetooth®is activated.
Only one mobile phone can be connected at any one time. The currently connected mobile
phone is indicated by the #dot in the device list.
iYou can only switch to another authorized
mobile phone if you are not currently making
a call.
De-authorizing (disconnecting) a
mobile phone
Mercedes-Benz USA, LLC recommends de-
authorization in the multimedia system as well
as on the mobile phone. Subsequent authoriza-
tion may otherwise fail.
XTo call up the telephone menu: press the
% button.
XTo show the menu bar: slide 6the control-
ler.
XTo select Connect Device: turn and press
the controller.
XTo highlight the desired mobile phone in the
device list: turn the controller.
XTo select G: slide 9the controller.
XTo select Deauthorize: turn and press the
controller.
A prompt appears, asking whether you really
wish to de-authorize this device.
XTo select Yes: turn and press the controller.
The mobile phone is de-authorized.
iBefore re-authorizing the mobile phone, you
should also delete the device name MBBlue‐
toothfrom your mobile phone's Bluetooth®
list.
Displaying connection details
XTo call up the telephone menu: press the
%button.
XTo switch to the menu bar in the telephone
menu: slide 6the controller.
XTo select Connect Device: turn and press
the controller.
XTo highlight the desired mobile phone in the
device list: turn the controller.
XTo select G: slide 9the controller.
XTo select Details: turn and press the con-
troller.
The following information concerning the
selected mobile phone is shown:
RBluetooth®device name
RBluetooth®address
RAvailability status (shown after a new
search)
RAuthorization status
XTo close the detailed display: slide8 the
controller.
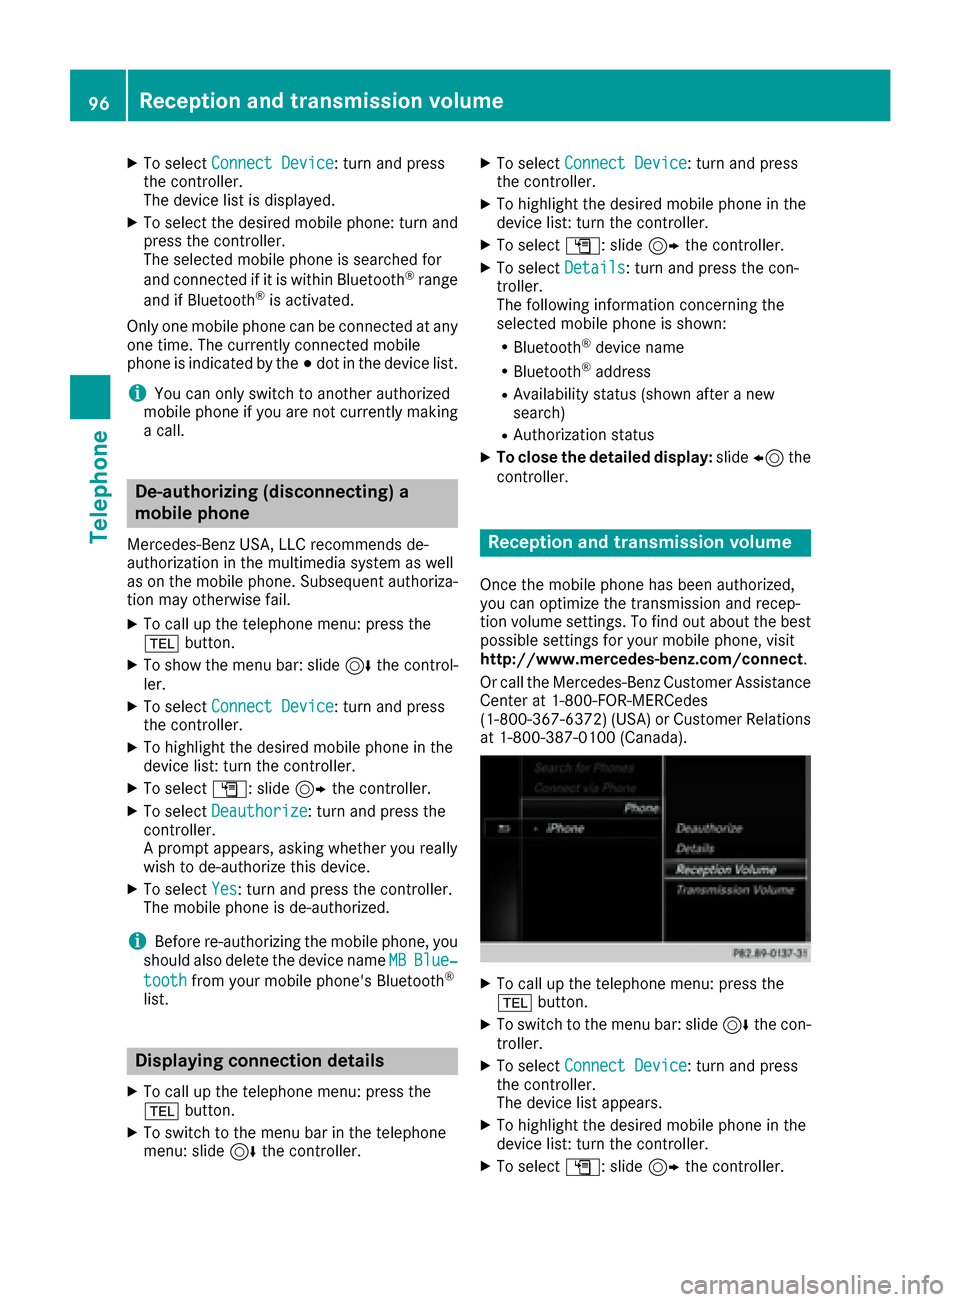
Reception and transmission volume
Once the mobile phone has been authorized,
you can optimize the transmission and recep-
tion volume settings. To find out about the best
possible settings for your mobile phone, visit
http://www.mercedes-benz.com/connect .
Or call the Mercedes-Benz Customer Assistance
Center at 1-800-FOR-MERCedes
(1-800-367-6372)( USA) or Customer Relations
at 1-800-387-0100 (Canada).
XTo call up the telephone menu: press the
% button.
XTo switch to the menu bar: slide 6the con-
troller.
XTo select Connect Device: turn and press
the controller.
The device list appears.
XTo highlight the desired mobile phone in the
device list: turn the controller.
XTo select G: slide 9the controller.
96Reception and transmission volume
Telephone
Page 155 of 178
iA2DP (Advanced Audio Distribution Profile):
Bluetooth®audio profile for audio data trans-
mission
AVRCP ( Audio Video Remote Control Profile):
Bluetooth
®audio profile for audio data play-
back
iThe Bluetooth®device must be visible to the
multimedia system for authorization. After
authorization, the multimedia system even
finds the Bluetooth
®device when it is not
visible.
General notes
Before using your Bluetooth®audio device with
the multimedia system for the first time, you will
need to authorize it.
When you authorize a new Bluetooth
®audio
device, it is connected automatically. Connec-
tion involves first searching for a Bluetooth
®
audio device and then authorizing it.
You can authorize up to 15 Bluetooth®devices.
iIf you authorize a mobile phone that sup-
ports Bluetooth®audio, the A2DP and AVRCP
Bluetooth®audio profiles are connected
automatically.
The mobile phone is then entered:
Rin the Bluetooth®telephone list
(Ypage 93)
Rin the Bluetooth®device list
(Ypage 154)
Mercedes-Benz recommends authorizing a
mobile phone in Bluetooth
®telephony
(Ypage 94).
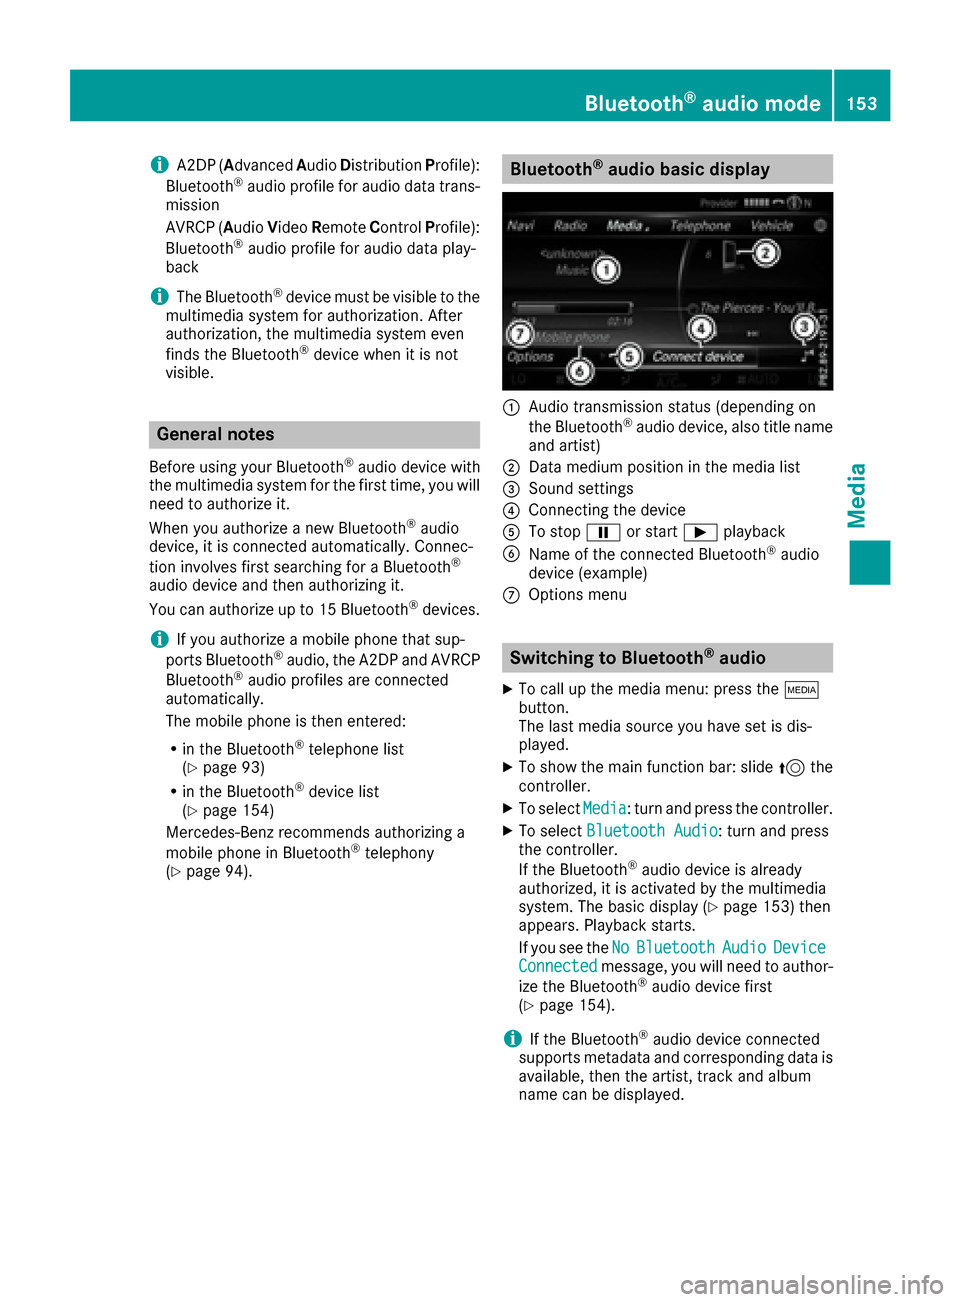
Bluetooth®audio basic display
:Audio transmission status (depending on
the Bluetooth®audio device, also title name
and artist)
;Data medium position in the media list
=Sound settings
?Connecting the device
ATo stop Ëor start Ìplayback
BName of the connected Bluetooth®audio
device (example)
COptions menu
Switching to Bluetooth®audio
XTo call up the media menu: press the Õ
button.
The last media source you have set is dis-
played.
XTo show the main function bar: slide 5the
controller.
XTo select Media: turn and press the controller.
XTo select Bluetooth Audio: turn and press
the controller.
If the Bluetooth
®audio device is already
authorized, it is activated by the multimedia
system. The basic display (
Ypage 153) then
appears. Playback starts.
If you see the No
BluetoothAudioDeviceConnectedmessage, you will need to author-
ize the Bluetooth®audio device first
(Ypage 154).
iIf the Bluetooth®audio device connected
supports metadata and corresponding data is
available, then the artist, track and album
name can be displayed.
Bluetooth®audio mode153
Media
Z