2017 MERCEDES-BENZ GLA SUV warning
[x] Cancel search: warningPage 282 of 369
Adding favourites
Adding predefined favourites
X Press the gbutton.
X COMAND Online: slide6the controller.
X Audio 20: slide5or6 the controller.
The menu bar is displayed.
X Select Reassign
Reassign.
The categories are displayed.
X Select a category.
The favourites are displayed.
X Select a favourite.
X COMAND Online: to add the favourite to the
desired position, turn and press the control-
ler.
X Audio 20: to add the favourite to the desired
position, turn, slide 5or6 and press the
controller.
If a favourite has already been added at this
position, it will be overwritten.
Adding your own favourites You can add climate control as a favourite, for
example.
X Select Vehicle
VehicleQClimate control Climate control.
X Press and hold the gbutton until the
favourites are displayed.
X Add a favourite to the desired position.
If a favourite has already been added at this
position, it will be overwritten. Navigation mode
Important safety notes G
WARNING
If you operate information and communica-
tion equipment integrated in the vehicle when driving, you could be distracted from the traf-
fic situation. This could also cause you to lose control of the vehicle. There is a risk of an
accident.
Only operate this equipment when the traffic
situation permits. If you cannot be sure of this,
stop the vehicle paying attention to road and
traffic conditions and operate the equipment
with the vehicle stationary. You must observe the legal requirements for the
country in which you are currently driving when operating the navigation system.
General notes Correct functioning of the navigation system
depends, amongst other things, on GPS recep-
tion. In certain situations, GPS reception may be
impaired, there may be interference or there
may be no reception at all, e.g. in tunnels or
multi-storey car parks.
Audio 20 is equipped with Garmin ®
MAP PILOT
(see the manufacturer's operating instructions).
The Garmin ®
MAP PILOT operating instructions
are stored on the SD card as a PDF file. The SD card box contains a quick guide.
The following descriptions apply to navigation
with COMAND Online. Further information can
be found in the Digital Owner's Manual.
Selecting a route type and route options Multimedia system:
X Select Navi
NaviQNavigation Navigation.
The map displays the current vehicle position.
X Slide 6the controller.
X Select Options
OptionsQRoute settings Route settings.
Notes for route types:
R Eco route Eco route
R Dynamic route
Dynamic route
Traffic reports on the route for the route guid-
ance are taken into account (not available in
all countries).
R Dynamic route only after request Dynamic route only after request
You can decide whether or not current traffic
reports should be included in the route cal-
culation (not available in all countries).
R Calculate alternative routes Calculate alternative routes
Different routes are being calculated. In order
to do so, instead of Start Start, select the menu
item Continue
Continue.
X To avoid/use route options: selectAvoid
Avoid
options
options.
X Select a route option.
Notes for route options:
R Use toll roads
Use toll roads Operating system
279Multimedia system Z
Page 289 of 369
Activating/deactivating text message
downloading from the mobile phone Dial number Function
00080 Text message down-
loading is deactiva-
ted.
00081 Text message down-
loading is activated.
For further information on receiving text mes-
sages when using the telephone module (see
the Digital Owner's Manual).
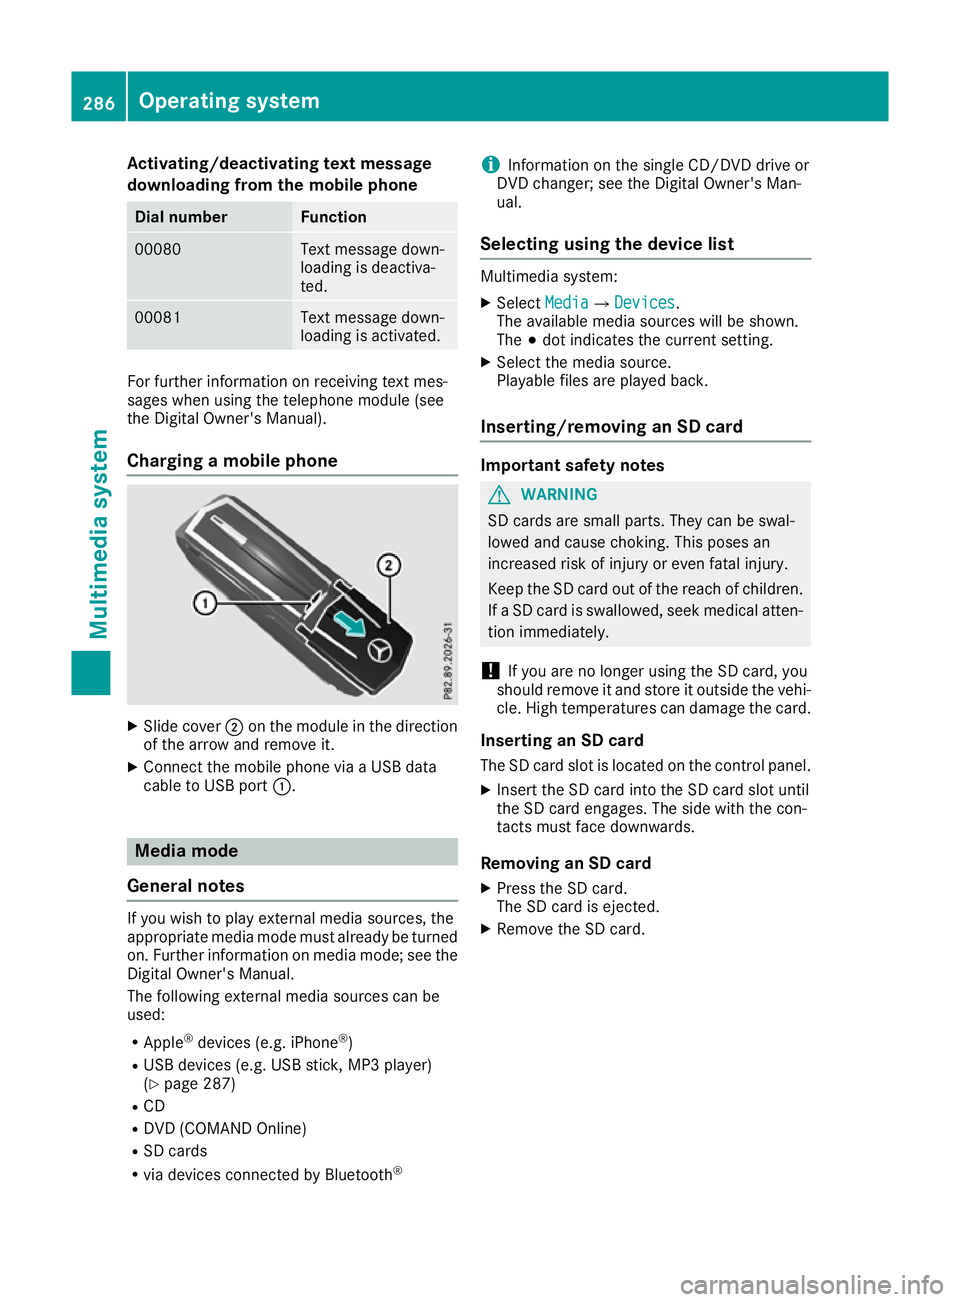
Charging a mobile phone X
Slide cover ;on the module in the direction
of the arrow and remove it.
X Connect the mobile phone via a USB data
cable to USB port :. Media mode
General notes If you wish to play external media sources, the
appropriate media mode must already be turned
on. Further information on media mode; see the Digital Owner's Manual.
The following external media sources can be
used:
R Apple ®
devices (e.g. iPhone ®
)
R USB devices (e.g. USB stick, MP3 player)
(Y page 287)
R CD
R DVD (COMAND Online)
R SD cards
R via devices connected by Bluetooth ®i
Information on the single CD/DVD drive or
DVD changer; see the Digital Owner's Man-
ual.
Selecting using the device list Multimedia system:
X Select Media MediaQ Devices
Devices.
The available media sources will be shown.
The #dot indicates the current setting.
X Select the media source.
Playable files are played back.
Inserting/removing an SD card Important safety notes
G
WARNING
SD cards are small parts. They can be swal-
lowed and cause choking. This poses an
increased risk of injury or even fatal injury.
Keep the SD card out of the reach of children. If a SD card is swallowed, seek medical atten-
tion immediately.
! If you are no longer using the SD card, you
should remove it and store it outside the vehi-
cle. High temperatures can damage the card.
Inserting an SD card
The SD card slot is located on the control panel. X Insert the SD card into the SD card slot until
the SD card engages. The side with the con-
tacts must face downwards.
Removing an SD card X Press the SD card.
The SD card is ejected.
X Remove the SD card. 286
Operating systemMultimedia system
Page 291 of 369

Loading guidelines
G
WARNING
If objects, luggage or loads are not secured or not secured sufficiently, they could slip, tip
over or be flung around and thereby hit vehicle
occupants. There is a risk of injury, especially when braking or abruptly changing directions.
Always store objects so that they cannot be
flung around. Secure objects, luggage or
loads against slipping or tipping before the
journey. G
WARNING
Combustion engines emit poisonous exhaust
gases such as carbon monoxide. If the tailgate is open when the engine is running, particu-
larly if the vehicle is moving, exhaust fumes
could enter the passenger compartment.
There is a risk of poisoning.
Turn off the engine before opening the tail-
gate. Never drive with the tailgate open. G
WARNING
The exhaust tail pipe and tail pipe trim can
become very hot. If you come into contact
with these parts of the vehicle, you could burn
yourself. There is a risk of injury.
Always be particularly careful around the
exhaust tail pipe and the tail pipe trim. Allow
these components to cool down before touch-
ing them.
The handling characteristics of a laden vehicle
are dependent on the distribution of the load
within the vehicle.
Observe the following notes on loading and
transporting a load:
R never exceed the maximum permissible gross
vehicle weight or the permissible axle loads
for the vehicle (including occupants).
R the luggage compartment is the preferred
place to store objects.
R position heavy loads as far forwards as pos-
sible and as low down in the luggage com-
partment as possible. R
the load must not protrude above the upper
edge of the seat backrests.
R always place the load against the rear or front
seat backrests. Make sure that the seat
backrests are securely locked into place.
R always place the load behind unoccupied
seats if possible.
R use the lashing eyelets and the luggage nets
to transport loads and luggage.
R only use lashing eyelets and fastening com-
ponents that are suitable for the weight and
size of the load.
R the maximum load capacity of the stowage
well under the luggage compartment floor is
25 kg.
R secure the load with sufficiently strong and
wear-resistant lashing material. Pad sharp
edges for protection.
! Do not position the load on one part of the
folding luggage compartment floor only. The
maximum load capacity of the folding luggage compartment floor is 100 kg. Spread the
weight evenly to avoid damaging the luggage
compartment floor. Place a solid board under the load if necessary. Please note that the
load on the luggage compartment floor will be increased when the load is lashed down. Stowage areas
Stowage compartments
Important safety notes G
WARNING
If you transport objects in the vehicle interior and these are not adequately secured, they
could slip or be flung around and thereby
strike vehicle occupants. In addition, cup
holders, open stowage spaces and mobile
phone brackets may not always be able to
hold the objects placed in them in the event of an accident. There is a risk of injury, particu-
larly in the event of sharp braking or sudden
changes of direction. 288
Stowage areasStowing and features
Page 293 of 369
Stowage compartment/telephone com-
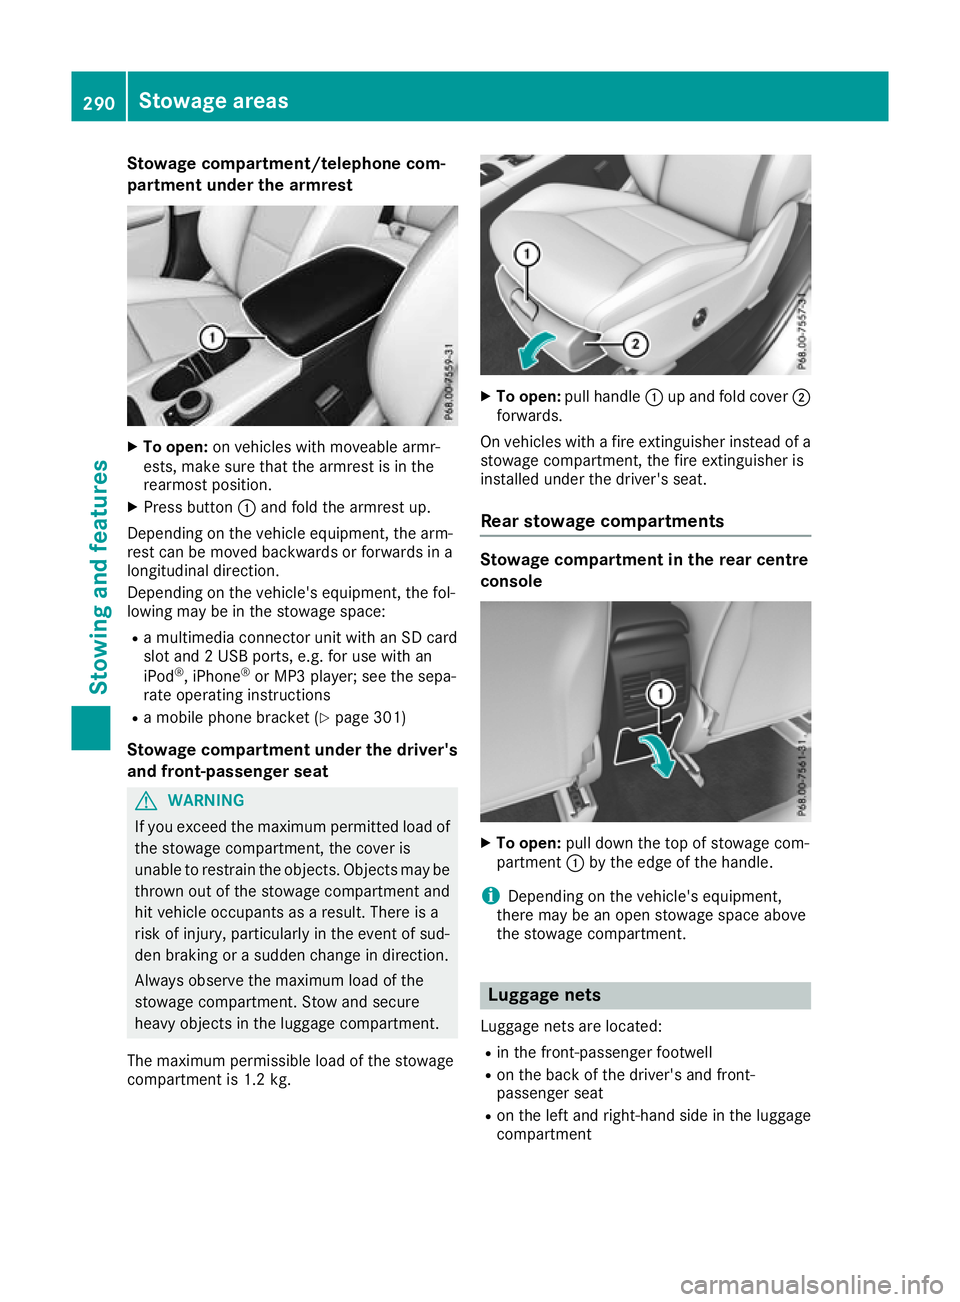
partment under the armrest X
To open: on vehicles with moveable armr-
ests, make sure that the armrest is in the
rearmost position.
X Press button :and fold the armrest up.
Depending on the vehicle equipment, the arm-
rest can be moved backwards or forwards in a
longitudinal direction.
Depending on the vehicle's equipment, the fol-
lowing may be in the stowage space:
R a multimedia connector unit with an SD card
slot and 2 USB ports, e.g. for use with an
iPod ®
, iPhone ®
or MP3 player; see the sepa-
rate operating instructions
R a mobile phone bracket (Y page 301)
Stowage compartment under the driver's and front-passenger seat G
WARNING
If you exceed the maximum permitted load of the stowage compartment, the cover is
unable to restrain the objects. Objects may be
thrown out of the stowage compartment and
hit vehicle occupants as a result. There is a
risk of injury, particularly in the event of sud-
den braking or a sudden change in direction.
Always observe the maximum load of the
stowage compartment. Stow and secure
heavy objects in the luggage compartment.
The maximum permissible load of the stowage
compartment is 1.2 kg. X
To open: pull handle :up and fold cover ;
forwards.
On vehicles with a fire extinguisher instead of a
stowage compartment, the fire extinguisher is
installed under the driver's seat.
Rear stowage compartments Stowage compartment in the rear centre
console
X
To open: pull down the top of stowage com-
partment :by the edge of the handle.
i Depending on the vehicle's equipment,
there may be an open stowage space above
the stowage compartment. Luggage nets
Luggage nets are located:
R in the front-passenger footwell
R on the back of the driver's and front-
passenger seat
R on the left and right-hand side in the luggage
compartment 290
Stowage areasStowing and features
Page 294 of 369
Observe the loading guidelines (Y
page 288)
and the safety notes regarding stowage spaces
(Y page 288). Folding backrest on the front-
passenger seat
G
WARNING
If the backrest of the co-driver's seat is folded forward, passengers in the rear compartment
could collide with parts of the seat mecha-
nism, particularly in the event of an accident,
heavy braking or sudden changes of direction.
There is a risk of injury.
If another person is travelling in the vehicle
when the backrest of the co-driver's seat is
folded forward, this person must sit on the
rear seat behind the driver.
The backrest of the front-passenger seat can be
folded forwards to increase the luggage com-
partment capacity.
Once you no longer need the backrest on the
front-passenger side to be used as a load sur-
face, fold the backrest back into place. X
To fold forward: gently push the backrest
back.
X Pull release handle :and fold the backrest
fully onto the seat cushion until it engages.
X To fold back: gently push the backrest down
and pull release handle :.
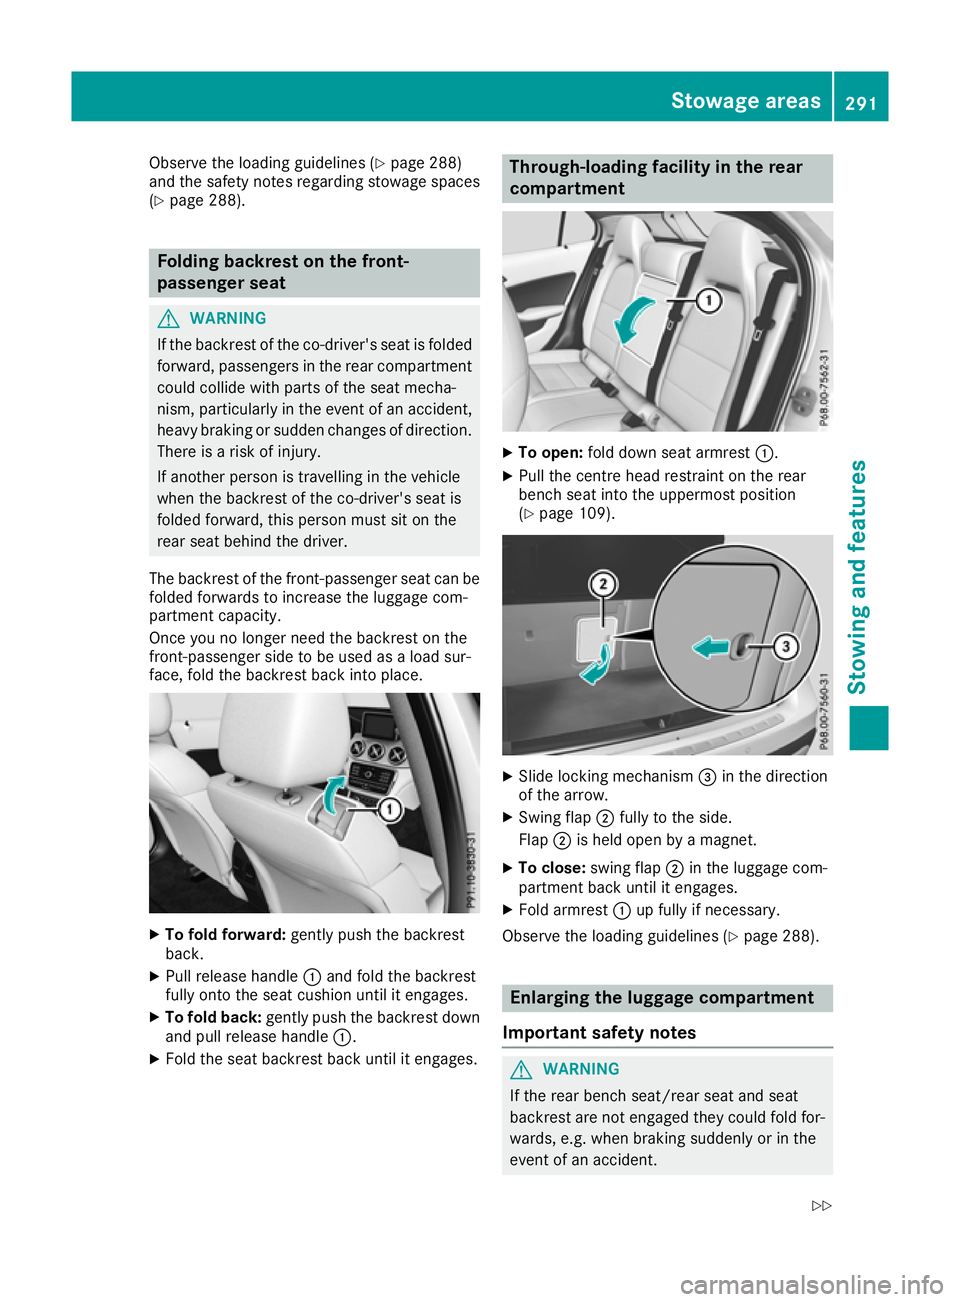
X Fold the seat backrest back until it engages. Through-loading facility in the rear
compartment
X
To open: fold down seat armrest :.
X Pull the centre head restraint on the rear
bench seat into the uppermost position
(Y page 109). X
Slide locking mechanism =in the direction
of the arrow.
X Swing flap ;fully to the side.
Flap ;is held open by a magnet.
X To close: swing flap ;in the luggage com-
partment back until it engages.
X Fold armrest :up fully if necessary.
Observe the loading guidelines (Y page 288). Enlarging the luggage compartment
Important safety notes G
WARNING
If the rear bench seat/rear seat and seat
backrest are not engaged they could fold for- wards, e.g. when braking suddenly or in the
event of an accident. Stowage areas
291Stowing and features
Z
Page 296 of 369
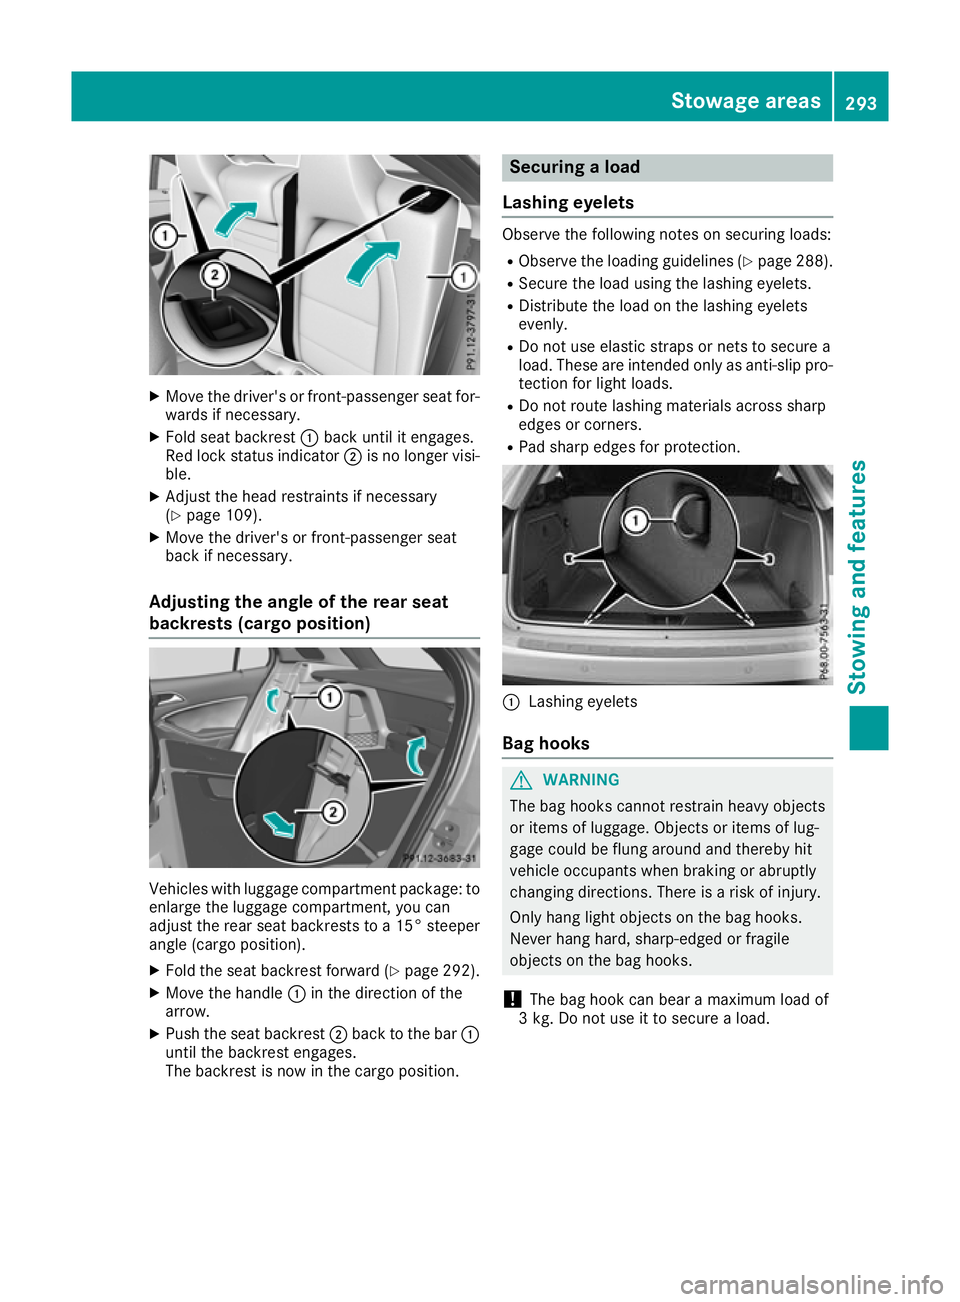
X
Move the driver's or front-passenger seat for-
wards if necessary.
X Fold seat backrest :back until it engages.
Red lock status indicator ;is no longer visi-
ble.
X Adjust the head restraints if necessary
(Y page 109).
X Move the driver's or front-passenger seat
back if necessary.
Adjusting the angle of the rear seat
backrests (cargo position) Vehicles with luggage compartment package: to
enlarge the luggage compartment, you can
adjust the rear seat backrests to a 15° steeper
angle (cargo position).
X Fold the seat backrest forward (Y page 292).
X Move the handle :in the direction of the
arrow.
X Push the seat backrest ;back to the bar :
until the backrest engages.
The backrest is now in the cargo position. Securing a load
Lashing eyelets Observe the following notes on securing loads:
R Observe the loading guidelines (Y page 288).
R Secure the load using the lashing eyelets.
R Distribute the load on the lashing eyelets
evenly.
R Do not use elastic straps or nets to secure a
load. These are intended only as anti-slip pro-
tection for light loads.
R Do not route lashing materials across sharp
edges or corners.
R Pad sharp edges for protection. :
Lashing eyelets
Bag hooks G
WARNING
The bag hooks cannot restrain heavy objects
or items of luggage. Objects or items of lug-
gage could be flung around and thereby hit
vehicle occupants when braking or abruptly
changing directions. There is a risk of injury.
Only hang light objects on the bag hooks.
Never hang hard, sharp-edged or fragile
objects on the bag hooks.
! The bag hook can bear a maximum load of
3 kg. Do not use it to secure a load. Stowage areas
293Stowing and features Z
Page 297 of 369
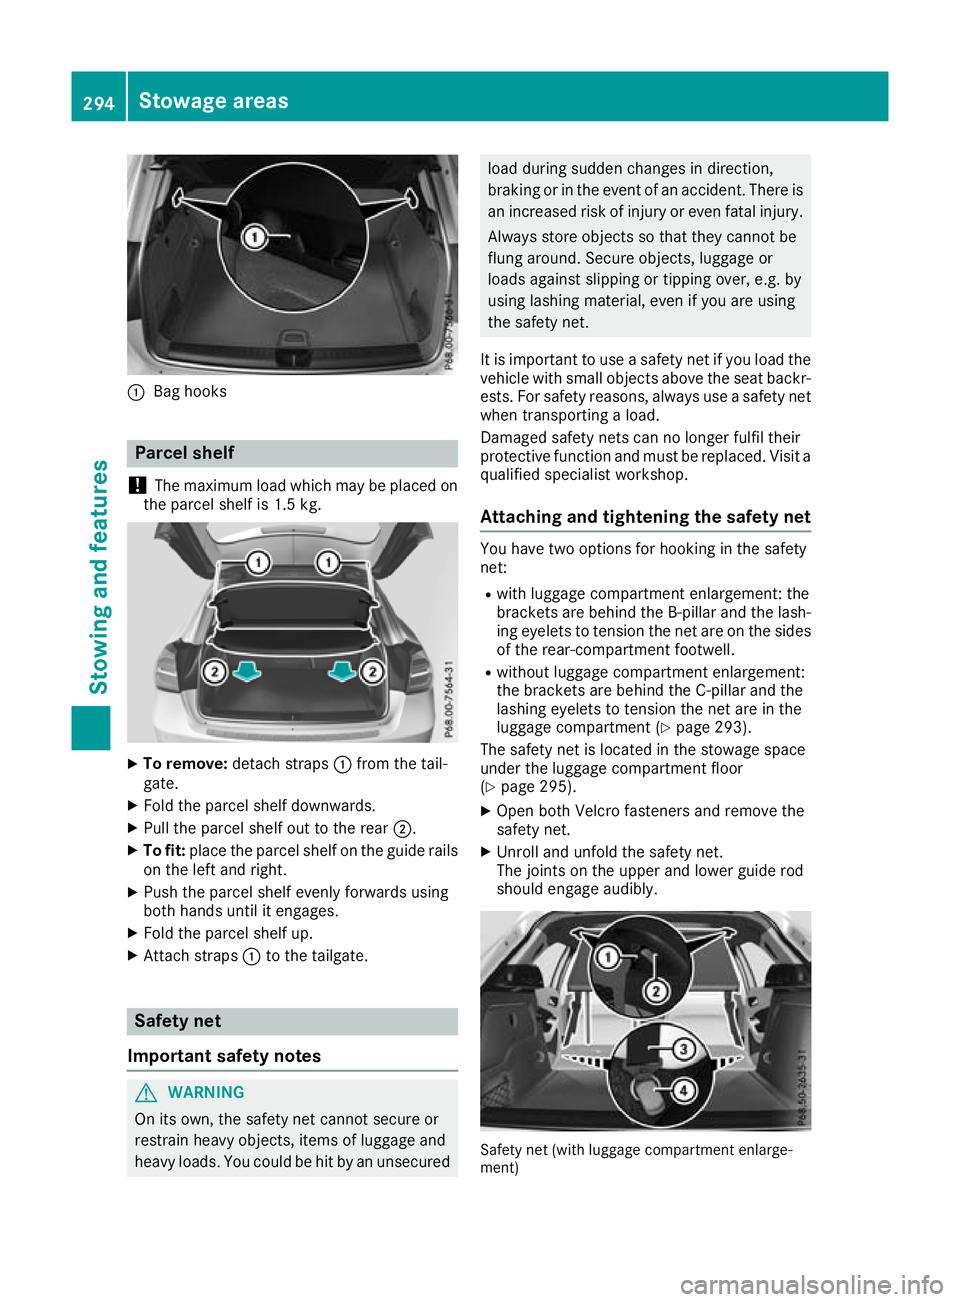
:
Bag hooks Parcel shelf
! The maximum load which may be placed on
the parcel shelf is 1.5 kg. X
To remove: detach straps :from the tail-
gate.
X Fold the parcel shelf downwards.
X Pull the parcel shelf out to the rear ;.
X To fit: place the parcel shelf on the guide rails
on the left and right.
X Push the parcel shelf evenly forwards using
both hands until it engages.
X Fold the parcel shelf up.
X Attach straps :to the tailgate. Safety net
Important safety notes G
WARNING
On its own, the safety net cannot secure or
restrain heavy objects, items of luggage and
heavy loads. You could be hit by an unsecured load during sudden changes in direction,
braking or in the event of an accident. There is
an increased risk of injury or even fatal injury.
Always store objects so that they cannot be
flung around. Secure objects, luggage or
loads against slipping or tipping over, e.g. by
using lashing material, even if you are using
the safety net.
It is important to use a safety net if you load the
vehicle with small objects above the seat backr- ests. For safety reasons, always use a safety netwhen transporting a load.
Damaged safety nets can no longer fulfil their
protective function and must be replaced. Visit a
qualified specialist workshop.
Attaching and tightening the safety net You have two options for hooking in the safety
net:
R with luggage compartment enlargement: the
brackets are behind the B‑ pillar and the lash-
ing eyelets to tension the net are on the sides of the rear-compartment footwell.
R without luggage compartment enlargement:
the brackets are behind the C-pillar and the
lashing eyelets to tension the net are in the
luggage compartment (Y page 293).
The safety net is located in the stowage space
under the luggage compartment floor
(Y page 295).
X Open both Velcro fasteners and remove the
safety net.
X Unroll and unfold the safety net.
The joints on the upper and lower guide rod
should engage audibly. Safety net (with luggage compartment enlarge-
ment) 294
Stowage areasStowing and features
Page 298 of 369
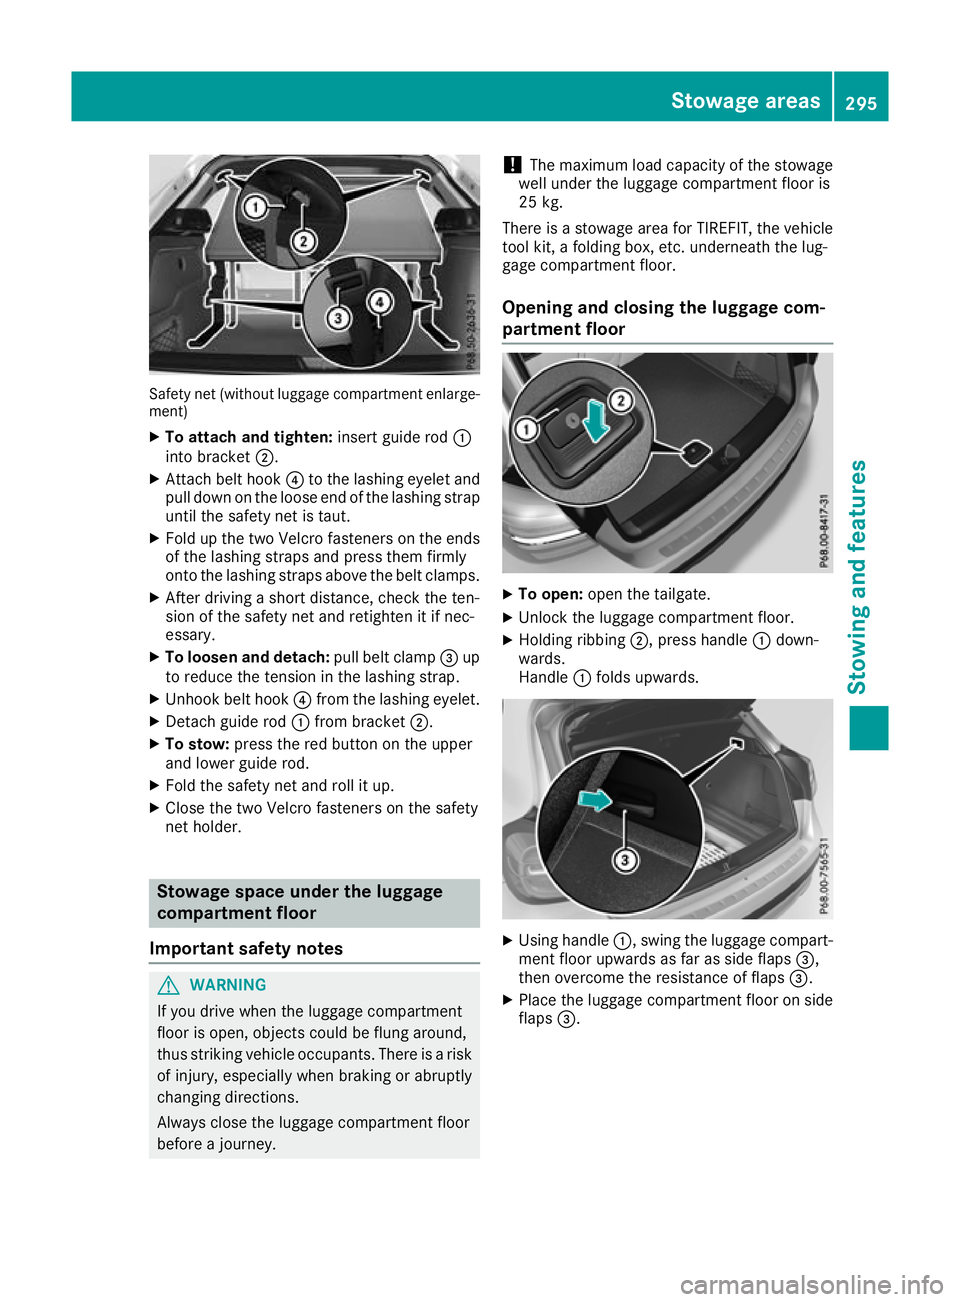
Safety net (without luggage compartment enlarge-
ment)
X To attach and tighten: insert guide rod:
into bracket ;.
X Attach belt hook ?to the lashing eyelet and
pull down on the loose end of the lashing strap until the safety net is taut.
X Fold up the two Velcro fasteners on the ends
of the lashing straps and press them firmly
onto the lashing straps above the belt clamps.
X After driving a short distance, check the ten-
sion of the safety net and retighten it if nec-
essary.
X To loosen and detach: pull belt clamp=up
to reduce the tension in the lashing strap.
X Unhook belt hook ?from the lashing eyelet.
X Detach guide rod :from bracket ;.
X To stow: press the red button on the upper
and lower guide rod.
X Fold the safety net and roll it up.
X Close the two Velcro fasteners on the safety
net holder. Stowage space under the luggage
compartment floor
Important safety notes G
WARNING
If you drive when the luggage compartment
floor is open, objects could be flung around,
thus striking vehicle occupants. There is a risk of injury, especially when braking or abruptly
changing directions.
Always close the luggage compartment floor
before a journey. !
The maximum load capacity of the stowage
well under the luggage compartment floor is
25 kg.
There is a stowage area for TIREFIT, the vehicle tool kit, a folding box, etc. underneath the lug-
gage compartment floor.
Opening and closing the luggage com-
partment floor X
To open: open the tailgate.
X Unlock the luggage compartment floor.
X Holding ribbing ;, press handle :down-
wards.
Handle :folds upwards. X
Using handle :, swing the luggage compart-
ment floor upwards as far as side flaps =,
then overcome the resistance of flaps =.
X Place the luggage compartment floor on side
flaps =. Stowage areas
295Stowing and features Z