2017 MERCEDES-BENZ GLA SUV dimensions
[x] Cancel search: dimensionsPage 100 of 369
Opening
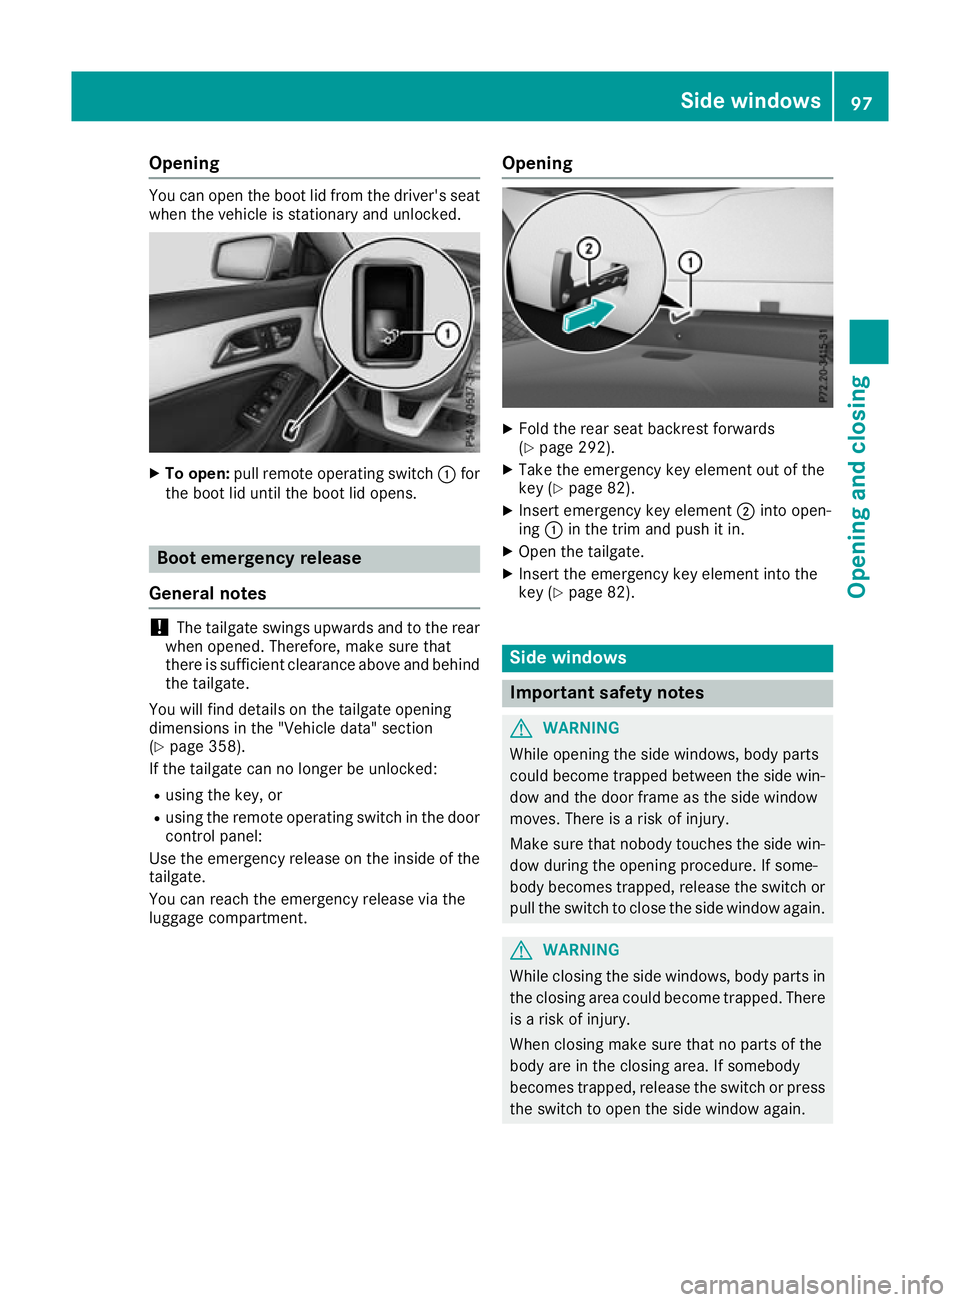
You can open the boot lid from the driver's seat
when the vehicle is stationary and unlocked. X
To open: pull remote operating switch :for
the boot lid until the boot lid opens. Boot emergency release
General notes !
The tailgate swings upwards and to the rear
when opened. Therefore, make sure that
there is sufficient clearance above and behind
the tailgate.
You will find details on the tailgate opening
dimensions in the "Vehicle data" section
(Y page 358).
If the tailgate can no longer be unlocked:
R using the key, or
R using the remote operating switch in the door
control panel:
Use the emergency release on the inside of the tailgate.
You can reach the emergency release via the
luggage compartment. Opening X
Fold the rear seat backrest forwards
(Y page 292).
X Take the emergency key element out of the
key (Y page 82).
X Insert emergency key element ;into open-
ing :in the trim and push it in.
X Open the tailgate.
X Insert the emergency key element into the
key (Y page 82). Side windows
Important safety notes
G
WARNING
While opening the side windows, body parts
could become trapped between the side win- dow and the door frame as the side window
moves. There is a risk of injury.
Make sure that nobody touches the side win-
dow during the opening procedure. If some-
body becomes trapped, release the switch or pull the switch to close the side window again. G
WARNING
While closing the side windows, body parts in the closing area could become trapped. There is a risk of injury.
When closing make sure that no parts of the
body are in the closing area. If somebody
becomes trapped, release the switch or press
the switch to open the side window again. Side windows
97Opening and closing Z
Page 216 of 369
Only release the ball coupling if the pivoting
range is unobstructed. Always make sure that the ball coupling engages when folding in.
When reversing the towing vehicle, make sure
there is nobody between the trailer and the vehi- cle.
Couple and uncouple the trailer carefully. If youdo not couple the trailer to the towing vehicle
correctly, the trailer could become detached.
When towing a trailer, your vehicle's handling
characteristics will be different to when driving
without a trailer.
The vehicle/trailer combination:
R is heavier
R is restricted in its acceleration and gradient-
climbing capability
R has an increased braking distance
R is affected more by strong crosswinds
R demands more sensitive steering
R has a larger turning circle
This can impair the vehicle's handling charac-
teristics. Adapt your driving style accordingly.
Maintain a safe distance. Drive carefully.
When towing a trailer, always adjust your speed to the current road and weather conditions. Do
not exceed the maximum permissible speed for
your vehicle/trailer combination. Notes on towing a trailer
General notes Trailer towing is not possible on the following
models:
R Mercedes‑AMG GLA 45 4MATIC
Items of optional equipment may influence the
effective trailer loads for the vehicle. Please find the applicable trailer loads for your vehicle on
the registration certificate.
When towing a trailer, set the tyre pressure on
the rear axle of the towing vehicle for a maxi-
mum load. Further information on the tyre pres-
sure table in the fuel filler flap (Y page 337).
Please note that when towing a trailer, the fol-
lowing driving systems have limited availability
or are not available at all:
R Parking Assist PARKTRONIC (Y page 193)
R Blind Spot Assist (Y page 209) The height of the ball coupling changes with the
load of the vehicle. If necessary, use a trailer
with a height-adjustable drawbar.
You will find fitting dimensions and loads under"Technical data" (Y page 359).
Driving tips Observe the information on ESP
®
trailer stabili-
sation (Y page 75).
The maximum permissible speed for vehicle/
trailer combinations depends on the type of
trailer. Before beginning the journey, check the
trailer's documents to see what the maximum
permitted speed is. Observe the legally prescri-
bed maximum speed in the relevant country.
For certain Mercedes-Benz vehicles, the maxi-
mum permissible rear axle load is increased
when towing a trailer. See the "Technical data"
section to find out whether this applies to your
vehicle. If when towing, the rear axle load is
increased even partly, the vehicle/trailer com-
bination may not exceed a maximum speed of
100 km/h for reasons concerning the operating
permit. This also applies in countries in which
the permissible maximum speed for vehicle/
trailer combinations is above 100 km/h.
When towing a trailer, your vehicle's handling
characteristics will be different to when driving
without a trailer and the vehicle will consume
more fuel.
Shift to a lower gear in good time on long and
steep downhill gradients. For vehicles with auto-
matic transmission, you need to have selected
manual drive program M(Y page 161).
This also applies if you have activated cruise
control, the speed limiter or Distance Pilot
DISTRONIC.
This will use the braking effect of the engine, so less braking will be required to maintain the
vehicle speed. This relieves the load on the
brake system and prevents the brakes from
overheating and wearing too quickly. If you need
additional braking, depress the brake pedal
repeatedly rather than continuously.
Briefly depressing the accelerator pedal on
downhill gradients while the manual drive pro-
gram Mis temporarily activated (vehicles with
automatic transmission): the automatic trans-
mission may switch back to the last active auto-
matic drive program Eor S. The automatic trans-
mission may shift to a higher gear. This can
reduce the engine's braking effect. Towing a trailer
213Driving and parking Z
Page 346 of 369
the wheels or tyres have different dimensions.
The wheel brakes or suspension components may also be damaged. There is a risk of acci-
dent.
Interchange front and rear wheels only if the
wheels and tyres are of the same dimensions.
! On vehicles fitted with a tyre pressure mon-
itor, electronic components are located in the wheel.
Tyre-fitting tools should not be applied in thearea of the valve, as this could damage the
electronic components.
Only have tyres changed at a qualified spe-
cialist workshop.
Interchanging the front and rear wheels of dif-
fering dimensions can render the general oper-
ating permit invalid.
Observe the instructions and safety notes in the "Changing a wheel" section (Y page 342).
The wear patterns on the front and rear tyres
differ depending on the operating conditions.
Interchange the wheels before a clear wear pat-
tern has formed on the tyres. Front tyres typi-
cally wear more on the shoulders, while rear
tyres wear more in the centre.
On vehicles that have front and rear wheels of
the same size, you can interchange the wheels
every 5,000 to 10,000 km depending on the
degree of tyre wear. Ensure the direction of
rotation is maintained.
Clean the contact surfaces of the wheel and the
brake disc thoroughly every time a wheel is
interchanged. Check the tyre pressure and, if
necessary, restart the tyre pressure loss warn-
ing system or the tyre pressure monitor. Direction of rotation
Tyres with a specified direction of rotation have additional benefits, e.g. if there is a risk of aqua-
planing. These advantages can only be gained if the tyres are fitted corresponding to the direc-
tion of rotation.
An arrow on the sidewall of the tyre indicates its correct direction of rotation. Storing wheels
Store wheels in a cool, dry and preferably dark
place if they are not being used. Protect the
tyres against oil, grease, petrol and diesel. Fitting a wheel
Preparing the vehicle X
Stop the vehicle on solid, non-slippery and
level ground.
X Apply the electric parking brake manually.
X Move the front wheels to the straight-ahead
position.
X Vehicles with manual transmission: fully
depress the clutch pedal and engage first or
reverse gear.
X Vehicles with automatic transmission:
shift the transmission to position
j.
X Switch off the engine.
X Vehicles without KEYLESS-GO: remove the
key from the ignition lock.
X Vehicles with KEYLESS-GO start-function
or KEYLESS-GO: open the driver's door.
The vehicle electronics are now in position
u. This is the same as “key removed”.
X Vehicles with KEYLESS-GO start function
or KEYLESS-GO: remove the Start/Stop but-
ton from the ignition lock (Y page 144).
X If included in the vehicle equipment, remove
the tyre-change tool kit from the vehicle.
X Additionally secure the vehicle against rolling
away (Y page 166).
i Apart from some country-specific variants,
vehicles are not equipped with a tyre-change
tool kit. Some tools for changing a wheel are
specific to the vehicle. For more information
on which tools are required to perform a
wheel change on your vehicle, consult a quali-
fied specialist workshop.
Necessary tyre-changing tools may include,
for example:
R Jack
R Wheel chock
R Wheel wrench Changing a
wheel
343Wheels an d tyres Z
Page 351 of 369
do not feature run-flat characteristics, e.g. win-
ter tyres. A TIREFIT kit can be obtained from a
qualified specialist workshop. Emergency spare wheel
Important safety notes
G
WARNING
The wheel/tyre dimensions and the tyre type of the spare wheel/emergency spare wheel
and the wheel to be replaced may differ. Fit-
ting a spare wheel/emergency spare wheel
may severely impair the driving characteris-
tics. There is a risk of accident.
To prevent hazardous situations:
R Adapt your driving style accordingly and
drive carefully.
R Never fit more than one spare wheel/emer-
gency spare wheel if the dimensions are
different to those of the wheel being
replaced.
R Only use a spare wheel/emergency spare
wheel briefly if the dimensions are different to those of the wheel being replaced.
R Do not switch off ESP ®
.
R Have the spare wheel/emergency spare
wheel in question replaced at the nearest
qualified specialist workshop. Make sure
that the wheel/tyre dimensions and tyre
type are correct.
When using an emergency spare wheel or spare wheel of a different size, you must not exceed
the vehicle's maximum design speed of
80 km/h.
You should regularly check the pressure of all
your tyres, including the emergency spare
wheel, particularly prior to long trips, and cor-
rect the pressure as necessary (Y page 337).
The value on the wheel is valid.
Snow chains must not be fitted to emergency
spare wheels. General notes
You can ask for information regarding permitted emergency spare wheels at a Mercedes-Benz
Service Centre.
An emergency spare wheel may also be fitted
against the direction of rotation. Observe the
time restriction on use as well as the speed lim- itation specified on the emergency spare wheel.
Replace the tyres after six years at the latest,
regardless of wear. This also applies to the
emergency spare wheel.
If you are driving with the emergency spare
wheel fitted, the tyre pressure loss warning sys-
tem or the tyre pressure monitor cannot func-
tion reliably. Restart the tyre pressure loss warn- ing system or tyre pressure monitor only once
the defective wheel has been replaced with a
new wheel.
Vehicles with tyre pressure monitor: after an
emergency spare wheel has been fitted, the sys-
tem may still display the tyre pressure of the
removed wheel for a few minutes. The value dis- played for the position where the emergency
spare wheel is fitted is not the same as the cur- rent tyre pressure of the emergency spare
wheel. Removing the emergency spare wheel
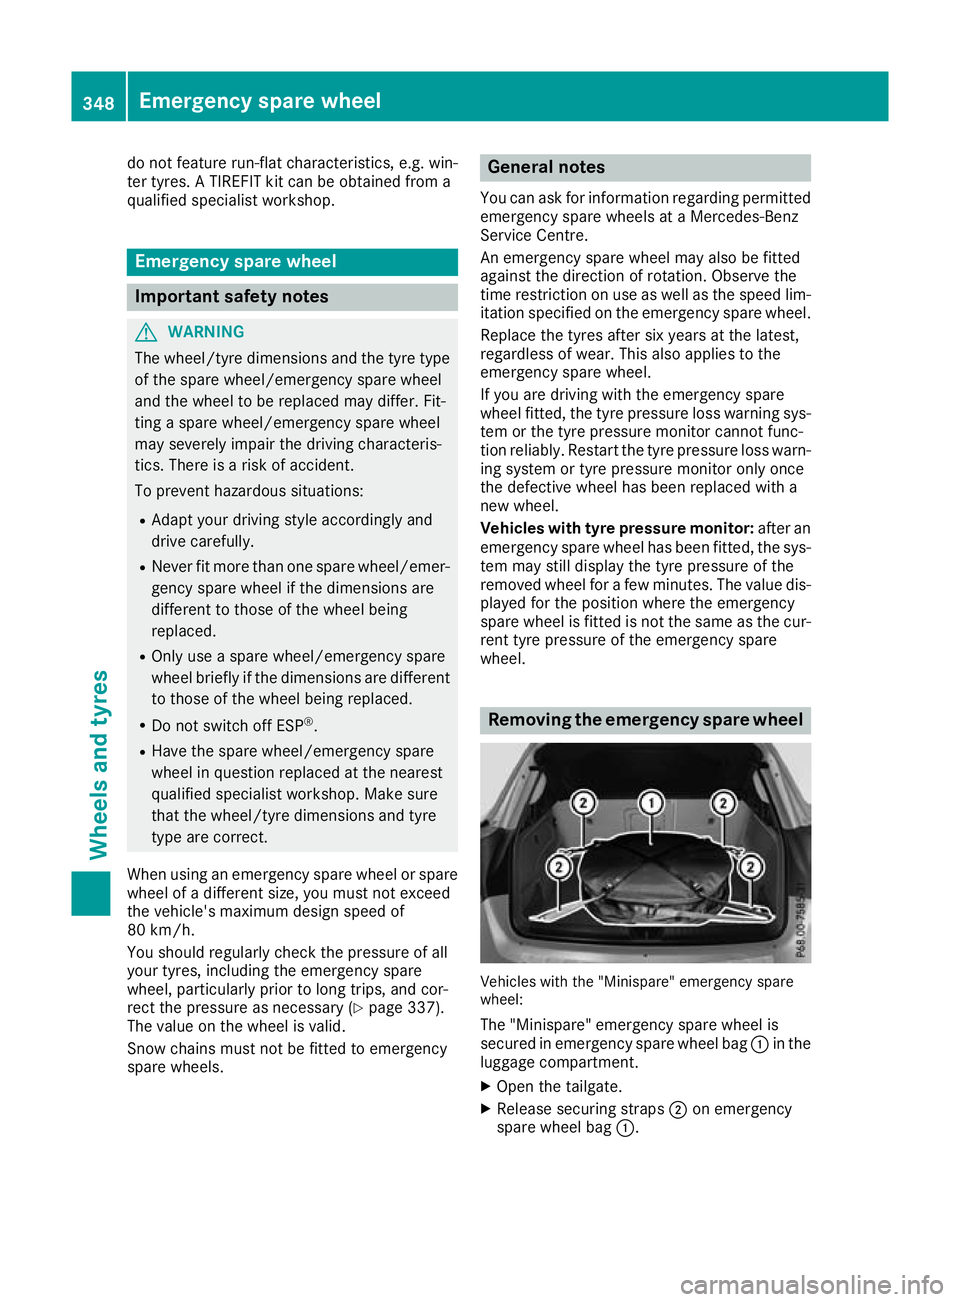
Vehicles with the "Minispare" emergency spare
wheel:
The "Minispare" emergency spare wheel is
secured in emergency spare wheel bag :in the
luggage compartment.
X Open the tailgate.
X Release securing straps ;on emergency
spare wheel bag :.348
Emergency spare wheelWheels and tyres
Page 361 of 369
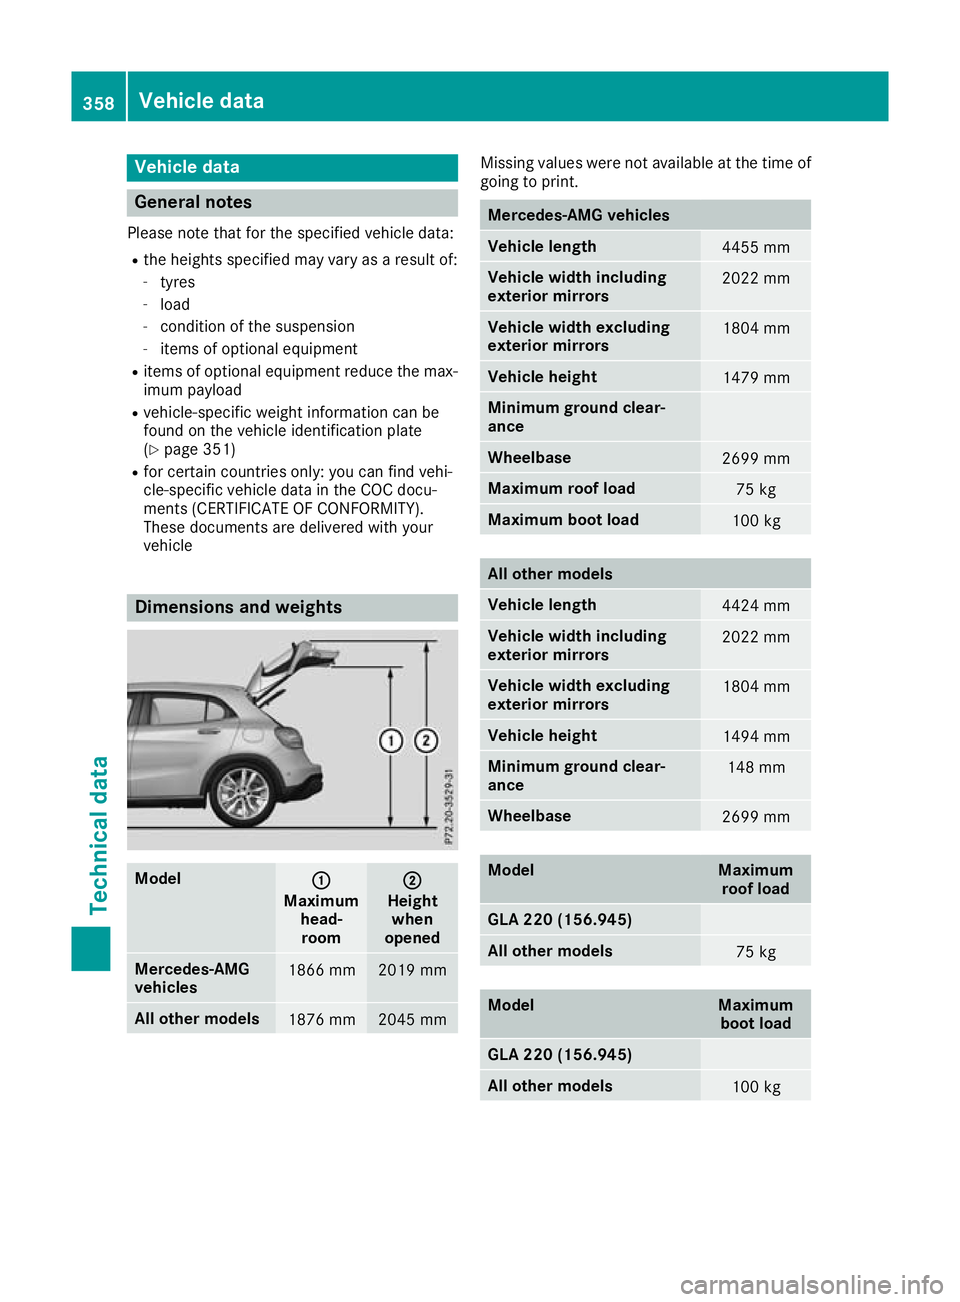
Vehicle data
General notes
Please note that for the specified vehicle data: R the heights specified may vary as a result of:
- tyres
- load
- condition of the suspension
- items of optional equipment
R items of optional equipment reduce the max-
imum payload
R vehicle-specific weight information can be
found on the vehicle identification plate
(Y page 351)
R for certain countries only: you can find vehi-
cle-specific vehicle data in the COC docu-
ments (CERTIFICATE OF CONFORMITY).
These documents are delivered with your
vehicle Dimensions and weights
Model
: :
Maximum head-room ;
;
Height when
opened Mercedes-AMG
vehicles
1866 mm 2019 mm
All other models
1876 mm 2045 mm Missing values were not available at the time of
going to print. Mercedes-AMG vehicles
Vehicle length
4455 mm
Vehicle width including
exterior mirrors
2022 mm
Vehicle width excluding
exterior mirrors
1804 mm
Vehicle height
1479 mm
Minimum ground clear-
ance
Wheelbase
2699 mm
Maximum roof load
75 kg
Maximum boot load
100 kg
All other models
Vehicle length
4424 mm
Vehicle width including
exterior mirrors
2022 mm
Vehicle width excluding
exterior mirrors
1804 mm
Vehicle height
1494 mm
Minimum ground clear-
ance
148 mm
Wheelbase
2699 mm
Model Maximum
roof load GLA 220 (156.945)
All other models
75 kg
Model Maximum
boot load GLA 220 (156.945)
All other models
100 kg358
Vehicle dataTechnical data