2017 MERCEDES-BENZ GLA SUV jump start
[x] Cancel search: jump startPage 6 of 369
Stowage areas ..................................... 288
Features .............................................. 296 Maintenance and care
......................302
Engine compartment ........................... 302
ASSYST PLUS ...................................... 306
Care ..................................................... 308 Breakdown assistance
.....................315
Where will I find...? .............................. 315
Flat tyre ............................................... 317
Battery (vehicle) .................................. 322
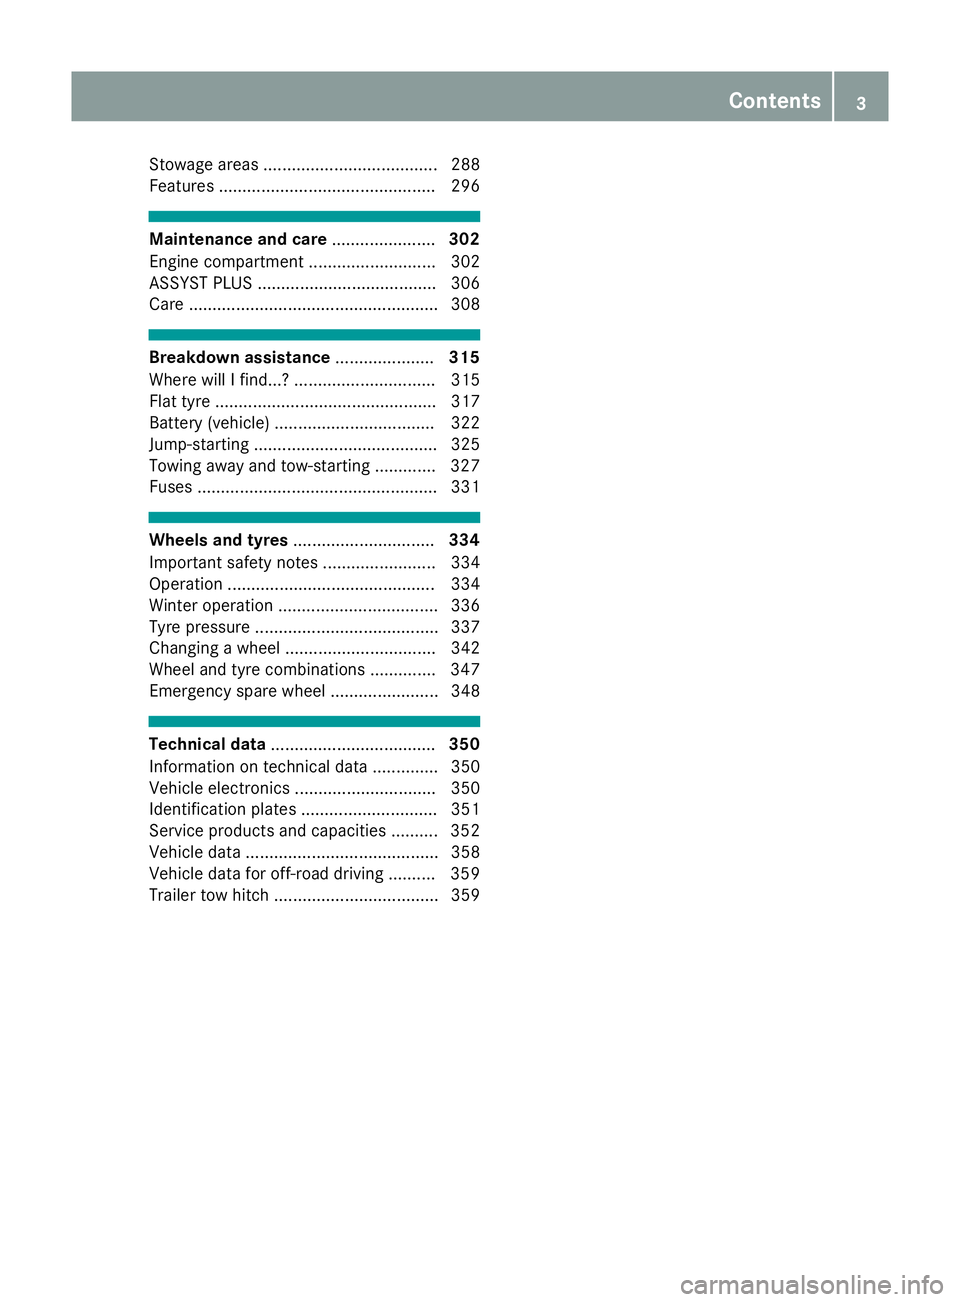
Jump-starting ....................................... 325
Towing away and tow-starting ............. 327
Fuses ................................................... 331 Wheels and tyres
.............................. 334
Important safety notes ........................ 334
Operation ............................................ 334
Winter operation .................................. 336
Tyre pressure ....................................... 337
Changing a wheel ................................ 342
Wheel and tyre combinations .............. 347
Emergency spare wheel ....................... 348 Technical data
................................... 350
Information on technical data .............. 350
Vehicle electronics .............................. 350
Identification plates ............................. 351
Service products and capacities .......... 352
Vehicle data ......................................... 358
Vehicle data for off-road driving .......... 359
Trailer tow hitch ................................... 359 Contents
3
Page 9 of 369
Automatic transmission emer-
gency running mode
.........................163
Auxiliary heating
Activating/deactivating ................. 138
Activating/deactivating (on the
centre console ).............................. 138
Remote control .............................. 138
Setting ........................................... 230
Auxiliary heating/ventilation
Display message ............................ 262
Important safety notes .................. 137
Problem (display message) ............ 141
Setting the departure time ............. 139
Auxiliary ventilation
Activating/deactivating ................. 138
Activating/deactivating (on the
centre console ).............................. 138
Remote control .............................. 138
Axle load, permissible (trailer tow-
ing) ...................................................... 359 B
Back button ....................................... 278
Bag hook ............................................ 293
Ball coupling
Folding in ....................................... 215
Folding in/out ................................ 214
Folding out ..................................... 214
BAS (Brake Assist System) ................. 69
Basic settings
see Settings
Battery (key)
Checking .......................................... 82
Important safety notes .................... 82
Replacing ......................................... 82
Battery (vehicle)
Charging ........................................ 324
Display message ............................ 250
Important safety notes .................. 322
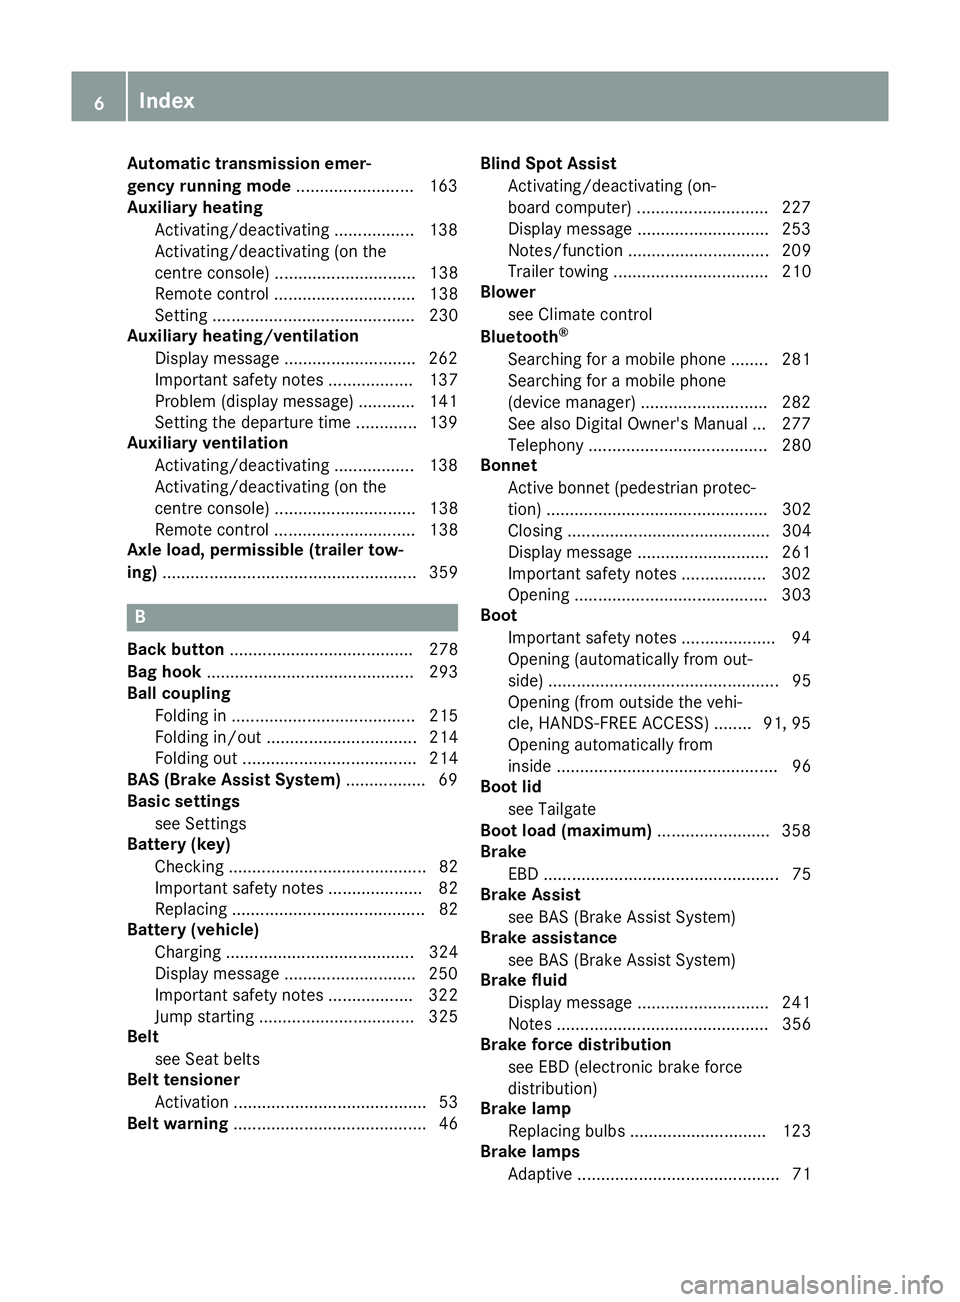
Jump starting ................................. 325
Belt
see Seat belts
Belt tensioner
Activation ......................................... 53
Belt warning ......................................... 46 Blind Spot Assist
Activating/deactivating (on-
board computer) ............................ 227
Display message ............................ 253
Notes/function .............................. 209
Trailer towing ................................. 210
Blower
see Climate control
Bluetooth ®
Searching for a mobile phone ........ 281
Searching for a mobile phone
(device manager) ........................... 282
See also Digital Owner's Manua l... 277
Telephony ...................................... 280
Bonnet
Active bonnet (pedestrian protec-tion) ............................................... 302
Closing ........................................... 304
Display message ............................ 261
Important safety notes .................. 302
Opening ......................................... 303
Boot
Important safety notes .................... 94
Opening (automatically from out-
side) ................................................. 95
Opening (from outside the vehi-
cle, HANDS-FREE ACCESS) ........ 91, 95
Opening automatically from
inside ............................................... 96
Boot lid
see Tailgate
Boot load (maximum) ........................ 358
Brake
EBD .................................................. 75
Brake Assist
see BAS (Brake Assist System)
Brake assistance
see BAS (Brake Assist System)
Brake fluid
Display message ............................ 241
Notes ............................................. 356
Brake force distribution
see EBD (electronic brake force
distribution)
Brake lamp
Replacing bulb s............................. 123
Brake lamps
Adaptive ........................................... 71 6
Index
Page 14 of 369
Emergency key
Unlocking the driver's door .............. 88
Emergency key element
Function/notes ................................ 81
Inserting .......................................... 82
Locking vehicle ................................ 88
Removing ........................................ .82
Emergency release
Driver's door .................................... 88
Emergency spare wheel
General notes ................................ 348
Important safety notes .................. 348
Removing ...................................... .348
Emergency unlocking
Vehicle ............................................. 88
Engine
Display message ............................ 249
ECO start/stop function ................ 148
Engine number ............................... 352
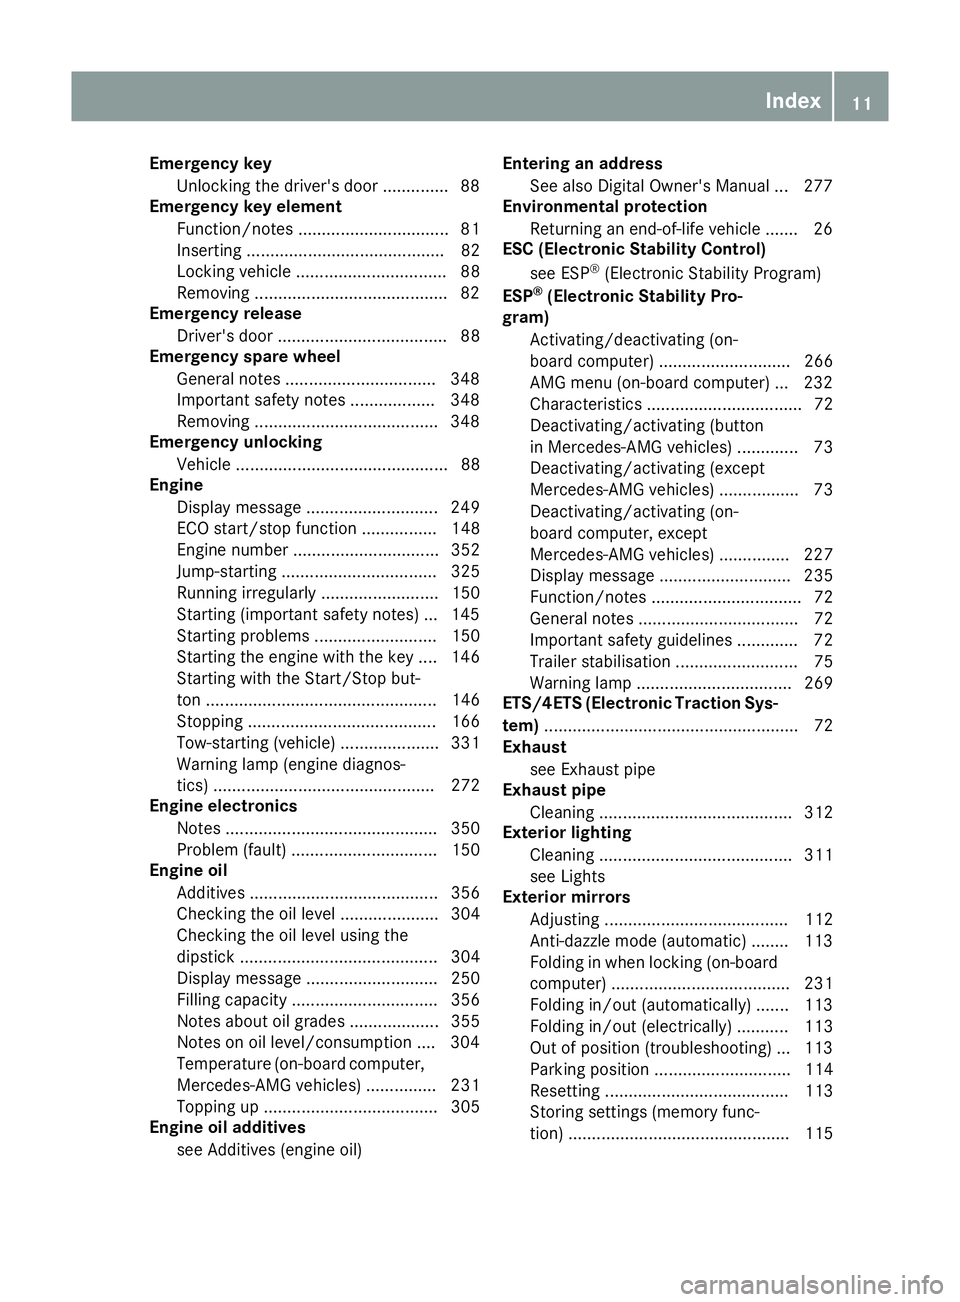
Jump-starting ................................. 325
Running irregularl y......................... 150
Starting (important safety notes )... 145
Starting problems .......................... 150
Starting the engine with the key .... 146
Starting with the Start/Stop but-
ton ................................................. 146
Stopping ........................................ 166
Tow-starting (vehicle) ..................... 331
Warning lamp (engine diagnos-
tics) ............................................... 272
Engine electronics
Notes ............................................. 350
Problem (fault) ............................... 150
Engine oil
Additives ........................................ 356
Checking the oil level ..................... 304
Checking the oil level using the
dipstick .......................................... 304
Display message ............................ 250
Filling capacity ............................... 356
Notes about oil grade s................... 355
Notes on oil level/consumption .... 304
Temperature (on-board computer, Mercedes-AMG vehicles) ............... 231
Topping up ..................................... 305
Engine oil additives
see Additives (engine oil) Entering an address
See also Digital Owner's Manua l... 277
Environmental protection
Returning an end-of-life vehicle ....... 26
ESC (Electronic Stability Control)
see ESP ®
(Electronic Stability Program)
ESP ®
(Electronic Stability Pro-
gram)
Activating/deactivating (on-
board computer) ............................ 266
AMG menu (on-board computer) ... 232
Characteristics ................................. 72
Deactivating/activating (button
in Mercedes-AMG vehicles) ............. 73
Deactivating/activating (except
Mercedes‑ AMG vehicles) ................. 73
Deactivating/activating (on-
board computer, except
Mercedes-AMG vehicles) ............... 227
Display message ............................ 235
Function/note s................................ 72
General notes .................................. 72
Important safety guidelines ............. 72
Trailer stabilisation .......................... 75
Warning lamp ................................. 269
ETS/4ETS (Electronic Traction Sys-
tem) ...................................................... 72
Exhaust
see Exhaust pipe
Exhaust pipe
Cleaning ......................................... 312
Exterior lighting
Cleaning ......................................... 311
see Lights
Exterior mirrors
Adjusting ....................................... 112
Anti-dazzle mode (automatic) ........ 113
Folding in when locking (on-boardcomputer) ...................................... 231
Folding in/out (automatically )....... 113
Folding in/out (electrically) ........... 113
Out of position (troubleshooting) ... 113
Parking position ............................. 114
Resetting ....................................... 113
Storing settings (memory func-
tion) ............................................... 115 Index
11
Page 16 of 369
H
Handling control system see ESP ®
(Electronic Stability Program)
HANDS-FREE ACCESS ................... 91, 95
Hazard warning lamps
Display message ............................ 263
Switching on/off ........................... 118
Head restraints
Adjusting ....................................... 108
Adjusting (manually) ...................... 109
Adjusting (rear) .............................. 109
Fitting/removing (rear) .................. 109
Headlamp flasher .............................. 118
Headlamps
Misting up ...................................... 119
see Automatic headlamp mode
Heating
see Climate control
High-pressure cleaners .................... 309
Hill start assist .................................. 147
HOLD function
Activating ....................................... 187
Activation conditions .................... .186
Deactivating ................................... 187
Display message ............................ 252
Function/notes ............................ .186
Home address
See also Digital Owner's Manual ... 277
Horn ...................................................... 32 I
Ignition key see Key
Ignition lock
see Key positions
Immobiliser .......................................... 76
Indicator and warning lamp
Restraint system ............................ 272
Indicator and warning lamps
Coolant .......................................... 273
Engine diagnostics ......................... 272
SPORT handling mode ................... 270
Indicator lamps
Display message ............................ 246
see Warning and indicator lamps Indicators
see Turn signals
Instrument cluster
Overview .......................................... 34
Settings ......................................... 228
Warning and indicator lamps ........... 34
Instrument cluster lighting .............. 217
Interior lighting
Control .......................................... .120
Overview ........................................ 119
Reading lamp ................................. 119
Interior motion sensor
Deactivating ..................................... 78
Function .......................................... .77
Priming ............................................ 77
Switching off .................................... 77
iPod ®
See also Digital Owner's Manual ... 277
ISOFIX child seat securing system ....57 J
Jack Declaration of conformity ................27
Storage location ............................ 317
Using ............................................. 344
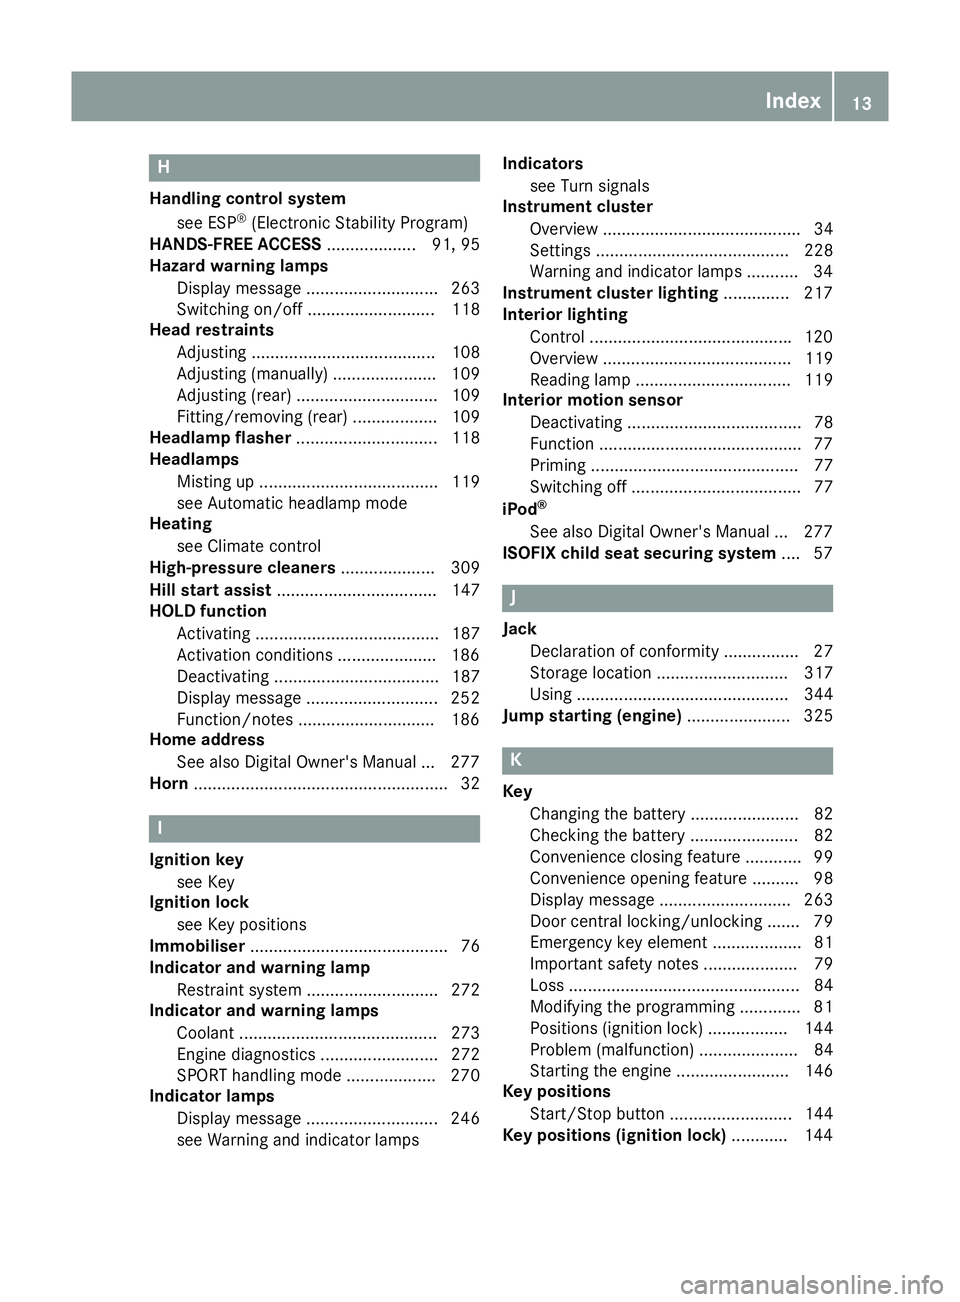
Jump starting (engine) ...................... 325 K
Key Changing the battery ....................... 82
Checking the battery ....................... 82
Convenience closing feature ............ 99
Convenience opening feature .......... 98
Display message ............................ 263
Door central locking/unlocking ....... 79
Emergency key element ................... 81
Important safety notes .................... 79
Loss ................................................. 84
Modifying the programming ............. 81
Positions (ignition lock) ................. 144
Problem (malfunction) ..................... 84
Starting the engine ........................ 146
Key positions
Start/Stop button .......................... 144
Key positions (ignition lock) ............ 144 Index
13
Page 88 of 369
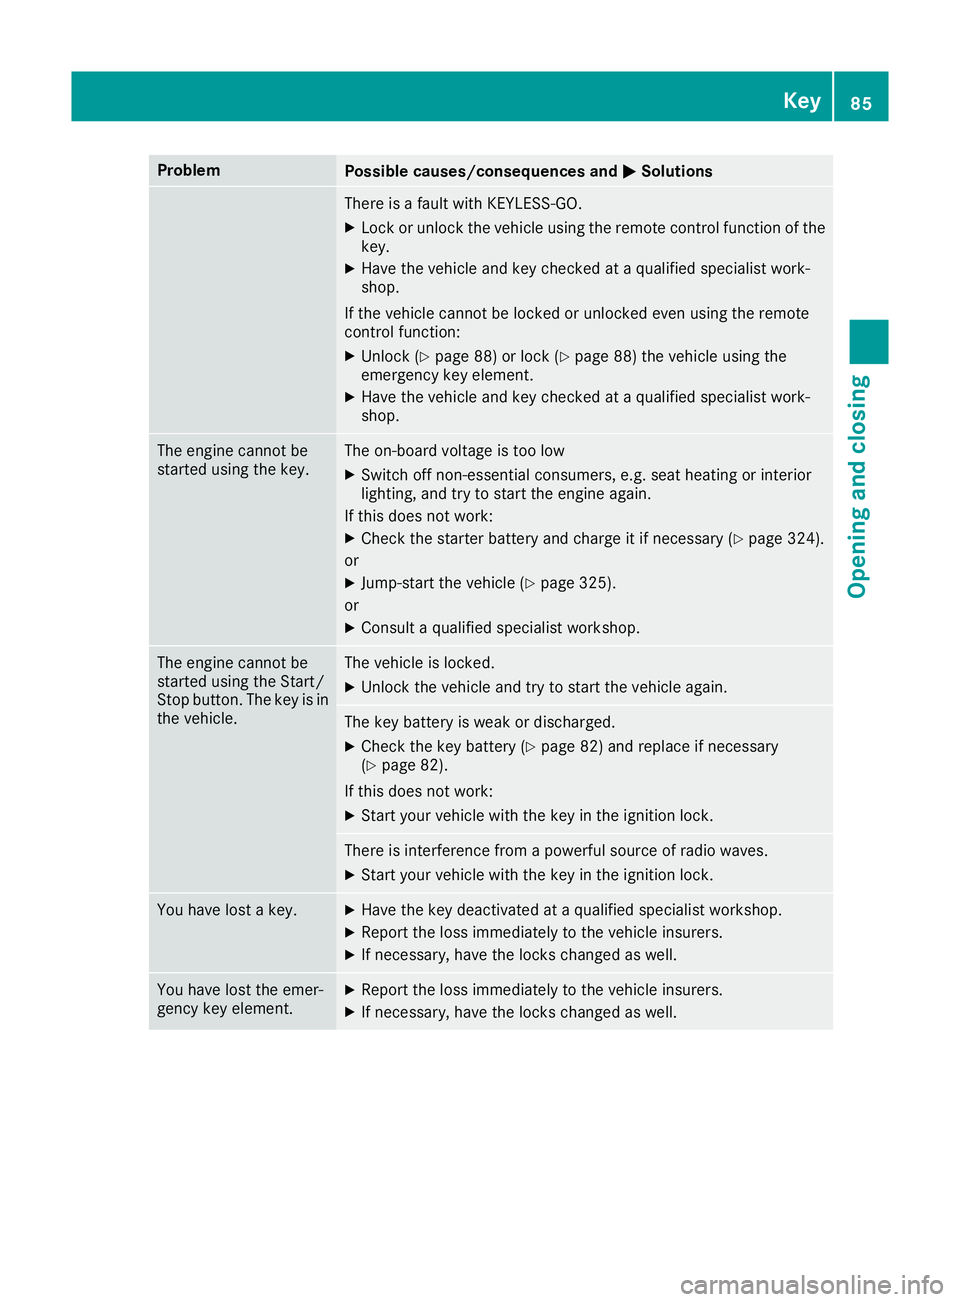
Problem
Possible causes/consequences and
M
MSolutions There is a fault with KEYLESS-GO.
X Lock or unlock the vehicle using the remote control function of the
key.
X Have the vehicle and key checked at a qualified specialist work-
shop.
If the vehicle cannot be locked or unlocked even using the remote
control function: X Unlock (Y page 88) or lock (Y page 88) the vehicle using the
emergency key element.
X Have the vehicle and key checked at a qualified specialist work-
shop. The engine cannot be
started using the key. The on-board voltage is too low
X Switch off non-essential consumers, e.g. seat heating or interior
lighting, and try to start the engine again.
If this does not work:
X Check the starter battery and charge it if necessary (Y page 324).
or
X Jump-start the vehicle (Y page 325).
or
X Consult a qualified specialist workshop. The engine cannot be
started using the Start/
Stop button. The key is in
the vehicle. The vehicle is locked.
X Unlock the vehicle and try to start the vehicle again. The key battery is weak or discharged.
X Check the key battery (Y page 82) and replace if necessary
(Y page 82).
If this does not work: X Start your vehicle with the key in the ignition lock. There is interference from a powerful source of radio waves.
X Start your vehicle with the key in the ignition lock. You have lost a key. X
Have the key deactivated at a qualified specialist workshop.
X Report the loss immediately to the vehicle insurers.
X If necessary, have the locks changed as well. You have lost the emer-
gency key element. X
Report the loss immediately to the vehicle insurers.
X If necessary, have the locks changed as well. Key
85Opening and closing Z
Page 154 of 369
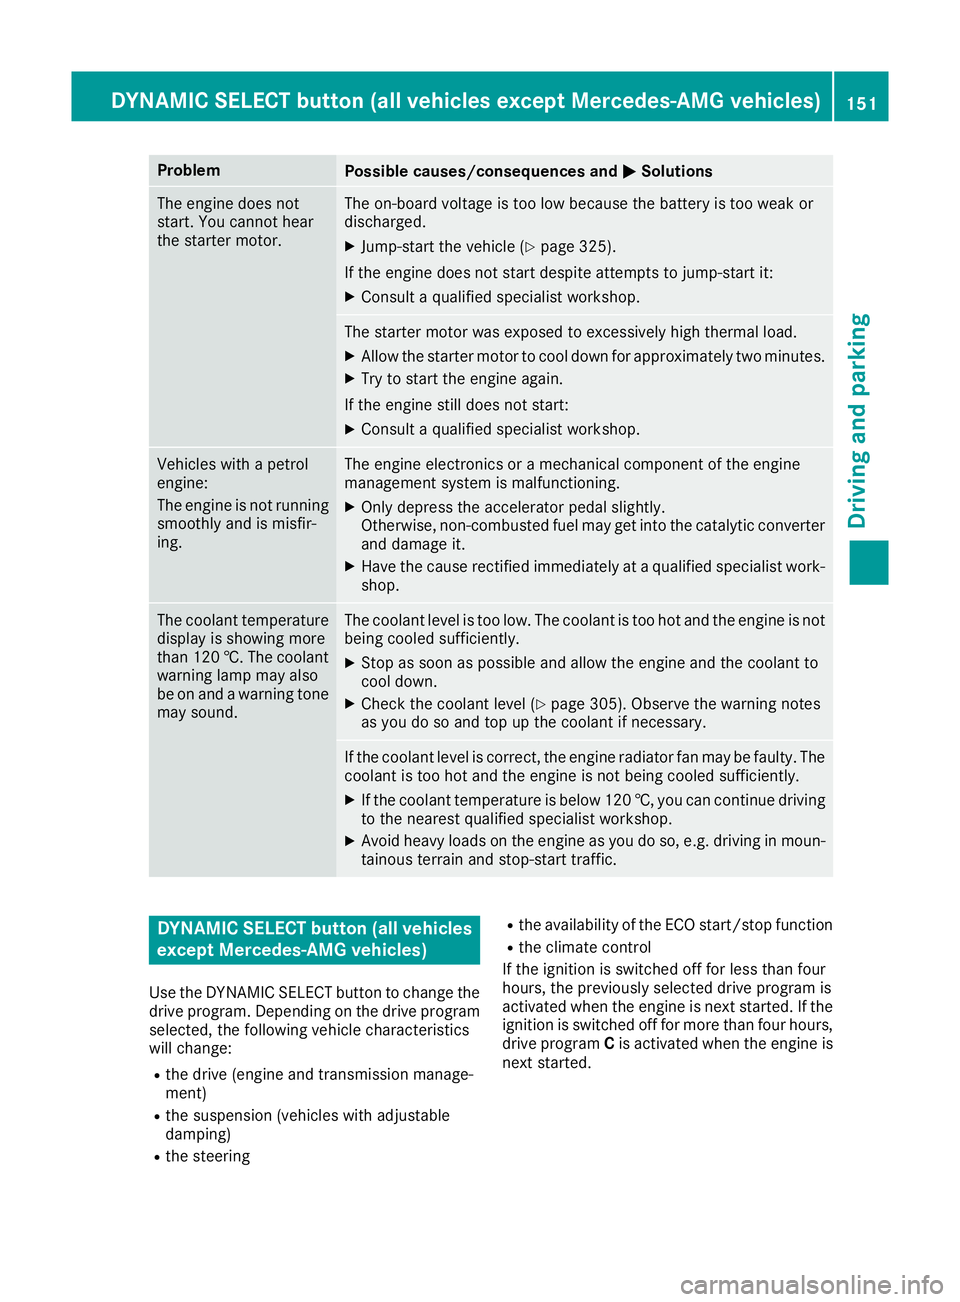
Problem
Possible causes/consequences and
M
MSolutions The engine does not
start. You cannot hear
the starter motor. The on-board voltage is too low because the battery is too weak or
discharged.
X Jump-start the vehicle (Y page 325).
If the engine does not start despite attempts to jump-start it:
X Consult a qualified specialist workshop. The starter motor was exposed to excessively high thermal load.
X Allow the starter motor to cool down for approximately two minutes.
X Try to start the engine again.
If the engine still does not start:
X Consult a qualified specialist workshop. Vehicles with a petrol
engine:
The engine is not running
smoothly and is misfir-
ing. The engine electronics or a mechanical component of the engine
management system is malfunctioning.
X Only depress the accelerator pedal slightly.
Otherwise, non-combusted fuel may get into the catalytic converter
and damage it.
X Have the cause rectified immediately at a qualified specialist work-
shop. The coolant temperature
display is showing more
than 120 †. The coolant warning lamp may also
be on and a warning tone
may sound. The coolant level is too low. The coolant is too hot and the engine is not
being cooled sufficiently.
X Stop as soon as possible and allow the engine and the coolant to
cool down.
X Check the coolant level (Y page 305). Observe the warning notes
as you do so and top up the coolant if necessary. If the coolant level is correct, the engine radiator fan may be faulty. The
coolant is too hot and the engine is not being cooled sufficiently.
X If the coolant temperature is below 120 †, you can continue driving
to the nearest qualified specialist workshop.
X Avoid heavy loads on the engine as you do so, e.g. driving in moun-
tainous terrain and stop-start traffic. DYNAMIC SELECT button (all vehicles
except Mercedes-AMG vehicles)
Use the DYNAMIC SELECT button to change the drive program. Depending on the drive program
selected, the following vehicle characteristics
will change:
R the drive (engine and transmission manage-
ment)
R the suspension (vehicles with adjustable
damping)
R the steering R
the availability of the ECO start/stop function
R the climate control
If the ignition is switched off for less than four
hours, the previously selected drive program is
activated when the engine is next started. If the ignition is switched off for more than four hours,
drive program Cis activated when the engine is
next started. DYNAMIC SELECT button (all vehicles except Mercedes-AMG vehicles)
151Driving and parking Z
Page 325 of 369
X
To reduce the tyre pressure: depress pres-
sure release button :next to pressure
gauge ;.
X When the tyre pressure is correct, unscrew
the filler hose from the valve of the sealed
tyre.
Please note that tyre sealant may leak out
when unscrewing the filler hose.
X Screw the valve cap onto the tyre valve of the
sealed tyre.
X Pull the tyre sealant bottle out of the tyre
inflation compressor.
The filler hose stays on the tyre sealant bottle.
X Drive to the nearest qualified specialist work-
shop and have the tyre changed there.
X Have the tyre sealant bottle replaced as soon
as possible at a qualified specialist workshop.
X Have the tyre sealant bottle replaced every
four years at a qualified specialist workshop. Battery (vehicle)
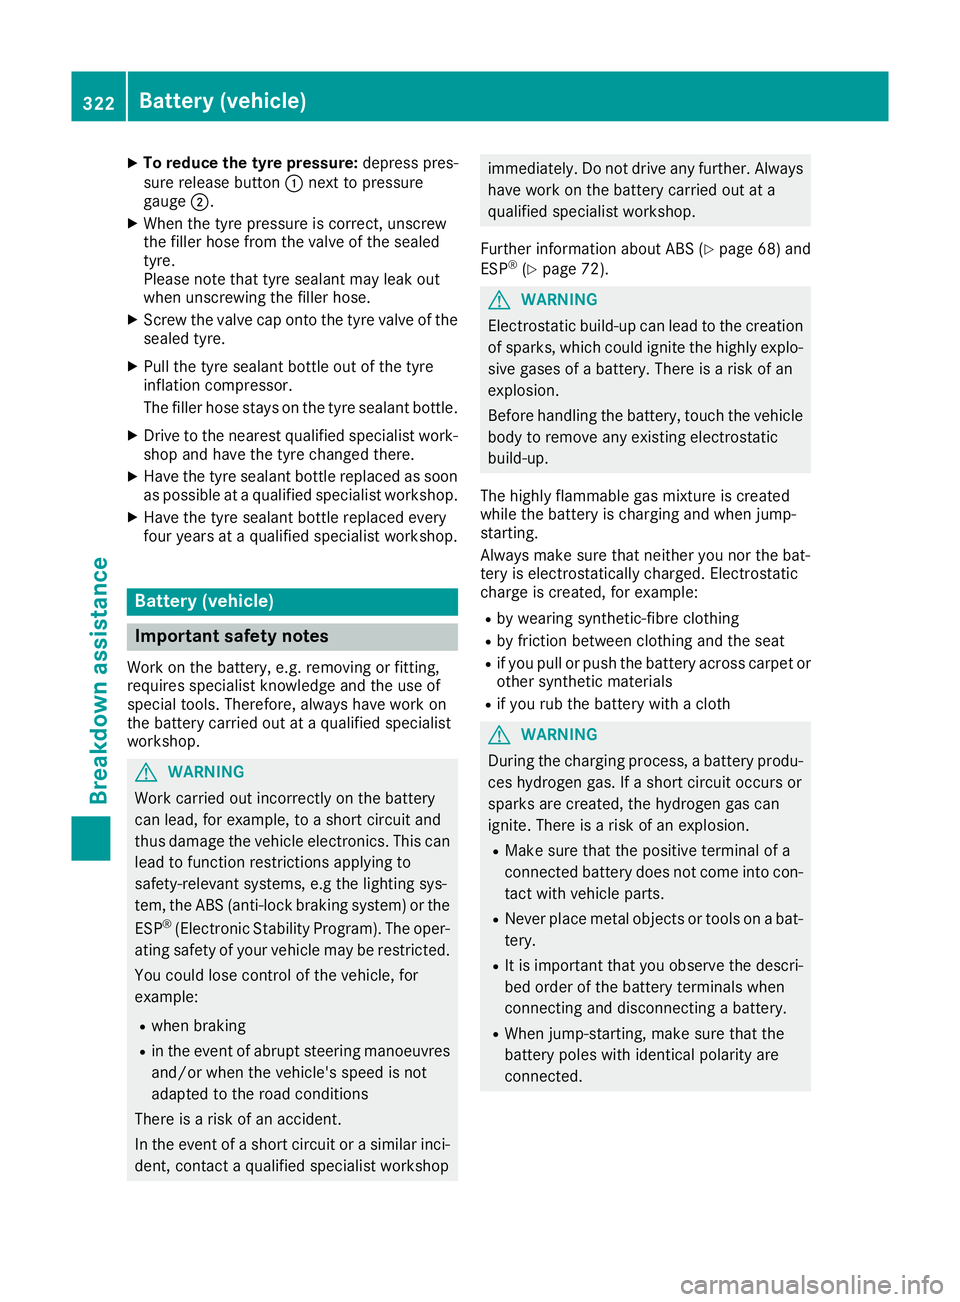
Important safety notes
Work on the battery, e.g. removing or fitting,
requires specialist knowledge and the use of
special tools. Therefore, always have work on
the battery carried out at a qualified specialist
workshop. G
WARNING
Work carried out incorrectly on the battery
can lead, for example, to a short circuit and
thus damage the vehicle electronics. This can lead to function restrictions applying to
safety-relevant systems, e.g the lighting sys-
tem, the ABS (anti-lock braking system) or the
ESP ®
(Electronic Stability Program). The oper-
ating safety of your vehicle may be restricted.
You could lose control of the vehicle, for
example:
R when braking
R in the event of abrupt steering manoeuvres
and/or when the vehicle's speed is not
adapted to the road conditions
There is a risk of an accident.
In the event of a short circuit or a similar inci- dent, contact a qualified specialist workshop immediately. Do not drive any further. Always
have work on the battery carried out at a
qualified specialist workshop.
Further information about ABS (Y page 68) and
ESP ®
(Y page 72). G
WARNING
Electrostatic build-up can lead to the creation of sparks, which could ignite the highly explo-
sive gases of a battery. There is a risk of an
explosion.
Before handling the battery, touch the vehicle body to remove any existing electrostatic
build-up.
The highly flammable gas mixture is created
while the battery is charging and when jump-
starting.
Always make sure that neither you nor the bat-
tery is electrostatically charged. Electrostatic
charge is created, for example:
R by wearing synthetic-fibre clothing
R by friction between clothing and the seat
R if you pull or push the battery across carpet or
other synthetic materials
R if you rub the battery with a cloth G
WARNING
During the charging process, a battery produ- ces hydrogen gas. If a short circuit occurs or
sparks are created, the hydrogen gas can
ignite. There is a risk of an explosion.
R Make sure that the positive terminal of a
connected battery does not come into con-
tact with vehicle parts.
R Never place metal objects or tools on a bat-
tery.
R It is important that you observe the descri-
bed order of the battery terminals when
connecting and disconnecting a battery.
R When jump-starting, make sure that the
battery poles with identical polarity are
connected. 322
Battery (vehicle)Breakdo
wn assis tance
Page 327 of 369
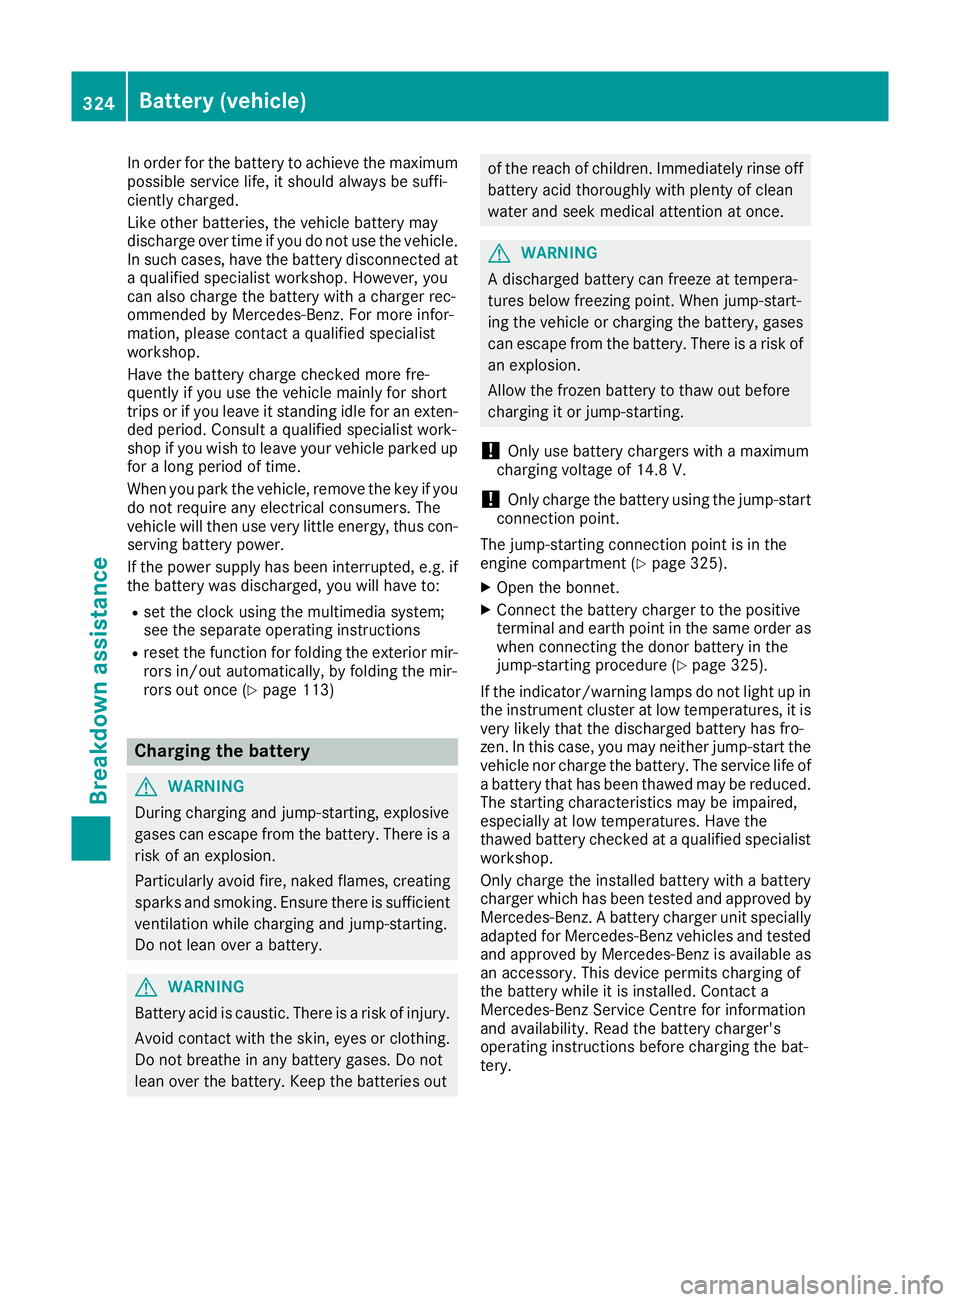
In order for the battery to achieve the maximum
possible service life, it should always be suffi-
ciently charged.
Like other batteries, the vehicle battery may
discharge over time if you do not use the vehicle. In such cases, have the battery disconnected at
a qualified specialist workshop. However, you
can also charge the battery with a charger rec-
ommended by Mercedes-Benz. For more infor-
mation, please contact a qualified specialist
workshop.
Have the battery charge checked more fre-
quently if you use the vehicle mainly for short
trips or if you leave it standing idle for an exten- ded period. Consult a qualified specialist work-
shop if you wish to leave your vehicle parked up
for a long period of time.
When you park the vehicle, remove the key if you do not require any electrical consumers. The
vehicle will then use very little energy, thus con- serving battery power.
If the power supply has been interrupted, e.g. if
the battery was discharged, you will have to:
R set the clock using the multimedia system;
see the separate operating instructions
R reset the function for folding the exterior mir-
rors in/out automatically, by folding the mir-
rors out once (Y page 113) Charging the battery
G
WARNING
During charging and jump-starting, explosive
gases can escape from the battery. There is a risk of an explosion.
Particularly avoid fire, naked flames, creating
sparks and smoking. Ensure there is sufficient
ventilation while charging and jump-starting.
Do not lean over a battery. G
WARNING
Battery acid is caustic. There is a risk of injury. Avoid contact with the skin, eyes or clothing.
Do not breathe in any battery gases. Do not
lean over the battery. Keep the batteries out of the reach of children. Immediately rinse off
battery acid thoroughly with plenty of clean
water and seek medical attention at once. G
WARNING
A discharged battery can freeze at tempera-
tures below freezing point. When jump-start-
ing the vehicle or charging the battery, gases can escape from the battery. There is a risk of
an explosion.
Allow the frozen battery to thaw out before
charging it or jump-starting.
! Only use battery chargers with a maximum
charging voltage of 14.8 V.
! Only charge the battery using the jump-start
connection point.
The jump-starting connection point is in the
engine compartment (Y page 325).
X Open the bonnet.
X Connect the battery charger to the positive
terminal and earth point in the same order as
when connecting the donor battery in the
jump-starting procedure (Y page 325).
If the indicator/warning lamps do not light up in
the instrument cluster at low temperatures, it is very likely that the discharged battery has fro-
zen. In this case, you may neither jump-start the vehicle nor charge the battery. The service life of
a battery that has been thawed may be reduced. The starting characteristics may be impaired,
especially at low temperatures. Have the
thawed battery checked at a qualified specialistworkshop.
Only charge the installed battery with a battery
charger which has been tested and approved by Mercedes-Benz. A battery charger unit specially
adapted for Mercedes-Benz vehicles and tested and approved by Mercedes-Benz is available as
an accessory. This device permits charging of
the battery while it is installed. Contact a
Mercedes-Benz Service Centre for information
and availability. Read the battery charger's
operating instructions before charging the bat-
tery. 324
Battery (vehicle)Breakdown assistance