2017 MERCEDES-BENZ GLA SUV charging
[x] Cancel search: chargingPage 9 of 369
Automatic transmission emer-
gency running mode
.........................163
Auxiliary heating
Activating/deactivating ................. 138
Activating/deactivating (on the
centre console ).............................. 138
Remote control .............................. 138
Setting ........................................... 230
Auxiliary heating/ventilation
Display message ............................ 262
Important safety notes .................. 137
Problem (display message) ............ 141
Setting the departure time ............. 139
Auxiliary ventilation
Activating/deactivating ................. 138
Activating/deactivating (on the
centre console ).............................. 138
Remote control .............................. 138
Axle load, permissible (trailer tow-
ing) ...................................................... 359 B
Back button ....................................... 278
Bag hook ............................................ 293
Ball coupling
Folding in ....................................... 215
Folding in/out ................................ 214
Folding out ..................................... 214
BAS (Brake Assist System) ................. 69
Basic settings
see Settings
Battery (key)
Checking .......................................... 82
Important safety notes .................... 82
Replacing ......................................... 82
Battery (vehicle)
Charging ........................................ 324
Display message ............................ 250
Important safety notes .................. 322
Jump starting ................................. 325
Belt
see Seat belts
Belt tensioner
Activation ......................................... 53
Belt warning ......................................... 46 Blind Spot Assist
Activating/deactivating (on-
board computer) ............................ 227
Display message ............................ 253
Notes/function .............................. 209
Trailer towing ................................. 210
Blower
see Climate control
Bluetooth ®
Searching for a mobile phone ........ 281
Searching for a mobile phone
(device manager) ........................... 282
See also Digital Owner's Manua l... 277
Telephony ...................................... 280
Bonnet
Active bonnet (pedestrian protec-tion) ............................................... 302
Closing ........................................... 304
Display message ............................ 261
Important safety notes .................. 302
Opening ......................................... 303
Boot
Important safety notes .................... 94
Opening (automatically from out-
side) ................................................. 95
Opening (from outside the vehi-
cle, HANDS-FREE ACCESS) ........ 91, 95
Opening automatically from
inside ............................................... 96
Boot lid
see Tailgate
Boot load (maximum) ........................ 358
Brake
EBD .................................................. 75
Brake Assist
see BAS (Brake Assist System)
Brake assistance
see BAS (Brake Assist System)
Brake fluid
Display message ............................ 241
Notes ............................................. 356
Brake force distribution
see EBD (electronic brake force
distribution)
Brake lamp
Replacing bulb s............................. 123
Brake lamps
Adaptive ........................................... 71 6
Index
Page 24 of 369
Tyres/wheels ................................. 347
Vehicle data ................................... 358
Telephone
Accepting a call (multifunction
steering wheel) .............................. 225
Authorising a mobile phone (con-
necting) ......................................... 281
Authorising a mobile phone via
the device manager (connecting) ... 282
Connecting a mobile phone
(device manager) ........................... 282
Connecting a Mobile phone (gen-
eral information) ............................2 80
Display message ............................ 263
Introduction ................................... 225
Menu (on-board computer) ............ 225
Number from the phone book ....... .225
Redialling ....................................... 226
Rejecting/ending a call ................. 225
See also Digital Owner's Manual ... 277
Telephone compartment ................ 290
Telephone module with Bluetooth ®
(SAP profile) Activating and connecting the
module .......................................... .284
Charging a mobile phone .............. .286
Connecting the mobile phone ....... .284
Connecting the module via a USB
cable .............................................. 283
Data modem mode ........................ 285
Installing the module ..................... 283
Introduction ................................... 283
Saving/deleting the PIN for the
SIM card ........................................ 285
Settings ......................................... 285
SIM card mode .............................. 284
Text messages ............................... 285
Transferring the phone book .......... 285
Temperature
Coolant .......................................... 218
Coolant (on-board computer,
Mercedes-AMG vehicles) .............. .231
Engine oil (on-board computer,
Mercedes-AMG vehicles) .............. .231
Outside temperature ..................... .217
Setting (climate control) ................ 133
Transmission oil (on-board com-
puter, Mercedes-AMG vehicles) ..... 231 TEMPOMAT
Function/notes ............................ .176
Text messages
Telephone module with Blue-
tooth ®
(SAP profile) ....................... 285
Through-loading ................................ 291
Timing (RACETIMER) ......................... 232
TIREFIT kit .......................................... 319
Declaration of conformity ................ 28
Important safety notes .................. 319
Storage location ............................ 317
Tyre pressure not reached ............. 321
Tyre pressure reached ................... 321
Tool
see Vehicle tool kit
Top Tether ............................................ 59
Total distance recorder .................... 221
Tow-away protection
Activating ......................................... 76
Deactivating ..................................... 77
Function .......................................... .76
Tow-starting
Emergency engine starting ............ 331
Fitting the towing eye .................... 328
Important safety notes .................. 327
Removing the towing eye ............... 329
Towing
Important safety notes .................. 327
Notes for 4MATIC vehicles ............ 330
Transporting the vehicle ................ 330
Towing a trailer
Axle load, permissibl e.................... 359
ESP ®
(Electronic Stability Pro-
gram) ............................................... 75
Failure check for LEDs ................... 216
General notes ................................ 213
Parking Pilot .................................. 196
Pulling away with a traile r.............. 147
Trailer tow hitch display message .. 262
Towing away
Fitting the towing ey e.................... 328
Removing the towing eye ............... 329
With both axles on the ground ....... 329
With front axle raised ..................... 329
Towing eye ......................................... 317 Index
21
Page 123 of 369
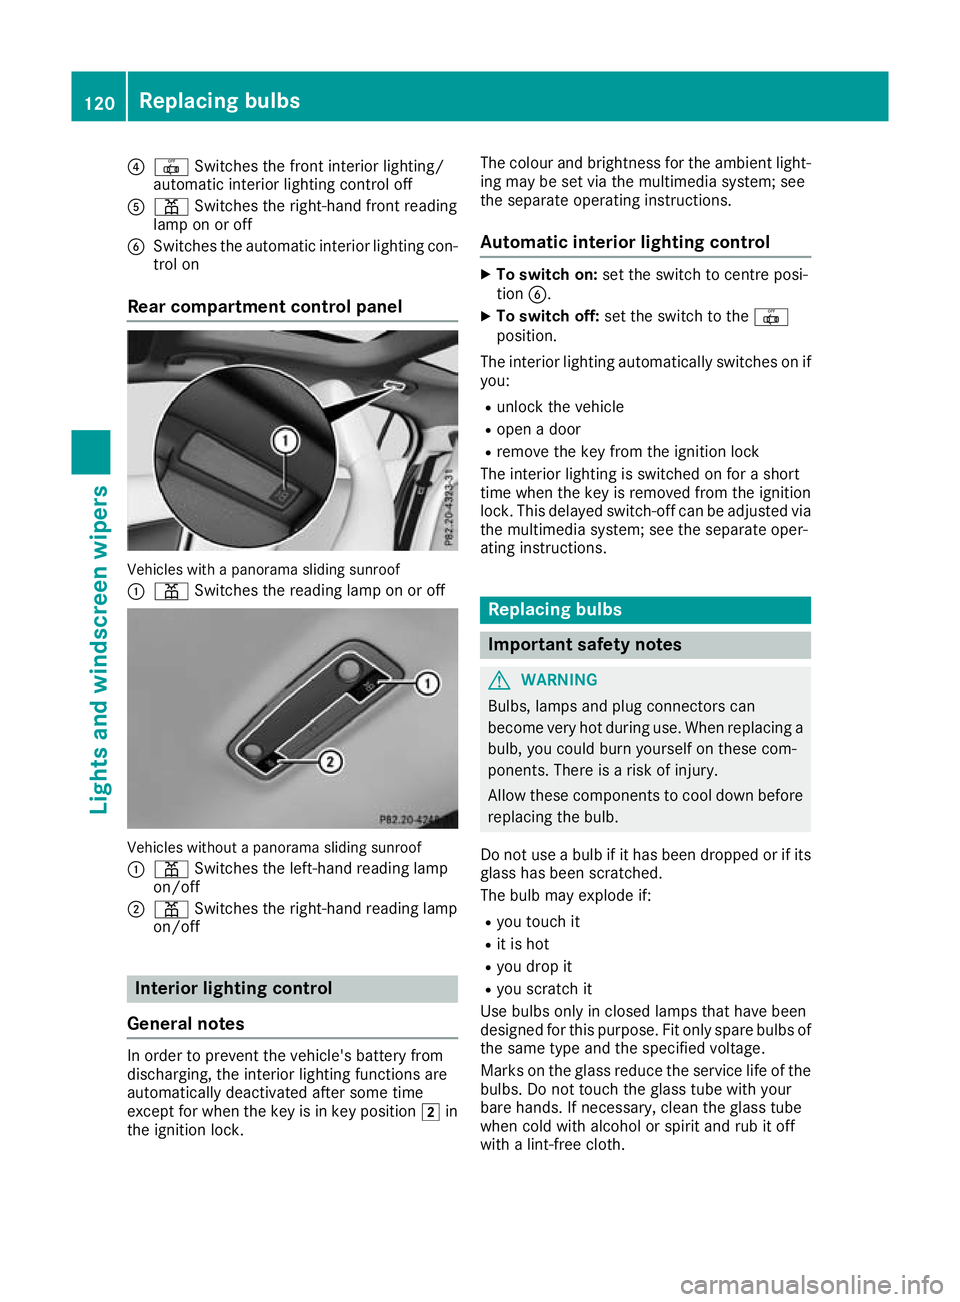
?
| Switches the front interior lighting/
automatic interior lighting control off
A p Switches the right-hand front reading
lamp on or off
B Switches the automatic interior lighting con-
trol on
Rear compartment control panel Vehicles with a panorama sliding sunroof
:
p Switches the reading lamp on or off Vehicles without a panorama sliding sunroof
: p Switches the left-hand reading lamp
on/off
; p Switches the right-hand reading lamp
on/off Interior lighting control
General notes In order to prevent the vehicle's battery from
discharging, the interior lighting functions are
automatically deactivated after some time
except for when the key is in key position 2in
the ignition lock. The colour and brightness for the ambient light-
ing may be set via the multimedia system; see
the separate operating instructions.
Automatic interior lighting control X
To switch on: set the switch to centre posi-
tion B.
X To switch off: set the switch to the |
position.
The interior lighting automatically switches on if you:
R unlock the vehicle
R open a door
R remove the key from the ignition lock
The interior lighting is switched on for a short
time when the key is removed from the ignition lock. This delayed switch-off can be adjusted via
the multimedia system; see the separate oper-
ating instructions. Replacing bulbs
Important safety notes
G
WARNING
Bulbs, lamps and plug connectors can
become very hot during use. When replacing a bulb, you could burn yourself on these com-
ponents. There is a risk of injury.
Allow these components to cool down before replacing the bulb.
Do not use a bulb if it has been dropped or if its
glass has been scratched.
The bulb may explode if:
R you touch it
R it is hot
R you drop it
R you scratch it
Use bulbs only in closed lamps that have been
designed for this purpose. Fit only spare bulbs of the same type and the specified voltage.
Marks on the glass reduce the service life of the bulbs. Do not touch the glass tube with your
bare hands. If necessary, clean the glass tube
when cold with alcohol or spirit and rub it off
with a lint-free cloth. 120
Replacing bulbsLights and windscreen wipers
Page 172 of 369
If your seat belt is not fastened, the following
conditions must be fulfilled for the electric park- ing brake to be released automatically:
R the driver's door is closed
R you are shifting from transmission position
j or have previously driven at speeds
greater than 3 km/h
Ensure that you do not depress the accelerator
pedal unintentionally. Otherwise, the parking
brake will be released and the vehicle will start
to move.
Emergency braking The vehicle can also be braked during an emer-
gency by using the electric parking brake.
X While the vehicle is in motion, push handle :
of the electric parking brake (Y page 168).
The vehicle is braked as long as you keep
handle :of the electric parking brake
pressed. The longer the electric parking brake
handle :is depressed, the greater the brak-
ing force.
During braking:
R a warning tone sounds
R the Release parking brake
Release parking brake message
appears
R the red !indicator lamp in the instrument
cluster flashes
When the vehicle has been braked to a stand-
still, the electric parking brake is applied. Parking up the vehicle
If you leave the vehicle parked up for longer than
four weeks, the battery may be damaged by
exhaustive discharging.
If you leave the vehicle parked up for longer than
six weeks, it may suffer from lack of use.
X Contact a qualified specialist workshop and
seek advice.
i You can obtain information on trickle charg-
ers from a qualified specialist workshop. Driving tips
General notes
Important safety notes G
WARNING
If you switch off the ignition while driving,
safety-relevant functions are only available
with limitations, or not at all. This could affect, for example, the power steering and the brake
boosting effect. You will require considerably
more effort to steer and brake. There is a risk of an accident.
Do not switch off the ignition while driving.
Drive sensibly – save fuel Observe the following tips to save fuel:
R The tyres should always be inflated to the rec-
ommended tyre pressure.
R Remove unnecessary loads.
R Remove roof racks when they are not needed.
R Warm up the engine at low engine speeds.
R Avoid frequent acceleration or braking.
R Have all maintenance work carried out as
indicated by the service intervals in the Ser-
vice Booklet or by the service interval display.
Fuel consumption also increases when driving in cold weather, in stop-start traffic, on short jour-
neys and in hilly terrain. ECO display
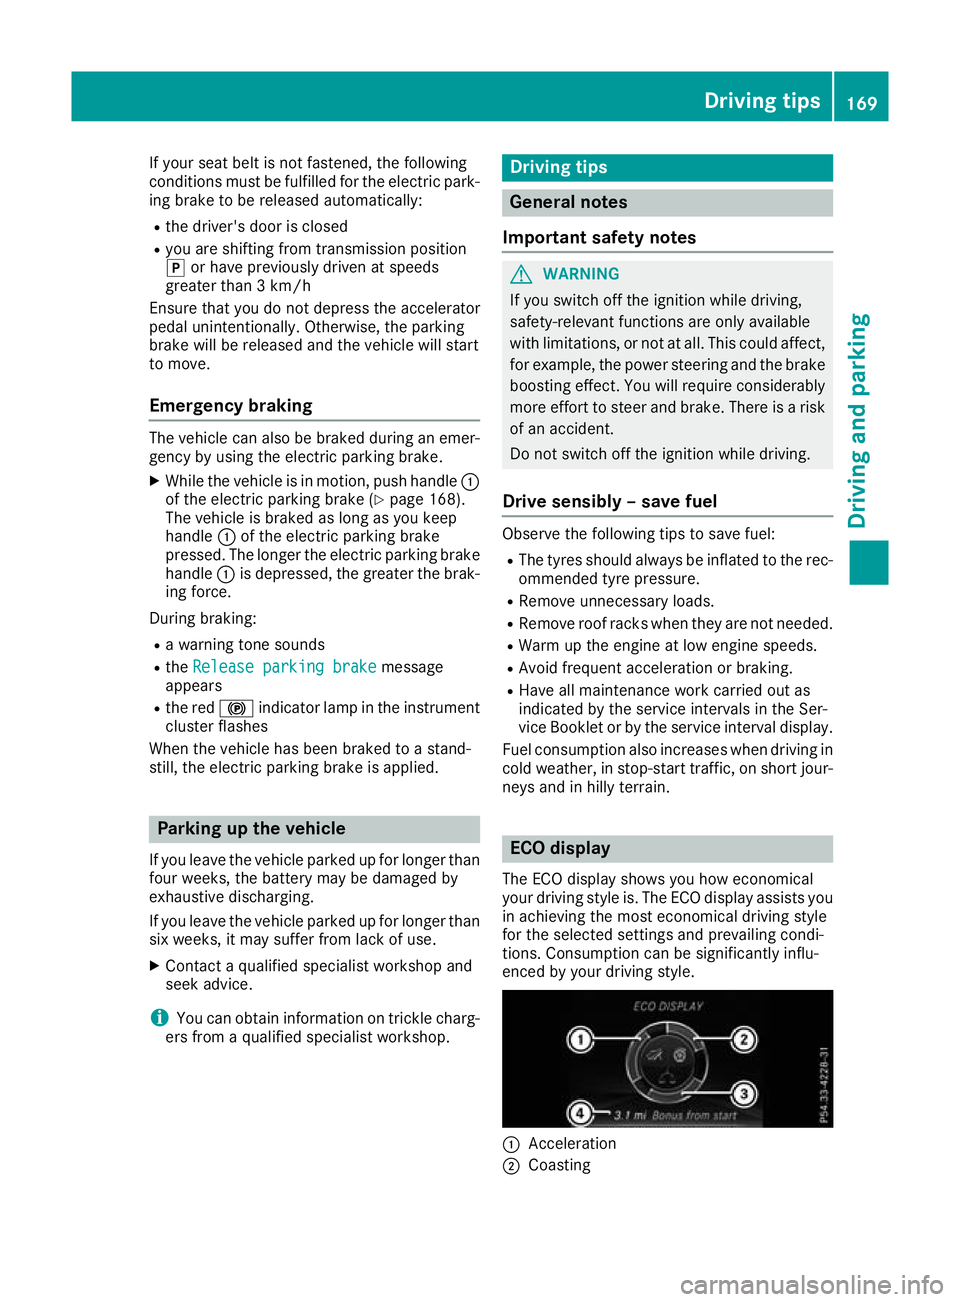
The ECO display shows you how economical
your driving style is. The ECO display assists you in achieving the most economical driving style
for the selected settings and prevailing condi-
tions. Consumption can be significantly influ-
enced by your driving style. :
Acceleration
; Coasting Driving tips
169Driving and parking Z
Page 286 of 369
to two minutes to be displayed (see the man-
ufacturer's operating instructions).
Symbols in the device manager The symbols are shown in colour depending on
their use. Symbol Explanation
Mobile phone connected to the
multimedia system
SAP telephone is connected to the
multimedia system Main telephone with full range of
functions
SAP telephone
Additional telephone for incoming
calls in two-telephone mode Telephone module with Bluetooth
®
(SAP profile)
Introduction The module can be used as a permanently instal-
led telephone with its own SIM card
(Y page 284) or in conjunction with a mobile
phone (Y page 284).
If you wish to use the module in conjunction with
your mobile telephone, the mobile phone must
support the Bluetooth ®
SAP profile (SIM Access
Profile).
The following functions are available using the
module:
R hands-free mode
R data modem mode (Y page 285)
R sending and receiving text messages
(Y page 285)
R access to the phone book of the mobile phone
(if supported by the mobile phone)
(Y page 285)
R charging a mobile phone via the USB port
(Y page 286)
i The module is not available in all vehicles,
depending on the equipment. Installing the module
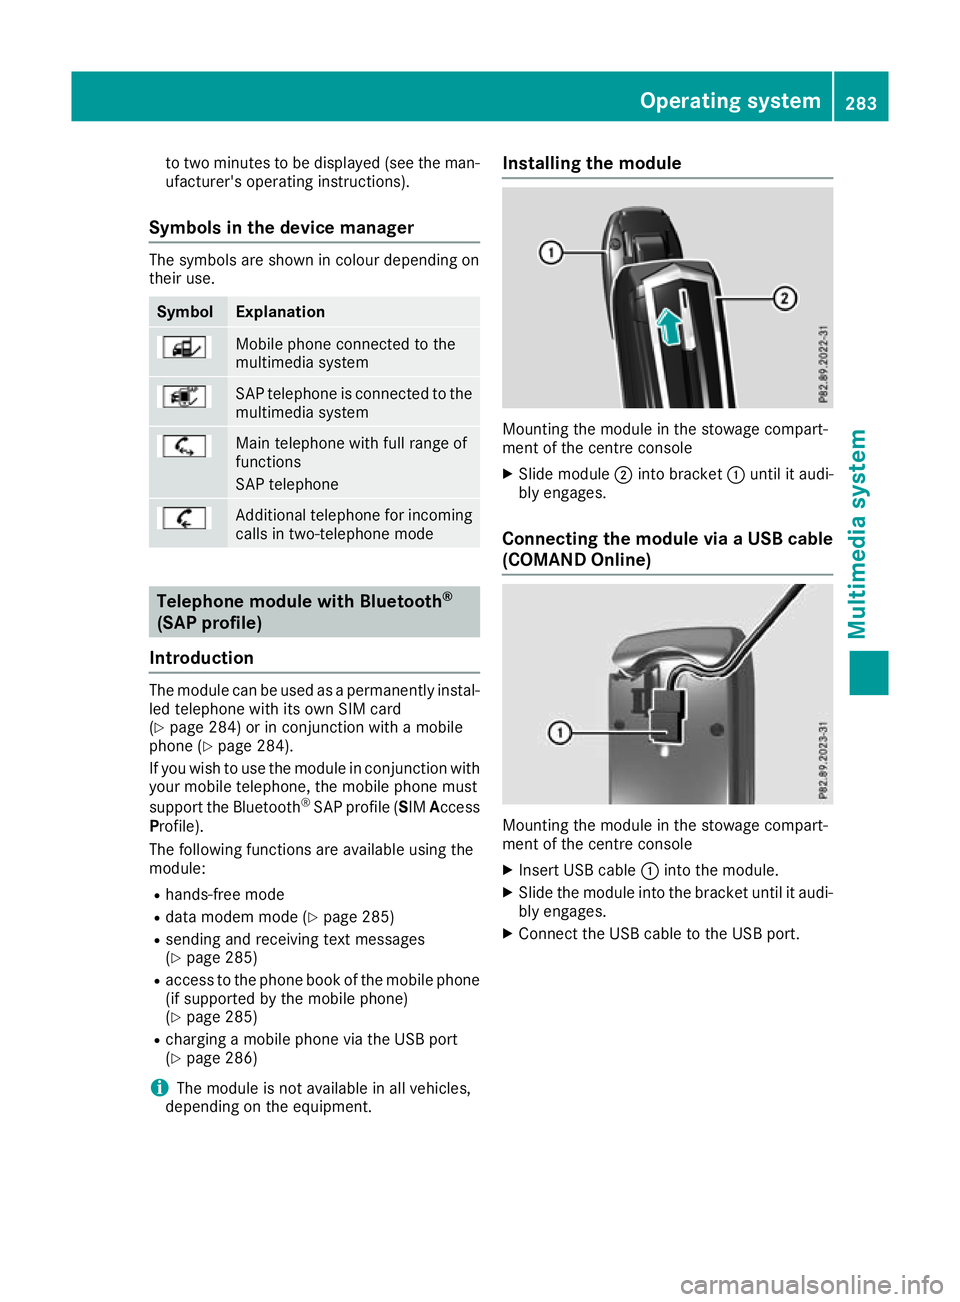
Mounting the module in the stowage compart-
ment of the centre console
X Slide module ;into bracket :until it audi-
bly engages.
Connecting the module via a USB cable (COMAND Online) Mounting the module in the stowage compart-
ment of the centre console
X Insert USB cable :into the module.
X Slide the module into the bracket until it audi-
bly engages.
X Connect the USB cable to the USB port. Operating system
283Multimedia system Z
Page 289 of 369
Activating/deactivating text message
downloading from the mobile phone Dial number Function
00080 Text message down-
loading is deactiva-
ted.
00081 Text message down-
loading is activated.
For further information on receiving text mes-
sages when using the telephone module (see
the Digital Owner's Manual).
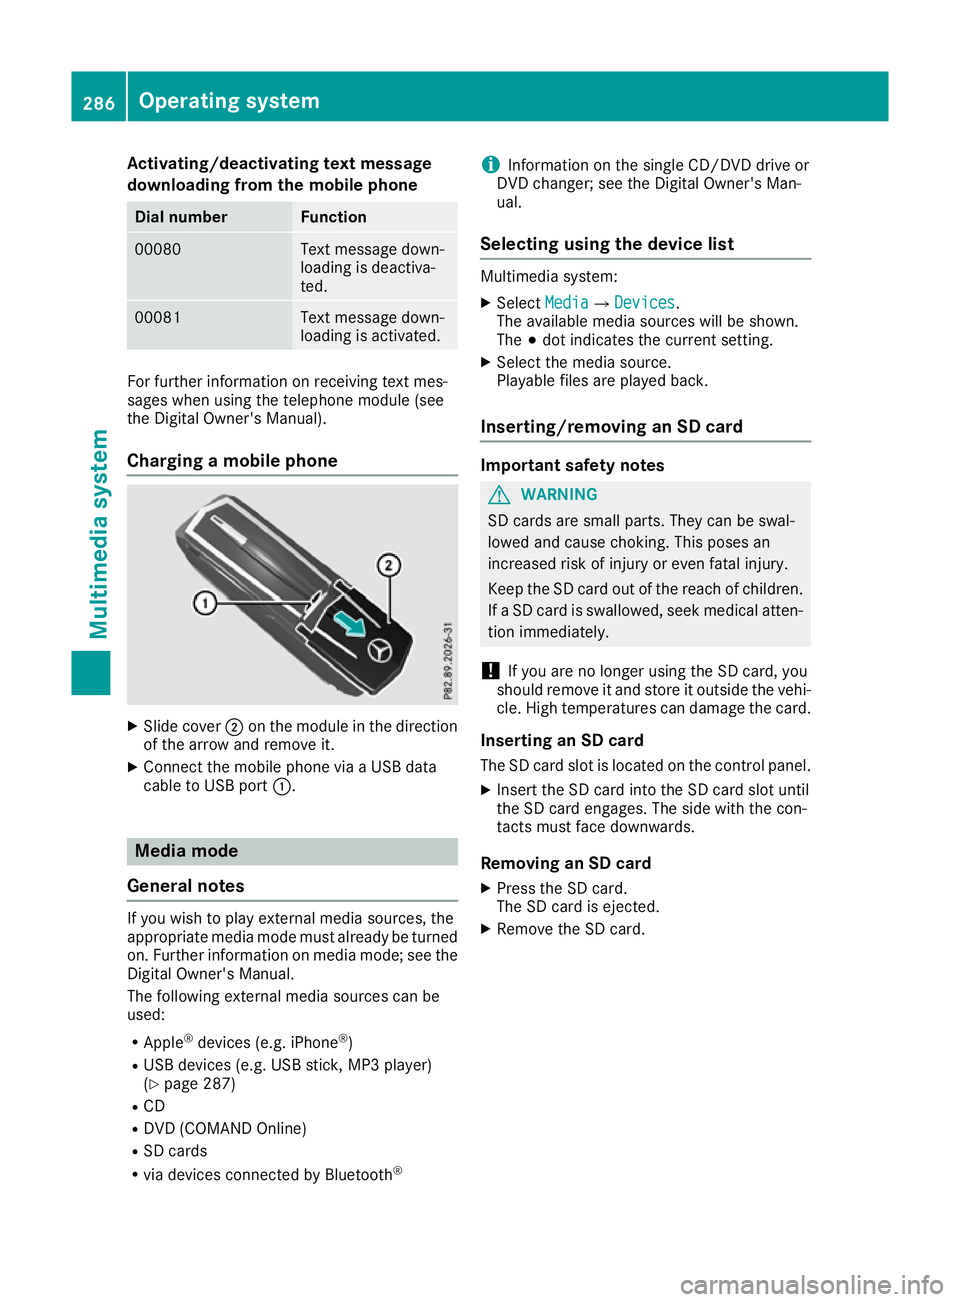
Charging a mobile phone X
Slide cover ;on the module in the direction
of the arrow and remove it.
X Connect the mobile phone via a USB data
cable to USB port :. Media mode
General notes If you wish to play external media sources, the
appropriate media mode must already be turned
on. Further information on media mode; see the Digital Owner's Manual.
The following external media sources can be
used:
R Apple ®
devices (e.g. iPhone ®
)
R USB devices (e.g. USB stick, MP3 player)
(Y page 287)
R CD
R DVD (COMAND Online)
R SD cards
R via devices connected by Bluetooth ®i
Information on the single CD/DVD drive or
DVD changer; see the Digital Owner's Man-
ual.
Selecting using the device list Multimedia system:
X Select Media MediaQ Devices
Devices.
The available media sources will be shown.
The #dot indicates the current setting.
X Select the media source.
Playable files are played back.
Inserting/removing an SD card Important safety notes
G
WARNING
SD cards are small parts. They can be swal-
lowed and cause choking. This poses an
increased risk of injury or even fatal injury.
Keep the SD card out of the reach of children. If a SD card is swallowed, seek medical atten-
tion immediately.
! If you are no longer using the SD card, you
should remove it and store it outside the vehi-
cle. High temperatures can damage the card.
Inserting an SD card
The SD card slot is located on the control panel. X Insert the SD card into the SD card slot until
the SD card engages. The side with the con-
tacts must face downwards.
Removing an SD card X Press the SD card.
The SD card is ejected.
X Remove the SD card. 286
Operating systemMultimedia system
Page 303 of 369
You will see a message if:
R a connection to the Mercedes-Benz emer-
gency call centre cannot be made
R a call has not been automatically forwarded
to the public emergency call centre
In this case, dial the 112emergency number
on your mobile phone.
You can find more information on the Mercedes-
Benz emergency call system in the separate
operating instructions. Mobile phone
Important safety notes G
WARNING
If you operate mobile communication equip-
ment while driving, you can be distracted from the traffic situation. This could also cause you
to lose control of the vehicle. There is a risk of an accident.
Only operate this equipment when the vehicleis stationary.
You must observe the legal requirements for the country in which you are currently driving whenoperating mobile communications equipment in
the vehicle.
If it is permitted by law to operate communica-
tions equipment while the vehicle is in motion,
you may do so only if the traffic situation per-
mits. You may otherwise be distracted from the traffic conditions, cause an accident and injure
yourself and others.
Excessive levels of electromagnetic radiation
may cause damage to your health and to the
health of others. The use of an exterior aerial
takes into consideration the scientific discus-
sion surrounding the possible health risk posed
by electromagnetic fields.
Mercedes-Benz recommends the use of an
approved exterior aerial. This ensures:
R optimal mobile phone reception quality in the
vehicle
R that mutual interference between the vehicle
electronics and mobile phones is minimised An exterior aerial has the following advantages:
R it conducts the electromagnetic fields gener-
ated by a wireless device to the exterior
R the field strength in the vehicle interior is
lower than in a vehicle that does not have an exterior aerial
Information on retrofitting two-way radios and
mobile phones (RF transmitters) (Y page 350).
General notes There are various mobile phone brackets that
may be fitted in your vehicle; in some cases,
these are country-specific.
You can connect a Bluetooth
®
-capable mobile
phone with the multimedia system via the Blue-
tooth ®
interface. This also applies if your vehicle
is equipped with convenience telephony.
More information on suitable mobile phones,
mobile phone brackets and on connecting Blue-
tooth ®
-capable mobile phones with the multi-
media system can be obtained:
R at your Mercedes-Benz Service Centre
R on the Internet at http://www.mercedes-
benz.com/connect
The functions and services available when you
use the phone depend on your mobile phone
model and service provider.
Using a mobile phone To connect a mobile phone to the exterior aerial
and charge it, insert it into the mobile phone
bracket.
X Open the telephone compartment
(Y page 290).
X Place the mobile phone bracket into the pre-
installed fitting; see the separate installation
instructions for the mobile phone fitting.
X Insert the mobile phone into the mobile phone
bracket; see the separate installation instruc-
tions for the mobile phone fitting.
i The mobile phone can also be operated
without being in the bracket. However, the
charging function and aerial function are not
available.
In order to use Bluetooth ®
(SAP profile) on your
telephone module, you must first insert the tele-
phone module into the pre-installed fitting. This connects it to the exterior aerial. If you wish to 300
FeaturesStowing and features
Page 325 of 369
X
To reduce the tyre pressure: depress pres-
sure release button :next to pressure
gauge ;.
X When the tyre pressure is correct, unscrew
the filler hose from the valve of the sealed
tyre.
Please note that tyre sealant may leak out
when unscrewing the filler hose.
X Screw the valve cap onto the tyre valve of the
sealed tyre.
X Pull the tyre sealant bottle out of the tyre
inflation compressor.
The filler hose stays on the tyre sealant bottle.
X Drive to the nearest qualified specialist work-
shop and have the tyre changed there.
X Have the tyre sealant bottle replaced as soon
as possible at a qualified specialist workshop.
X Have the tyre sealant bottle replaced every
four years at a qualified specialist workshop. Battery (vehicle)
Important safety notes
Work on the battery, e.g. removing or fitting,
requires specialist knowledge and the use of
special tools. Therefore, always have work on
the battery carried out at a qualified specialist
workshop. G
WARNING
Work carried out incorrectly on the battery
can lead, for example, to a short circuit and
thus damage the vehicle electronics. This can lead to function restrictions applying to
safety-relevant systems, e.g the lighting sys-
tem, the ABS (anti-lock braking system) or the
ESP ®
(Electronic Stability Program). The oper-
ating safety of your vehicle may be restricted.
You could lose control of the vehicle, for
example:
R when braking
R in the event of abrupt steering manoeuvres
and/or when the vehicle's speed is not
adapted to the road conditions
There is a risk of an accident.
In the event of a short circuit or a similar inci- dent, contact a qualified specialist workshop immediately. Do not drive any further. Always
have work on the battery carried out at a
qualified specialist workshop.
Further information about ABS (Y page 68) and
ESP ®
(Y page 72). G
WARNING
Electrostatic build-up can lead to the creation of sparks, which could ignite the highly explo-
sive gases of a battery. There is a risk of an
explosion.
Before handling the battery, touch the vehicle body to remove any existing electrostatic
build-up.
The highly flammable gas mixture is created
while the battery is charging and when jump-
starting.
Always make sure that neither you nor the bat-
tery is electrostatically charged. Electrostatic
charge is created, for example:
R by wearing synthetic-fibre clothing
R by friction between clothing and the seat
R if you pull or push the battery across carpet or
other synthetic materials
R if you rub the battery with a cloth G
WARNING
During the charging process, a battery produ- ces hydrogen gas. If a short circuit occurs or
sparks are created, the hydrogen gas can
ignite. There is a risk of an explosion.
R Make sure that the positive terminal of a
connected battery does not come into con-
tact with vehicle parts.
R Never place metal objects or tools on a bat-
tery.
R It is important that you observe the descri-
bed order of the battery terminals when
connecting and disconnecting a battery.
R When jump-starting, make sure that the
battery poles with identical polarity are
connected. 322
Battery (vehicle)Breakdo
wn assis tance