2017 MERCEDES-BENZ E-CLASS SALOON boot
[x] Cancel search: bootPage 132 of 497

g
Driver's seat and front passenger seat occu‐
pied
1 Driver's seat, front passenger seat and rear
seats occupied
2 Driver's seat, front passenger seat and rear
seats occupied, boot laden
3 Driver's seat and front passenger seat occu‐
pied and maximum permissible rear axle
load utilised #
Turn the headlamp range adjus terto the
position which cor responds tothe load con‐
dition of your vehicle. Operating
the lights combination switch 1
Main beam
2 Turn signal light, right 3
Headlamp flasher
4 Turn signal light, left #
Use the combination switch toactivate the
function in question.
Main beam #
Toswitch on: turnthe light switch tothe
L orà position. #
Press the combination switch be yond the
pressure point in the direction of ar row1.
When the main beam is activated, the indica‐
to r lamp for dipped beam Lis deactiva‐
te d and replaced bythe indicator lamp for
th e main beam K. #
Toswitch off: movethe combination switch
back toits starting position.
Headla mpflasher: #
Pull the combination switch in the direction
of ar row3. Light and sight
12 9
Page 142 of 497
#
Turn there leva nt housing co ver anti-clock‐
wise and remo veit. #
Main beam/dipped beam: turnthe soc ket
anti-clockwise and remo veit. #
Turn signal light: turnthe soc ket anti-clo ck‐
wise, unlock and remo veit. #
Pull the bulb out of the soc ket. #
Inse rtthe new bulb into the soc ket so that
th e entire base of the bulb is resting on the
bottom of the soc ket. #
Inse rtsoc ket and turn it clo ckwise. #
Press on the housing co ver and turn it clock‐
wise. #
Replace the co ver in the front wheel ar ch. Changing
there ar bulbs (vehicles with halo‐
ge n headla mps) Opening and closing
the side trim panels in
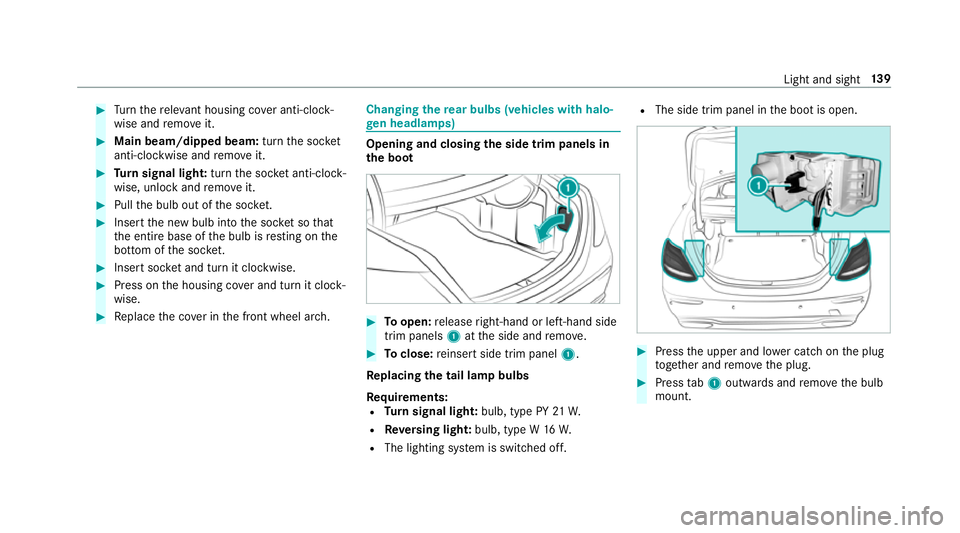
th e boot #
Toopen: release right-hand or left-hand side
trim panels 1atthe side and remo ve. #
Toclose: reinse rtside trim panel 1.
Re placing the tail lamp bulbs
Re quirements:
R Turn signal light: bulb, type PY 21W.
R Reversing light: bulb, type W 16W.
R The lighting sy stem is switched off. R
The side trim panel in the boot is open. #
Press the upper and lo wer catch on the plug
to ge ther and remo vethe plug. #
Press tab1 outwards and remo vethe bulb
mount. Light and sight
13 9
Page 191 of 497
The electric parking brake is
released when the
fo llowing conditions are fulfilled:
R The driver's door is closed.
R The engine is running.
R Age ar has been selec ted, youre lease the
clutch pedal and dep ress the accelera tor
pedal.
R When reve rsege ar k is selec ted, the boot
lid must be closed.
If th e electric parking brake is released,
th e! indicator lamp in the instrument clus‐
te r goes out.
Ve hicles with automatic transmission:
The electric parking brake is released when the
fo llowing conditions are fulfilled:
R The engine is running.
R The seat belt tongue is inser ted into the seat
belt buckle of the driver's seat.
R The transmission is in position hork and
yo u depress the accelera tor pedal or you
shift from transmission position jtoh or
k. R
Ifth e transmission is in position k,the boot
lid must be closed.
If th e seat belt tongue is not inser ted into the
seat belt buckle of the driver's seat, thefo llow‐
ing conditions must be fulfilled:
R The driver's door is closed.
R You mo vethe transmission out of transmis‐
sion position joryou ha veprev iously
driven faster than 3 km/h.
R Ifth e transmission is in position k,the boot
lid must be closed.
If th e electric parking brake is released,
th e! indicator lamp in the instrument clus‐
te r goes out. Applying or
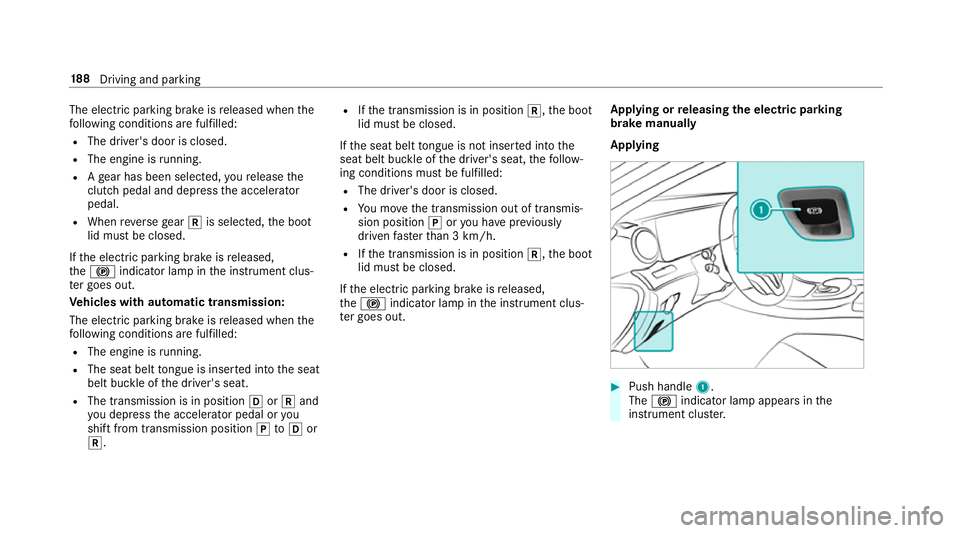
releasing the electric pa rking
brake manually
Applying #
Push handle 1.
The ! indicator lamp appears in the
instrument clus ter. 18 8
Driving and pa rking
Page 223 of 497
Re
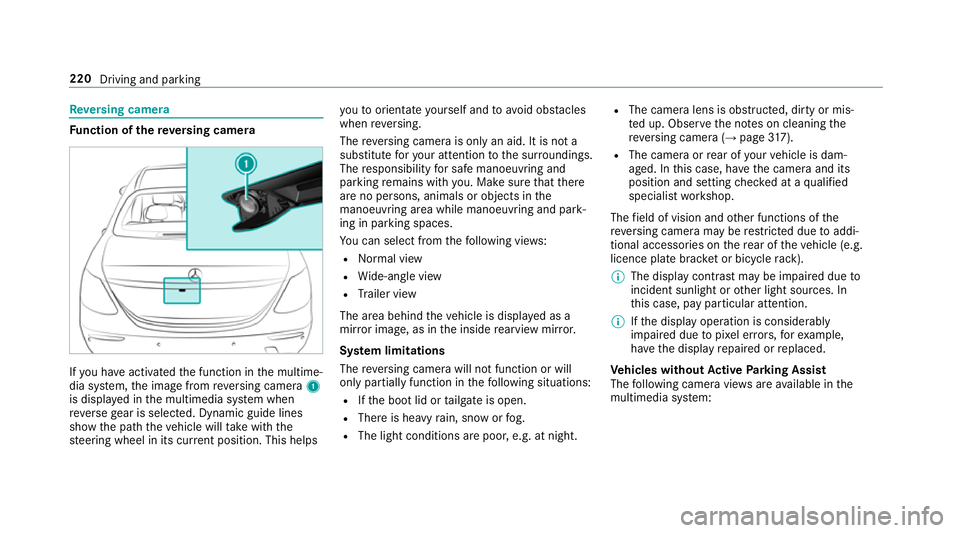
versing camera Fu
nction of there ve rsing camera If
yo u ha veactivated the function in the multime‐
dia sy stem, the image from reve rsing camera 1
is displa yed in the multimedia sy stem when
re ve rsege ar is selec ted. Dynamic guide lines
show the path theve hicle will take with the
st eering wheel in its cur rent position. This helps yo
uto orientate yourself and toavo id obs tacles
when reve rsing.
The reve rsing camera is only an aid. It is not a
substitute foryo ur attention tothe sur roundings.
The responsibility for safe manoeuvring and
parking remains with you. Make sure that there
are no persons, animals or objects in the
manoeuvring area while manoeuvring and park‐
ing in parking spaces.
Yo u can select from thefo llowing vie ws:
R Normal view
R Wide-angle view
R Trailer view
The area behind theve hicle is displa yed as a
mir ror image, as in the inside rearview mir ror.
Sy stem limitations
The reve rsing camera will not function or will
only partially function in thefo llowing situations:
R Ifth e boot lid or tailgate is open.
R There is heavy rain, snow or fog.
R The light conditions are poor, e.g. at night. R
The camera lens is obstructed, dirty or mis‐
te d up. Obser vethe no tes on cleaning the
re ve rsing camera (→ page317).
R The camera or rear of your vehicle is dam‐
aged. In this case, ha vethe camera and its
position and setting checked at a qualified
specialist workshop.
The field of vision and other functions of the
re ve rsing camera may be restricted due toaddi‐
tional accesso ries on there ar of theve hicle (e.g.
licence plate brac ket or bicycle rack ).
% The display contrast may be impaired due to
incident sunlight or other light sources. In
th is case, pay particular attention.
% Ifth e display operation is considerably
impaired due topixel er rors,fo rex ample,
ha ve the display repaired or replaced.
Ve hicles without Active Parking Assist
The following camera vie wsare available in the
multimedia sy stem: 220
Driving and parking
Page 228 of 497

The guide lines in
the multimedia sy stem dis‐
play show the dis tances toyour vehicle. The
dis tances only apply toroad le vel.
In trailer mode, the guide lines are shown at
th e le vel of the trailer hitch.
Tr ailer view (if trailer hitch is fitted)
If yo u select trailer view and no trailer is connec‐
te dto theve hicle, thefo llowing display appears: 1
Yellow guide line, locating aid
2 Red guide line at a dis tance of appr oximately
0.3 m tothe ball head of the trailer hitch
3 Ball head of the trailer hitch When
the electrical connection is es tablished
between theve hicle and the trailer, the display
ch anges toside camera view 1.
This view supports manoeuvring procedures with
a trailer.
Side view of the mir ror cameras
The sides of theve hicle can be seen in this vie w. 1
Guide line of extern al vehicle dimensions
with outside mir rors folded out
2 Marker of the wheel conta ct points
Sy stem limitations
The 360° Camera will not function or will only
partially function in thefo llowing situations:
R Ifth e doors are open.
R The side mir rors are folded in.
R Ifth e boot lid or tailgate is open.
R There is heavy rain, snow or fog.
R The light conditions are poor, e.g. at night. Driving and parking
225
Page 237 of 497
%
On completion of the parking procedure, the
ve hicle is loc ked.
Re quirements:
R The mobile phone and Remo teParking Assist
are connec ted (→ page 236)
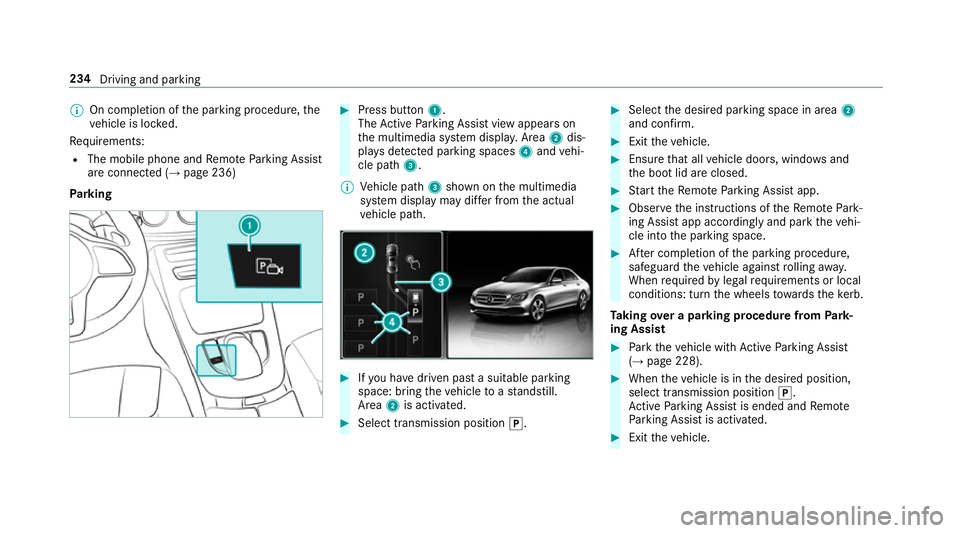
Park ing #
Press button 1.
The Active Parking Assist view appears on
th e multimedia sy stem displa y.Area 2dis‐
pl ay s de tected pa rking spaces 4and vehi‐
cle path 3.
% Vehicle path 3shown on the multimedia
sy stem display may dif fer from the actual
ve hicle path. #
Ifyo u ha vedriven past a suitable parking
space: bring theve hicle toast andstill.
Area 2is activated. #
Select transmission position j. #
Select the desired parking space in area 2
and confi rm. #
Exit theve hicle. #
Ensure that all vehicle doors, windo wsand
th e boot lid are closed. #
Start theRe mo teParking Assist app. #
Obser vethe instructions of theRe mo tePark‐
ing Assist app accordingly and park theve hi‐
cle into the parking space. #
After completion of the parking procedure,
safeguard theve hicle against rolling away.
When requ ired bylegal requirements or local
conditions: turn the wheels towa rdsth eke rb.
Ta king over a parking procedu refrom Park‐
ing Assist #
Park theve hicle with Active Parking Assist
(→ page 228). #
When theve hicle is in the desired position,
select transmission position j.
Ac tive Parking Assist is ended and Remo te
Pa rking Assist is activated. #
Exit theve hicle. 234
Driving and parking
Page 238 of 497
#
Ensu rethat all vehicle doors, windo wsand
th e boot lid are closed. #
Start theRe mo teParking Assist app. #
Obser vethe instructions of theRe mo tePark‐
ing Assist app accordingly and park theve hi‐
cle into the parking space. #
After completion of the parking procedure,
safeguard theve hicle against rolling away.
When requ ired bylegal requirements or local
conditions: turn the wheels towa rdsth eke rb.
Pa rking with explo ration mode #
Bring theve hicle toast andstill. #
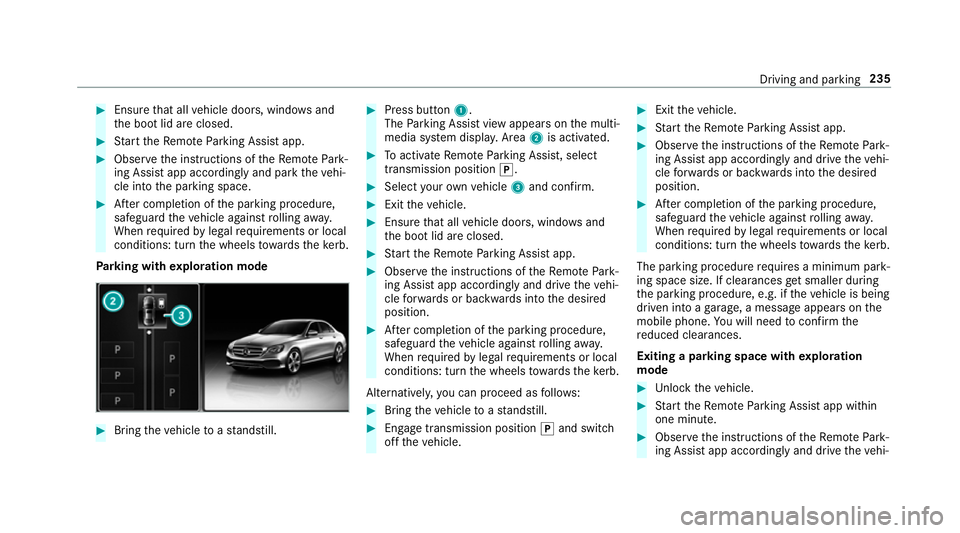
Press button 1.
The Parking Assist view appears on the multi‐
media sy stem displa y.Area 2is acti vated. #
Toactivate Remo teParking Assist, select
transmission position j. #
Select your ow nve hicle 3and confirm. #
Exit theve hicle. #
Ensure that all vehicle doors, windo wsand
th e boot lid are closed. #
Start theRe mo teParking Assist app. #
Obser vethe instructions of theRe mo tePark‐
ing Assist app accordingly and drive theve hi‐
cle forw ards or backwards into the desired
position. #
After completion of the parking procedure,
safeguard theve hicle against rolling away.
When requ ired bylegal requirements or local
conditions: turn the wheels towa rdsth eke rb.
Alternatively, you can proceed as follo ws: #
Bring theve hicle toast andstill. #
Engage transmission position jand switch
off theve hicle. #
Exit theve hicle. #
Start theRe mo teParking Assist app. #
Obser vethe instructions of theRe mo tePark‐
ing Assist app accordingly and drive theve hi‐
cle forw ards or backwards into the desired
position. #
After completion of the parking procedure,
safeguard theve hicle against rolling away.
When requ ired bylegal requirements or local
conditions: turn the wheels towa rdsth eke rb.
The parking procedu re requires a minimum park‐
ing space size. If clearances getsmaller during
th e parking procedure, e.g. if theve hicle is being
driven into a garage , a message appears on the
mobile phone. You will need toconfirm the
re duced clearances.
Exiting a parking space with explo ration
mode #
Unlock theve hicle. #
Start theRe mo teParking Assist app within
one minute. #
Obser vethe instructions of theRe mo tePark‐
ing Assist app accordingly and drive theve hi‐ Driving and parking
235
Page 317 of 497
#
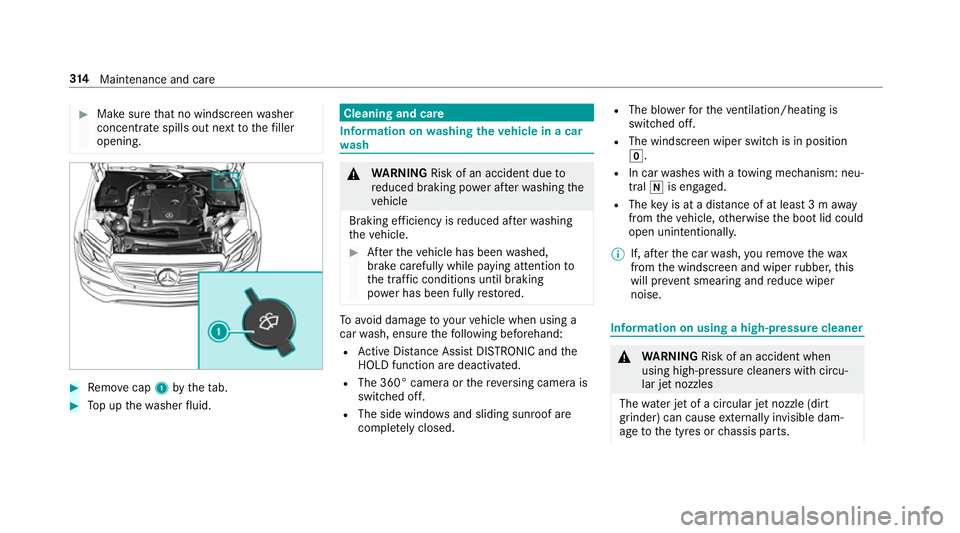
Make sure that no windsc reen washer
concentrate spills out next tothefiller
opening. #
Remo vecap 1bytheta b. #
Top up thewa sher fluid. Cleaning and care
Information on
washing theve hicle in a car
wa sh &
WARNING Risk of an accident due to
re duced braking po wer af terwa shing the
ve hicle
Braking ef ficiency is reduced af terwa shing
th eve hicle. #
Afterth eve hicle has been washed,
brake carefully while paying attention to
th e traf fic conditions until braking
po we r has been fully restored. To
avo id damage to yourvehicle when using a
car wash, ensure thefo llowing beforehand:
R Active Dis tance Assi stDISTRONIC and the
HOLD function are deactivated.
R The 360° came raor there ve rsing camera is
switched off.
R The side windo wsand sliding sun roof are
comple tely closed. R
The bl owerforth eve ntilation/heating is
switched off.
R The windsc reen wiper switch is in position
g.
R In car washes with a towing mechanism: neu‐
tral iis engaged.
R The key is at a dis tance of at least 3 m away
from theve hicle, otherwise the boot lid could
open unintentionally.
% If, af terth e car wash, youre mo vethewax
from the windscreen and wiper rubber, this
will pr event smearing and reduce wiper
noise. Information on using a high-p
ressure cleaner &
WARNING Risk of an accident when
using high-pressure cleane rswith circu‐
lar jet nozzles
The wate r jet of a circular jet nozzle (dirt
grinder) can cause extern ally invisible dam‐
age tothe tyres or chassis parts. 314
Maintenance and care