2017 MERCEDES-BENZ CLS-Class radio
[x] Cancel search: radioPage 158 of 206
XSelect a sub-category, e.g.Rock.
XSelect a track in the sub-category for playing.
All of the tracks in this sub-category are
played.
Gracenote®Media Database
General notes
This function is available in CD audio, MP3 and
iPod®mode.
There is a version of Gracenote®music recog-
nition technology, Emeryville, California, USA on
the hard disk of the multimedia system. You will recognize this by the logo in the bottom right-
hand corner of certain audio displays. If the
audio CD does not contain any CD text informa-
tion, the multimedia system can use the Grace-
note
®Media Database to identify unknown
audio tracks when in audio CD mode.
In addition the cover art for the main display
field, the album list and the "Select by cover"
function from the Gracenote
®Media Database
are displayed for the music files and the iPod®.
This occurs when the cover art is not contained
in the files but in the Gracenote
®Media Data-
base.
Online prompt for metadata
A connection to the Gracenote®Data Server is
made automatically when an audio CD is inser-
ted. The missing data is loaded, saved in the
multimedia system and shown on the display. If
the search for metadata is unsuccessful, no data
can be displayed. If no phone is connected or
configured for data use, this function is unavail-
able.
An Internet connection is required for this
(
Ypage 129).
Saving audio CDs
General notes
iStore your audio CDs in a safe place. Any
malfunction in the multimedia system may
result in the loss of stored files. Mercedes-
Benz is not liable for any loss of data. No individual music tracks can be stored or
deleted, only a maximum of 12 complete audio
CDs.
If 12 audio CDs are stored, the
REC
option in the
Media menu bar is grayed out and has no func-
tion. One audio CD must be deleted before a
new audio CD can be copied.
Copying an audio CD
XInsert an audio CD.
XIn media mode, slide 6the controller.
The media menu bar appears.
XTo start the copying process: selectRECby
turning and pressing the controller.
XTo select Start: press the controller.
The copying procedure starts and is shown in
the progress bar.
It may take some time for the copying process
to be completed, depending on the amount of
data.
If the copying process is successful, the
Music files copied.
message appears
XTo cancel copying: selectCancel.
The files copied up to the point of cancellation
are lost.
iDuring the copying process, you can switch
to another function (e.g. radio) or to another
media source (e.g. USB). The copying proce-
dure continues in the background. It is how-
ever not possible to select another CD in the
CD changer.
Playing audio CDs
XIn Media mode, slide 6the controller.
The media menu bar appears.
XTo select Search: turn and press the control-
ler.
The category list appears.
XTo select StoredAudioCDsin the category
list: turn and press the controller.
A selection list for the copied audio CDs is
displayed.
XTo select the desired audio CD: turn and press
the controller.
The track list is displayed.
XTo select a track: turn the controller and press
to confirm.
156Audio/video mode
Media
Page 174 of 206
Your multimediasyste mequipment
These operatin ginstruction sdescribe all th e
standar dan doptional equipment of your multi-
media system, as available at th etime of going
to press. Country-specifi cdifference sare pos -
sible. Bear in min dthat your vehicle may no t
feature all function sdescribed here. Thi salso
applies to safety-relevan tsystems an dfunc-
tions.
Read th einformation on qualifie dspecialis t
workshop sin th evehicle Operator's Manual.
Sound settings
Calling up th esound menu
You can mak evarious sound setting sfo rth e
differen taudio an dvideo sources. It is possible
to set more bass fo rradio mode than fo raudio
CD mode, fo rexample. The respective sound
men ucan be called up from th emen uof th e
desire dmode.
XSwitch to radio mode (Ypage 140).
or
XSwitch to media mode (Ypage 149).
XTo display themen ubars: slid e6 thecon-
troller.
XTo selec tà :turn an dpress th econtroller .
The men uappears wit hth elast setting
accessed, e.g. Balance/Fade r
.
Sound men uoverview
FunctionOptions
EqualizerSets treble ,mid -
range an dbass
Balance/faderAdjust sth evolume :
right/lef tan d
front/rea r
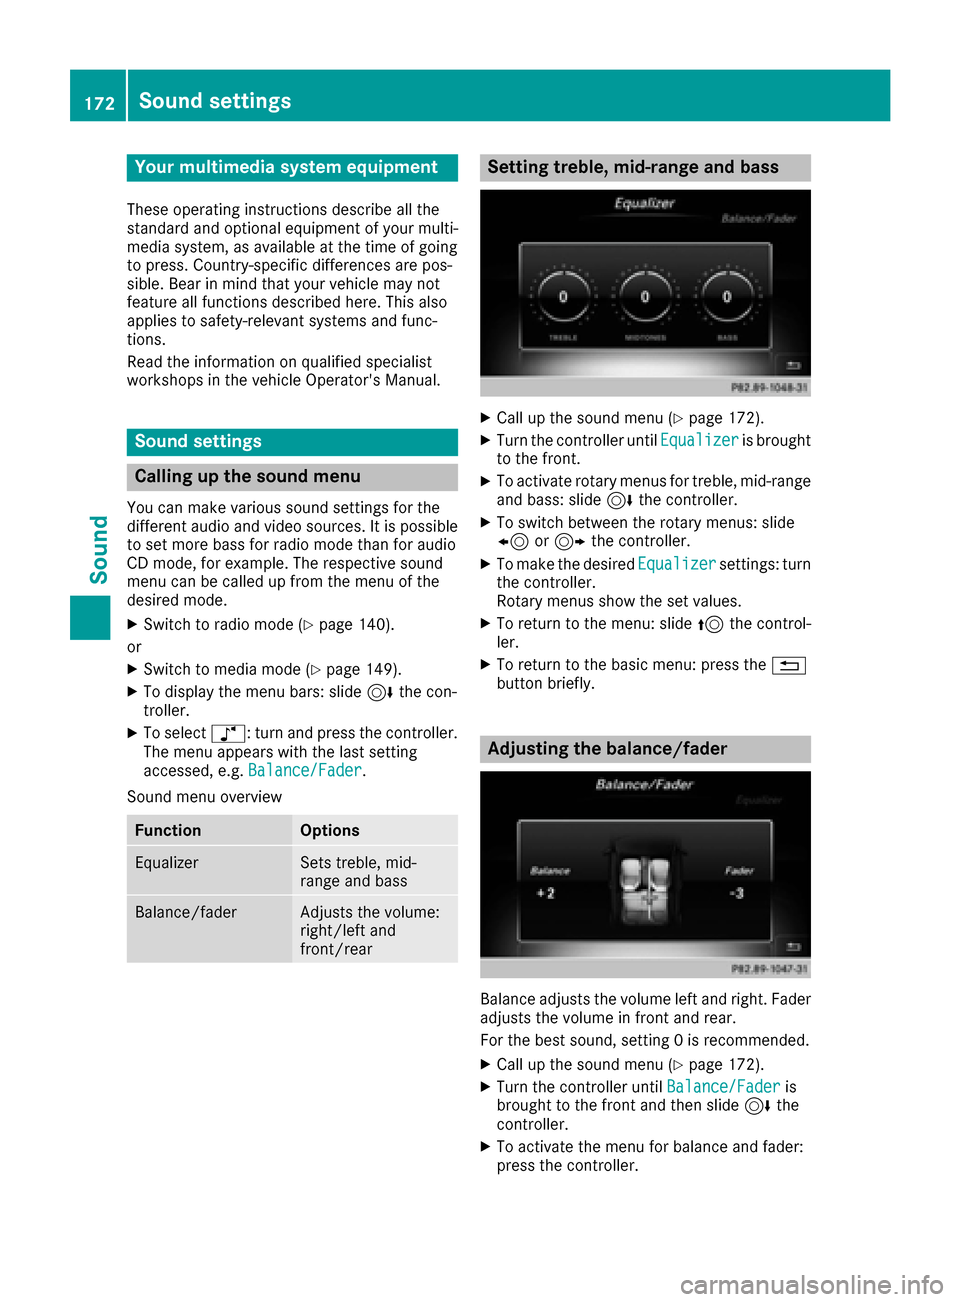
Setting treble, mid-range an dbass
XCall up th esound men u (Ypage 172).
XTurnth econtroller until Equalizeris brought
to th efront.
XTo activat erotary menus fo rtreble ,mid-range
an dbass :slid e6 thecontroller .
XTo switch between th erotary menus: slid e
8 or9 thecontroller .
XTo maketh edesire dEqualize rsettings: turn
th econtroller .
Rotary menus sho wtheset values.
XTo return to th emenu: slid e5 thecontrol-
ler .
XTo return to th ebasi cmenu: press th e%
butto nbriefly.
Adjusting th ebalance/fader
Balance adjust sth evolume lef tan dright .Fader
adjust sth evolume in fron tan drear.
Fo rth ebes tsound ,setting 0is recommended .
XCall up thesound men u (Ypage 172).
XTurnth econtroller until Balance/Faderis
brought to th efron tan dthen slid e6 the
controller .
XTo activat eth emen ufo rbalance an dfader:
press th econtroller .
172Sound settings
Sound
Page 175 of 206
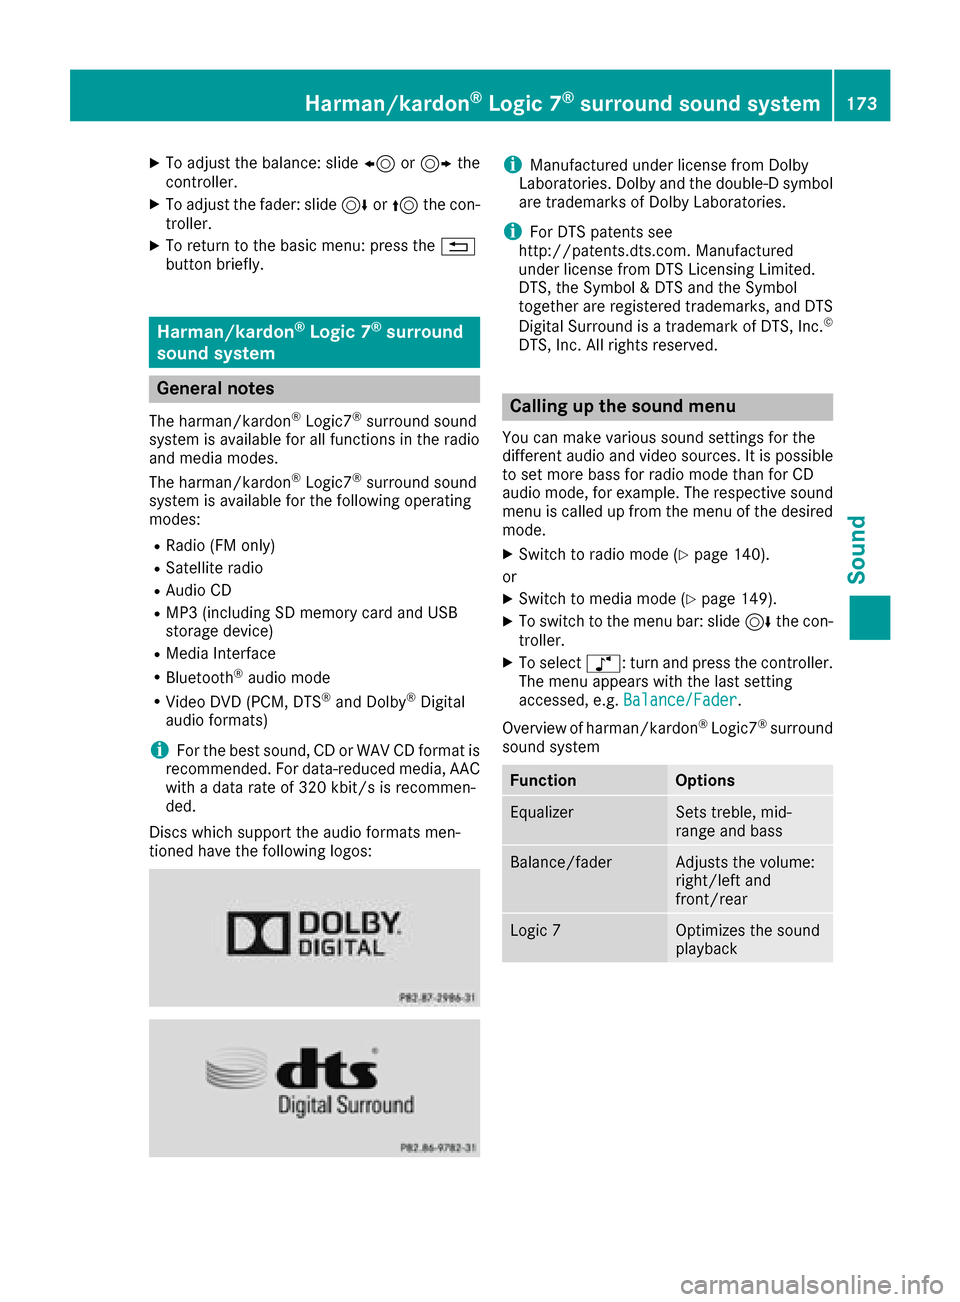
XTo adjust the balance: slide8or9 the
controller.
XTo adjust the fader: slide 6or5 the con-
troller.
XTo return to the basic menu: press the %
button briefly.
Harman/kardon®Logic 7®surround
sound system
General notes
The harman/kardon®Logic7®surround sound
system is available for all functions in the radio
and media modes.
The harman/kardon
®Logic7®surround sound
system is available for the following operating
modes:
RRadio (FM only)
RSatellite radio
RAudio CD
RMP3 (including SD memory card and USB
storage device)
RMedia Interface
RBluetooth®audio mode
RVideo DVD (PCM, DTS®and Dolby®Digital
audio formats)
iFor the best sound, CD or WAV CD format is
recommended. For data-reduced media, AAC
with a data rate of 320 kbit/s is recommen-
ded.
Discs which support the audio formats men-
tioned have the following logos:
iManufactured under license from Dolby
Laboratories. Dolby and the double-D symbol
are trademarks of Dolby Laboratories.
iFor DTS patents see
http://patents.dts.com. Manufactured
under license from DTS Licensing Limited.
DTS, the Symbol & DTS and the Symbol
together are registered trademarks, and DTS
Digital Surround is a trademark of DTS, Inc.
©
DTS, Inc. All rights reserved.
Calling up the sound menu
You can make various sound settings for the
different audio and video sources. It is possible
to set more bass for radio mode than for CD
audio mode, for example. The respective sound
menu is called up from the menu of the desired
mode.
XSwitch to radio mode (Ypage 140).
or
XSwitch to media mode (Ypage 149).
XTo switch to the menu bar: slide 6the con-
troller.
XTo select à: turn and press the controller.
The menu appears with the last setting
accessed, e.g. Balance/Fader
.
Overview of harman/kardon
®Logic7®surround
sound system
FunctionOptions
EqualizerSets treble, mid-
range and bass
Balance/faderAdjusts the volume:
right/left and
front/rear
Logic 7Optimizes the sound
playback
Harman/kardon®Logic 7®surround sound system173
Sound
Page 176 of 206
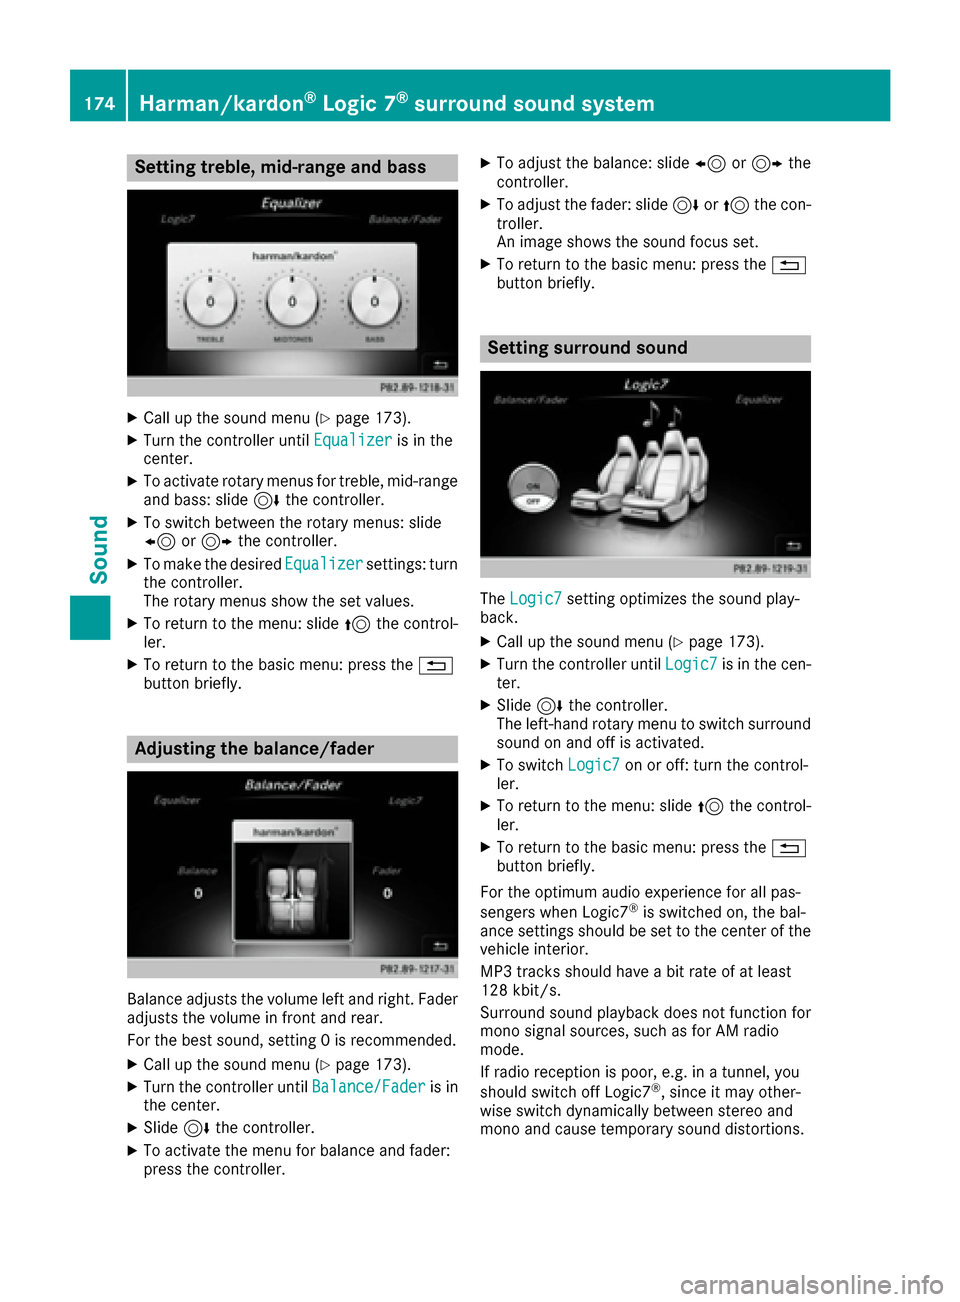
Setting treble, mid-range and bass
XCall up the sound menu (Ypage 173).
XTurn the controller untilEqualizeris in the
center.
XTo activate rotary menus for treble, mid-range
and bass: slide 6the controller.
XTo switch between the rotary menus: slide
8 or9 the controller.
XTo make the desired Equalizersettings: turn
the controller.
The rotary menus show the set values.
XTo return to the menu: slide 5the control-
ler.
XTo return to the basic menu: press the %
button briefly.
Adjusting the balance/fader
Balance adjusts the volume left and right. Fader
adjusts the volume in front and rear.
For the best sound, setting 0 is recommended.
XCall up the sound menu (Ypage 173).
XTurn the controller until Balance/Faderis in
the center.
XSlide 6the controller.
XTo activate the menu for balance and fader:
press the controller.
XTo adjust the balance: slide 8or9 the
controller.
XTo adjust the fader: slide 6or5 the con-
troller.
An image shows the sound focus set.
XTo return to the basic menu: press the %
button briefly.
Setting surround sound
The Logic7setting optimizes the sound play-
back.
XCall up the sound menu (Ypage 173).
XTurn the controller until Logic7is in the cen-
ter.
XSlide 6the controller.
The left-hand rotary menu to switch surround
sound on and off is activated.
XTo switch Logic7on or off: turn the control-
ler.
XTo return to the menu: slide 5the control-
ler.
XTo return to the basic menu: press the %
button briefly.
For the optimum audio experience for all pas-
sengers when Logic7
®is switched on, the bal-
ance settings should be set to the center of the
vehicle interior.
MP3 tracks should have a bit rate of at least
128 kbit/s.
Surround sound playback does not function for
mono signal sources, such as for AM radio
mode.
If radio reception is poor, e.g. in a tunnel, you
should switch off Logic7
®, since it may other-
wise switch dynamically between stereo and
mono and cause temporary sound distortions.
174Harman/kardon®Logic 7®surround sound system
Sound
Page 177 of 206

Bang & Olufsen BeoSound
General notes
The Bang & Olufsen BeoSound AMG sound sys-
tem is available for all functions in the radio and
media modes.
The following modes are available for the Bang &
Olufsen BeoSound AMG sound system:
RRadio (FM only)
RSatellite radio
RAudio CD
RMP3/AAC
RMedia Interface
RBluetooth®audio mode
RVideo DVD (PCM, DTS®and Dolby®Digital
audio formats)
iFor the best sound, CD or WAV CD format is
recommended. For data-reduced media, AAC
with a data rate of 320 kbit/s is recommen-
ded.
iManufactured under license from Dolby
Laboratories. Dolby and the double-D symbol
are trademarks of Dolby Laboratories.
iFor DTS patents see
http://patents.dts.com. Manufactured
under license from DTS Licensing Limited.
DTS, the Symbol & DTS and the Symbol
together are registered trademarks, and DTS
Digital Surround is a trademark of DTS, Inc.
©
DTS, Inc. All rights reserved.
Calling up the sound menu
You can make various sound settings for the
different audio and video sources. It is possible
to set more bass for radio mode than for audio
CD mode, for example. The respective sound
menu is called up from the menu of the desired
mode.
XSwitch to radio mode (Ypage 140).
or
XSwitch to media mode (Ypage 149).
XTo switch to the menu bar: slide 6the con-
troller.
XTo select à: turn and press the controller.
The menu appears with the last setting
accessed, e.g. Balance/Fader
.
Bang & Olufsen BeoSound AMG sound system
FunctionOptions
EqualizerSets treble, mid-
range and bass
Balance/faderAdjusts the volume:
right/left and
front/rear
True ImageSets a sound profile
in the vehicle
Sound ModeOptimizes the sound
playback
Setting treble, mid-range and bass
XCall up the sound menu (Ypage 175).
XTurn the controller until Equalizeris in the
center.
XSlide 6the controller.
Rotary menus for treble, mid-range and bass
are activated.
Bang & Olufsen BeoSound175
Sound
Page 180 of 206

Your multimediasyste mequipment
These operatin ginstruction sdescribe all th e
standar dan doptional equipment of your multi-
media system, as available at th etime of going
to press. Country-specifi cdifference sare pos -
sible. Bear in min dthat your vehicle may no t
feature all function sdescribed here. Thi salso
applies to safety-relevan tsystems an dfunc-
tions.
Read th einformation on qualifie dspecialis t
workshop sin th evehicle Operator's Manual.
Weather forecasts
Introduction
Thi sfunction is currentl yno tavailable fo rCan -
ada.
Fo rth ereception of weather forecast svia sat -
ellite radio, you will need aSIRIU SXM Satellite
Weather subscription .
If th emessage: Pleasecall SIRIUS to
activate the system at :888-539-7474ESN :SIRIUS IDappears alon gwit hth eID
number of th eSIRIU Sdevice, you will need to
hav eth eweather servic eactivated first .
XTo selectCal lorCancel:turn an dpress th e
controller .
If amobile phone is connecte dto th emulti-
media syste m (
Ypage 94), when you selec t
Cal l, acal lis placed to amember of th eSIR-
IU Sservic estaff .The ID number of th eSIRIU S
devic ewill be transferred to th etelephon e
display.
XThi swill be followed by instruction sfrom th e
servic eemployee.
The multimedia syste mcan receiv eweather
forecast sfo rth eUS A(includin gAlask aan d
Hawaii) via satellite radio.
The received weather dat acan be displaye das
an information chart (dail yforecast ,five-day
forecast ,detailed information )or on th e
weather map .
The weather dat areceived from th eweather
station is stored in th emultimedia syste mfor
on ehour .It can therefore be displaye dagain
immediately after restartin gth eengin e(fo r
example after refueling). Dependin
gon whic hscale has bee nselected,
th eweather map can display th efollowin g
weather dat awit hsymbols :
Rprecipitation radar
The precipitation radar canno tbe displaye d
fo rAlaska, Hawaii an dPuerto Rico.
Rstor mcharacteristics
Rhig han dlow-pressure areas, weather fronts
Rcours eof tropical cyclones (hurricanes,
typhoons )
Rstormwarnings
Rwin ddirection an dspeeds
iHurricane: term used to describe th etropi-
cal cyclones that primarily develo pin th e
Atlantic, North Pacifi can dSout hPacifi c
oceans. The win dspeeds are abov e74 mph
(11 8km/ h). Five categories are used to clas-
sify the strength of a hurricane.
Typhoon: term used to describe a tropical
cyclone that develops in the northwestern
Pacific. The wind speeds are in the category of
a hurricane.
Switching the SIRIUS Weather display
on/off
Switching on
XPress the %button.
XTo select Tel/®in the main function bar:
slide 5, turn and press the controller.
A menu appears.
XTo select SIRIUS Weather: turn and press
the controller.
The information chart shows the daily fore-
cast at the current vehicle position.
178Weather forecasts
SIRIUS Weather
Page 191 of 206
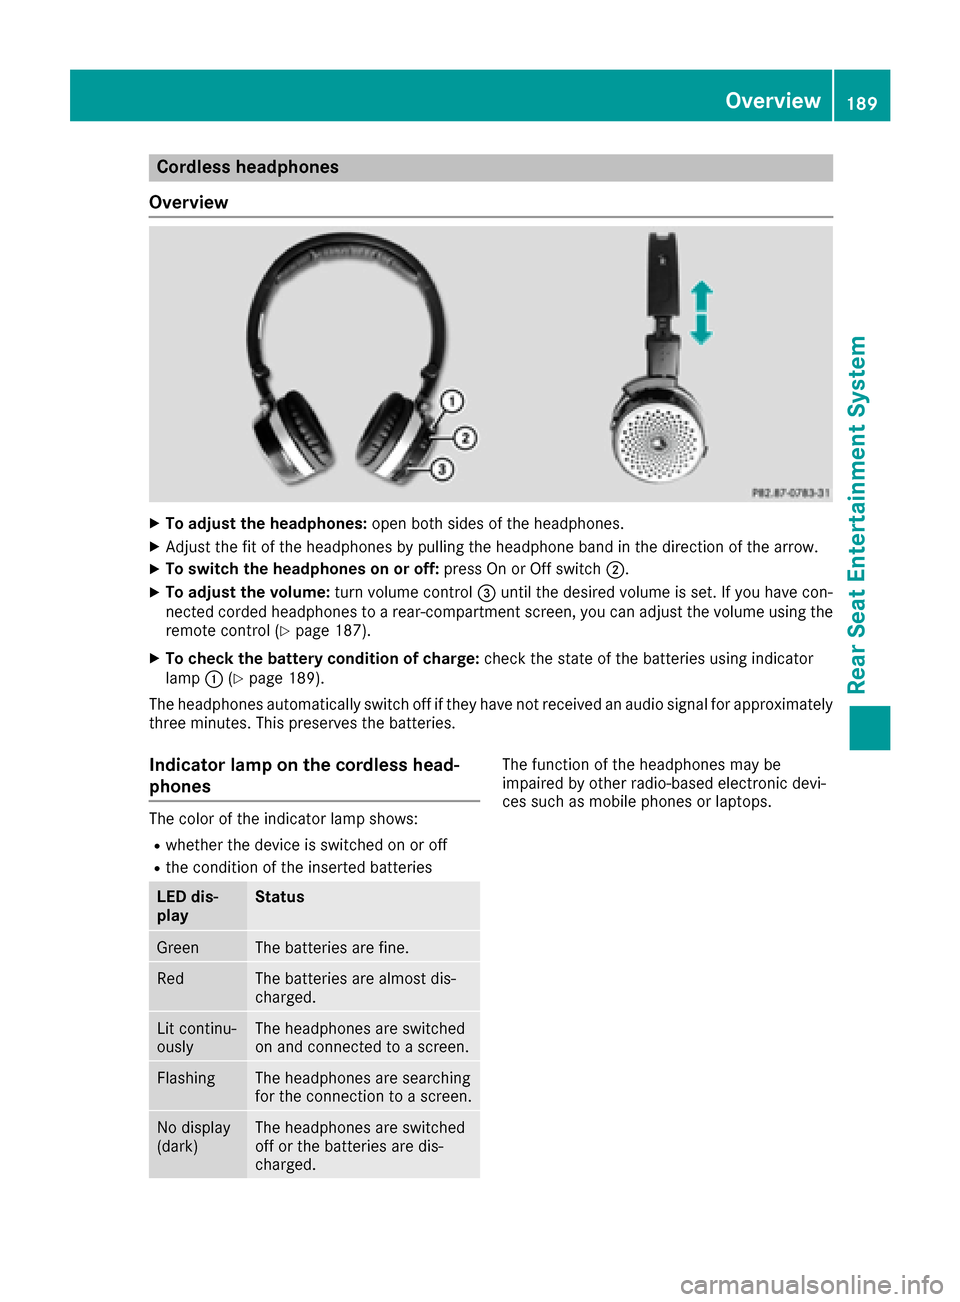
Cordless headphones
Overview
XTo adjust the headphones: open both sides of the headphones.
XAdjust the fit of the headphones by pulling the headphone band in the direction of the arrow.
XTo switch the headphones on or off: press On or Off switch;.
XTo adjust the volume: turn volume control=until the desired volume is set. If you have con-
nected corded headphones to a rear-compartment screen, you can adjust the volume using the
remote control (
Ypage 187).
XTo check the battery condition of charge: check the state of the batteries using indicator
lamp :(Ypage 189).
The headphones automatically switch off if they have not received an audio signal for approximately
three minutes. This preserves the batteries.
Indicator lamp on the cordless head-
phones
The color of the indicator lamp shows:
Rwhether the device is switched on or off
Rthe condition of the inserted batteries
LED dis-
playStatus
GreenThe batteries are fine.
RedThe batteries are almost dis-
charged.
Lit continu-
ouslyThe headphones are switched
on and connected to a screen.
FlashingThe headphones are searching
for the connection to a screen.
No display
(dark)The headphones are switched
off or the batteries are dis-
charged.
The function of the headphones may be
impaired by other radio-based electronic devi-
ces such as mobile phones or laptops.
Overview189
Rear Seat Entertainment System
Z
Page 194 of 206

Selecting sound settings
You can select sound settings in the following
operating modes:
RAudio CD/MP3
RVideo DVD
RRadio (active media source in COMAND)
RAUX
XSwitch on an operating mode (e.g. audio CD
mode) (Ypage 193).
XSelectTrebleorBassusing
the :=; buttons on the remote
control and press the 9button to confirm.
An adjustment scale appears.
XSelect a setting using the 9:buttons
and press the 9button to confirm.
Multiple users
Simultaneous use of the rear-compart-
ment disc drive
The two rear-compartment screens can be oper- ated almost entirely independently from one
another. However, a conflict may occur in some
menus if the two screens are used simultane-
ously.
The following functions affect both screens:
Rchanging playback options
Rselecting a track (from a track list or folder)
Rusing the play, pause and stop functions
Rfast forward and rewind or scrolling
Rcalling up the DVD menu and navigating
within it
Rsetting the language, subtitles and camera
angle
Rcalling up interactive DVD content
The following functions affect only one screen:
Rchanging audio and video functions as well as picture settings
Rswitching between full screen and the menu
Switching between operating modes
When you exit an operating mode (e.g. audio CD
mode), the current setting is saved. If you call up
this operating mode again later, there are two
possibilities:
Rthe operating mode has been changed on the
other screen.
Rthe operating mode has not been changed.
In the first case, the operating mode appears as it is on the other screen.
In the second case, the setting appears on the
screen as it was when you last exited the oper-
ating mode.
Picture settings
Overview
You can select the picture settings in video DVD and AUX mode (Ypage 202).
Adjusting the brightness, contrast and
color
XSwitch to video DVD mode (Ypage 196).
XTo show the menu: press the9button on
the remote control.
XSelect DVD-Videousing the :=;
buttons and press the 9button to confirm.
XSelect Brightness,Contrastor Colorusing the 9: buttons and press the 9
button to confirm.
A scale appears.
XSelect a setting using the 9:buttons
and press the 9button to confirm.
Changing the picture format
XTo show the menu: press the9button on
the remote control.
XSelect DVD-Videousing the :=;
buttons and press the 9button to confirm.
The dot in front of one of the menu items
Automatic
, 16:9 Optimized,4:3or Wide‐screenshows the currently set picture for-
mat.
XSelect a format using the 9:buttons
and press the 9button to confirm.
192Basic functions
Rear Seat Entertainment System