Page 14 of 589
23
Your vehicle at a glance
1. Door locks .............................................4-17
2. Fuel filler lid ..........................................4-31
3. Rear combination lamp(Maintenance) .......................................8-90
4. High mounted stop lamp (Maintenance) .....................................8-102
5. Rear window wiper blade .....................4-95
6. Liftgate ..................................................4-22
7. Antenna ..................................................5-2
8. Rearview camera .................................4-87
OPS016006N
■ Rear view
❈The actual shape may differ from the illustration.
Page 15 of 589
Your vehicle at a glance
42
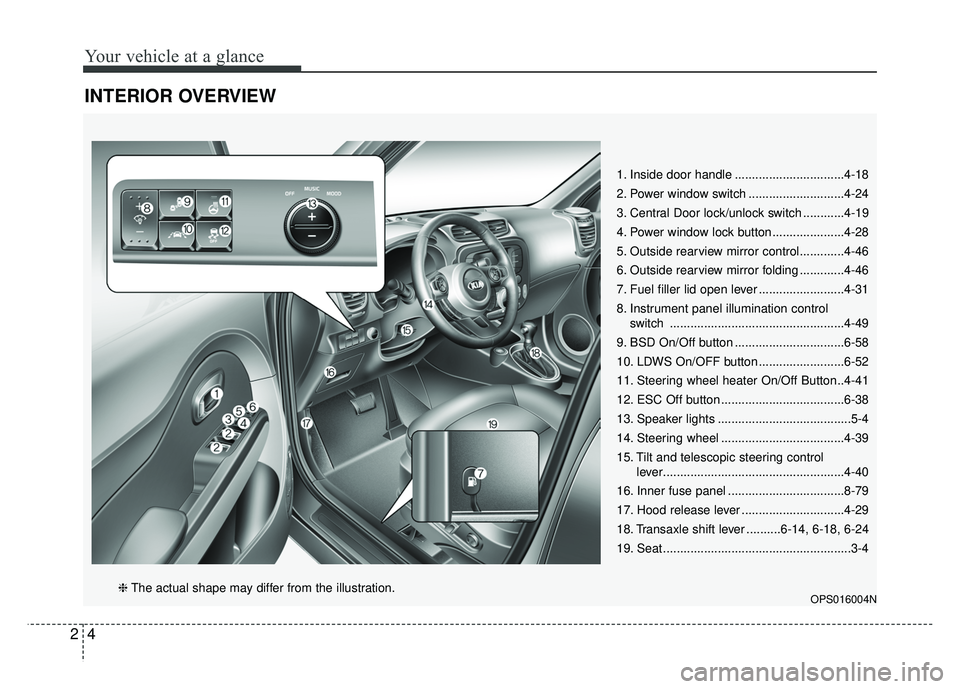
INTERIOR OVERVIEW
1. Inside door handle ................................4-18
2. Power window switch ............................4-24
3. Central Door lock/unlock switch ............4-19
4. Power window lock button .....................4-28
5. Outside rearview mirror control.............4-46
6. Outside rearview mirror folding .............4-46
7. Fuel filler lid open lever .........................4-31
8. Instrument panel illumination controlswitch ...................................................4-49
9. BSD On/Off button ................................6-58
10. LDWS On/OFF button .........................6-52
11. Steering wheel heater On/Off Button..4-41
12. ESC Off button ....................................6-38
13. Speaker lights .......................................5-4
14. Steering wheel ....................................4-39
15. Tilt and telescopic steering control lever.....................................................4-40
16. Inner fuse panel ..................................8-79
17. Hood release lever ..............................4-29
18. Transaxle shift lever ..........6-14, 6-18, 6-24
19. Seat .......................................................3-4
OPS016004N❈ The actual shape may differ from the illustration.
Page 24 of 589
Safety features of your vehicle
63
WARNING- Unexpected
Seat Movement
After adjusting a manual seat,
always check that it is locked by
shifting your weight to the front
and back. Sudden or unexpect-
ed movement of the driver's
seat could cause you to lose
control of the vehicle.WARNING - Rear seat- backs
Always lock the rear seatback
before driving. Failure to do so
could result in passengers or
objects being thrown forward
injuring vehicle occupants.
WARNING- Luggage and Cargo
Do not stack pile or stack lug-
gage or cargo higher than the
seatback in the cargo area. In an
accident the cargo could strike
and injury a passenger. If
objects are large, heavy or must
be piled, they must be secured
in the cargo area.
WARNING- Seat adjustment
Do not adjust the seat while wearing seat belts. Moving the
seat forward will cause strong
pressure on the abdomen.
Do not place your hand near the seat bottom or seat track
while adjusting the seat. Your
hand could get caught in the
seat mechanism.
WARNING- Small
Objects
Use extreme caution when pick-
ing up small objects trapped
under the seats or between the
seat and the center console.
Your hands might be cut or
injured by the sharp edges of
the seats mechanism.
WARNING- Cargo Area
Do not allow passengers to ride
in the cargo area under any cir-
cumstance. The cargo area is
solely for the purpose of trans-
porting luggage or cargo.
Page 25 of 589
37
Safety features of your vehicle
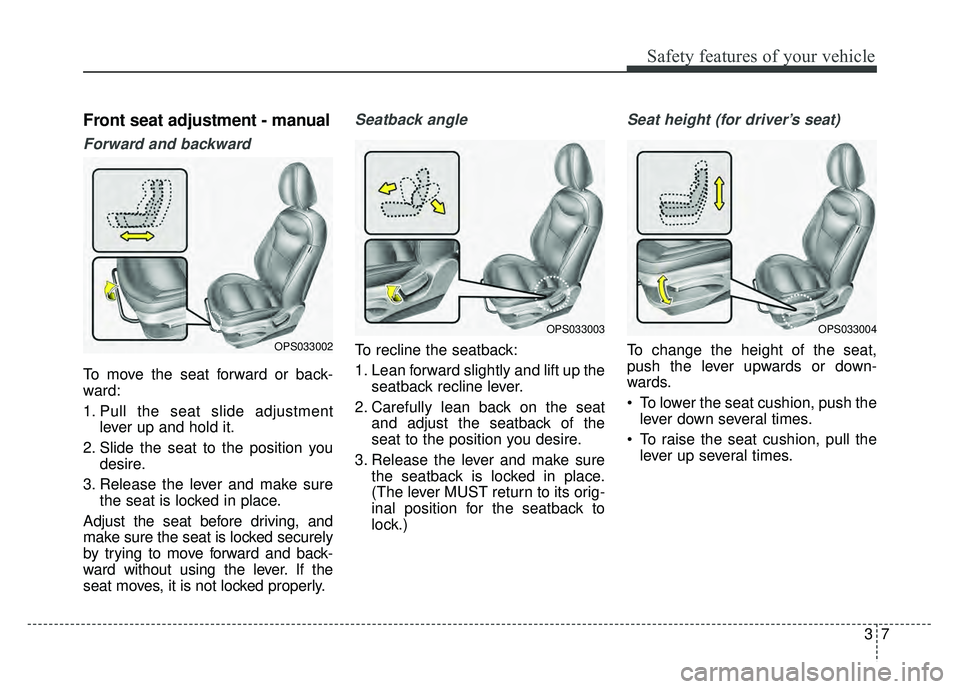
Front seat adjustment - manual
Forward and backward
To move the seat forward or back-
ward:
1. Pull the seat slide adjustmentlever up and hold it.
2. Slide the seat to the position you desire.
3. Release the lever and make sure the seat is locked in place.
Adjust the seat before driving, and
make sure the seat is locked securely
by trying to move forward and back-
ward without using the lever. If the
seat moves, it is not locked properly.
Seatback angle
To recline the seatback:
1. Lean forward slightly and lift up the seatback recline lever.
2. Carefully lean back on the seat and adjust the seatback of the
seat to the position you desire.
3. Release the lever and make sure the seatback is locked in place.
(The lever MUST return to its orig-
inal position for the seatback to
lock.)
Seat height (for driver’s seat)
To change the height of the seat,
push the lever upwards or down-
wards.
To lower the seat cushion, push thelever down several times.
To raise the seat cushion, pull the lever up several times.OPS033002
OPS033003OPS033004
Page 30 of 589
Safety features of your vehicle
12
3
To reinstall the headrest :
1. Put the headrest poles (2) into the
holes while pressing the release
button (1).
2. Recline the seatback (4) with the recline lever or switch (3).
3. Adjust the headrest to the appro- priate height.
Seatback pocket (if equipped)
The seatback pocket is provided on
the back of the front passenger’s
seatbacks.
OPS033048L
OPS033050L
■Type A
■ Type B
OPS033016
WARNING- Headrest
Reinstallation
To reduce the risk of injury to
the head or neck, always make
sure the headrest is locked into
position and adjusted properly
after reinstalling.
WARNING- Seatback pockets
Do not put heavy or sharp
objects in the seatback pocket.
An occupant could contact such
objects in a crash. Heavy objects
in the front passenger seatback
could also interfere with the
airbag sensing system.
Page 32 of 589
Safety features of your vehicle
14
3
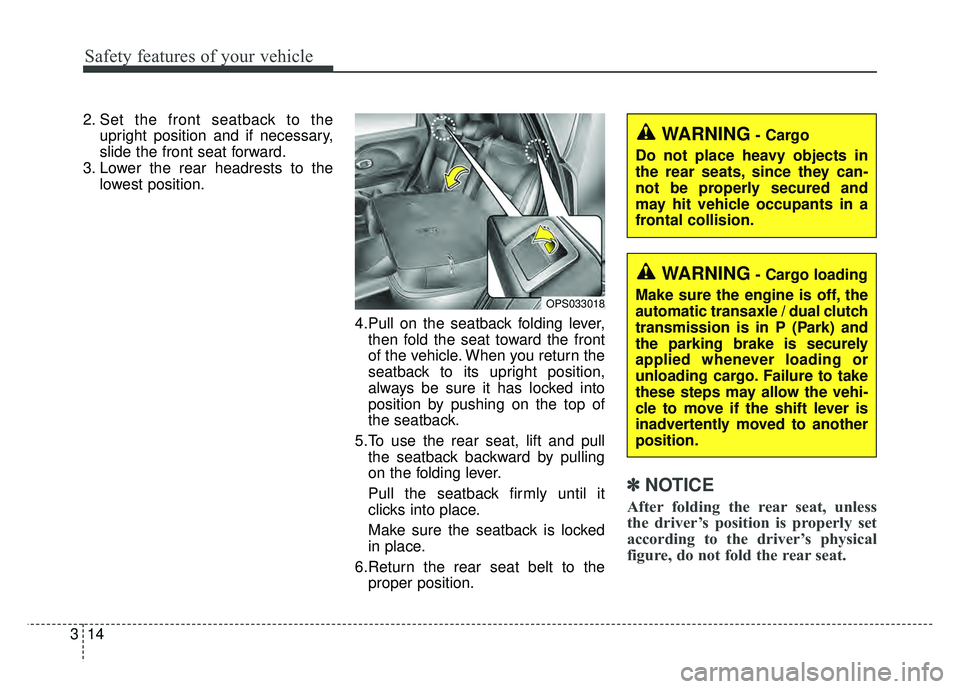
2. Set the front seatback to the
upright position and if necessary,
slide the front seat forward.
3. Lower the rear headrests to the lowest position.
4.Pull on the seatback folding lever,then fold the seat toward the front
of the vehicle. When you return the
seatback to its upright position,
always be sure it has locked into
position by pushing on the top of
the seatback.
5.To use the rear seat, lift and pull the seatback backward by pulling
on the folding lever.
Pull the seatback firmly until it
clicks into place.
Make sure the seatback is locked
in place.
6.Return the rear seat belt to the proper position.
✽ ✽
NOTICE
After folding the rear seat, unless
the driver’s position is properly set
according to the driver’s physical
figure, do not fold the rear seat.
OPS033018
WARNING- Cargo
Do not place heavy objects in
the rear seats, since they can-
not be properly secured and
may hit vehicle occupants in a
frontal collision.
WARNING- Cargo loading
Make sure the engine is off, the
automatic transaxle / dual clutch
transmission is in P (Park) and
the parking brake is securely
applied whenever loading or
unloading cargo. Failure to take
these steps may allow the vehi-
cle to move if the shift lever is
inadvertently moved to another
position.
Page 33 of 589
315
Safety features of your vehicle
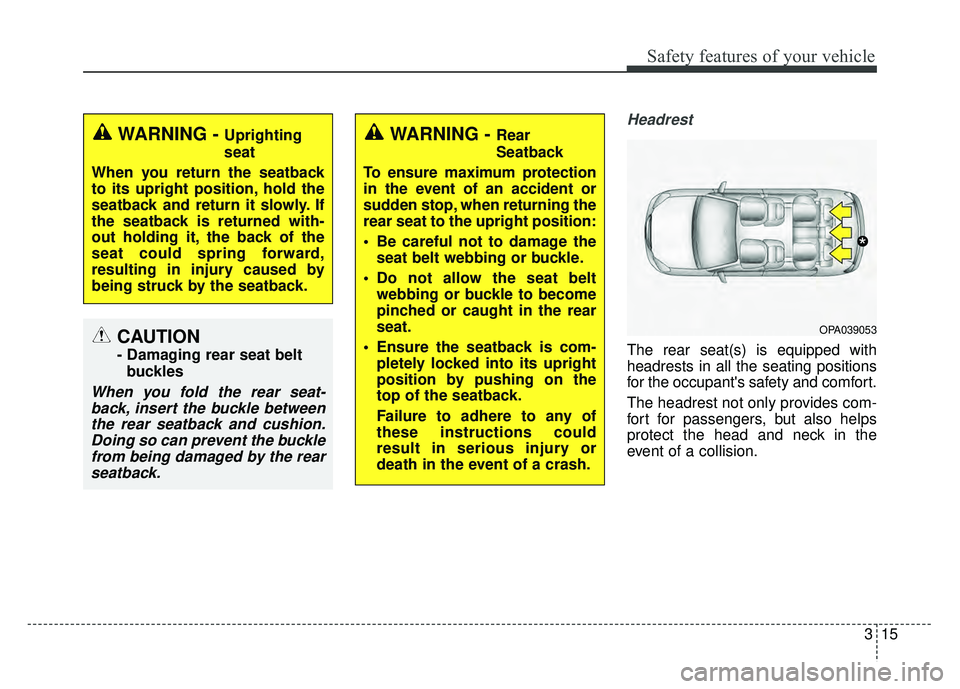
Headrest
The rear seat(s) is equipped with
headrests in all the seating positions
for the occupant's safety and comfort.
The headrest not only provides com-
fort for passengers, but also helps
protect the head and neck in the
event of a collision.
WARNING - Uprighting
seat
When you return the seatback
to its upright position, hold the
seatback and return it slowly. If
the seatback is returned with-
out holding it, the back of the
seat could spring forward,
resulting in injury caused by
being struck by the seatback.WARNING - Rear
Seatback
To ensure maximum protection
in the event of an accident or
sudden stop, when returning the
rear seat to the upright position:
Be careful not to damage the seat belt webbing or buckle.
Do not allow the seat belt webbing or buckle to become
pinched or caught in the rear
seat.
Ensure the seatback is com- pletely locked into its upright
position by pushing on the
top of the seatback.
Failure to adhere to any of
these instructions could
result in serious injury or
death in the event of a crash.
OPA039053
*
CAUTION
- Damaging rear seat belt
buckles
When you fold the rear seat-back, insert the buckle betweenthe rear seatback and cushion.Doing so can prevent the bucklefrom being damaged by the rearseatback.
Page 34 of 589
Safety features of your vehicle
16
3
For maximum effectiveness in case of
an accident, the headrest should be
adjusted so the middle of the head-
rest is at the same height as the cen-
ter of gravity of an occupant's head.
Generally, the center of gravity of
most people's head is similar with
the height of the top of their eyes.
Also adjust the headrest as close to
your head as possible. For this rea-
son, the use of a cushion that holds
the body away from the seatback is
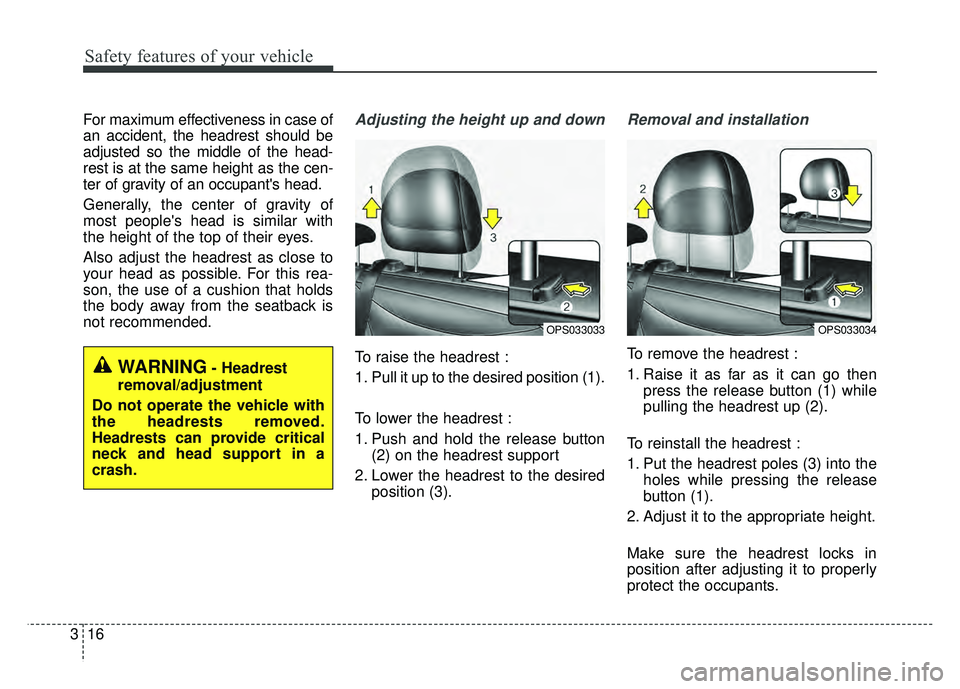
not recommended.Adjusting the height up and down
To raise the headrest :
1. Pull it up to the desired position (1).
To lower the headrest :
1. Push and hold the release button
(2) on the headrest support
2. Lower the headrest to the desired position (3).
Removal and installation
To remove the headrest :
1. Raise it as far as it can go thenpress the release button (1) while
pulling the headrest up (2).
To reinstall the headrest :
1. Put the headrest poles (3) into the holes while pressing the release
button (1).
2. Adjust it to the appropriate height.
Make sure the headrest locks in
position after adjusting it to properly
protect the occupants.
OPS033033
WARNING- Headrest
removal/adjustment
Do not operate the vehicle with
the headrests removed.
Headrests can provide critical
neck and head support in a
crash.
OPS033034