2017 KIA SOUL service indicator
[x] Cancel search: service indicatorPage 338 of 589
619
Driving your vehicle
For smooth operation, depress thebrake pedal and the lock release but-ton when shifting from N (Neutral) toa forward or reverse gear.When stopped on an incline, do not
hold the vehicle with the engine
power. Use the service brake or the
parking brake.
Transaxle ranges
The indicator in the instrument clus-
ter displays the shift lever position
when the ignition switch is in the ON
position.
P (Park)
Always come to a complete stop
before shifting into P (Park). This
position locks the transaxle and pre-
vents the drive wheels from rotating.
Shifting into P (Park) while the vehi-
cle is in motion will cause the drive
wheels to lock which will cause you
to lose control of the vehicle. R (Reverse)
Use this position to drive the vehicle
backward.
N (Neutral)
The wheels and transaxle are not
engaged. The vehicle will roll freely
even on the slightest incline unless
the parking brake or service brakes
are applied.
CAUTION- Transaxle
To avoid damage to your
transaxle, do not accelerate theengine in R (Reverse) or any for-ward gear position with thebrakes on. The transaxle may bedamaged if you shift into P(Park) while the vehicle is inmotion.
WARNING- Leaving the
Vehicle
To avoid unexpected or sudden
vehicle movement, never leave
your vehicle if the transmission
is not locked in the P (Park)
position and the parking brake
is fully engaged. Before leaving
the driver's seat, always make
sure the shift lever is engaged in
P (Park), set the parking brake
fully and shut the engine off.CAUTION- Shifting
Always come to a complete stop before shifting into or out of R(Reverse); you may damage thetransaxle if you shift into R(Reverse) while the vehicle is inmotion, except when “Rockingthe vehicle” explained in thissection.
Page 352 of 589
633
Driving your vehicle
In the event of brake failure
If service brakes fail to operate while
the vehicle is in motion, you can
make an emergency stop with the
parking brake. The stopping dis-
tance, however, will be much greater
than normal.
Disc brakes wear indicator
When your brake pads are worn and
new pads are required, you will hear
a high-pitched warning sound from
your front brakes or rear brakes. You
may hear this sound come and go or
it may occur whenever you depress
the brake pedal.
Please remember that some driving
conditions or climates may cause a
brake squeal when you first apply (or
lightly apply) the brakes. This is nor-
mal and does not indicate a problem
with your brakes.
Always replace the front or rear
brake pads as pairs.
WARNING- Parkingbrake
Applying the parking brake
while the vehicle is moving at
normal speeds can cause a
sudden loss of control of the
vehicle. If you must use the
parking brake to stop the vehi-
cle, use great caution in apply-
ing the brake.CAUTION- Parking brake
Driving with the parking brake
applied will cause excessivebrake pad (or lining) and brakerotor wear.
WARNING- Brake wear
Do not ignore high pitched
whining sounds from your
brakes. If you ignore this audi-
ble warning, you will eventually
lose braking performance,
which could lead to a serious
accident.
Page 415 of 589
What to do in an emergency
10
7
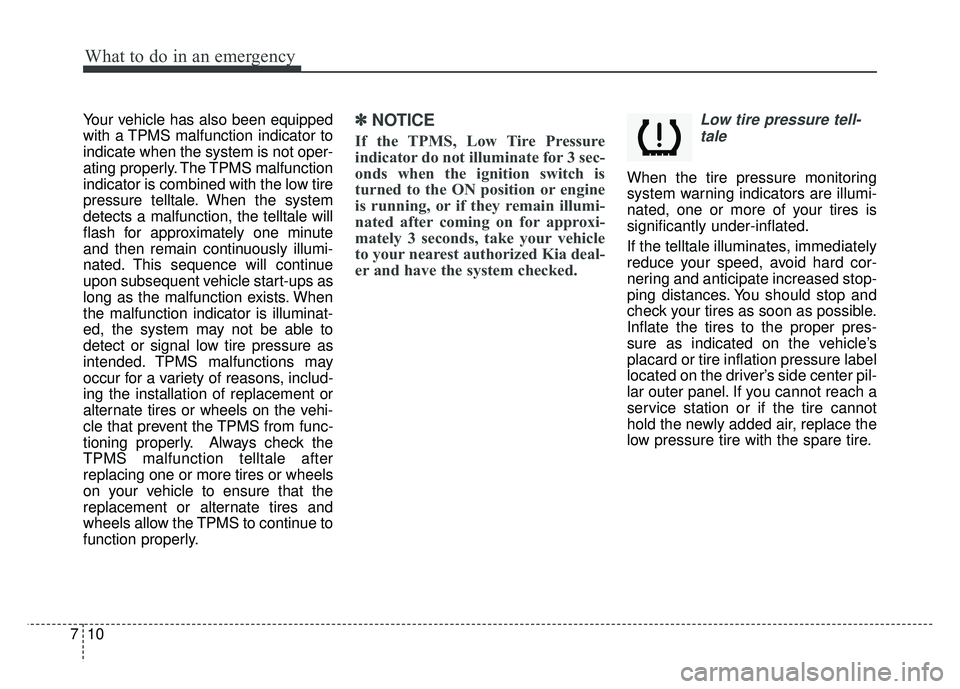
Your vehicle has also been equipped
with a TPMS malfunction indicator to
indicate when the system is not oper-
ating properly. The TPMS malfunction
indicator is combined with the low tire
pressure telltale. When the system
detects a malfunction, the telltale will
flash for approximately one minute
and then remain continuously illumi-
nated. This sequence will continue
upon subsequent vehicle start-ups as
long as the malfunction exists. When
the malfunction indicator is illuminat-
ed, the system may not be able to
detect or signal low tire pressure as
intended. TPMS malfunctions may
occur for a variety of reasons, includ-
ing the installation of replacement or
alternate tires or wheels on the vehi-
cle that prevent the TPMS from func-
tioning properly. Always check the
TPMS malfunction telltale after
replacing one or more tires or wheels
on your vehicle to ensure that the
replacement or alternate tires and
wheels allow the TPMS to continue to
function properly.✽ ✽
NOTICE
If the TPMS, Low Tire Pressure
indicator do not illuminate for 3 sec-
onds when the ignition switch is
turned to the ON position or engine
is running, or if they remain illumi-
nated after coming on for approxi-
mately 3 seconds, take your vehicle
to your nearest authorized Kia deal-
er and have the system checked.
Low tire pressure tell-
tale
When the tire pressure monitoring
system warning indicators are illumi-
nated, one or more of your tires is
significantly under-inflated.
If the telltale illuminates, immediately
reduce your speed, avoid hard cor-
nering and anticipate increased stop-
ping distances. You should stop and
check your tires as soon as possible.
Inflate the tires to the proper pres-
sure as indicated on the vehicle’s
placard or tire inflation pressure label
located on the driver’s side center pil-
lar outer panel. If you cannot reach a
service station or if the tire cannot
hold the newly added air, replace the
low pressure tire with the spare tire.
Page 417 of 589
What to do in an emergency
12
7
The TPMS malfunction indicator
may blink for approximately 1
minute and then remain continuous-
ly illuminated if the vehicle is moving
around electric power supply cables
or radios transmitters such as at
police stations, government and
public offices, broadcasting sta-
tions, military installations, airports,
or transmitting towers, etc. This can
interfere with normal operation of
the Tire Pressure Monitoring
System (TPMS).
The TPMS malfunction indicator may blink for approximately 1
minute and then remain continuous-
ly illuminated if snow chains are
used or some separate electronic
devices such as notebook comput-
er, mobile charger, remote starter or
navigation etc., are used in the vehi-
cle. This can interfere with normal
operation of the Tire Pressure
Monitoring System (TPMS).Changing a tire with TPMS
If you have a flat tire, the Low Tire
Pressure telltale will come on. Have
the flat tire repaired by an authorized
Kia dealer as soon as possible or
replace the flat tire with the spare tire.
Each wheel is equipped with a tire
pressure sensor mounted inside the
tire behind the valve stem. You must
use TPMS specific wheels. It is rec-
ommended that you always have
your tires serviced by an authorized
Kia dealer. Even if you replace the low pressure
tire with the spare tire, the Low Tire
Pressure telltale will remain on until
the low pressure tire is repaired and
placed on the vehicle.
After you replace the low pressure
tire with the spare tire, the TPMS
malfunction indicator may illuminate
after a few minutes because the
TPMS sensor mounted on the spare
wheel is not initiated.
Once the low pressure tire is reinflat-
ed to the recommended pressure
and installed on the vehicle or the
TPMS sensor mounted on the
replaced spare wheel is initiated by
an authorized Kia dealer, the TPMS
malfunction indicator and the low tire
pressure telltale will extinguish within
a few minutes of driving.
If the indicator is not extinguished
after a few minutes of driving, please
visit an authorized Kia dealer.
CAUTION- Repair Agents
Never use a puncture-repairing
agent not approved by Kia torepair and/or inflate a low pres-sure tire. The tire sealant notapproved by Kia may damagethe tire pressure sensor.
Page 582 of 589
Index
8I
Vanity mirror lamp . . . . . . . . . . . . . . . . . . . . . . . . . 4-100
Interior overview. . . . . . . . . . . . . . . . . . . . . . . . . . . . . . . 2-4
Jack and tools . . . . . . . . . . . . . . . . . . . . . . . . . . . . . . . . 7-15
Jump starting. . . . . . . . . . . . . . . . . . . . . . . . . . . . . . . . . . 7-5
Key operations . . . . . . . . . . . . . . . . . . . . . . . . . . . . . . . . 4-4
Key positions . . . . . . . . . . . . . . . . . . . . . . . . . . . . . . . . . 6-6 Illuminated ignition switch . . . . . . . . . . . . . . . . . . . . 6-6
Ignition switch position . . . . . . . . . . . . . . . . . . . . . . . 6-6
Starting the engine . . . . . . . . . . . . . . . . . . . . . . . . . . . 6-7
Keys . . . . . . . . . . . . . . . . . . . . . . . . . . . . . . . . . . . . \
. . . . 4-4 Record your key number . . . . . . . . . . . . . . . . . . . . . . 4-4
Key operations . . . . . . . . . . . . . . . . . . . . . . . . . . . . . . 4-4
Transmitter precautions . . . . . . . . . . . . . . . . . . . . . . . 4-6
Battery replacement . . . . . . . . . . . . . . . . . . . . . . . . . . 4-7
Immobilizer system . . . . . . . . . . . . . . . . . . . . . . . . . . 4-8
Label Air bag warning label. . . . . . . . . . . . . . . . . . . . . . . . 3-68
Tire sidewall labeling . . . . . . . . . . . . . . . . . . . . . . . . 8-64
Vehicle certification label. . . . . . . . . . . . . . . . . . . . . 9-10 Tire specification and pressure label . . . . . . . . . . . . 9-11
Refrigerant label . . . . . . . . . . . . . . . . . . . . . . . . . . . . 9-11
Lane Departure Warning System (LDWS) . . . . . . . . . 6-52 Warning indicator . . . . . . . . . . . . . . . . . . . . . . . . . . 6-54
The LDWS does not operate when . . . . . . . . . . . . . 6-55
The LDWS may not warn you even if the vehicleleaves the lane, or may warn you even if the
vehicle does not leave the lane when; . . . . . . . . . . 6-55
LCD Display . . . . . . . . . . . . . . . . . . . . . . . . . . . . . . . . . 4-56 LCD Modes . . . . . . . . . . . . . . . . . . . . . . . . . . . . . . . 4-56
Service mode . . . . . . . . . . . . . . . . . . . . . . . . . . . . . . 4-57
User Settings Mode . . . . . . . . . . . . . . . . . . . . . . . . . 4-58
Turn by turn Mode . . . . . . . . . . . . . . . . . . . . . . . . . . 4-64
Warning messages . . . . . . . . . . . . . . . . . . . . . . . . . . 4-64
LCD Modes . . . . . . . . . . . . . . . . . . . . . . . . . . . . . . . . . 4-56
License plate lamp bulb replacement . . . . . . . . . . . . 8-102
Liftgate . . . . . . . . . . . . . . . . . . . . . . . . . . . . . . . . . . . . \
. 4-22 Opening Liftgate . . . . . . . . . . . . . . . . . . . . . . . . . . . 4-22
Closing Liftgate . . . . . . . . . . . . . . . . . . . . . . . . . . . . 4-22
Emergency Liftgate safety release . . . . . . . . . . . . . . 4-23
Light bulb position (Front) . . . . . . . . . . . . . . . . . . . . . . 8-89
Light bulb position (Rear) . . . . . . . . . . . . . . . . . . . . . . 8-90
Light bulbs . . . . . . . . . . . . . . . . . . . . . . . . . . . . . . . . . . 8-88\
Bulb replacement precaution . . . . . . . . . . . . . . . . . . 8-88
Light bulb position (Front). . . . . . . . . . . . . . . . . . . . 8-89
Light bulb position (Rear) . . . . . . . . . . . . . . . . . . . . 8-90
Headlamp (HID type) bulb replacement . . . . . . . . . 8-90
Headlamp (Low/High beam) bulb replacement . . . . 8-91
K
J
L
Page 587 of 589
I13
Index
Checking tire inflation pressure . . . . . . . . . . . . . . . . 8-60
Tire rotation . . . . . . . . . . . . . . . . . . . . . . . . . . . . . . . 8-61
Wheel alignment and tire balance . . . . . . . . . . . . . . 8-62
Tire replacement . . . . . . . . . . . . . . . . . . . . . . . . . . . . 8-63
Wheel replacement . . . . . . . . . . . . . . . . . . . . . . . . . . 8-64
Tire traction . . . . . . . . . . . . . . . . . . . . . . . . . . . . . . . 8-64
Tire maintenance . . . . . . . . . . . . . . . . . . . . . . . . . . . 8-64
Tire sidewall labeling . . . . . . . . . . . . . . . . . . . . . . . 8-64
Tire terminology and definitions . . . . . . . . . . . . . . . 8-68
All season tires . . . . . . . . . . . . . . . . . . . . . . . . . . . . . 8-71
Summer tires . . . . . . . . . . . . . . . . . . . . . . . . . . . . . . 8-71
Snow tires . . . . . . . . . . . . . . . . . . . . . . . . . . . . . . . . . 8-71
Tire chains . . . . . . . . . . . . . . . . . . . . . . . . . . . . . . . . 8-71
Radial-ply tires . . . . . . . . . . . . . . . . . . . . . . . . . . . . . 8-72
Low aspect ratio tire. . . . . . . . . . . . . . . . . . . . . . . . . 8-73
Towing . . . . . . . . . . . . . . . . . . . . . . . . . . . . . . . . . . . . \
. 7-32 Towing service . . . . . . . . . . . . . . . . . . . . . . . . . . . . . 7-32
Removable towing hook (front) . . . . . . . . . . . . . . . . 7-33
Emergency towing . . . . . . . . . . . . . . . . . . . . . . . . . . 7-34
Trailer Towing . . . . . . . . . . . . . . . . . . . . . . . . . . . . . . . 6-79
Transaxle - Automatic transaxle . . . . . . . . . . . . . . . . . . 6-18
Transaxle - DUAL CLUTCH TRANSMISSION. . . . . 6-24
Transaxle shift indicator . . . . . . . . . . . . . . . . . . . . . . . . 4-54
Transmitter precautions . . . . . . . . . . . . . . . . . . . . . . . . . 4-6
Trip information (Trip computer) . . . . . . . . . . . . . . . . . 4-68 Trip A/B . . . . . . . . . . . . . . . . . . . . . . . . . . . . . . . . . . 4-69\
Fuel Economy . . . . . . . . . . . . . . . . . . . . . . . . . . . . . 4-70
Accumulated Info display . . . . . . . . . . . . . . . . . . . . 4-71
Drive Info display. . . . . . . . . . . . . . . . . . . . . . . . . . . 4-72
Turn by turn Mode . . . . . . . . . . . . . . . . . . . . . . . . . . . . 4-64
Turn signals. . . . . . . . . . . . . . . . . . . . . . . . . . . . . . . . . . 4-91\
User Settings Mode . . . . . . . . . . . . . . . . . . . . . . . . . . . 4-58
Using the button on the smart key . . . . . . . . . . . 4-12, 4-13
Vanity mirror lamp . . . . . . . . . . . . . . . . . . . . . . . . . . . 4-100
Vanity mirror lamp bulb replacement . . . . . . . . . . . . . 8-105
Vehicle break-in process . . . . . . . . . . . . . . . . . . . . . . . . . 1-6
Vehicle certification label . . . . . . . . . . . . . . . . . . . . . . . 9-10
Vehicle data collection and event data recorders . . . . . . 1-7
Vehicle handling instructions . . . . . . . . . . . . . . . . . . . . . 1-6
Vehicle identification number (VIN) . . . . . . . . . . . . . . 9-10
VEHICLE LOAD LIMIT . . . . . . . . . . . . . . . . . . . . . . . 6-80
Vehicle stability management (VSM) . . . . . . . . . . . . . 6-42
Vehicle weight . . . . . . . . . . . . . . . . . . . . . . . . . . . . . . . 6-86
U
V