Page 20 of 614
Your vehicle at a glance
62
INSTRUMENT PANEL OVERVIEW
ODM016004❈The actual shape may differ from the illustration. 1. Lighting control lever ........................4-127
2. Audio remote control buttons ...........4-182
3. Bluetooth hands-free
buttons..............................................4-219
4. Cruise control button ..........................5-67
5. LCD display control buttons ...............4-84
6. Horn ...................................................4-58
7. Driver’s front air bag ...........................3-60
8. Wiper and washer control lever........4-137
9. Ignition switch/ Engine start/stop button ................5-6, 5-9
10. Audio ..............................................4-182
11. Hazard warning flasher ..................4-126
12. Climate control system .......4-147, 4-157
13. Passenger's front air bag .................3-60
14. Glove box .......................................4-169
Page 100 of 614
Welcome system . . . . . . . . . . . . . . . . . . . . . . . . . . 4-144
. . . . . . . . . . . . . . . . . . . . . . . . . . 4-144
. . . . . . . . . . . . . . . . . 4-144
Defroster . . . . . . . . . . . . . . . . . . . . . . . . . . . . . . . . 4-145
. . . . . . . . . . . . . . . . . . . . . . . 4-145
. . . . . . . . . . . . . . . . . . . . . . . . . . . 4-146
Manual climate control system . . . . . . . . . . . . . . 4-147
. . . . . . . . . . . . . . . . . . 4-148
. . . . . . . . . . . . . . . . . . . . . . . . . . . . 4-153
. . . . . . . . . . . . . . . . . . . . . . 4-155
refrigerant and compressor lubricant . . . . . . . . . 4-156
. . . . . . . . . . . . . 4-156
Automatic climate control system. . . . . . . . . . . . 4-157
. . . . . . . . . 4-158
. . . . . . . . . . . 4-159
Windshield defrosting and defogging . . . . . . . . . 4-165
. . . . . . . . . . . . . . . . 4-165
. . . . . . . . . . . . . . 4-166
Storage compartments . . . . . . . . . . . . . . . . . . . . . 4-169
. . . . . . . . . . . . . . . . . . . . . . . 4-169
. . . . . . . . . . . . . . . . . . . . . . . . . . . . . . . . . . 4-16\
9
. . . . . . . . . . . . . . . . . . . . . . . . . . . . . . . . . . 4-17\
0
. . . . . . . . . . . . . . . . . . . . . . . . . . . . . 4-170
. . . . . . . . . . . . . . . . . . . . . . . . . . . . . . . 4-171
Interior features . . . . . . . . . . . . . . . . . . . . . . . . . . 4-172
. . . . . . . . . . . . . . . . . . . . . . . . . . . . . . . . . 4-172
. . . . . . . . . . . . . . . . . . . . . . . . . . . . . . . . . . . 4-\
173
. . . . . . . . . . . . . . . . . . . . . . . . . . . . . . . . 4-173
. . . . . . . . . . . . . . . . . . . . . . . . . . . . . . 4-175
USB and iPod
®port . . . . . . . . . . . . . . . . . . . . . 4-176
. . . . . . . . . . . . . . . . . . . . . . . . . 4-176
. . . . . . . . . . . . . . . . . . . . . . . . 4-177
. . . . . . . . . . . . . . . . . . . . . . . . . . . . . . . . 4-179
Exterior features. . . . . . . . . . . . . . . . . . . . . . . . . . 4-180
. . . . . . . . . . . . . . . . . . . . . . . . . . . . . . . . . . 4-18\
0
Audio system . . . . . . . . . . . . . . . . . . . . . . . . . . . . . 4-182
. . . . . . . . . . . . . . . . . . . . . . . . . . . . . . . . . . . 4-\
182
. . . . . . . . . . . . . . . . . . 4-182
. . . . . . . . . . . . . . . . . . . . . 4-184
4
Page 157 of 614
Features of your vehicle
60
4
MIRRORS
Inside rearview mirror
Adjust the rearview mirror so that the
center view through the rear window
is seen. Make this adjustment before
you start driving.
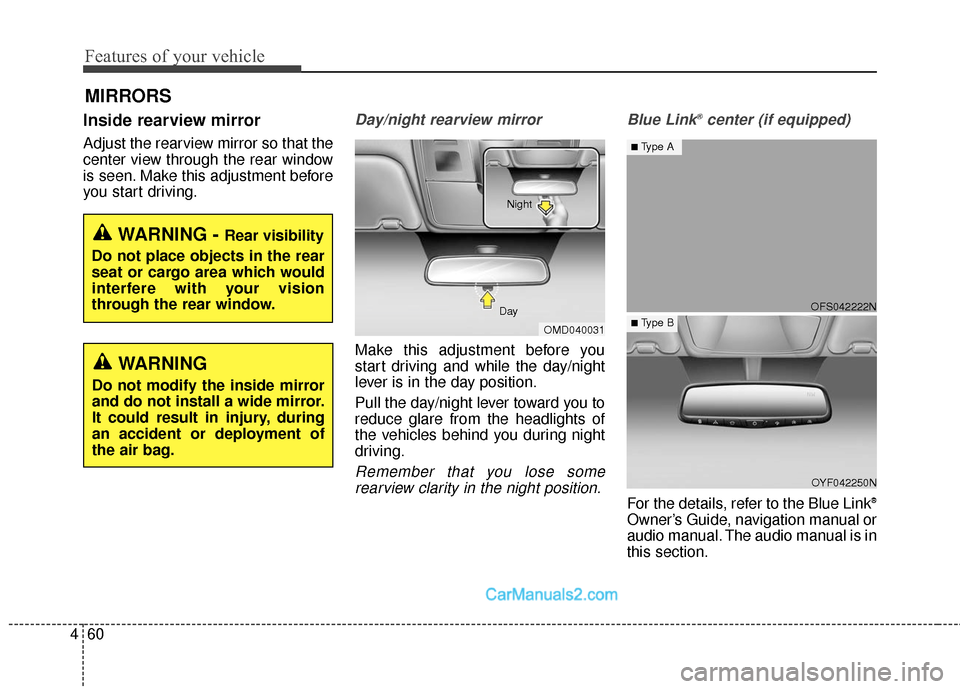
Day/night rearview mirror
Make this adjustment before you
start driving and while the day/night
lever is in the day position.
Pull the day/night lever toward you to
reduce glare from the headlights of
the vehicles behind you during night
driving.
Remember that you lose some
rearview clarity in the night position. Blue Link
®center (if equipped)
For the details, refer to the Blue Link®
Owner’s Guide, navigation manual or
audio manual. The audio manual is in
this section.
WARNING - Rear visibility
Do not place objects in the rear
seat or cargo area which would
interfere with your vision
through the rear window.
OMD040031
Day Night
WARNING
Do not modify the inside mirror
and do not install a wide mirror.
It could result in injury, during
an accident or deployment of
the air bag.
OFS042222N
OYF042250N
■Type A
■ Type B
Page 271 of 614
Features of your vehicle
174
4
The power outlet is designed to pro-
vide power for mobile telephones or
other devices designed to operate
with vehicle electrical systems. The
devices should draw less than 10
amps with the engine running.CAUTION
Use the power outlet only
when the engine is runningand remove the accessoryplug after use. Using theaccessory plug for prolongedperiods of time with theengine off could cause thebattery to discharge.
Only use 12V electric acces- sories which are less than 10Ain electric capacity.
Adjust the air-conditioner or heater to the lowest operatinglevel when using the poweroutlet.
Close the cover when not in use.
Some electronic devices can cause electronic interferencewhen plugged into a vehicle’spower outlet. These devicesmay cause excessive audiostatic and malfunctions inother electronic systems ordevices used in your vehicle.
WARNING
Do not put fingers or foreign
elements (pin, etc.) into a power
outlet and do not touch with a
wet hand. You may get an elec-
tric shock.
Page 273 of 614
Features of your vehicle
176
4
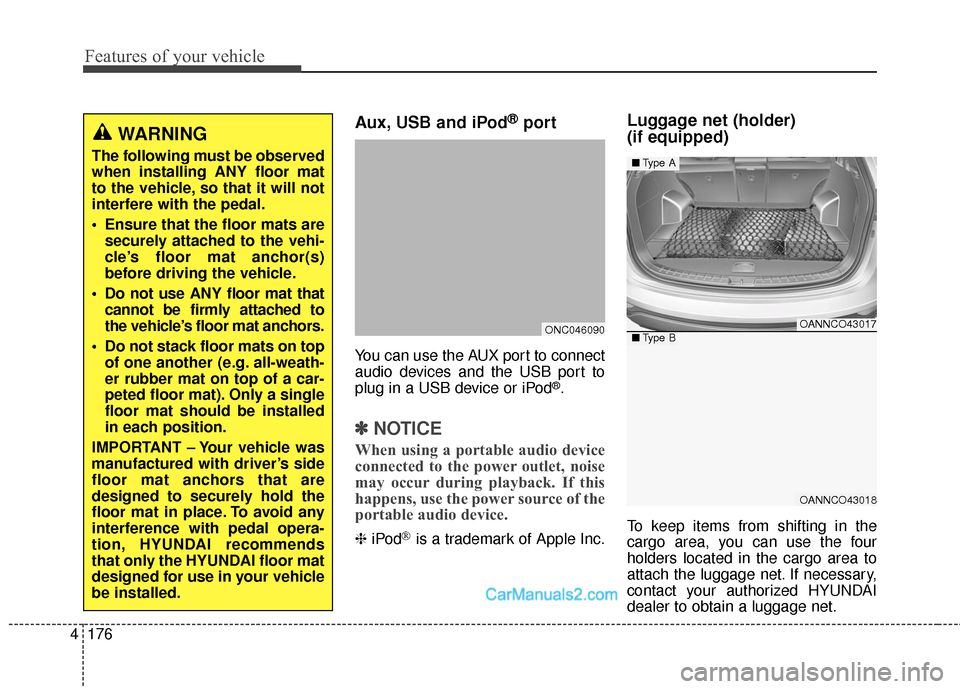
Aux, USB and iPod®port
You can use the AUX port to connect
audio devices and the USB port to
plug in a USB device or iPod
®.
✽ ✽
NOTICE
When using a portable audio device
connected to the power outlet, noise
may occur during playback. If this
happens, use the power source of the
portable audio device.
❈ iPod®is a trademark of Apple Inc.
Luggage net (holder)
(if equipped)
To keep items from shifting in the
cargo area, you can use the four
holders located in the cargo area to
attach the luggage net. If necessary,
contact your authorized HYUNDAI
dealer to obtain a luggage net.
WARNING
The following must be observed
when installing ANY floor mat
to the vehicle, so that it will not
interfere with the pedal.
Ensure that the floor mats are
securely attached to the vehi-
cle’s floor mat anchor(s)
before driving the vehicle.
Do not use ANY floor mat that cannot be firmly attached to
the vehicle’s floor mat anchors.
Do not stack floor mats on top of one another (e.g. all-weath-
er rubber mat on top of a car-
peted floor mat). Only a single
floor mat should be installed
in each position.
IMPORTANT – Your vehicle was
manufactured with driver’s side
floor mat anchors that are
designed to securely hold the
floor mat in place. To avoid any
interference with pedal opera-
tion, HYUNDAI recommends
that only the HYUNDAI floor mat
designed for use in your vehicle
be installed.
ONC046090OANNCO43017
OANNCO43018
■ Type A
■Type B
Page 279 of 614
Features of your vehicle
182
4
✽
✽
NOTICE
• If you install an aftermarket HID
headlamp, your vehicle's audio
and electronic device may mal-
function.
• Prevent caustic solutions such as perfume and cosmetic oil from
contacting the dashboard because
they may cause damage or discol-
oration.
Antenna
Roof antenna
Your vehicle uses a roof antenna to
receive both AM and FM broadcast
signals.
Steering wheel audio control
The steering wheel incorporates
audio control buttons on the left hand
side of the steering wheel.
AUDIO SYSTEM
OANNMM2901
CAUTION
Do not operate audio remote
control buttons simultaneously.
ODM042327
Page 280 of 614
4183
Features of your vehicle
MODE (1)
Press the button to change audio
source.
SEEK/PRESET ( / ) (2)
The SEEK/PRESET button has dif-
ferent functions based on the system
mode.
For the following functions the button
should be pressed for 0.8 second or
more.
RADIO mode
It will function as the AUTO SEEK
select button.
CD/USB/iPod
®mode
It will function as the FF/REW button.
If the SEEK/PRESET button is
pressed for less than 0.8 second, it
will work as follows in each mode.
RADIO mode
It will function as the PRESET STA-
TION buttons.
CD/USB/iPod
®mode
It will function as TRACK UP/DOWN
button.
VOLUME (VOL+/-) (3)
• Push the lever upward (+) to increase the volume.
Push the lever downward (-) to decrease the volume.
MUTE (4)
Press the button to mute the sound.
Press the button to turn off themicrophone during a telephone call.
Detailed information for audio control
buttons are described in the following
pages in this section.
Page 281 of 614
Features of your vehicle
184
4
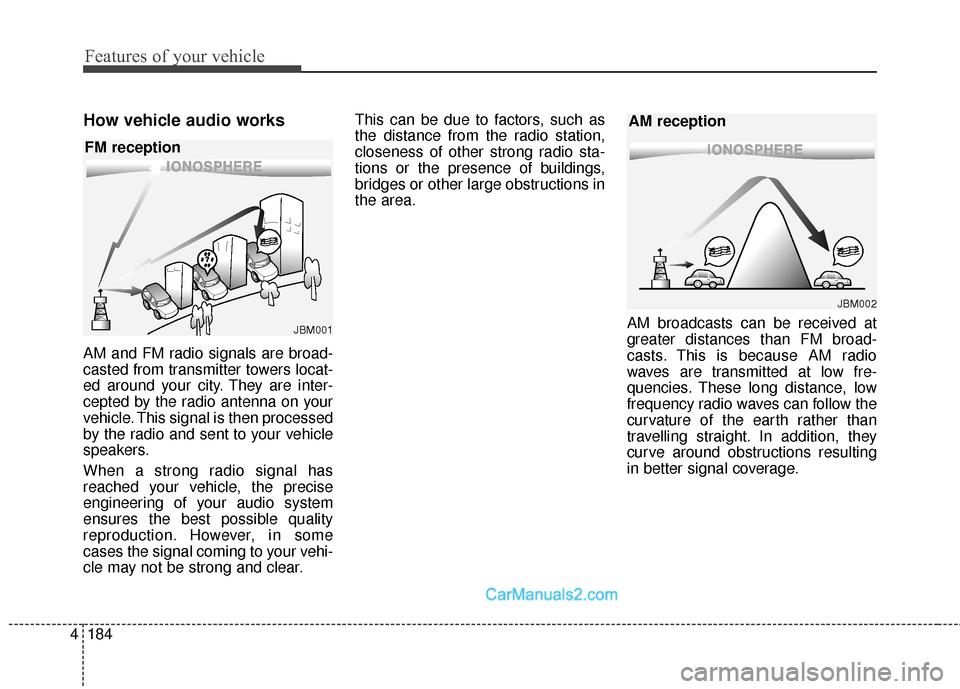
How vehicle audio works
AM and FM radio signals are broad-
casted from transmitter towers locat-
ed around your city. They are inter-
cepted by the radio antenna on your
vehicle. This signal is then processed
by the radio and sent to your vehicle
speakers.
When a strong radio signal has
reached your vehicle, the precise
engineering of your audio system
ensures the best possible quality
reproduction. However, in some
cases the signal coming to your vehi-
cle may not be strong and clear. This can be due to factors, such as
the distance from the radio station,
closeness of other strong radio sta-
tions or the presence of buildings,
bridges or other large obstructions in
the area.
AM broadcasts can be received at
greater distances than FM broad-
casts. This is because AM radio
waves are transmitted at low fre-
quencies. These long distance, low
frequency radio waves can follow the
curvature of the earth rather than
travelling straight. In addition, they
curve around obstructions resulting
in better signal coverage.
JBM001
FM reception
JBM002
AM reception