2017 Hyundai Ioniq Hybrid display
[x] Cancel search: displayPage 199 of 553
3-97
Convenient features of your vehicle
3
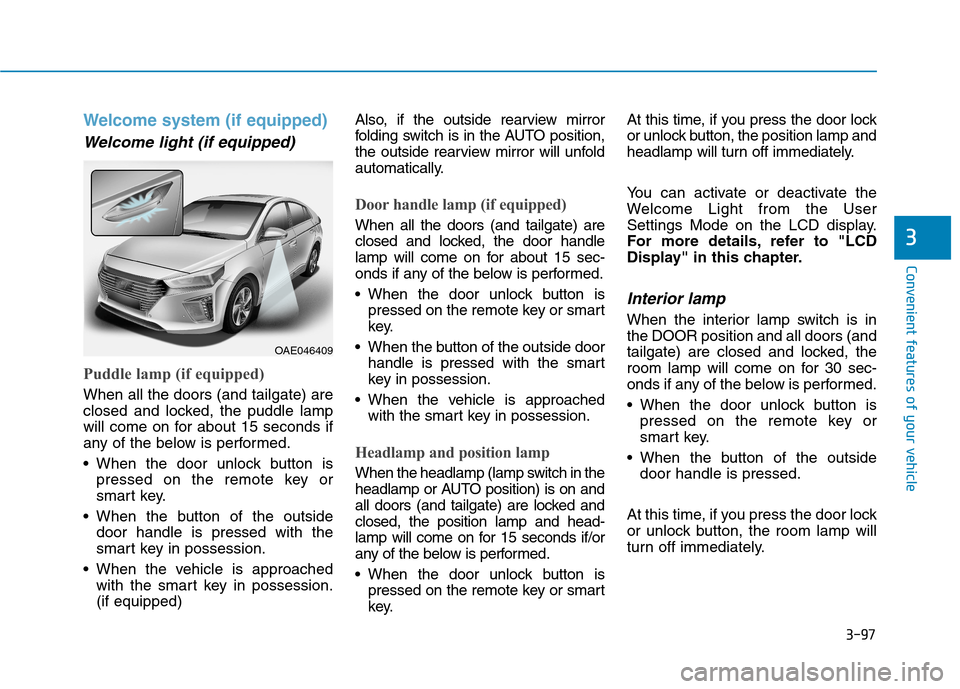
Welcome system (if equipped)
Welcome light (if equipped)
Puddle lamp (if equipped)
When all the doors (and tailgate) are
closed and locked, the puddle lamp
will come on for about 15 seconds if
any of the below is performed.
When the door unlock button ispressed on the remote key or
smart key.
When the button of the outside door handle is pressed with the
smart key in possession.
When the vehicle is approached with the smart key in possession.(if equipped) Also, if the outside rearview mirror
folding switch is in the AUTO position,
the outside rearview mirror will unfold
automatically.
Door handle lamp (if equipped)
When all the doors (and tailgate) are
closed and locked, the door handle
lamp will come on for about 15 sec-
onds if any of the below is performed.
When the door unlock button is
pressed on the remote key or smart
key.
When the button of the outside door handle is pressed with the smart
key in possession.
When the vehicle is approached with the smart key in possession.
Headlamp and position lamp
When the headlamp (lamp switch in the
headlamp or AUTO position) is on and
all doors (and tailgate) are locked andclosed, the position lamp and head-
lamp will come on for 15 seconds if/or
any of the below is performed.
When the door unlock button ispressed on the remote key or smart
key. At this time, if you press the door lock
or unlock button, the position lamp and
headlamp will turn off immediately.
You can activate or deactivate the
Welcome Light from the User
Settings Mode on the LCD display.
For more details, refer to "LCD
Display" in this chapter.
Interior lamp
When the interior lamp switch is inthe DOOR position and all doors (and
tailgate) are closed and locked, the
room lamp will come on for 30 sec-
onds if any of the below is performed.
When the door unlock button is
pressed on the remote key or
smart key.
When the button of the outside door handle is pressed.
At this time, if you press the door lock
or unlock button, the room lamp will
turn off immediately.
OAE046409
Page 206 of 553
3-104
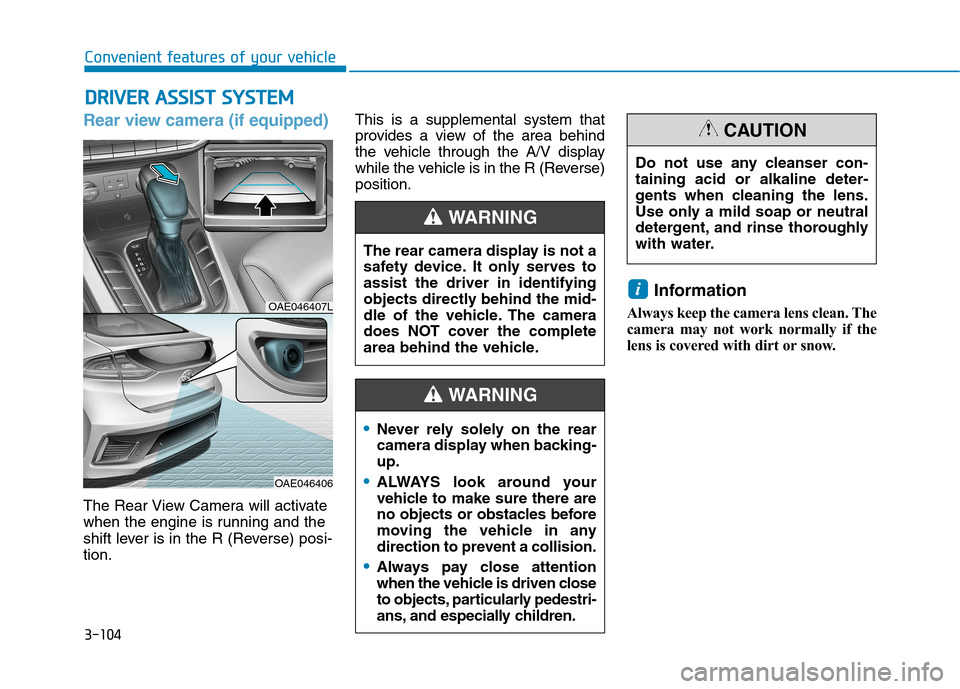
Rear view camera (if equipped)
The Rear View Camera will activate
when the engine is running and the
shift lever is in the R (Reverse) posi-tion.This is a supplemental system that
provides a view of the area behind
the vehicle through the A/V display
while the vehicle is in the R (Reverse)position.
Information
Always keep the camera lens clean. The
camera may not work normally if the
lens is covered with dirt or snow.
i
DD RRIIVV EERR AA SSSSIISS TT SS YY SSTT EEMM
Convenient features of your vehicle
The rear camera display is not a
safety device. It only serves toassist the driver in identifying
objects directly behind the mid-
dle of the vehicle. The camera
does NOT cover the complete
area behind the vehicle.
WARNING
OAE046407L
OAE046406
Do not use any cleanser con- taining acid or alkaline deter-
gents when cleaning the lens.
Use only a mild soap or neutral
detergent, and rinse thoroughly
with water.
CAUTION
Never rely solely on the rear
camera display when backing-up.
ALWAYS look around your
vehicle to make sure there are
no objects or obstacles before
moving the vehicle in any
direction to prevent a collision.
Always pay close attention
when the vehicle is driven close
to objects, particularly pedestri-
ans, and especially children.
WARNING
Page 215 of 553
3-113
Convenient features of your vehicle
3
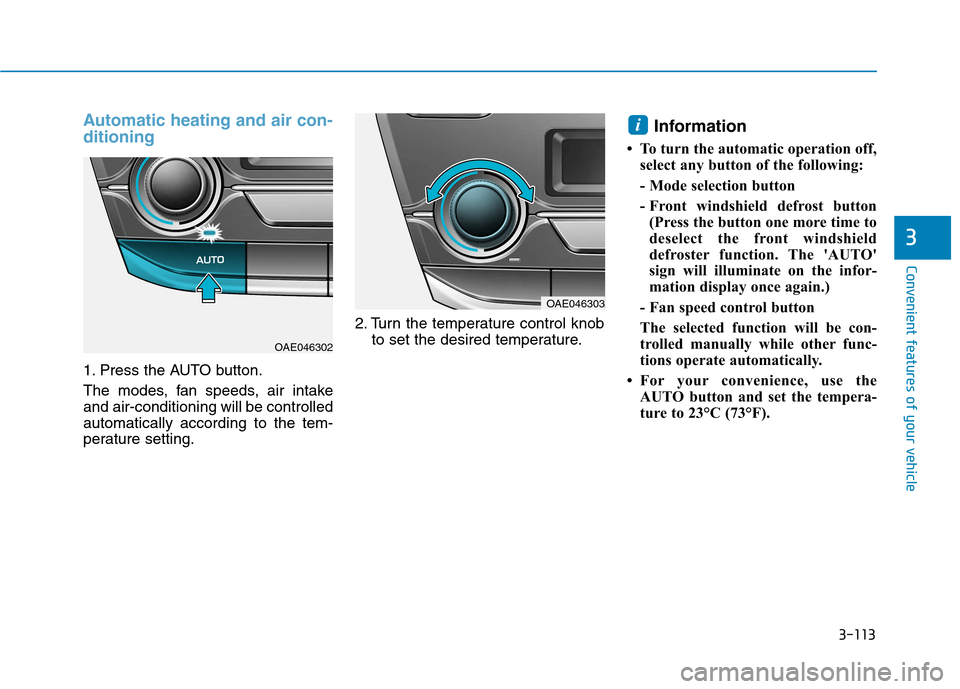
Automatic heating and air con- ditioning
1. Press the AUTO button.
The modes, fan speeds, air intake and air-conditioning will be controlledautomatically according to the tem-
perature setting.2. Turn the temperature control knob
to set the desired temperature. Information
To turn the automatic operation off, select any button of the following:
- Mode selection button
- Front windshield defrost button(Press the button one more time to
deselect the front windshield
defroster function. The 'AUTO'
sign will illuminate on the infor-
mation display once again.)
- Fan speed control button
The selected function will be con-
trolled manually while other func-
tions operate automatically.
For your convenience, use the AUTO button and set the tempera-
ture to 23°C (73°F).
i
OAE046303
OAE046302
Page 220 of 553
3-118
Convenient features of your vehicle
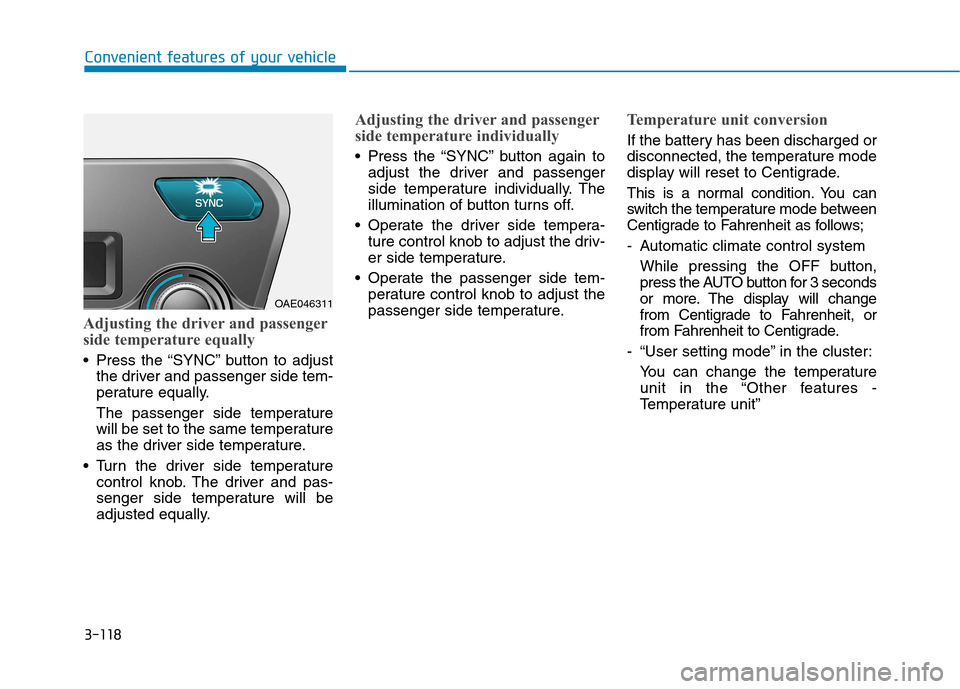
Adjusting the driver and passenger
side temperature equally
Press the “SYNC” button to adjustthe driver and passenger side tem-
perature equally.
The passenger side temperature
will be set to the same temperature
as the driver side temperature.
Turn the driver side temperature control knob. The driver and pas-
senger side temperature will be
adjusted equally.
Adjusting the driver and passenger
side temperature individually
Press the “SYNC” button again toadjust the driver and passenger
side temperature individually. The
illumination of button turns off.
Operate the driver side tempera- ture control knob to adjust the driv-
er side temperature.
Operate the passenger side tem- perature control knob to adjust the
passenger side temperature.
Temperature unit conversion
If the battery has been discharged or
disconnected, the temperature mode
display will reset to Centigrade.
This is a normal condition. You can
switch the temperature mode between
Centigrade to Fahrenheit as follows;
- Automatic climate control system
While pressing the OFF button,
press the AUTO button for 3 seconds
or more. The display will change
from Centigrade to Fahrenheit, or
from Fahrenheit to Centigrade.
- “User setting mode” in the cluster: You can change the temperature
unit in the “Other features -
Temperature unit”
OAE046311
Page 237 of 553
3-135
Convenient features of your vehicle
3
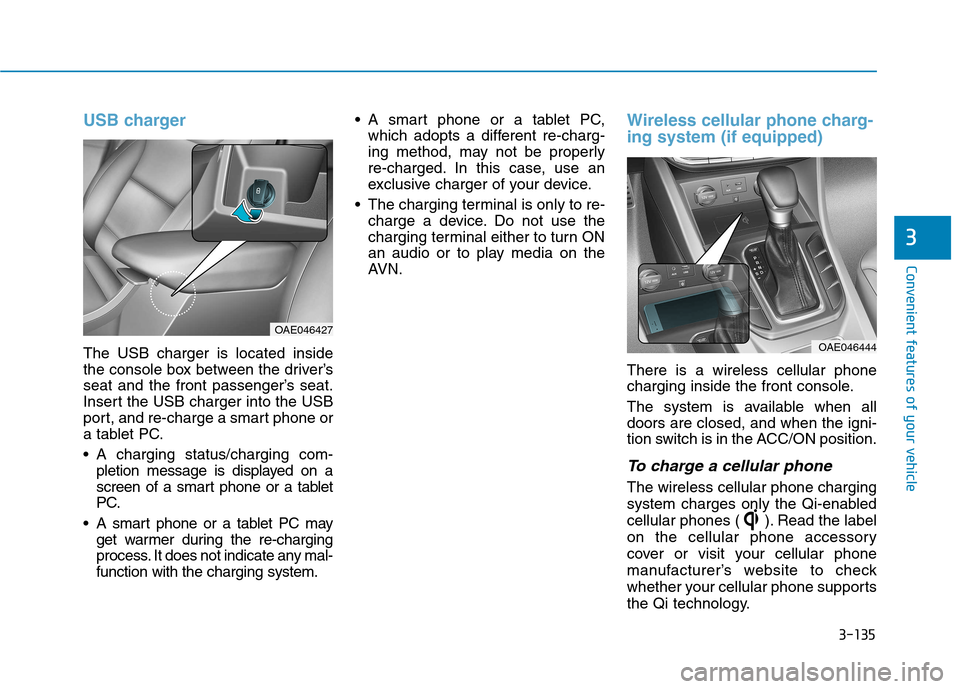
USB charger
The USB charger is located inside
the console box between the driver’s
seat and the front passenger’s seat.
Insert the USB charger into the USB
port, and re-charge a smart phone or
a tablet PC.
A charging status/charging com-pletion message is displayed on a
screen of a smart phone or a tablet
PC.
A smart phone or a tablet PC may get warmer during the re-charging
process. It does not indicate any mal-function with the charging system. A smart phone or a tablet PC,
which adopts a different re-charg-
ing method, may not be properly
re-charged. In this case, use an
exclusive charger of your device.
The charging terminal is only to re- charge a device. Do not use the
charging terminal either to turn ON
an audio or to play media on the
AVN.
Wireless cellular phone charg- ing system (if equipped)
There is a wireless cellular phone
charging inside the front console.
The system is available when all doors are closed, and when the igni-
tion switch is in the ACC/ON position.
To charge a cellular phone
The wireless cellular phone charging
system charges only the Qi-enabled
cellular phones ( ). Read the label
on the cellular phone accessory
cover or visit your cellular phone
manufacturer’s website to check
whether your cellular phone supports
the Qi technology.
OAE046444
OAE046427
Page 238 of 553

3-136
Convenient features of your vehicle
The wireless charging process starts
when you put a Qi-enabled cellularphone on the wireless charging unit.
1. Remove other items, including thesmart key, from the wireless charg-
ing unit. If not, the wireless charg-
ing process may be interrupted.
2. The indicator illuminates in orange during the charging process. The
indicator color changes to green,when the charging process iscompleted.
3. You can turn ON or OFF the wire- less charging function in the user
settings mode on the instrument
cluster. (For further information,
refer to the “LCD Modes” in this
chapter.)
Slightly change the cellular phoneposition, when the cellular phone is
not being charged. Make sure that
the indicator illuminates in orange.
The indicator color may not change
to green in accordance with the cel-
lular phone type, even though the
charging process is completed. The
indicator blinks in orange for 10 sec-onds when there is a malfunctionwith the wireless charging system. In this case, temporarily stop the
charging process, and re-attempt to
wirelessly charge your cellular phoneagain.
The system warns you with a mes-
sage on the LCD display when you do
not take out the cellular phone fromthe wireless charging unit with thefront door open and the Engine
Start/Stop button in the OFF position.
The wireless cellular phone
charging system may not sup-
port certain cellular phones,
which are not verified for the Qi
specification ( ).
Locate your cell phone well in the middle of the wireless cellular
phone charging system. Even
when your cell phone locates
slightly to one side, the charging
speed may decrease.
The wireless charging process may temporarily stop, when a
smart key function operates (i.e.
starting the engine, opening the
doors, closing the doors). For certain cell phones, the indi-
cator color may not change to
green, even when the wireless
charging process is properlycompleted.
The wireless charging process may temporarily stop, when tempera-
ture abnormally increases inside
the wireless cellular phone charg-
ing system. The wireless charging
process restarts, when tempera-
ture falls to a proper level.
The wireless charging process may temporarily stop when there
is any metallic item, such as a
coin, between the wireless cellu-
lar phone charging system and a
cellular phone.
NOTICE
Page 239 of 553
3-137
Convenient features of your vehicle
3
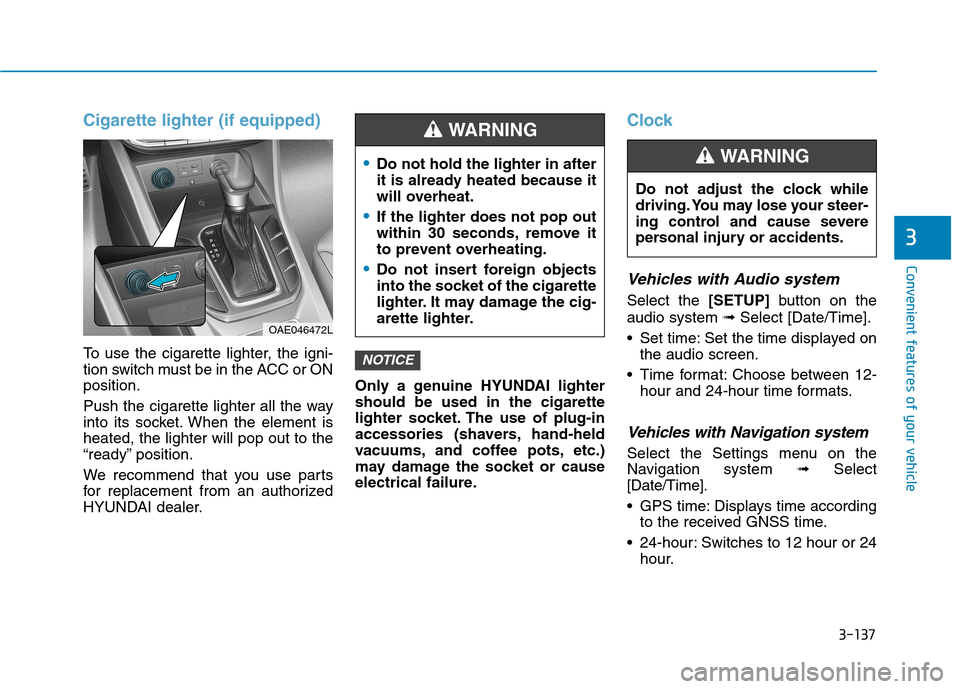
Cigarette lighter (if equipped)
To use the cigarette lighter, the igni-
tion switch must be in the ACC or ONposition.
Push the cigarette lighter all the way
into its socket. When the element isheated, the lighter will pop out to the
“ready” position.
We recommend that you use parts
for replacement from an authorized
HYUNDAI dealer.Only a genuine HYUNDAI lightershould be used in the cigarette
lighter socket. The use of plug-in
accessories (shavers, hand-held
vacuums, and coffee pots, etc.)
may damage the socket or cause
electrical failure.
Clock
Vehicles with Audio system
Select the
[SETUP]button on the
audio system ➟Select [Date/Time].
Set time: Set the time displayed on the audio screen.
Time format: Choose between 12- hour and 24-hour time formats.
Vehicles with Navigation system
Select the Settings menu on the
Navigation system ➟Select
[Date/Time].
GPS time: Displays time according to the received GNSS time.
24-hour: Switches to 12 hour or 24 hour.
NOTICE
Do not adjust the clock while
driving. You may lose your steer-
ing control and cause severe
personal injury or accidents.
WARNING Do not hold the lighter in after
it is already heated because it
will overheat.
If the lighter does not pop out
within 30 seconds, remove it
to prevent overheating.
Do not insert foreign objects
into the socket of the cigarette
lighter. It may damage the cig-
arette lighter.
WARNING
OAE046472L
Page 250 of 553
4-9
Multimedia System
4
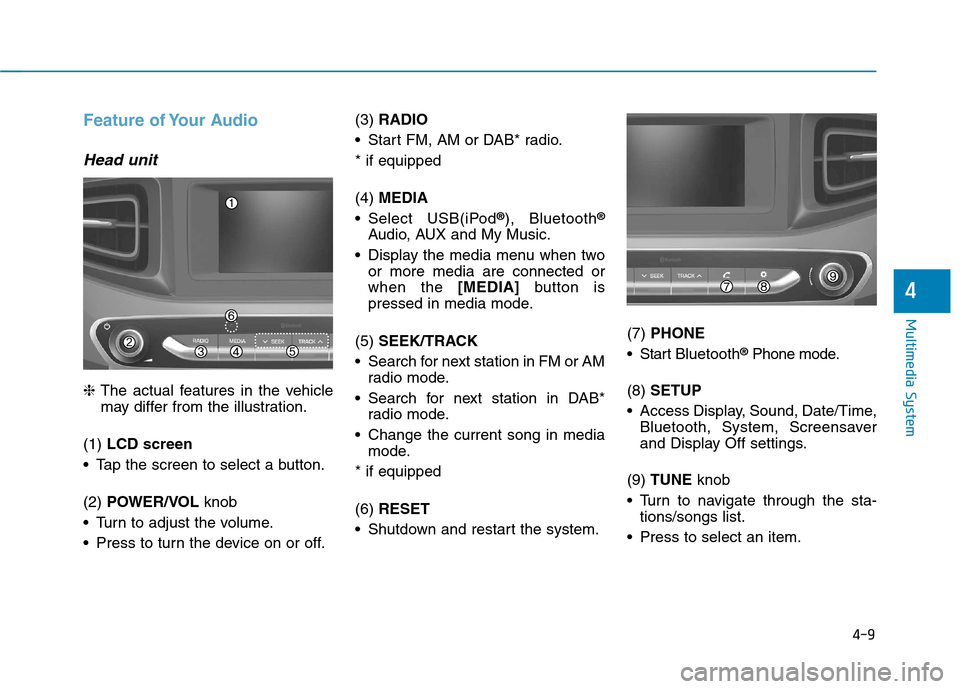
Feature of Your Audio
Head unit
❈The actual features in the vehicle
may differ from the illustration.
(1) LCD screen
Tap the screen to select a button. (2) POWER/VOL knob
Turn to adjust the volume.
Press to turn the device on or off. (3)
RADIO
Start FM, AM or DAB* radio.* if equipped (4) MEDIA
Select USB(iPod ®
), Bluetooth ®
Audio, AUX and My Music.
Display the media menu when two or more media are connected or when the [MEDIA]button is
pressed in media mode.
(5) SEEK/TRACK
Search for next station in FM or AM radio mode.
Search for next station in DAB* radio mode.
Change the current song in media mode.
* if equipped (6) RESET
Shutdown and restart the system. (7)
PHONE
Start Bluetooth ®
Phone mode.
(8) SETUP
Access Display, Sound, Date/Time, Bluetooth, System, Screensaver
and Display Off settings.
(9) TUNE knob
Turn to navigate through the sta- tions/songs list.
Press to select an item.