Page 114 of 571
3-22
Convenient features of your vehicle
Recalling memory position
1. Move the shift lever into P (for
Automatic transmission) or Neutral
(for manual transmission) whilst the
ignition switch or the Engine
Start/Stop button is in the ON posi-
tion.
2. Press the desired memory button
(1 or 2). The system will beep once,
then the driver’s seat position, out-
side rearview mirror and instrument
panel illumination will automatically
adjust to the stored position (if
equipped).
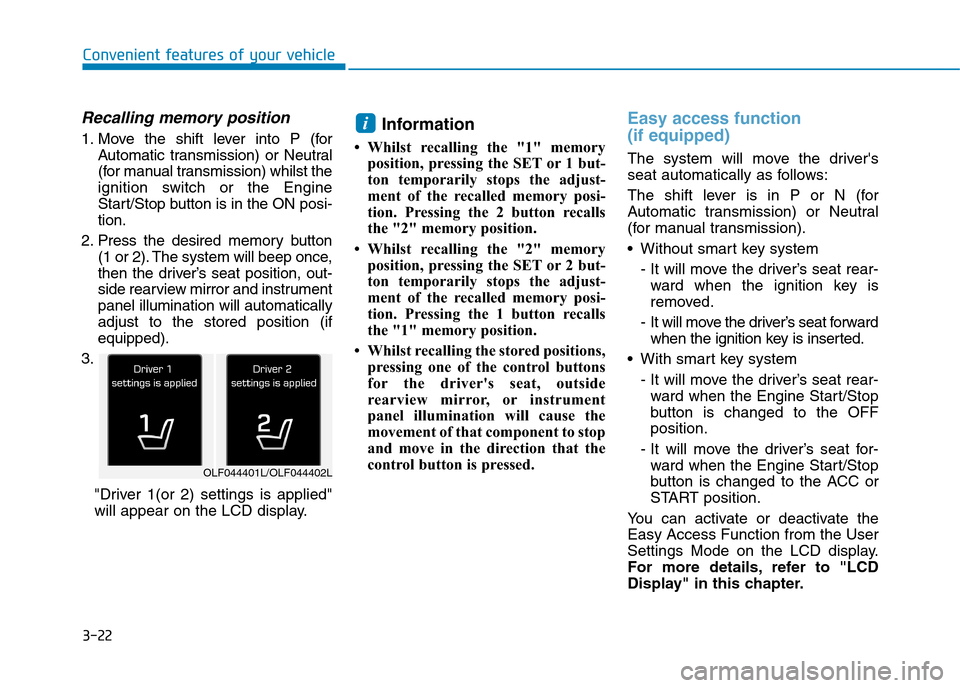
3.
"Driver 1(or 2) settings is applied"
will appear on the LCD display.
Information
• Whilst recalling the "1" memory
position, pressing the SET or 1 but-
ton temporarily stops the adjust-
ment of the recalled memory posi-
tion. Pressing the 2 button recalls
the "2" memory position.
• Whilst recalling the "2" memory
position, pressing the SET or 2 but-
ton temporarily stops the adjust-
ment of the recalled memory posi-
tion. Pressing the 1 button recalls
the "1" memory position.
• Whilst recalling the stored positions,
pressing one of the control buttons
for the driver's seat, outside
rearview mirror, or instrument
panel illumination will cause the
movement of that component to stop
and move in the direction that the
control button is pressed.
Easy access function
(if equipped)
The system will move the driver's
seat automatically as follows:
The shift lever is in P or N (for
Automatic transmission) or Neutral
(for manual transmission).
•Without smart key system
- It will move the driver’s seat rear-
ward when the ignition key is
removed.
- It will move the driver’s seat forward
when the ignition key is inserted.
•With smart key system
- It will move the driver’s seat rear-
ward when the Engine Star t/Stop
button is changed to the OFF
position.
- It will move the driver’s seat for-
ward when the Engine Star t/Stop
button is changed to the ACC or
START position.
Yo u c a n a c t i v a t e o r d e a c t i v a t e t h e
Easy Access Function from the User
Settings Mode on the LCD display.
For more details, refer to "LCD
Display" in this chapter.
i
OLF044401L/OLF044402L
Page 118 of 571
3-26
Convenient features of your vehicle
MMIIRRRROORRSS
Inside rearview mirror
Before you start driving, adjust the
rearview mirror to centre on the view
through the rear window.
When cleaning the mirror, use a
paper towel or similar material
dampened with glass cleaner. Do
not spray glass cleaner directly on
the mirror as that may cause the
liquid cleaner to enter the mirror
housing.
NOTICE
Make sure your line of sight is
not obstructed. Do not place
objects in the rear seat, luggage
compartment, or behind the
rear headrests which could
interfere with your vision
through the rear window.
WA R N I N G
To p r e v e n t s e r i o u s i n j u r y d u r i n g
an accident or deployment of
the air bag, do not modify the
rearview mirror and do not
install a wide mirror.
WA R N I N G
NEVER adjust the mirror whilst
driving. This may cause loss of
vehicle control resulting in an
accident.
WA R N I N G
Page 119 of 571
3-27
Convenient features of your vehicle
3
Day/night rearview mirror
(if equipped)
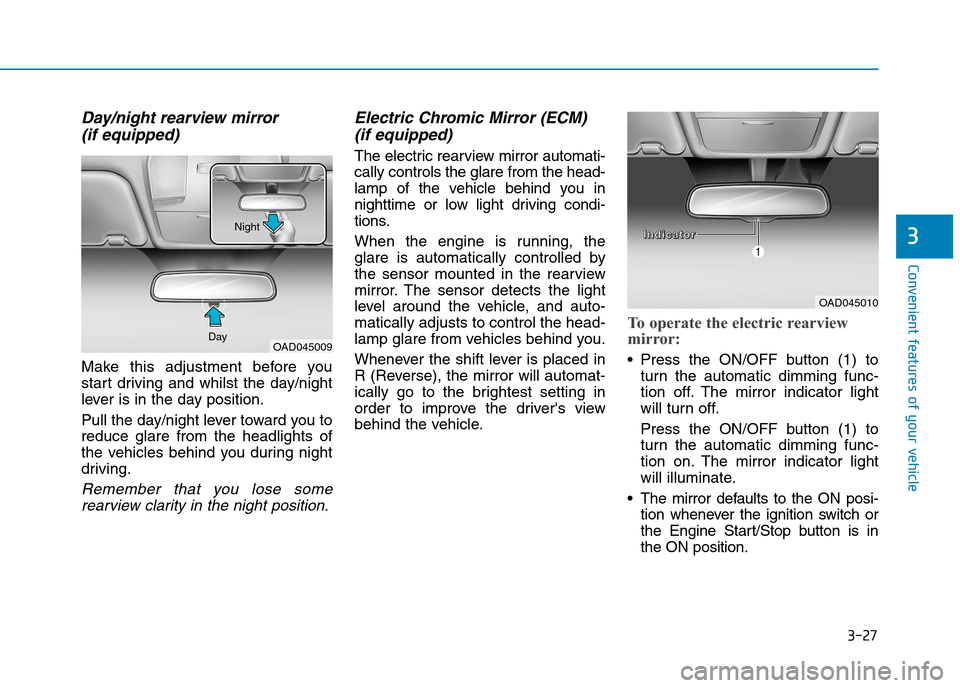
Make this adjustment before you
start driving and whilst the day/night
lever is in the day position.
Pull the day/night lever toward you to
reduce glare from the headlights of
the vehicles behind you during night
driving.
Remember that you lose some
rearview clarity in the night position.
Electric Chromic Mirror (ECM)
(if equipped)
The electric rearview mirror automati-
cally controls the glare from the head-
lamp of the vehicle behind you in
nighttime or low light driving condi-
tions.
When the engine is running, the
glare is automatically controlled by
the sensor mounted in the rearview
mirror. The sensor detects the light
level around the vehicle, and auto-
matically adjusts to control the head-
lamp glare from vehicles behind you.
Whenever the shift lever is placed in
R (Reverse), the mirror will automat-
ically go to the brightest setting in
order to improve the driver's view
behind the vehicle.
To operate the electric rearview
mirror:
•Press the ON/OFF button (1) to
turn the automatic dimming func-
tion off. The mirror indicator light
will turn off.
Press the ON/OFF button (1) to
turn the automatic dimming func-
tion on. The mirror indicator light
will illuminate.
•The mirror defaults to the ON posi-
tion whenever the ignition switch or
the Engine Start/Stop button is in
the ON position.
OAD045010
OAD045009Day
NightIIIInnnnddddiiiiccccaaaattttoooorrrr
Page 120 of 571
3-28
Convenient features of your vehicle
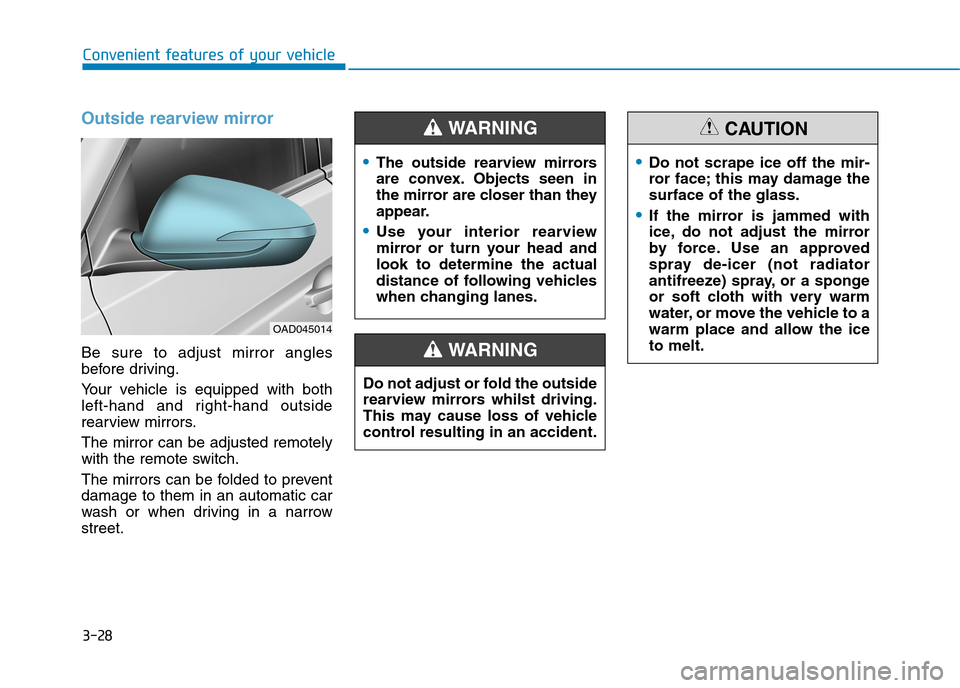
Outside rearview mirror
Be sure to adjust mirror angles
before driving.
Yo u r v e h i c l e i s e q u i p p e d w i t h b o t h
left-hand and right-hand outside
rearview mirrors.
The mirror can be adjusted remotely
with the remote switch.
The mirrors can be folded to prevent
damage to them in an automatic car
wash or when driving in a narrow
street.
Do not adjust or fold the outside
rearview mirrors whilst driving.
This may cause loss of vehicle
control resulting in an accident.
WA R N I N G
•Do not scrape ice off the mir-
ror face; this may damage the
surface of the glass.
•If the mirror is jammed with
ice, do not adjust the mirror
by force. Use an approved
spray de-icer (not radiator
antifreeze) spray, or a sponge
or soft cloth with very warm
water, or move the vehicle to a
warm place and allow the ice
to melt.
CAUTION
OAD045014
•The outside rearview mirrors
are convex. Objects seen in
the mirror are closer than they
appear.
•Use your interior rearview
mirror or turn your head and
look to determine the actual
distance of following vehicles
when changing lanes.
WA R N I N G
Page 121 of 571
3-29
Convenient features of your vehicle
3
Adjusting the rearview mirrors:
Move the lever (1) to the L (Left) or R
(Right) to select the rearview mirror
you would like to adjust.
Use the mirror adjustment control to
position the selected mirror up,
down, left or right.
After adjustment, move the lever (1)
to the middle to prevent inadvertent
adjustment.
•The mirrors stop moving when
they reach the maximum adjust-
ing angles, but the motor contin-
ues to operate whilst the switch
is pressed. Do not press the
switch longer than necessary,
the motor may be damaged.
•Do not attempt to adjust the out-
side rearview mirror by hand
otherwise the motor may be
damaged.
Folding the outside rearview
mirror
Manual type
To f o l d t h e o u t s i d e r e a r v i e w m i r r o r ,
grasp the housing of the mirror and
then fold it toward the rear of the
vehicle.
NOTICE
OAD045016
OAD045015R
Page 122 of 571
3-30
Convenient features of your vehicle
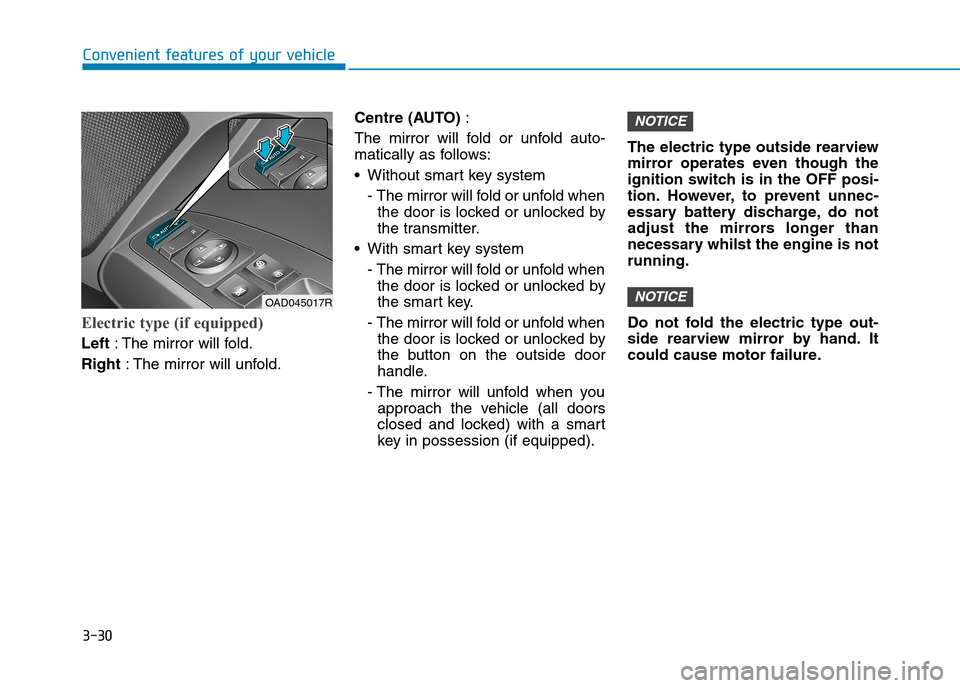
Electric type (if equipped)
Left:The mirror will fold.
Right:The mirror will unfold.
Centre (AUTO):
The mirror will fold or unfold auto-
matically as follows:
•Without smart key system
- The mirror will fold or unfold when
the door is locked or unlocked by
the transmitter.
•With smart key system
- The mirror will fold or unfold when
the door is locked or unlocked by
the smart key.
- The mirror will fold or unfold when
the door is locked or unlocked by
the button on the outside door
handle.
- The mirror will unfold when you
approach the vehicle (all doors
closed and locked) with a smart
key in possession (if equipped).
The electric type outside rearview
mirror operates even though the
ignition switch is in the OFF posi-
tion. However, to prevent unnec-
essary battery discharge, do not
adjust the mirrors longer than
necessary whilst the engine is not
running.
Do not fold the electric type out-
side rearview mirror by hand. It
could cause motor failure.
NOTICE
NOTICE
OAD045017R
Page 235 of 571
3-143
Convenient features of your vehicle
3
•For maximum defrosting, set the
temperature control to the extreme
right/hot position and the fan speed
control to the highest speed.
•If warm air to the floor is desired
whilst defrosting or defogging, set
the mode to the floor-defrost posi-
tion.
•Before driving, clear all snow and
ice from the windscreen, rear win-
dow, outside rear view mirrors, and
all side windows.
•Clear all snow and ice from the
bonnet and air inlet in the cowl grill
to improve heater and defroster
efficiency and to reduce the proba-
bility of fogging up inside of the
windscreen.
Manual climate control system
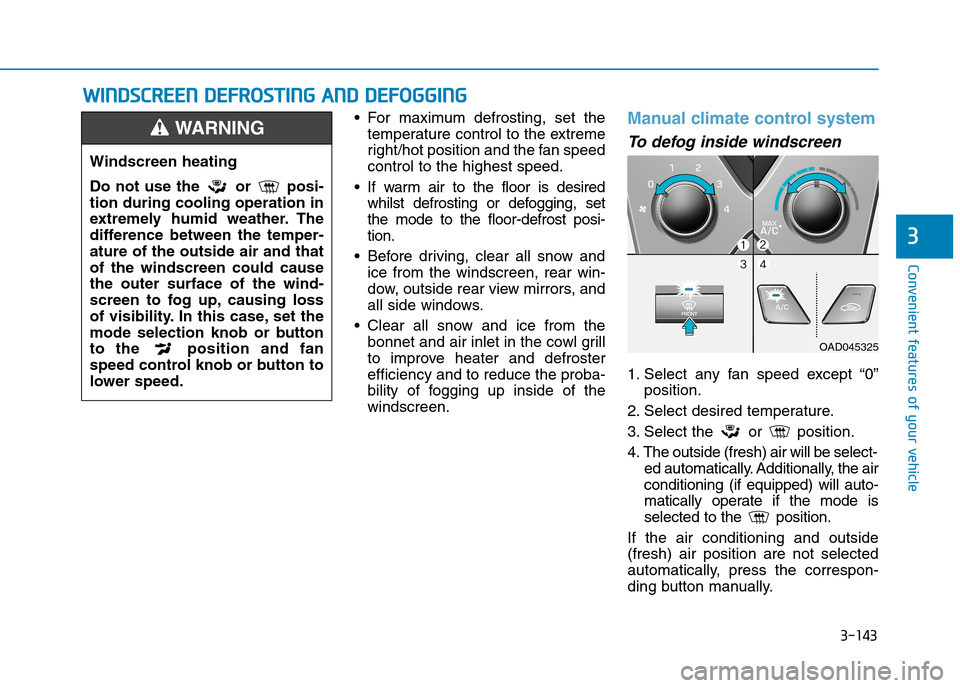
To d e f o g i n s i d e w i n d s c r e e n
1. Select any fan speed except “0”
position.
2. Select desired temperature.
3. Select the or position.
4. The outside (fresh) air will be select-
ed automatically. Additionally, the air
conditioning (if equipped) will auto-
matically operate if the mode is
selected to the position.
If the air conditioning and outside
(fresh) air position are not selected
automatically, press the correspon-
ding button manually.
WWIINNDDSSCCRREEEENN DDEEFFRROOSSTTIINNGG AANNDD DDEEFFOOGGGGIINNGG
Windscreen heating
Do not use the or posi-
tion during cooling operation in
extremely humid weather. The
difference between the temper-
ature of the outside air and that
of the windscreen could cause
the outer surface of the wind-
screen to fog up, causing loss
of visibility. In this case, set the
mode selection knob or button
to the position and fan
speed control knob or button to
lower speed.
WA R N I N G
OAD045325
Page 241 of 571
3-149
Convenient features of your vehicle
3
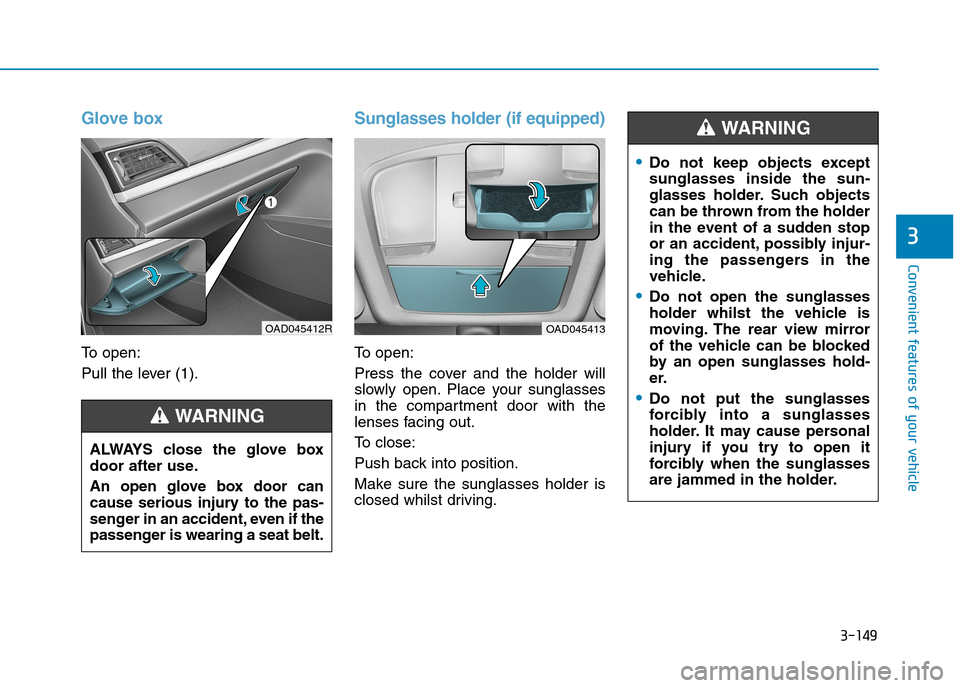
Glove box
To o p e n :
Pull the lever (1).
Sunglasses holder (if equipped)
To o p e n :
Press the cover and the holder will
slowly open. Place your sunglasses
in the compartment door with the
lenses facing out.
To c l o s e :
Push back into position.
Make sure the sunglasses holder is
closed whilst driving.
ALWAYS close the glove box
door after use.
An open glove box door can
cause serious injury to the pas-
senger in an accident, even if the
passenger is wearing a seat belt.
WA R N I N G
OAD045413OAD045412R
•Do not keep objects except
sunglasses inside the sun-
glasses holder. Such objects
can be thrown from the holder
in the event of a sudden stop
or an accident, possibly injur-
ing the passengers in the
vehicle.
•Do not open the sunglasses
holder whilst the vehicle is
moving. The rear view mirror
of the vehicle can be blocked
by an open sunglasses hold-
er.
•Do not put the sunglasses
forcibly into a sunglasses
holder. It may cause personal
injury if you try to open it
forcibly when the sunglasses
are jammed in the holder.
WA R N I N G