2017 Hyundai Elantra service
[x] Cancel search: servicePage 4 of 571

F4
FOREWORD
Thank you for choosing HYUNDAI. We are pleased to welcome you to the growing number of discriminating people who
drive HYUNDAI. The advanced engineering and high-quality construction of each HYUNDAI we build is something of
which we're very proud.
Yo u r O w n e r ' s M a n u a l w i l l i n t r o d u c e y o u t o t h e f e a t u r e s a n d o p e r a t i o n o f y o u r n e w H Y U N D A I . I t i s s u g g e s t e d t h a t y o u r e a d
it carefully because the information it contains can contribute greatly to the satisfaction you receive from your new vehi-
cle.
The manufacturer also recommends that service and maintenance on your vehicle be performed by an authorised
HYUNDAI dealer.
HYUNDAI MOTOR COMPANY
Note :Because future owners will also need the information included in this manual, if you sell this HYUNDAI, please
leave the manual in the vehicle for their use. Thank you.
Copyright 2015 HYUNDAI Motor Company. All rights reserved. No part of this publication may be reproduced, stored
in any retrieval system or transmitted in any form or by any means without the prior written permission of HYUNDAI
Motor Company.
Severe engine and transmission damage may result from the use of poor quality fuels and lubricants that
do not meet HYUNDAI specifications. You must always use high quality fuels and lubricants that meet the
specifications listed on Page 8-6 in the Vehicle Specifications section of this Owner's Manual.
CAUTION
Page 19 of 571
F19
If you have a flat tyre ........................................6-16
Jack and tools .................................................................6-16
Changing tyres .................................................................6-17
To w i n g . . . . . . . . . . . . . . . . . . . . . . . . . . . . . . . . . . . . . . . . . . . . . . . . . . . . . . . . . . . . . . . . . . . 6 - 2 3
To w i n g s e r v i c e . . . . . . . . . . . . . . . . . . . . . . . . . . . . . . . . . . . . . . . . . . . . . . . . . . . . . . . . . . . . . . . . . 6 - 2 3
Removable towing hook ...............................................6-24
Emergency towing .........................................................6-25
Engine compartment .............................................7-3
Maintenance services ...........................................7-4
Owner�s responsibility......................................................7-4
Owner maintenance precautions ..................................7-4
Owner maintenance ...............................................7-5
Owner maintenance schedule ........................................7-6
Scheduled maintenance services.........................7-8
Normal Maintenance Schedule .....................................7-9
Maintenance under severe usage and
low mileage conditions ..................................................7-13
Explanation of scheduled maintenance items..7-15
Engine oil ..............................................................7-19
Checking the engine oil level .......................................7-19
Checking the engine oil and filter ..............................7-20
Engine coolant......................................................7-21
Checking the engine coolant level..............................7-21
Changing the coolant .....................................................7-23
Brake/clutch fluid ................................................7-24
Checking the brake/clutch fluid level ........................7-24
Washer fluid .........................................................7-26
Checking the washer fluid level ..................................7-26
F19
7Maintenance
Page 20 of 571
F20F20
Parking brake .......................................................7-27
Checking the parking brake .........................................7-27
Air cleaner ............................................................7-28
Filter replacement ...........................................................7-28
Climate control air filter .....................................7-30
Filter inspection ...............................................................7-30
Filter replacement ...........................................................7-30
Wiper blades .........................................................7-31
Blade inspection ..............................................................7-31
Blade replacement ..........................................................7-31
Battery...................................................................7-34
For best battery service................................................7-34
Battery capacity label ...................................................7-36
Battery recharging .........................................................7-36
Reset items .......................................................................7-37
Ty r e s a n d w h e e l s . . . . . . . . . . . . . . . . . . . . . . . . . . . . . . . . . . . . . . . . . . . . . . . . . 7 - 3 8
Ty r e c a r e . . . . . . . . . . . . . . . . . . . . . . . . . . . . . . . . . . . . . . . . . . . . . . . . . . . . . . . . . . . . . . . . . . . . . . . . . . . 7 - 3 8
Recommended cold tyre inflation pressures ...........7-38
Checking tyre inflation pressure.................................7-40
Ty r e r o t a t i o n . . . . . . . . . . . . . . . . . . . . . . . . . . . . . . . . . . . . . . . . . . . . . . . . . . . . . . . . . . . . . . . . . . . 7 - 4 1
Wheel alignment and tyre balance .............................7-42
Ty r e r e p l a c e m e n t . . . . . . . . . . . . . . . . . . . . . . . . . . . . . . . . . . . . . . . . . . . . . . . . . . . . . . . . . . . . 7 - 4 2
Wheel replacement ........................................................7-44
Ty r e t r a c t i o n . . . . . . . . . . . . . . . . . . . . . . . . . . . . . . . . . . . . . . . . . . . . . . . . . . . . . . . . . . . . . . . . . . . . . 7 - 4 4
Ty r e m a i n t e n a n c e . . . . . . . . . . . . . . . . . . . . . . . . . . . . . . . . . . . . . . . . . . . . . . . . . . . . . . . . . . 7 - 4 4
Ty r e s i d e w a l l l a b e l l i n g . . . . . . . . . . . . . . . . . . . . . . . . . . . . . . . . . . . . . . . . . . . . . . . . . . . . 7 - 4 4
Low aspect ratio tyre ...................................................7-49
Fuses ......................................................................7-50
Fuse/relay panel description .......................................7-56
Light bulbs.............................................................7-67
Headlamp, position lamp, turn signal lamp and
fog lamp light bulb replacement .................................7-68
Side repeater lamp replacement .................................7-74
Rear combination lamp bulb replacement ................7-75
High mounted stop lamp replacement .......................7-79
Licence plate light bulb replacement ........................7-79
Interior light bulb replacement ....................................7-80
Appearance care ..................................................7-81
Exterior care ....................................................................7-81
Interior care......................................................................7-87
Emission control system .....................................7-88
Crankcase emission control system ...........................7-88
Evaporative emission control system.........................7-89
Exhaust emission control system ...............................7-89
Page 57 of 571
2-30
Safety system of your vehicle
Pre-tensioner seat belt
(Driver and front passenger,
if equipped)
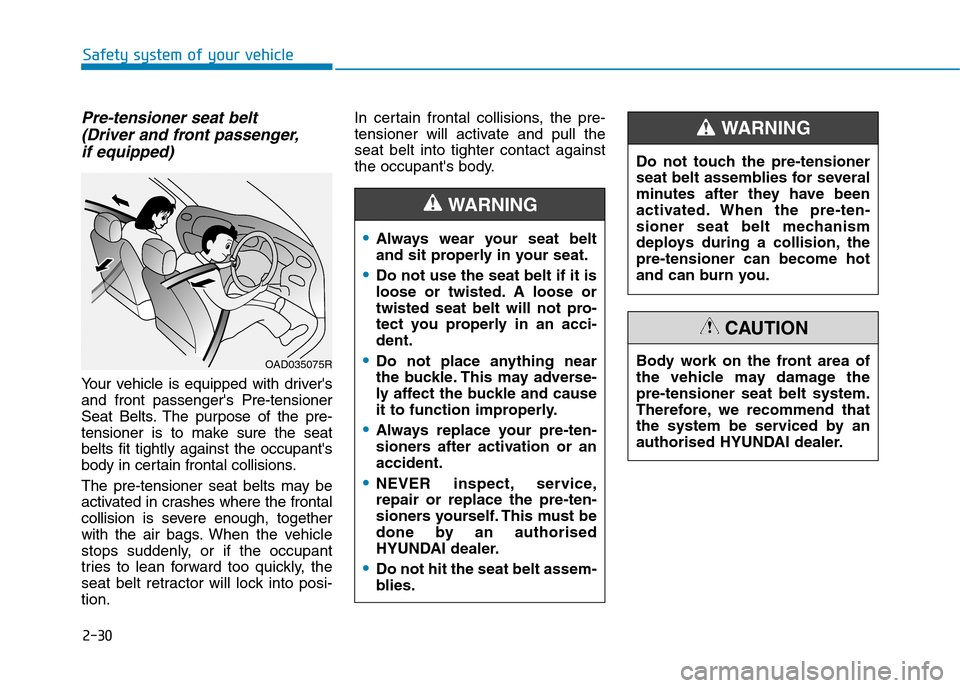
Yo u r v e h i c l e i s e q u i p p e d w i t h d r i v e r ' s
and front passenger's Pre-tensioner
Seat Belts. The purpose of the pre-
tensioner is to make sure the seat
belts fit tightly against the occupant's
body in certain frontal collisions.
The pre-tensioner seat belts may be
activated in crashes where the frontal
collision is severe enough, together
with the air bags.When the vehicle
stops suddenly, or if the occupant
tries to lean forward too quickly, the
seat belt retractor will lock into posi-
tion.
In certain frontal collisions, the pre-
tensioner will activate and pull the
seat belt into tighter contact against
the occupant's body.
•Always wear your seat belt
and sit properly in your seat.
•Do not use the seat belt if it is
loose or twisted. A loose or
twisted seat belt will not pro-
tect you properly in an acci-
dent.
•Do not place anything near
the buckle. This may adverse-
ly affect the buckle and cause
it to function improperly.
•Always replace your pre-ten-
sioners after activation or an
accident.
•NEVER inspect, service,
repair or replace the pre-ten-
sioners yourself. This must be
done by an authorised
HYUNDAI dealer.
•Do not hit the seat belt assem-
blies.
WA R N I N G
Do not touch the pre-tensioner
seat belt assemblies for several
minutes after they have been
activated. When the pre-ten-
sioner seat belt mechanism
deploys during a collision, the
pre-tensioner can become hot
and can burn you.
WA R N I N G
Body work on the front area of
the vehicle may damage the
pre-tensioner seat belt system.
Therefore, we recommend that
the system be serviced by an
authorised HYUNDAI dealer.
CAUTION
OAD035075R
Page 78 of 571
2-51
Safety system of your vehicle
2
Curtain air bags
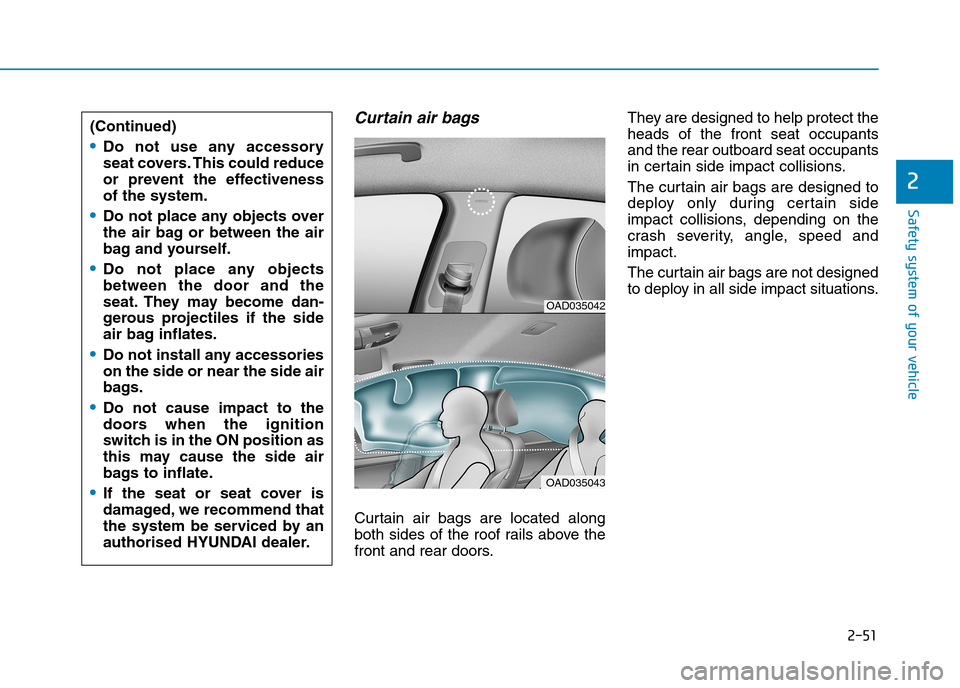
Curtain air bags are located along
both sides of the roof rails above the
front and rear doors.
They are designed to help protect the
heads of the front seat occupants
and the rear outboard seat occupants
in certain side impact collisions.
The curtain air bags are designed to
deploy only during certain side
impact collisions, depending on the
crash severity, angle, speed and
impact.
The curtain air bags are not designed
to deploy in all side impact situations.
OAD035042
OAD035043
(Continued)
•Do not use any accessory
seat covers. This could reduce
or prevent the effectiveness
of the system.
•Do not place any objects over
the air bag or between the air
bag and yourself.
•Do not place any objects
between the door and the
seat. They may become dan-
gerous projectiles if the side
air bag inflates.
•Do not install any accessories
on the side or near the side air
bags.
•Do not cause impact to the
doors when the ignition
switch is in the ON position as
this may cause the side air
bags to inflate.
•If the seat or seat cover is
damaged, we recommend that
the system be serviced by an
authorised HYUNDAI dealer.
Page 90 of 571
2-63
Safety system of your vehicle
2
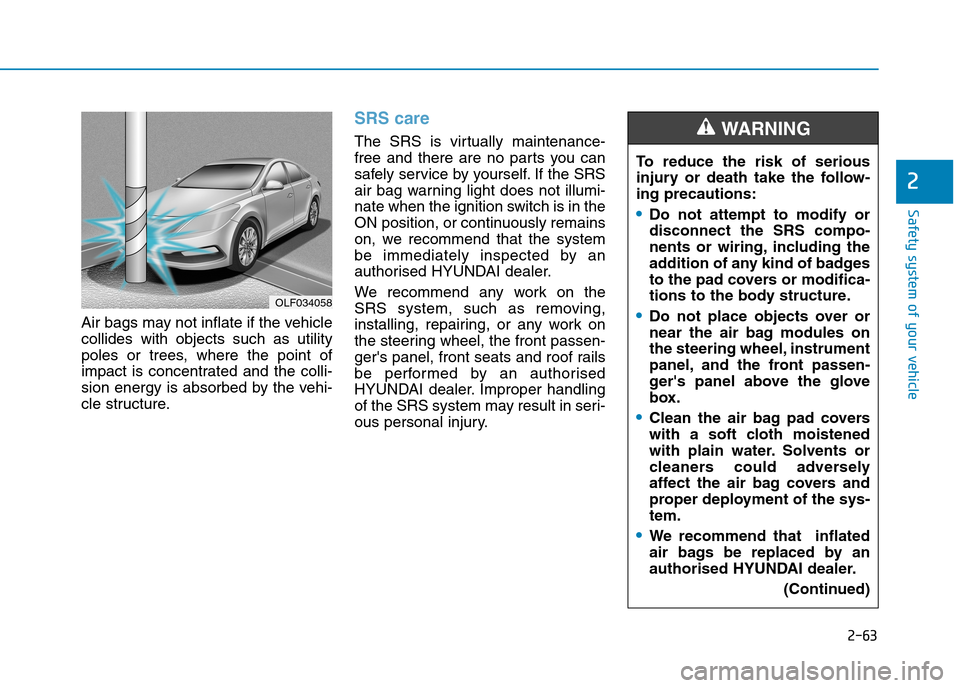
Air bags may not inflate if the vehicle
collides with objects such as utility
poles or trees, where the point of
impact is concentrated and the colli-
sion energy is absorbed by the vehi-
cle structure.
SRS care
The SRS is virtually maintenance-
free and there are no parts you can
safely service by yourself. If the SRS
air bag warning light does not illumi-
nate when the ignition switch is in the
ON position, or continuously remains
on, we recommend that the system
be immediately inspected by an
authorised HYUNDAI dealer.
We recommend any work on the
SRS system, such as removing,
installing, repairing, or any work on
the steering wheel, the front passen-
ger's panel, front seats and roof rails
be performed by an authorised
HYUNDAI dealer. Improper handling
of the SRS system may result in seri-
ous personal injury.
OLF034058
To r e d u c e t h e r i s k o f s e r i o u s
injury or death take the follow-
ing precautions:
•Do not attempt to modify or
disconnect the SRS compo-
nents or wiring, including the
addition of any kind of badges
to the pad covers or modifica-
tions to the body structure.
•Do not place objects over or
near the air bag modules on
the steering wheel, instrument
panel, and the front passen-
ger's panel above the glove
box.
•Clean the air bag pad covers
with a soft cloth moistened
with plain water. Solvents or
cleaners could adversely
affect the air bag covers and
proper deployment of the sys-
tem.
•We recommend that inflated
air bags be replaced by an
authorised HYUNDAI dealer.
(Continued)
WA R N I N G
Page 105 of 571
3-13
Convenient features of your vehicle
3
Immobiliser system
The immobiliser system protects your
vehicle from theft. If an improperly
coded key (or other device) is used,
the engine’s fuel system is disabled.
When the ignition switch is placed in
the ON position, the immobiliser sys-
tem indicator should come on briefly,
then go off. If the indicator starts to
blink, the system does not recognise
the coding of the key.
Place the ignition switch to the
LOCK/OFF position, then place the
ignition switch to the ON position
again.
The system may not recognise your
key’s coding if another immobiliser
key or other metal object (i.e., key
chain) is near the key. The engine
may not start because the metal may
interrupt the transponder signal from
transmitting normally.
If the system repeatedly does not
recognise the coding of the key, it is
recommended that you contact your
HYUNDAI dealer.
Do not attempt to alter this system or
add other devices to it. Electrical
problems could result that may make
your vehicle inoperable.
The transponder in your key is an
important part of the immobiliser
system. It is designed to give
years of trouble-free service, how-
ever you should avoid exposure to
moisture, static electricity and
rough handling. Immobiliser sys-
tem malfunction could occur.
NOTICE
In order to prevent theft of your
vehicle, do not leave spare keys
anywhere in your vehicle.
WA R N I N G
Page 140 of 571
3-48
Convenient features of your vehicle
Closing the fuel filler door
1. To install the fuel tank cap, turn it
clockwise until it “clicks” one time.
2. Close the fuel filler door until it is
latched securely.
Petrol is highly flammable and
explosive. Failure to follow
these guidelines may result in
SERIOUS INJURY or DEATH:
•Read and follow all warnings
posted at the service station.
•Before refuelling, note the
location of the Emergency
Petrol Shut-Off, if available, at
the service station.
•Before touching the fuel noz-
zle, you should eliminate the
potential build-up of static
electricity by touching a metal
part of the vehicle, a safe dis-
tance away from the fuel filler
neck, nozzle, or other fuel
source, with your bare hand.
(Continued)
WA R N I N G
(Continued)
•Do not use mobile phones
whilst refuelling. Electric cur-
rent and/or electronic interfer-
ence from mobile phones can
potentially ignite fuel vapours
and cause a fire.
•Do not get back into a vehicle
once you have begun refu-
elling. You can generate a
build-up of static electricity by
touching, rubbing or sliding
against any item or fabric
capable of producing static
electricity. Static electricity
discharge can ignite fuel
vapours causing a fire. If you
must re-enter the vehicle, you
should once again eliminate
potentially dangerous static
electricity discharge by touch-
ing a metal part of the vehicle,
away from the fuel filler neck,
nozzle or other fuel source,
with your bare hand.
(Continued)
(Continued)
•When refuelling, always move
the shift lever to the P (Park)
position (for automatic trans-
mission) or first gear or R
(Reverse, for manual trans-
mission), set the parking
brake, and place the ignition
switch to the LOCK/OFF posi-
tion. Sparks produced by
electrical components related
to the engine can ignite fuel
vapours causing a fire.
•When using an approved
portable fuel container, be
sure to place the container on
the ground prior to refuelling.
Static electricity discharge
from the container can ignite
fuel vapours causing a fire.
Once refuelling has begun,
contact between your bare
hand and the vehicle should
be maintained until the filling
is complete.
(Continued)