2017 FORD TAURUS change time
[x] Cancel search: change timePage 2 of 504

The information contained in this publication was correct at the time of going to print. In the interest ofcontinuous development, we reserve the right to change specifications, design or equipment at any timewithout notice or obligation. No part of this publication may be reproduced, transmitted, stored in aretrieval system or translated into any language in any form by any means without our written permission.Errors and omissions excepted.© Ford Motor Company 2016
All rights reserved.Part Number: 20160909193046
Page 54 of 504
PRINCIPLE OF OPERATION
MyKey allows you to program keys withrestricted driving modes to promote gooddriving habits. All but one of the keysprogrammed to the vehicle can beactivated with these restricted modes.
Any keys that have not been programmedare referred to as administrator keys oradmin keys. They can be used to:
•Create a MyKey.
•Program configurable MyKey settings.
•Clear all MyKey features.
When you have programmed a MyKey, youcan access the following information usingthe information display:
•How many admin keys and MyKeys areprogrammed to your vehicle.
•The total distance your vehicle hastraveled using a MyKey.
Note:All MyKeys are programmed to thesame settings. You cannot program themindividually.
Note:For vehicles equipped with apush-button start switch: When both aMyKey and an admin key are present whenyou start your vehicle, the system recognizesthe admin key only.
Non-configurable Settings
The following settings cannot be changedby an admin key user:
•Belt-Minder or safety belt reminder.You cannot disable this feature. Theaudio system will mute when the frontseat occupants’ safety belts are notfastened.
•Early low fuel. The low fuel warning isactivated earlier, giving the MyKey usermore time to refuel.
•Driver assist features, if equipped onyour vehicle, are forced on: parking aid,blind spot information system (BLIS),cross traffic alert, lane departurewarning and forward collision warningsystem.
•Satellite radio adult contentrestrictions (available only in somemarkets).
Note:When you switch lane departurewarning off temporarily, it turns on at thenext ignition cycle.
Configurable Settings
With an admin key, you can configurecertain MyKey settings when you firstcreate a MyKey and before you recycle thekey or restart the vehicle. You can alsochange the settings afterward with anadmin key:
•A vehicle speed limit can be set.Warnings will be shown in the display,followed by an audible tone when yourvehicle reaches the set speed. Youcannot override the set speed by fullydepressing the accelerator pedal or bysetting cruise control.
WARNING
Do not set MyKey maximum speedlimit to a limit that will prevent thedriver from maintaining a safe speedconsidering posted speed limits andprevailing road conditions. The driver isalways responsible to drive in accordancewith local laws and prevailing conditions.Failure to do so could result in accident orinjury.
51
Taurus (CPH) Canada/United States of America, enUSA, First Printing
MyKey™
Page 56 of 504
Note:You can clear or change your MyKeysettings at any time during the same keycycle as you created the MyKey. Once youhave switched the vehicle off, however, youwill need an admin key to change or clearyour MyKey settings.
CLEARING ALL MYKEYS
You can clear or change your MyKeysettings using the information displaycontrol on the steering wheel. SeeInformation Displays (page 89).
Switch the ignition on using an admin key.
To clear all MyKeys of all MyKey settings, press the left arrow button to accessthe main menu and scroll to:
Action and DescriptionMessage
Press the OK button or the right arrow button.Settings
Press the OK button or the right arrow button.MyKey
Press and hold the OK button until the instrument clusterdisplays the following message.Clear MyKey
All MyKeys
Cleared
Note:When you clear your MyKeys, you remove all restrictions and return all MyKeys totheir original admin key status.
53
Taurus (CPH) Canada/United States of America, enUSA, First Printing
MyKey™
Page 60 of 504
LOCKING AND UNLOCKING
You can use the power door lock controlor the remote control to lock and unlockyour vehicle.
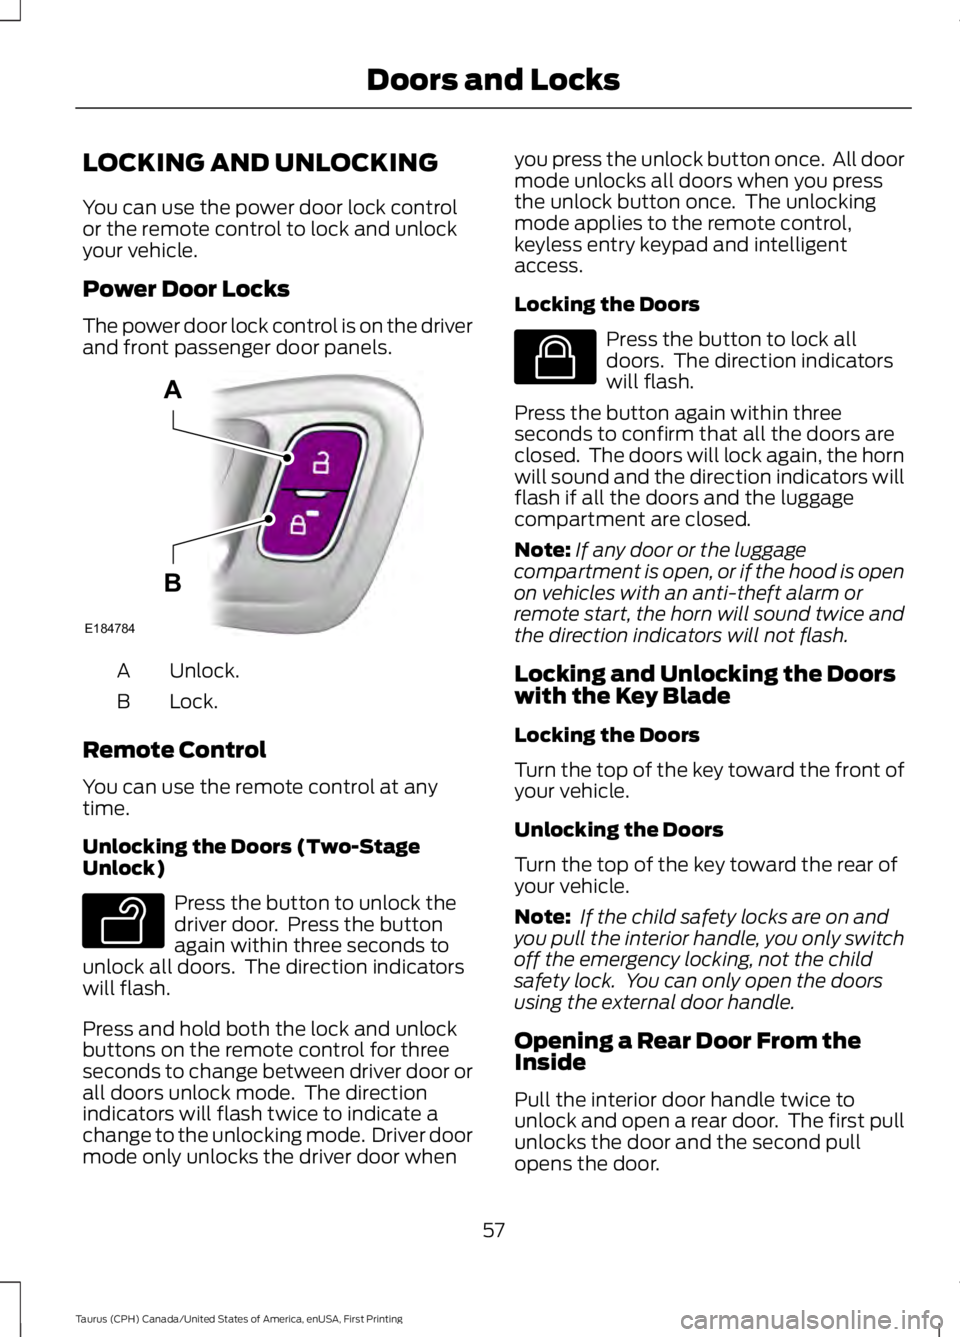
Power Door Locks
The power door lock control is on the driverand front passenger door panels.
Unlock.A
Lock.B
Remote Control
You can use the remote control at anytime.
Unlocking the Doors (Two-StageUnlock)
Press the button to unlock thedriver door. Press the buttonagain within three seconds tounlock all doors. The direction indicatorswill flash.
Press and hold both the lock and unlockbuttons on the remote control for threeseconds to change between driver door orall doors unlock mode. The directionindicators will flash twice to indicate achange to the unlocking mode. Driver doormode only unlocks the driver door when
you press the unlock button once. All doormode unlocks all doors when you pressthe unlock button once. The unlockingmode applies to the remote control,keyless entry keypad and intelligentaccess.
Locking the Doors
Press the button to lock alldoors. The direction indicatorswill flash.
Press the button again within threeseconds to confirm that all the doors areclosed. The doors will lock again, the hornwill sound and the direction indicators willflash if all the doors and the luggagecompartment are closed.
Note:If any door or the luggagecompartment is open, or if the hood is openon vehicles with an anti-theft alarm orremote start, the horn will sound twice andthe direction indicators will not flash.
Locking and Unlocking the Doorswith the Key Blade
Locking the Doors
Turn the top of the key toward the front ofyour vehicle.
Unlocking the Doors
Turn the top of the key toward the rear ofyour vehicle.
Note: If the child safety locks are on andyou pull the interior handle, you only switchoff the emergency locking, not the childsafety lock. You can only open the doorsusing the external door handle.
Opening a Rear Door From theInside
Pull the interior door handle twice tounlock and open a rear door. The first pullunlocks the door and the second pullopens the door.
57
Taurus (CPH) Canada/United States of America, enUSA, First Printing
Doors and LocksE184784
A
B E138629 E138623
Page 75 of 504

GENERAL INFORMATION
Condensation in Lamp Assemblies
Exterior lamps have vents toaccommodate normal changes in airpressure.
Condensation can be a natural by-productof this design. When moist air enters thelamp assembly through the vents, there isa possibility that condensation can occurwhen the temperature is cold. Whennormal condensation occurs, a fine mistcan form on the interior of the lens. Thefine mist eventually clears and exitsthrough the vents during normal operation.
Clearing time may take as long as 48 hoursunder dry weather conditions.
Examples of acceptable condensation are:
•The presence of a fine mist (no streaks,drip marks or large droplets).
•A fine mist covers less than 50% of thelens.
Examples of unacceptable condensationare:
•A water puddle inside the lamp.
•Streaks, drip marks or large dropletspresent on the interior of the lens.
If you see any unacceptable condensation,have your vehicle checked by an authorizeddealer.
LIGHTING CONTROL
Off.A
Parking lamps, instrument panellamps, license plate lamps andtail lamps.
B
Headlamps.C
High Beams
Push the lever away from you to switchthe high beam on.
Push the lever away from you again or pullthe lever toward you to switch the highbeam off.
72
Taurus (CPH) Canada/United States of America, enUSA, First Printing
LightingE224599
A E167827
Page 77 of 504

INSTRUMENT LIGHTING
DIMMER
Note:If you disconnect and connect thebattery, or fully discharge and charge thebattery, the lighting level will switch to themaximum setting.
Use the instrument lighting dimmer toadjust the brightness of the instrumentpanel and all applicable lighting in yourvehicle.
•Tap the top or bottom of the controlto the first detent to brighten or dim allinterior lighting incrementally.
•Press and hold the top or bottom ofthe control to the first detent until youreach the desired lighting level.
•Press and hold the top of the controlto the second detent to switch theinterior lights on.
•Press and hold the bottom of thecontrol to the second detent to switchthe interior lights off.
HEADLAMP EXIT DELAY
You can set the delay time to keep theheadlamps on for up to three minutes afterthe ignition is switched off.
Follow the steps below to change thedelay time (Steps 1 through 6 must bedone within 10 seconds):
1. Switch the ignition off.
2. Turn the lighting control to theautolamp position.
3. Turn the lighting control to the offposition.
4. Switch the ignition on.
5. Switch the ignition off.
6. Turn the lighting control to theautolamp position. The headlamps andparking lamps will turn on.
7. Turn the lighting control to the offposition when the desired delay timehas been reached. The headlamps andparking lamps will turn off. You can setthe headlamp exit delay to one of thefollowing settings:
•Off.
•10 seconds.
•20 seconds.
•120 seconds.
Note:You can also adjust the time delayusing the display controls in the instrumentcluster. See Information Displays (page89).
DAYTIME RUNNING LAMPS
WARNING
The daytime running lamps systemdoes not activate the rear lamps andmay not provide adequate lightingduring low visibility driving conditions. Also,the autolamps switch position may notactivate the headlamps in all low visibilityconditions, such as daytime fog. Make surethe headlamps are switched to auto or on,as appropriate, during all low visibilityconditions. Failure to do so may result in acrash.
74
Taurus (CPH) Canada/United States of America, enUSA, First Printing
LightingE173259
Page 78 of 504
The daytime running lamps turn on when:
1. The ignition is switched to the onposition.
2. The lighting control is in the offposition, parking lamps position or theautolamps position, and the sensordetects daylight.
3. Your vehicle is in drive (D).
AUTOMATIC HIGH BEAM
CONTROL (If Equipped)
The system will automatically turn on yourhigh beams if it is dark enough and no othertraffic is present. When it detects theheadlights of an approaching vehicle, thetail lamps of the preceding vehicle or streetlighting, the system will turn off the highbeams. The low beams remain on.
Note:If it appears that automatic controlof the high beams is not functioningproperly, check the windshield in front ofthe camera for a blockage. A clear view ofthe road is required for proper systemoperation. Have any windshield damage inthe area of the camera’s field-of-viewrepaired.
Note:If the system detects a blockage suchas bird droppings, bug splatter, snow or ice,and you do not observe changes, the systemwill go into low beam mode until you clearthe blockage. A message may also appearin the instrument cluster display noting thefront camera is blocked.
Note:In cold or inclement weatherconditions, you will notice a decrease in theavailability of the high beam system,especially at start up. If you want to changethe beam state independently of theautomatic control, you may switch the highbeams on or off using the lever. Automaticcontrol will resume when conditions arecorrect.
Note:Modification of the vehicle ride heightsuch as using much larger tires, maydegrade feature performance.
A camera sensor, centrally mountedbehind the windshield of your vehicle,continuously monitors conditions to decidewhen to turn the high beams off and on.
Once the system is active, the high beamswill turn on if:
•The ambient light level is low enough.
•There is no traffic in front of the vehicle.
•The vehicle speed is greater than32 mph (52 km/h).
The high beams will turn off if:
•The system detects the headlamps ofan approaching vehicle or the taillamps of a preceding vehicle.
•Vehicle speed falls below 27 mph(44 km/h).
•The ambient light level is high enoughthat high beams are not required.
•The system detects severe rain, snowor fog.
•The camera is blocked.
Activating the System
Switch on the system using the informationdisplay and autolamps. See InformationDisplays (page 89).
Switch the lighting control to theautolamps position. See Autolamps(page 73).
75
Taurus (CPH) Canada/United States of America, enUSA, First Printing
Lighting
Page 88 of 504
•It may take a short time for the needleto reach full after leaving the gasstation. This is normal and dependsupon the slope of pavement at the gasstation.
•The fuel amount dispensed into thetank is a little less or more than thegauge indicated. This is normal anddepends upon the slope of pavementat the gas station.
•If the gas station nozzle shuts offbefore the tank is full, try a differentgas pump nozzle.
•There is a small reserve left in the tankwhen the fuel gauge reaches empty.
Low Fuel Reminder
A low fuel reminder triggers when thedistance to empty reaches 75 miles (120km), 50 miles (80 km), 25 miles (40 km),10 miles (20 km) and 0 miles (0 km) .
Variations:
Note:The low fuel warning anddistance-to-empty warning can appear atdifferent fuel gauge positions depending onfuel economy conditions. This variation isnormal.
WARNING LAMPS AND
INDICATORS
The following warning lamps andindicators alert you to a vehicle conditionthat may become serious. Some lampsilluminate when you start your vehicle tomake sure they work. If any lamps remainon after starting your vehicle, refer to therespective system warning lamp for furtherinformation.
Note:Some warning indicators appear inthe information display and function thesame as a warning lamp, but do not displaywhen you start your vehicle.
Adaptive Cruise Control (If Equipped)
The speed control systemindicator light changes color toindicate what mode the systemis in. See Using Adaptive Cruise Control(page 179).
On (white light): Illuminates when youswitch on the adaptive cruise controlsystem. Turns off when the speed controlsystem is turned off.
Engaged (green light): Illuminates whenyou engage the adaptive cruise controlsystem. Turns off when you disengage thespeed control system.
Anti-Lock Braking System
If it illuminates when you aredriving, this indicates amalfunction. You continue tohave the normal braking system (withoutABS) unless the brake system warninglamp is also illuminated. Have the systemchecked by an authorized dealer.
Automatic High Beam Control
It will illuminate when thisfeature is on. See AutomaticHigh Beam Control (page 75).
Battery
If it illuminates while driving, itindicates a malfunction. Switchoff all unnecessary electricalequipment and have the system checkedby an authorized dealer immediately.
Blind Spot Monitor (If Equipped)
It illuminates when you switchthis feature off or in conjunctionwith a message. See Blind SpotInformation System (page 191).
85
Taurus (CPH) Canada/United States of America, enUSA, First Printing
Instrument ClusterE144524 E151262