2017 FORD TAURUS change time
[x] Cancel search: change timePage 135 of 504
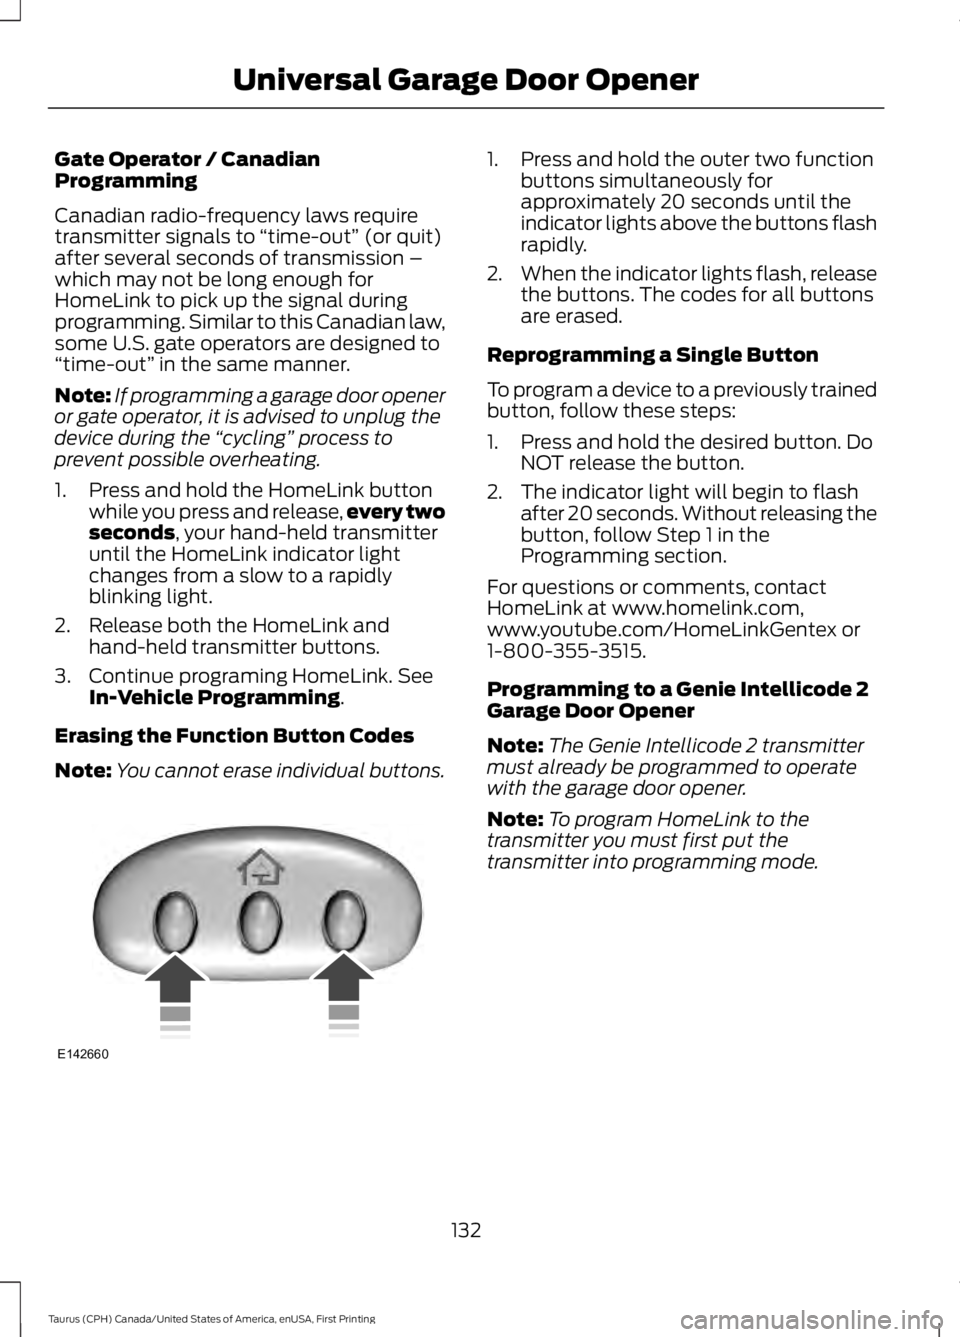
Gate Operator / CanadianProgramming
Canadian radio-frequency laws requiretransmitter signals to “time-out” (or quit)after several seconds of transmission –which may not be long enough forHomeLink to pick up the signal duringprogramming. Similar to this Canadian law,some U.S. gate operators are designed to“time-out” in the same manner.
Note:If programming a garage door openeror gate operator, it is advised to unplug thedevice during the “cycling” process toprevent possible overheating.
1. Press and hold the HomeLink buttonwhile you press and release,every twoseconds, your hand-held transmitteruntil the HomeLink indicator lightchanges from a slow to a rapidlyblinking light.
2. Release both the HomeLink andhand-held transmitter buttons.
3. Continue programing HomeLink. SeeIn-Vehicle Programming.
Erasing the Function Button Codes
Note:You cannot erase individual buttons.
1. Press and hold the outer two functionbuttons simultaneously forapproximately 20 seconds until theindicator lights above the buttons flashrapidly.
2.When the indicator lights flash, releasethe buttons. The codes for all buttonsare erased.
Reprogramming a Single Button
To program a device to a previously trainedbutton, follow these steps:
1. Press and hold the desired button. DoNOT release the button.
2. The indicator light will begin to flashafter 20 seconds. Without releasing thebutton, follow Step 1 in theProgramming section.
For questions or comments, contactHomeLink at www.homelink.com,www.youtube.com/HomeLinkGentex or1-800-355-3515.
Programming to a Genie Intellicode 2Garage Door Opener
Note:The Genie Intellicode 2 transmittermust already be programmed to operatewith the garage door opener.
Note:To program HomeLink to thetransmitter you must first put thetransmitter into programming mode.
132
Taurus (CPH) Canada/United States of America, enUSA, First Printing
Universal Garage Door OpenerE142660
Page 136 of 504
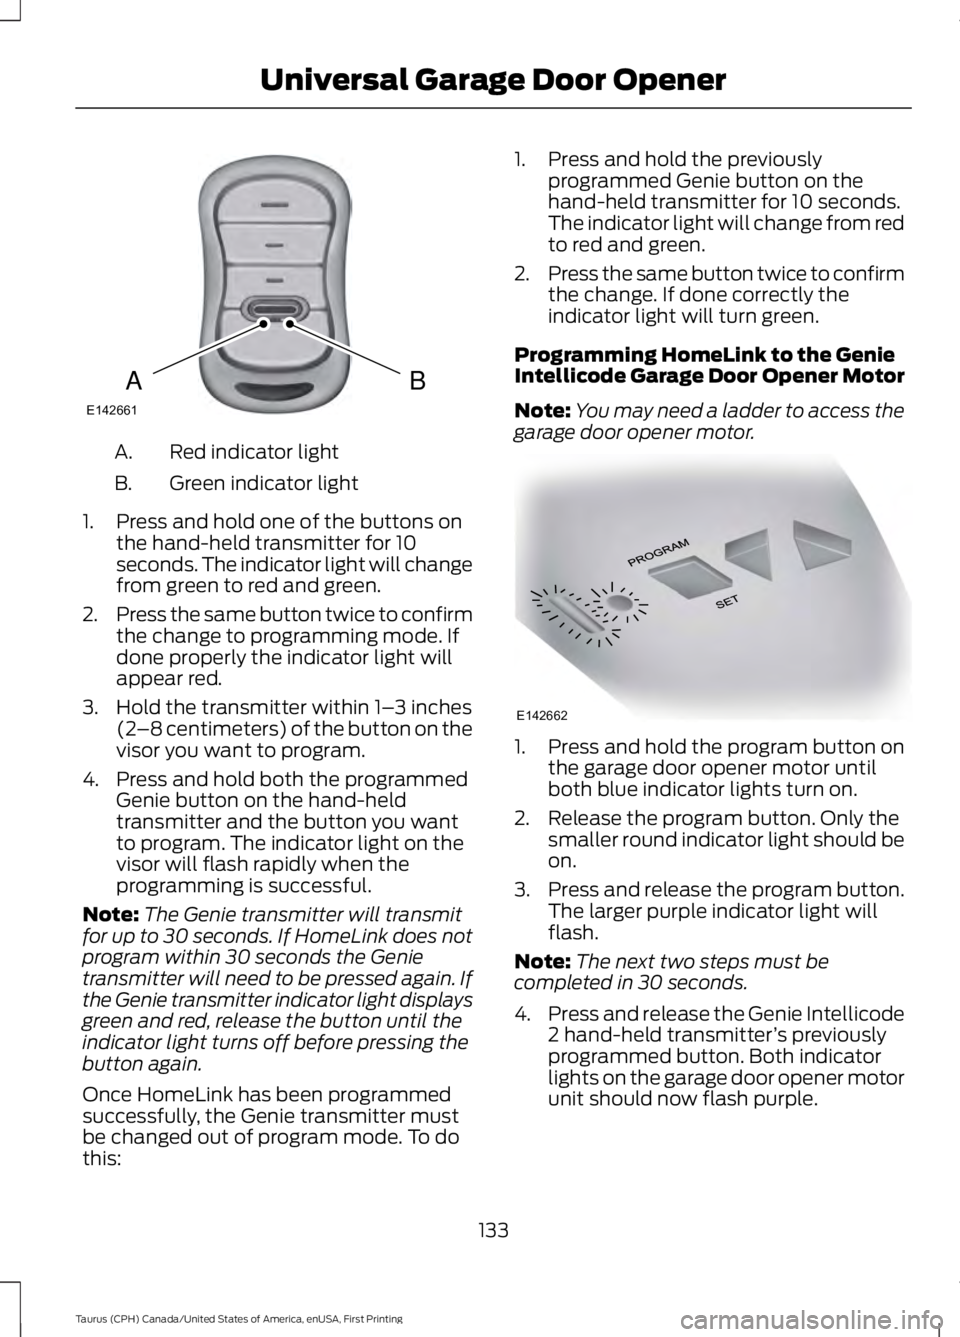
Red indicator lightA.
Green indicator lightB.
1. Press and hold one of the buttons onthe hand-held transmitter for 10seconds. The indicator light will changefrom green to red and green.
2.Press the same button twice to confirmthe change to programming mode. Ifdone properly the indicator light willappear red.
3. Hold the transmitter within 1–3 inches(2–8 centimeters) of the button on thevisor you want to program.
4. Press and hold both the programmedGenie button on the hand-heldtransmitter and the button you wantto program. The indicator light on thevisor will flash rapidly when theprogramming is successful.
Note:The Genie transmitter will transmitfor up to 30 seconds. If HomeLink does notprogram within 30 seconds the Genietransmitter will need to be pressed again. Ifthe Genie transmitter indicator light displaysgreen and red, release the button until theindicator light turns off before pressing thebutton again.
Once HomeLink has been programmedsuccessfully, the Genie transmitter mustbe changed out of program mode. To dothis:
1. Press and hold the previouslyprogrammed Genie button on thehand-held transmitter for 10 seconds.The indicator light will change from redto red and green.
2.Press the same button twice to confirmthe change. If done correctly theindicator light will turn green.
Programming HomeLink to the GenieIntellicode Garage Door Opener Motor
Note:You may need a ladder to access thegarage door opener motor.
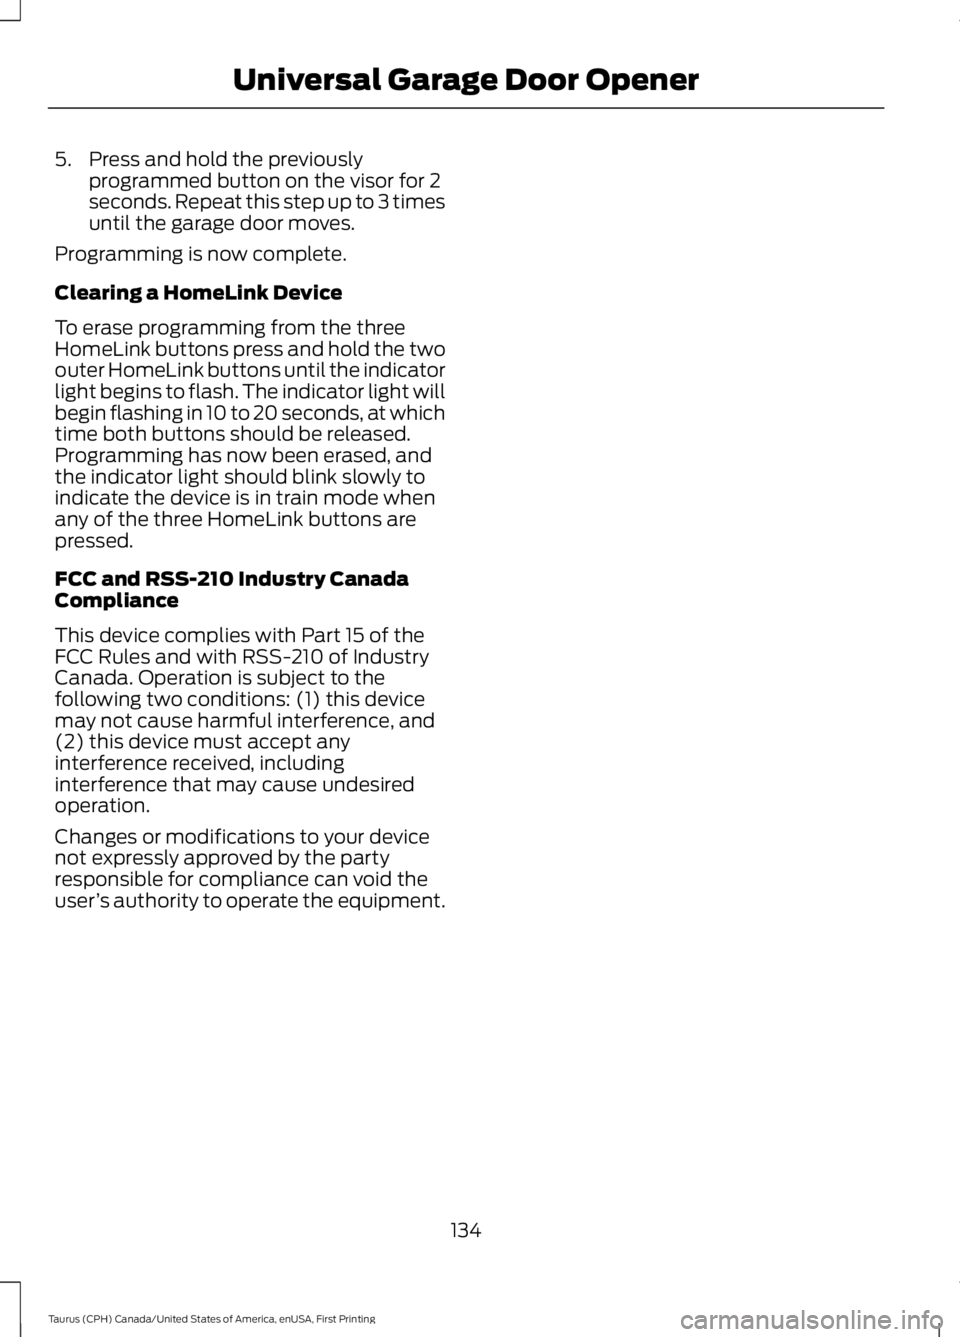
1. Press and hold the program button onthe garage door opener motor untilboth blue indicator lights turn on.
2. Release the program button. Only thesmaller round indicator light should beon.
3.Press and release the program button.The larger purple indicator light willflash.
Note:The next two steps must becompleted in 30 seconds.
4.Press and release the Genie Intellicode2 hand-held transmitter’s previouslyprogrammed button. Both indicatorlights on the garage door opener motorunit should now flash purple.
133
Taurus (CPH) Canada/United States of America, enUSA, First Printing
Universal Garage Door OpenerBAE142661 E142662
Page 137 of 504
5. Press and hold the previouslyprogrammed button on the visor for 2seconds. Repeat this step up to 3 timesuntil the garage door moves.
Programming is now complete.
Clearing a HomeLink Device
To erase programming from the threeHomeLink buttons press and hold the twoouter HomeLink buttons until the indicatorlight begins to flash. The indicator light willbegin flashing in 10 to 20 seconds, at whichtime both buttons should be released.Programming has now been erased, andthe indicator light should blink slowly toindicate the device is in train mode whenany of the three HomeLink buttons arepressed.
FCC and RSS-210 Industry CanadaCompliance
This device complies with Part 15 of theFCC Rules and with RSS-210 of IndustryCanada. Operation is subject to thefollowing two conditions: (1) this devicemay not cause harmful interference, and(2) this device must accept anyinterference received, includinginterference that may cause undesiredoperation.
Changes or modifications to your devicenot expressly approved by the partyresponsible for compliance can void theuser’s authority to operate the equipment.
134
Taurus (CPH) Canada/United States of America, enUSA, First Printing
Universal Garage Door Opener
Page 148 of 504
Switching Between E85 andGasoline
We do not recommend repeatedlyalternating between E85 and gasoline. Ifyou switch from using E85 to gasoline, orfrom gasoline to E85, add as much fuel aspossible, at least half a tank. Drive yourvehicle immediately for a minimum of 5 mi(8 km) to allow it to adapt to the changein ethanol concentration. If you use E85exclusively, we recommend that you fillthe fuel tank with regular unleadedgasoline at each scheduled oil change.
FUEL QUALITY - GASOLINE
Choosing the Right Fuel
Your vehicle is designed to operate onregular unleaded gasoline with a minimumpump (R+M)/2 octane rating of 87.
Some fuel stations, particularly those inhigh altitude areas, offer fuels posted asregular unleaded gasoline with an octanerating below 87. We do not recommendthese fuels.
For best overall vehicle and engineperformance, premium fuel with an octanerating of 91 or higher is recommended. Theperformance gained by using premium fuelis most noticeable in hot weather as wellas other conditions, for example whentowing a trailer. See Towing (page 206).
Do not use any fuel other than thoserecommended because they could lead toengine damage that will not be covered bythe vehicle Warranty.
Note:Use of any fuel other than thoserecommended can impair the emissioncontrol system and cause a loss of vehicleperformance.
Do not use:
•Diesel fuel.
•Fuels containing kerosene or paraffin.
•Fuel containing more than 15% ethanolor E85 fuel.
•Fuels containing methanol.
•Fuels containing metallic-basedadditives, including manganese-basedcompounds.
•Fuels containing the octane boosteradditive, methylcyclopentadienylmanganese tricarbonyl (MMT).
•Leaded fuel (using leaded fuel isprohibited by law).
The use of fuels with metallic compoundssuch as methylcyclopentadienylmanganese tricarbonyl (commonly knownas MMT), which is a manganese-basedfuel additive, will impair engineperformance and affect the emissioncontrol system.
Do not be concerned if the enginesometimes knocks lightly. However, if theengine knocks heavily while using fuel withthe recommended octane rating, contactan authorized dealer to prevent any enginedamage.
FUEL FILLER FUNNEL
LOCATION
The fuel filler funnel is under the luggagecompartment floor covering.
145
Taurus (CPH) Canada/United States of America, enUSA, First Printing
Fuel and RefuelingE161513
Page 160 of 504
USING ALL-WHEEL DRIVE (If
Equipped)
All-wheel drive uses all four wheels topower the vehicle. This increases traction,enabling you to drive over terrain and roadconditions that a conventional two-wheeldrive vehicle cannot. The AWD system isactive all the time and requires no inputfrom the operator.
Note:Your AWD vehicle is not intended foroff-road use. The AWD feature gives yourvehicle some limited off-road capabilitiesin which driving surfaces are relatively level,obstruction-free and otherwise similar tonormal on-road driving conditions.Operating your vehicle under other thanthose conditions could subject the vehicleto excessive stress which might result indamage which is not covered under yourwarranty.
Note: The Power Transfer Unit (PTU) inTaurus SHO™ performance packagevehicles does not require any normalscheduled maintenance. The system iselectronically monitored and notifies thedriver of required service by displaying themessage Change AWD Power TransferUnit Lube in the information display. ThePTU lubricant will be more likely to requirea fluid change if the vehicle has experiencedextended periods of extreme or severe dutycycle driving. Do not check or change thePTU lubricant unless the unit shows signsof leakage or a message indicating requiredservice is displayed. Contact an authorizeddealer for service if the PTU was submergedin water and to reset the PTU lube lifemonitor.
Note:When an AWD system fault ispresent, the warning Check AWD displaysin the information display. The AWD systemis not functioning correctly and defaultedto front-wheel drive. When this warningdisplays, have your vehicle serviced at anauthorized dealer.
Note: The AWD OFF message may alsoappear in the information display if the AWDsystem overheats and defaults tofront-wheel drive. This may occur if thevehicle is operated in extreme conditionswith excessive wheel slip, such as deepsand. To resume normal AWD function assoon as possible, stop the vehicle in a safelocation and stop the engine for at least 10minutes. After the engine has beenrestarted and the AWD system hasadequately cooled, the AWD OFF messagewill turn off and normal AWD functionreturns. If the engine is not stopped, theAWD OFF message turns off when thesystem cools and normal AWD functionreturns.
157
Taurus (CPH) Canada/United States of America, enUSA, First Printing
All-Wheel Drive (If Equipped)
Page 164 of 504
Sand
Most of the time traction control improvestire traction by managing wheel slipthrough Brake, Engine, and AWDcalibrations. However, during low speeddriving, disabling traction control in deepsand can help keep the wheels moving tomaintain vehicle momentum.
When driving over sand, try to keep all fourwheels on the most solid area of the trail.Avoid reducing the tire pressures but shiftto a lower gear and drive steadily throughthe terrain. Apply the accelerator slowlyand avoid spinning the wheels.
Do not drive your vehicle in deep sand foran extended period of time. This couldcause the AWD system to overheat anddefault to front-wheel drive. If this occurs,an AWD OFF message displays in theinformation display. To resume normalAWD function as soon as possible, stopthe vehicle in a safe location and stop theengine for at least 10 minutes. After theengine has been restarted and the AWDsystem has adequately cooled, the AWDOFF message turns off and normal AWDfunction returns. In the event the engine isnot stopped, the AWD OFF message turnsoff when the system cools and normalAWD function returns.
When driving at slow speeds in deep sandunder high outside temperatures, use L(Low) gear when possible. L (Low) gearoperation will maximize the engine andtransmission cooling capability.
Under severe operating conditions, the A/Cmay cycle on and off to protectoverheating of the engine.
Avoid excessive speed because vehiclemomentum can work against you andcause the vehicle to become stuck to thepoint that assistance may be required fromanother vehicle. Remember, you may beable to back out the way you came if youproceed with caution.
Mud and Water
If you must drive through high water, driveslowly. Traction or brake capability maybe limited.
When driving through water, determine thedepth; avoid water higher than the bottomof the wheel rims (for cars) or the bottomof the hubs (for trucks) (if possible) andproceed slowly. If the ignition system getswet, the vehicle may stall.
Once through water, always try the brakes.Wet brakes do not stop the vehicle aseffectively as dry brakes. Drying can beimproved by moving your vehicle slowlywhile applying light pressure on the brakepedal.
Be cautious of sudden changes in vehiclespeed or direction when you are driving inmud. Even AWD vehicles can lose tractionin slick mud. As when you are driving oversand, apply the accelerator slowly andavoid spinning your wheels. If the vehicledoes slide, steer in the direction of the slideuntil you regain control of the vehicle.
After driving through mud, clean off residuestuck to rotating driveshafts and tires.Excess mud stuck on tires and rotatingdriveshafts causes an imbalance thatcould damage drive components.
Note:Driving through deep water maydamage the transmission.
If the front or rear axle is submerged inwater, have the power transfer unit (PTU)or rear axle serviced by an authorizeddealer.
161
Taurus (CPH) Canada/United States of America, enUSA, First Printing
All-Wheel Drive (If Equipped)E143950
Page 170 of 504

PRINCIPLE OF OPERATION
WARNINGS
Vehicle modifications involvingbraking system, aftermarket roofracks, suspension, steering system,tire construction and wheel and tire sizemay change the handling characteristicsof your vehicle and may adversely affectthe performance of the electronic stabilitycontrol system. In addition, installing anystereo loudspeakers may interfere withand adversely affect the electronic stabilitycontrol system. Install any aftermarketstereo loudspeaker as far as possible fromthe front center console, the tunnel, andthe front seats in order to minimize the riskof interfering with the electronic stabilitycontrol sensors. Reducing theeffectiveness of the electronic stabilitycontrol system could lead to an increasedrisk of loss of vehicle control, vehiclerollover, personal injury and death.
Remember that even advancedtechnology cannot defy the laws ofphysics. It’s always possible to losecontrol of a vehicle due to inappropriatedriver input for the conditions. Aggressivedriving on any road condition can causeyou to lose control of your vehicleincreasing the risk of personal injury orproperty damage. Activation of theelectronic stability control system is anindication that at least some of the tireshave exceeded their ability to grip the road;this could reduce the operator’s ability tocontrol the vehicle potentially resulting ina loss of vehicle control, vehicle rollover,personal injury and death. If your electronicstability control system activates, SLOWDOWN.
The system automatically turns on eachtime you switch the ignition on.
If a fault occurs in either the stabilitycontrol or the traction control system, youmay experience the following conditions:
•The stability and traction control lightilluminates steadily.
•The stability control and tractioncontrol systems do not enhance yourvehicle's ability to maintain traction ofthe wheels.
If a driving condition activates either thestability control or the traction controlsystem you may experience the followingconditions:
•The stability and traction control lightflashes.
•Your vehicle slows down.
•Reduced engine power.
•A vibration in the brake pedal.
•The brake pedal is stiffer than usual.
•If the driving condition is severe andyour foot is not on the brake, the brakepedal may move as the system applieshigher brake force.
The stability control system has severalfeatures built into it to help you maintaincontrol of your vehicle:
Electronic Stability Control
The system enhances your vehicle’s abilityto prevent skids or lateral slides byapplying brakes to one or more of thewheels individually and, if necessary,reducing engine power.
Traction Control
The system enhances your vehicle’s abilityto maintain traction of the wheels bydetecting and controlling wheel spin. SeeUsing Traction Control (page 166).
167
Taurus (CPH) Canada/United States of America, enUSA, First Printing
Stability Control
Page 178 of 504
The system does not position your vehicle where I want in the space
The tires may not be installed or maintained correctly (not inflated correctly, impropersize, or of different sizes).
A repair or alteration has changed detection capabilities.
A parked vehicle has a high attachment (salt sprayer, snowplow, moving truck bed,etc).
The parking space length or position of parked objects changed after your vehicle passed.
The temperature around your vehicle changes quickly (driving from a heated garageinto the cold, or after leaving a car wash).
REAR VIEW CAMERA
WARNINGS
The rear view camera system is areverse aid supplement device thatstill requires the driver to use it inconjunction with the interior and exteriormirrors for maximum coverage.
Objects that are close to eithercorner of the bumper or under thebumper, might not be seen on thescreen due to the limited coverage of thecamera system.
Reverse your vehicle as slow aspossible, higher speeds may limityour reaction time to stop yourvehicle.
Use caution when the rear cargo dooris ajar. If the rear cargo door is ajar,the camera will be out of positionand the video image may be incorrect. Allguidelines disappear when the rear cargodoor is ajar. Some vehicles may not comeequipped with guidelines.
Do not switch the camera featureson or off when your vehicle is moving.
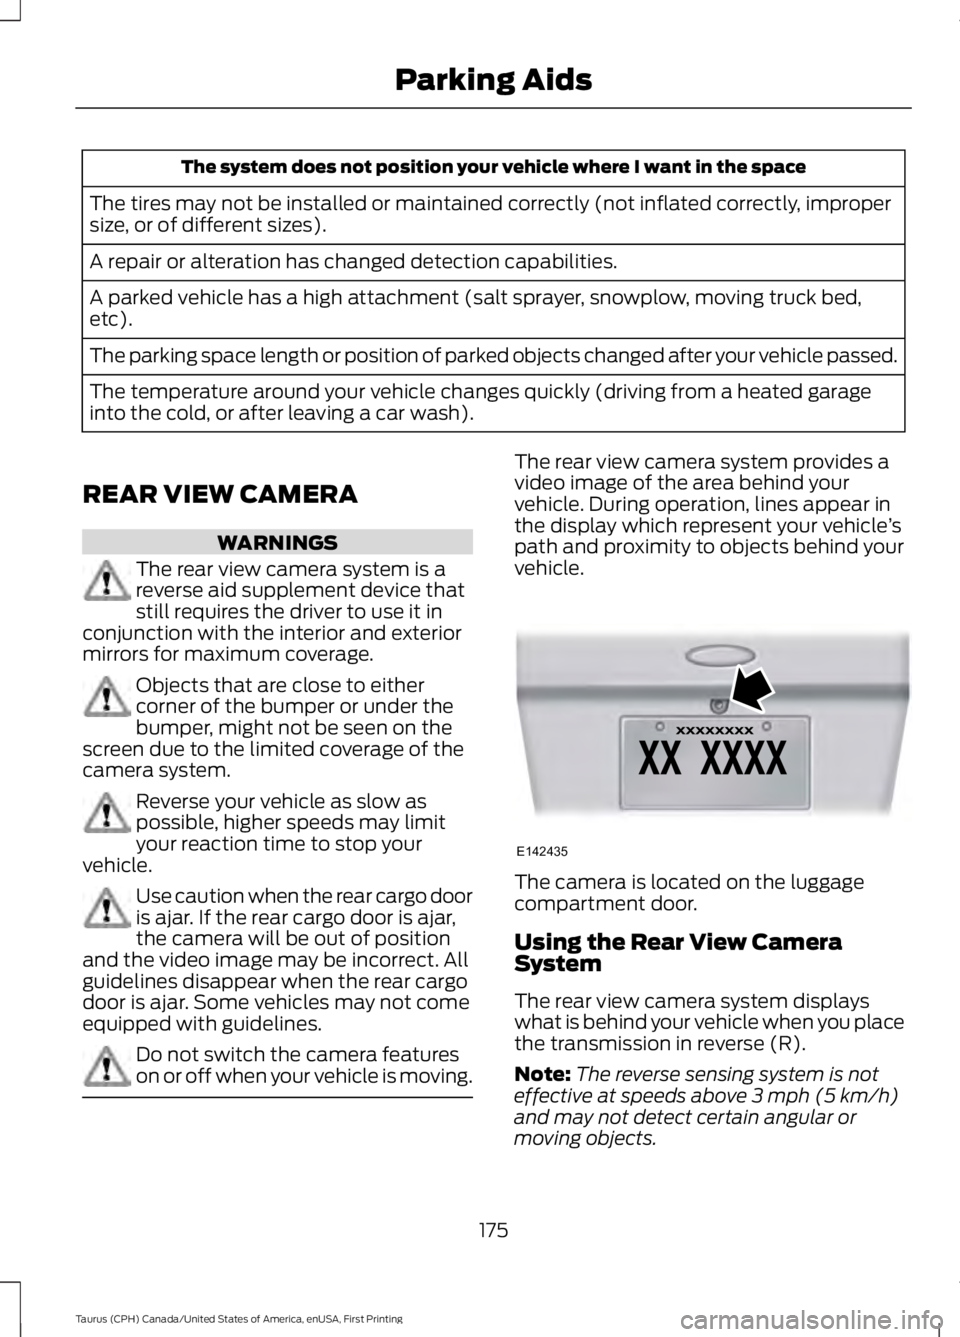
The rear view camera system provides avideo image of the area behind yourvehicle. During operation, lines appear inthe display which represent your vehicle’spath and proximity to objects behind yourvehicle.
The camera is located on the luggagecompartment door.
Using the Rear View CameraSystem
The rear view camera system displayswhat is behind your vehicle when you placethe transmission in reverse (R).
Note:The reverse sensing system is noteffective at speeds above 3 mph (5 km/h)and may not detect certain angular ormoving objects.
175
Taurus (CPH) Canada/United States of America, enUSA, First Printing
Parking AidsE142435