2017 FORD SUPER DUTY trailer
[x] Cancel search: trailerPage 7 of 636

Bed Ramps....................................................265
Towing
Towing a Trailer............................................268
Trailer Reversing Aids
.................................269
Trailer Sway Control
....................................277
Recommended Towing Weights............277
Essential Towing Checks...........................281
Towing the Vehicle on Four Wheels......289
Driving Hints
Breaking-In....................................................290
Economical Driving
.....................................290
Driving Through Water................................291
Floor Mats........................................................291
Snowplowing................................................292
Roadside Emergencies
Roadside Assistance..................................295
Hazard Warning Flashers
.........................296
Fuel Shutoff - 6.2L/6.8L
...........................296
Fuel Shutoff - 6.7L Diesel.........................297
Jump Starting the Vehicle........................298
Post-Crash Alert System.........................300
Transporting the Vehicle
..........................300
Towing Points................................................301
Customer Assistance
Getting the Services You Need
..............303
In California (U.S. Only)............................304
The Better Business Bureau (BBB) Auto Line Program (U.S. Only).....................305
Utilizing the Mediation/Arbitration Program (Canada Only)
......................306
Getting Assistance Outside the U.S. and Canada.......................................................306
Ordering Additional Owner's Literature....................................................307
Reporting Safety Defects (U.S. Only)............................................................308 Reporting Safety Defects (Canada
Only)............................................................308
Fuses
Fuse Specification Chart...........................310
Changing a Fuse
...........................................318
Maintenance
General Information...................................320
Opening and Closing the Hood..............320
Under Hood Overview - 6.2L....................321
Under Hood Overview - 6.8L...................322
Under Hood Overview - 6.7L Diesel
......323
Engine Oil Dipstick
......................................324
Engine Oil Check - 6.2L/6.8L..................324
Engine Oil Check - 6.7L Diesel................325
Changing the Engine Oil and Oil Filter..............................................................326
Changing the Coalescer Filter Element.......................................................327
Oil Change Indicator Reset......................328
Engine Coolant Check - 6.2L/6.8L........329
Engine Coolant Check - 6.7L Diesel......333
Automatic Transmission Fluid Check............................................................337
Transfer Case Fluid Check.......................340
Brake Fluid Check
.......................................340
Power Steering Fluid Check......................341
Washer Fluid Check
.....................................341
Draining the Fuel Filter Water Trap - 6.7L Diesel............................................................342
Fuel Filter - 6.2L/6.8L................................343
Changing the 12V Battery.........................343
Checking the Wiper Blades.....................345
Changing the Wiper Blades.....................345
Adjusting the Headlamps........................346
Changing a Bulb
...........................................347
Bulb Specification Chart
..........................350
Changing the Engine Air Filter - 6.2L/ 6.8L...............................................................353
4
Super Duty (TFE) Canada/United States of America, enUSA, First Printing Table of Contents
Page 94 of 636
SPOT LAMPS (If Equipped)
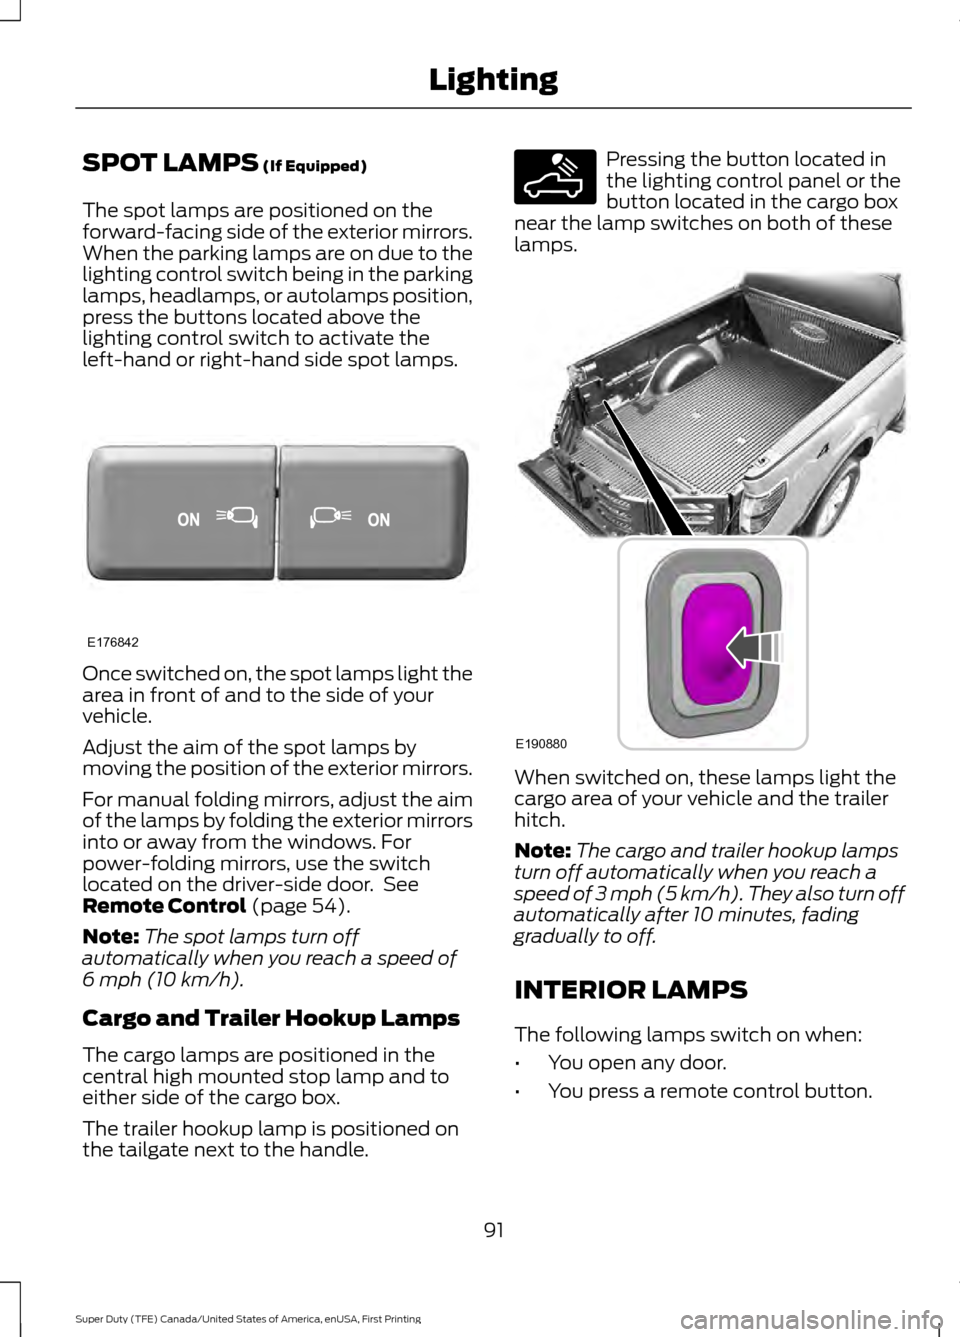
The spot lamps are positioned on the
forward-facing side of the exterior mirrors.
When the parking lamps are on due to the
lighting control switch being in the parking
lamps, headlamps, or autolamps position,
press the buttons located above the
lighting control switch to activate the
left-hand or right-hand side spot lamps. Once switched on, the spot lamps light the
area in front of and to the side of your
vehicle.
Adjust the aim of the spot lamps by
moving the position of the exterior mirrors.
For manual folding mirrors, adjust the aim
of the lamps by folding the exterior mirrors
into or away from the windows. For
power-folding mirrors, use the switch
located on the driver-side door. See
Remote Control
(page 54).
Note: The spot lamps turn off
automatically when you reach a speed of
6 mph (10 km/h)
.
Cargo and Trailer Hookup Lamps
The cargo lamps are positioned in the
central high mounted stop lamp and to
either side of the cargo box.
The trailer hookup lamp is positioned on
the tailgate next to the handle. Pressing the button located in
the lighting control panel or the
button located in the cargo box
near the lamp switches on both of these
lamps. When switched on, these lamps light the
cargo area of your vehicle and the trailer
hitch.
Note:
The cargo and trailer hookup lamps
turn off automatically when you reach a
speed of
3 mph (5 km/h). They also turn off
automatically after 10 minutes, fading
gradually to off.
INTERIOR LAMPS
The following lamps switch on when:
• You open any door.
• You press a remote control button.
91
Super Duty (TFE) Canada/United States of America, enUSA, First Printing LightingE176842 E189587 E190880
Page 100 of 636
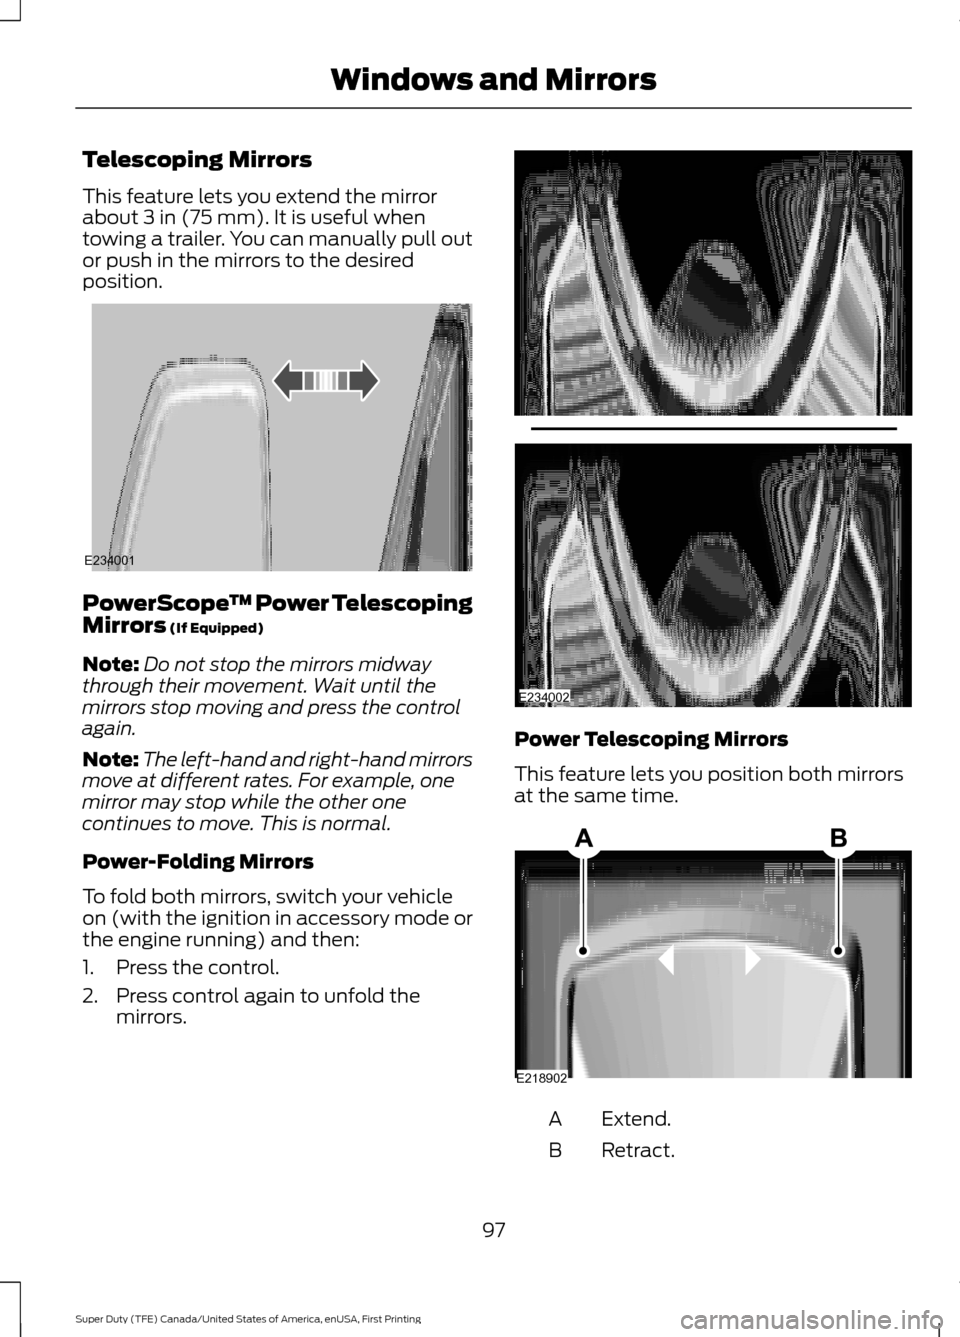
Telescoping Mirrors
This feature lets you extend the mirror
about 3 in (75 mm). It is useful when
towing a trailer. You can manually pull out
or push in the mirrors to the desired
position. PowerScope
™ Power Telescoping
Mirrors
(If Equipped)
Note: Do not stop the mirrors midway
through their movement. Wait until the
mirrors stop moving and press the control
again.
Note: The left-hand and right-hand mirrors
move at different rates. For example, one
mirror may stop while the other one
continues to move. This is normal.
Power-Folding Mirrors
To fold both mirrors, switch your vehicle
on (with the ignition in accessory mode or
the engine running) and then:
1. Press the control.
2. Press control again to unfold the mirrors. Power Telescoping Mirrors
This feature lets you position both mirrors
at the same time.
Extend.
A
Retract.
B
97
Super Duty (TFE) Canada/United States of America, enUSA, First Printing Windows and MirrorsE234001 E234002 E218902
Page 101 of 636
To adjust your mirrors, make sure you
switch your vehicle on (with the ignition in
accessory mode or the engine running) and
then press the adjustment control to
position the mirrors.
Note:
Moving the mirrors 10 or more times
within one minute, or repeated folding,
unfolding and telescoping of the mirrors
while holding the control down during full
travel, may disable the system to protect
the motors from overheating. Wait
approximately three minutes with the
vehicle running, and up to 10 minutes with
the vehicle off, for the system to reset and
for function to return to normal.
Loose Mirror
If your power-folding mirrors are manually
folded, they may not work properly even
after you re-position them. You need to
reset them if:
• The mirrors vibrate when you drive.
• The mirrors feel loose.
• The mirrors do not stay in the folded or
unfolded position.
• One of the mirrors is not in its normal
driving position.
To reset the power-fold feature, use the
power-folding mirror control to fold and
unfold the mirrors. You may hear a loud
noise as you reset the power-folding
mirrors. This sound is normal. Repeat this
process as needed each time the mirrors
are manually folded.
Heated Exterior Mirrors (If Equipped)
See Heated Windows and Mirrors (page
150
).
Memory Mirrors
(If Equipped)
You can save and recall the mirror
positions through the memory function.
See
Memory Function (page 157). Direction Indicator Mirrors (If Equipped)
While the vehicle is running, the
forward-facing portion of the appropriate
mirror housing blinks when you switch on
the direction indicator.
Puddle Lamps
(If Equipped)
The lamps on the bottom part of the mirror
housing light when you use your
transmitter to unlock the doors or when
you open a door.
Clearance Lamps
(If Equipped)
The lower, outer part of the mirror housings
light when you switch the headlamps or
parking lamps on.
Spot Lamps
(If Equipped)
The area lights are on the forward-facing
portion of the mirror housing. You can
switch them on and off by using the
controls located on the instrument panel.
See
Lighting (page 86).
Trailer Towing Camera System
(If
Equipped)
See
Rear View Camera (page 232).
Blind Spot Information System
(If
Equipped)
See
Blind Spot Information System
(page 249).
INTERIOR MIRROR WARNING
Do not adjust the mirror when your
vehicle is moving.
98
Super Duty (TFE) Canada/United States of America, enUSA, First Printing Windows and Mirrors
Page 108 of 636
Fuel gauge position
Distance-to-empty
Driving type (fuel economy
conditions)
1/8th tank
50 mi (80 km)
Highway driving
1/4 tank
50 mi (80 km)
Severe duty driving (trailer
towing, extended idle)
Transmission Fluid Temperature
Gauge
Indicates transmission fluid temperature.
At normal operating temperature, the level
indicator will be in the normal range. If the
transmission fluid temperature exceeds
the normal range, stop the vehicle as soon
as safely possible and verify the airflow is
not restricted such as snow or debris
blocking airflow through the grill. Also,
higher than normal operating temperature
can be caused by special operation
conditions (i.e. snowplowing, towing or
off-road use). See Special Operating
Conditions Scheduled Maintenance
(page
575). Operating the transmission for
extended periods with the gauge in the
higher than normal area may cause
internal transmission damage. You need
to alter the severity of your driving
conditions to lower the transmission
temperature into the normal range. If the
gauge continues to show high
temperatures, see an authorized dealer.
Turbo Boost Gauge
(If Equipped)
Indicates the amount of manifold air
pressure in the engine.
DEF Gauge
(If Equipped)
Indicates the current DEF level. WARNING LAMPS AND
INDICATORS
The following warning lamps and
indicators will alert you to a vehicle
condition that may become serious. Some
lamps will illuminate when you start your
vehicle to make sure they work. If any
lamps remain on after starting your vehicle,
refer to the respective system warning
lamp for further information.
Note:
Some warning indicators appear in
the information display and function the
same as a warning lamp but do not display
when you start your vehicle.
Adaptive Cruise Control
(If Equipped) The speed control system
indicator light changes color to
indicate what mode the system
is in. See Using Adaptive Cruise Control
(page
240).
On (white light): Illuminates when the
adaptive cruise control system is turned
on. Turns off when the speed control
system is turned off.
Engaged (green light): Illuminates when
the adaptive cruise control system is
engaged. Turns off when the speed control
system is disengaged.
105
Super Duty (TFE) Canada/United States of America, enUSA, First Printing Instrument ClusterE144524
Page 114 of 636
GENERAL INFORMATION
WARNING
Driving while distracted can result in
loss of vehicle control, crash and
injury. We strongly recommend that
you use extreme caution when using any
device that may take your focus off the
road. Your primary responsibility is the safe
operation of your vehicle. We recommend
against the use of any hand-held device
while driving and encourage the use of
voice-operated systems when possible.
Make sure you are aware of all applicable
local laws that may affect the use of
electronic devices while driving. Various systems on your vehicle can be
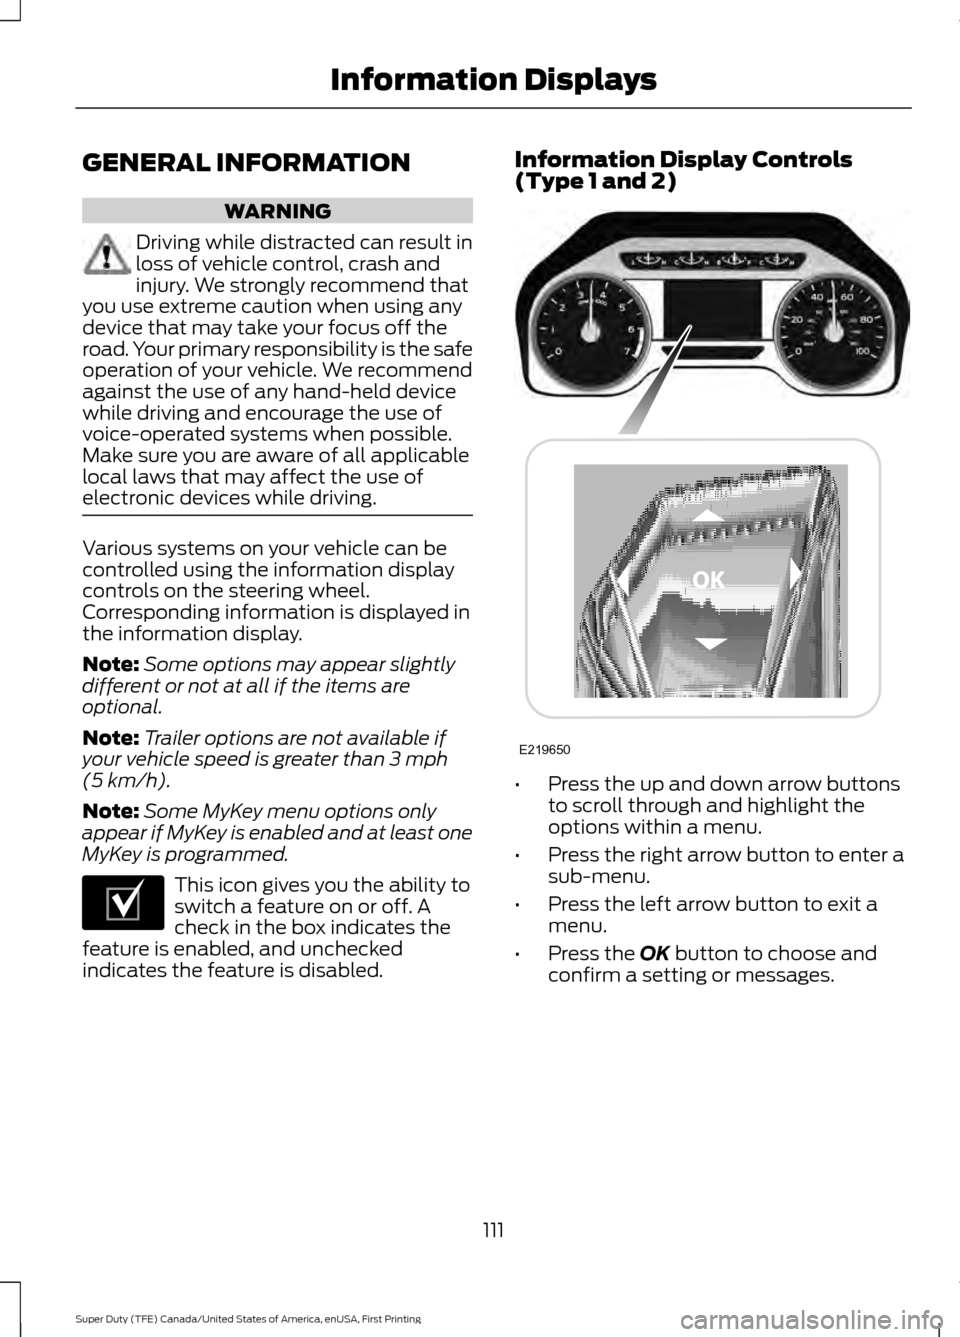
controlled using the information display
controls on the steering wheel.
Corresponding information is displayed in
the information display.
Note:
Some options may appear slightly
different or not at all if the items are
optional.
Note: Trailer options are not available if
your vehicle speed is greater than 3 mph
(5 km/h).
Note: Some MyKey menu options only
appear if MyKey is enabled and at least one
MyKey is programmed. This icon gives you the ability to
switch a feature on or off. A
check in the box indicates the
feature is enabled, and unchecked
indicates the feature is disabled. Information Display Controls
(Type 1 and 2)
•
Press the up and down arrow buttons
to scroll through and highlight the
options within a menu.
• Press the right arrow button to enter a
sub-menu.
• Press the left arrow button to exit a
menu.
• Press the
OK button to choose and
confirm a setting or messages.
111
Super Duty (TFE) Canada/United States of America, enUSA, First Printing Information DisplaysE204495 E219650
Page 117 of 636
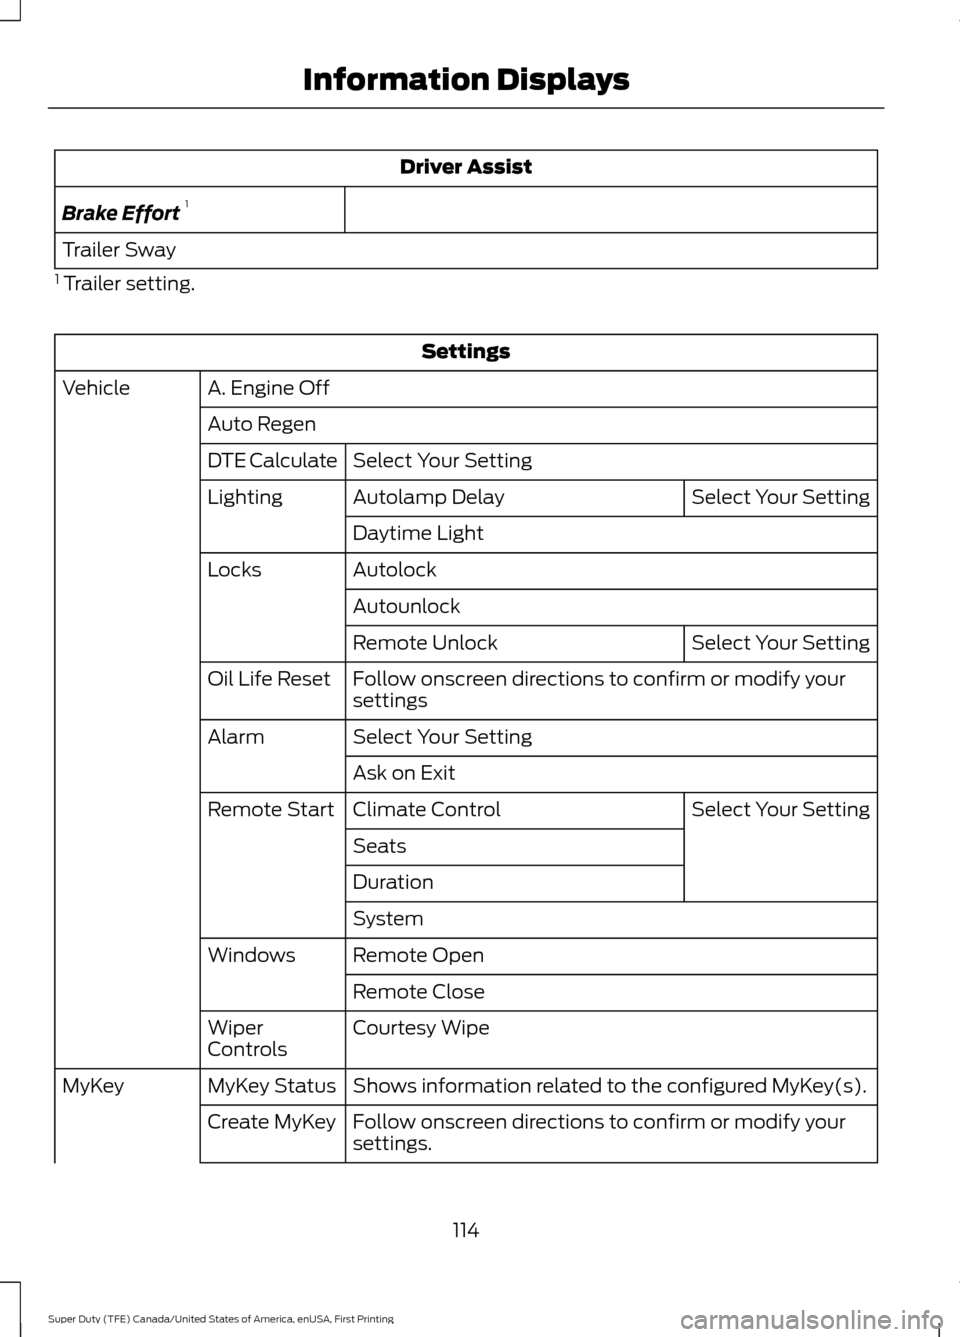
Driver Assist
Brake Effort 1
Trailer Sway
1 Trailer setting. Settings
A. Engine Off
Vehicle
Auto RegenSelect Your Setting
DTE Calculate
Select Your Setting
Autolamp Delay
Lighting
Daytime Light
Autolock
Locks
Autounlock Select Your Setting
Remote Unlock
Follow onscreen directions to confirm or modify your
settings
Oil Life Reset
Select Your Setting
Alarm
Ask on Exit Select Your Setting
Climate Control
Remote Start
Seats
Duration
System
Remote Open
Windows
Remote Close
Courtesy Wipe
Wiper
Controls
Shows information related to the configured MyKey(s).
MyKey Status
MyKey
Follow onscreen directions to confirm or modify your
settings.
Create MyKey
114
Super Duty (TFE) Canada/United States of America, enUSA, First Printing Information Displays
Page 120 of 636
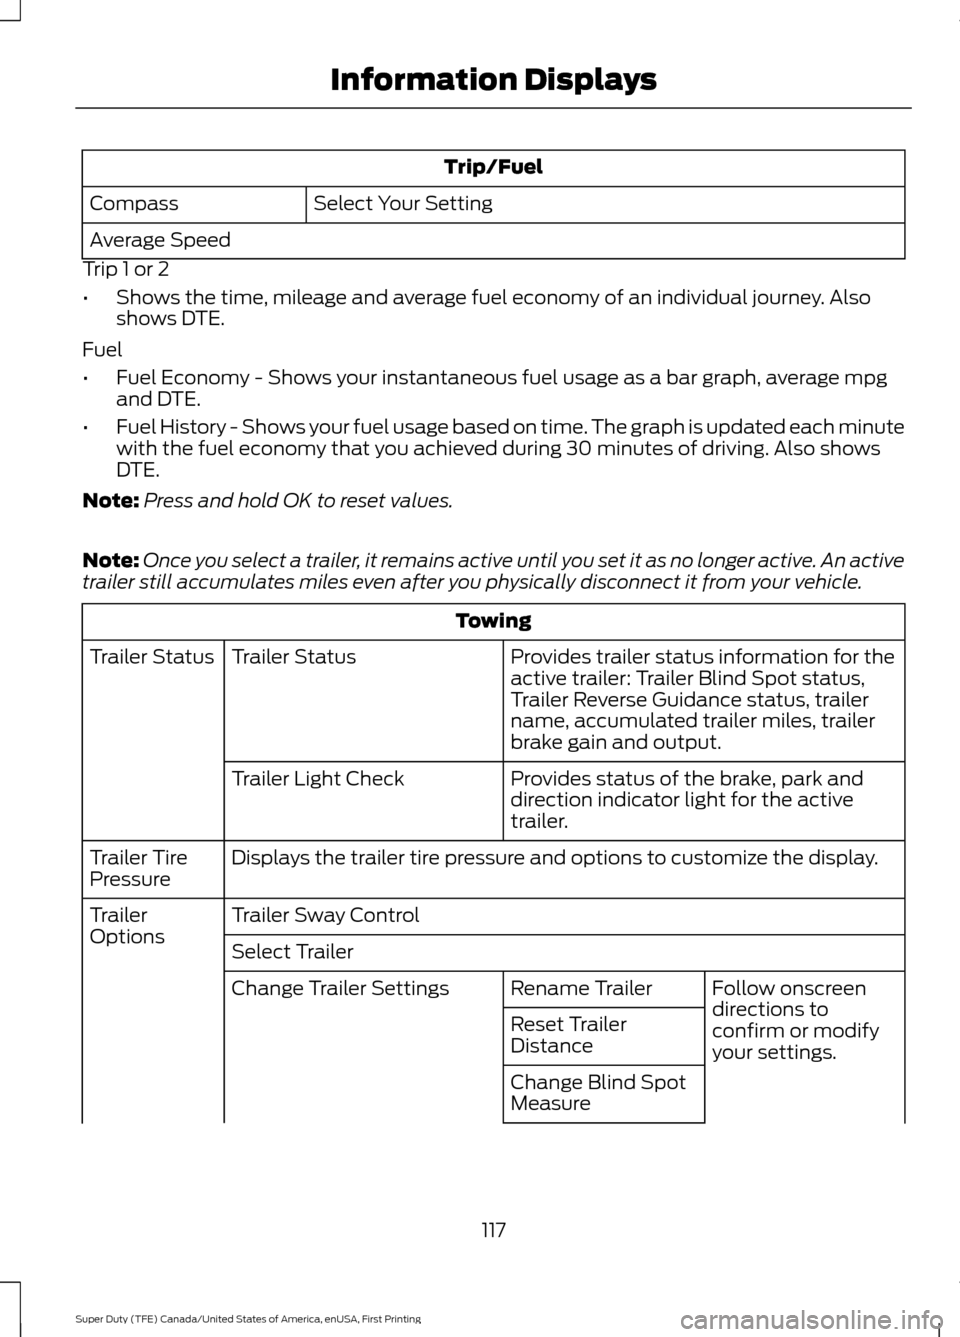
Trip/Fuel
Select Your Setting
Compass
Average Speed
Trip 1 or 2
• Shows the time, mileage and average fuel economy of an individual journey. Also
shows DTE.
Fuel
• Fuel Economy - Shows your instantaneous fuel usage as a bar graph, average mpg
and DTE.
• Fuel History - Shows your fuel usage based on time. The graph is updated each minute
with the fuel economy that you achieved during 30 minutes of driving. Also shows
DTE.
Note: Press and hold OK to reset values.
Note: Once you select a trailer, it remains active until you set it as no longer active. An active
trailer still accumulates miles even after you physically disconnect it from your vehicle. Towing
Provides trailer status information for the
active trailer: Trailer Blind Spot status,
Trailer Reverse Guidance status, trailer
name, accumulated trailer miles, trailer
brake gain and output.
Trailer Status
Trailer Status
Provides status of the brake, park and
direction indicator light for the active
trailer.
Trailer Light Check
Displays the trailer tire pressure and options to customize the display.
Trailer Tire
Pressure
Trailer Sway Control
Trailer
Options
Select Trailer
Follow onscreen
directions to
confirm or modify
your settings.
Rename Trailer
Change Trailer Settings
Reset Trailer
Distance
Change Blind Spot
Measure
117
Super Duty (TFE) Canada/United States of America, enUSA, First Printing Information Displays