2017 FORD FOCUS ELECTRIC battery
[x] Cancel search: batteryPage 116 of 367
Note:
If the system detects a vehicle
charging system fault at any point in a
charge cycle, the entire charge indicator will
flash continuously for one minute and then
turn off. If this happens, unplug the charging
coupler and then plug it back into the charge
port. If the problem persists, contact an
authorized dealer.
Disconnecting the Charging Coupler
1. Press and hold the button on the charging coupler and disconnect from
the charging port.
Note: Do not pull the wall plug from the
wall while the vehicle is charging. Doing so
may damage the outlet and the cord.
2. Close the charge port door.
Note: To close the charge port door, press
the center rear edge of the charge port door
and then release.
Convenience Charging and MyFord
Mobile
Use the MyFord Mobile app to set up the
charging convenience features. Visit
myfordmobile.com for more complete
information and to set up your MyFord
Mobile account.
Your vehicle has the following features to
improve your charging experience.
Value Charge
The vehicle schedules charging at the
lowest available utility rates. Contact your
utility company to see what rates are
available.
Charge Now
Fully charge your vehicle at the quickest
rate. The vehicle starts charging
immediately after you connect the
charging plug into the vehicle. My GO Time
Setting My GO Times through the MyFord
Mobile application allows you to set
charging schedules and cabin
preconditioning settings so your vehicle is
ready to drive when you are. By setting a
My GO Time the vehicles charge can be
completed before your next set drive time.
A calendar view allows you to program two
My GO Times per day for each of the seven
days of the week. Remember, your vehicle
must be plugged in for My GO Time to
work.
Cabin Preconditioning
Get the most miles out of every charge by
preconditioning your vehicle while it’
s still
plugged in and charging. Use your smart
phone to set the cabin temperature and
departure time before you leave so you use
energy from your home wall outlet instead
of your battery to heat or cool your vehicle.
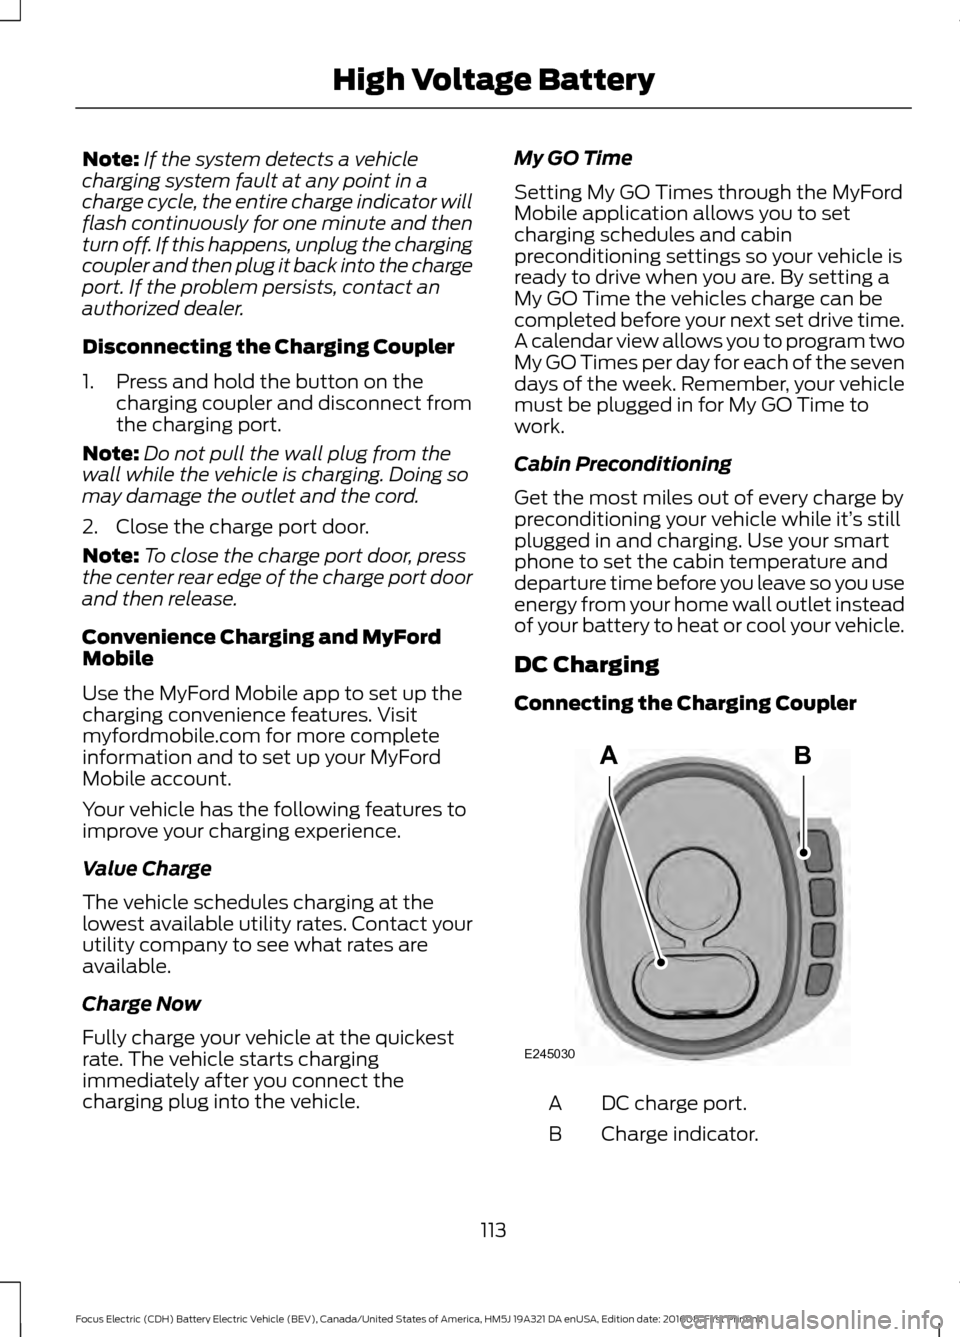
DC Charging
Connecting the Charging Coupler DC charge port.
A
Charge indicator.
B
113
Focus Electric (CDH) Battery Electric Vehicle (BEV), Canada/United States of America, HM5J 19A321 DA enUSA, Edition date: 201608, First Printing High Voltage BatteryAB
E245030
Page 117 of 367
The charge indicator displays the state of
charge in 25 percent increments.
Repeated use of this charging method
could have a long term effect on the
battery.
1. Shift into park (P), apply the parking
brake and turn the vehicle off.
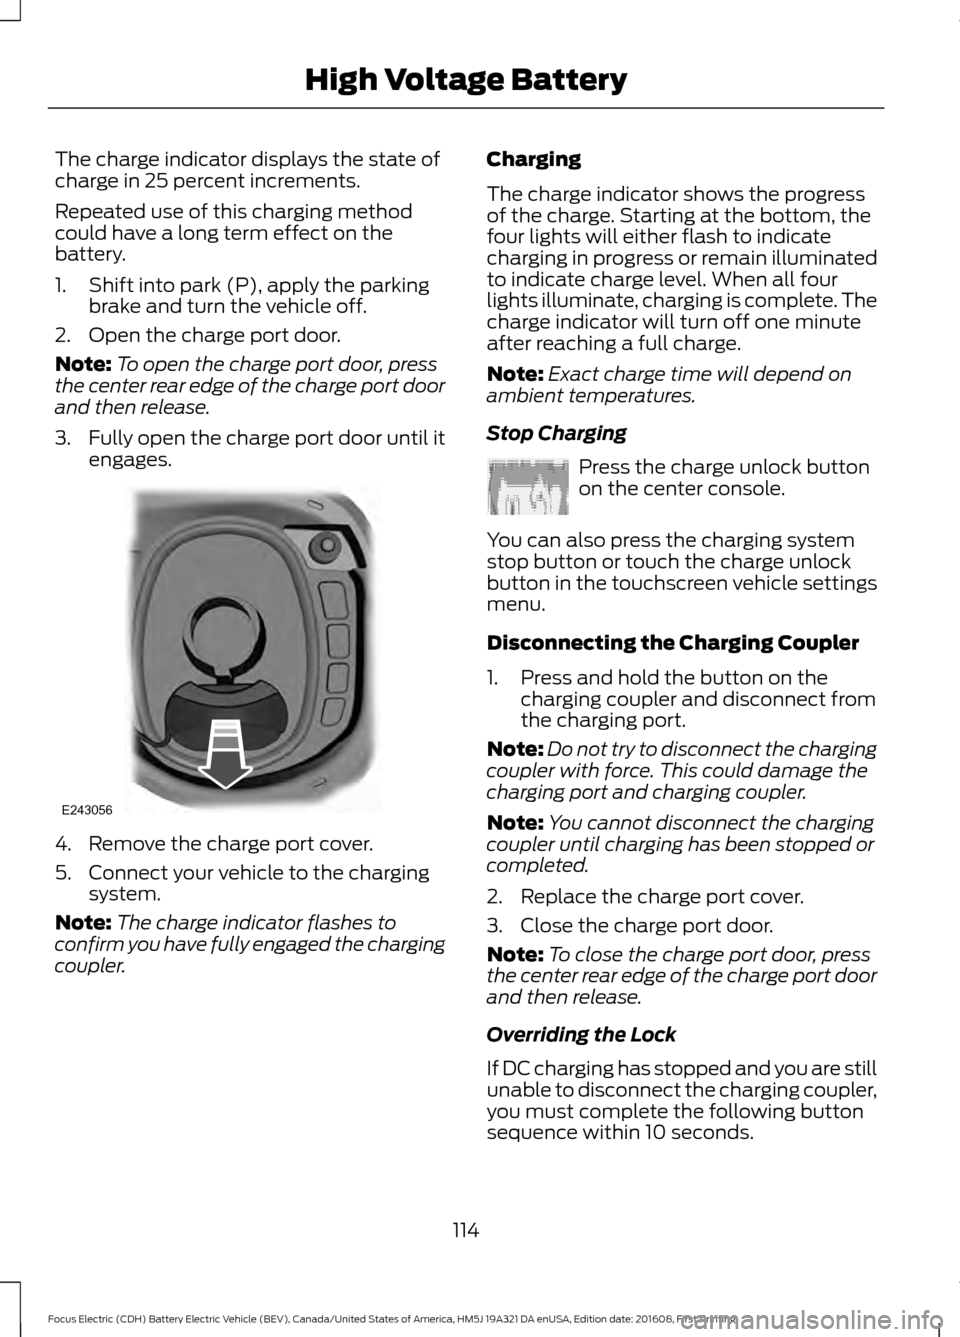
2. Open the charge port door.
Note: To open the charge port door, press
the center rear edge of the charge port door
and then release.
3. Fully open the charge port door until it
engages. 4. Remove the charge port cover.
5. Connect your vehicle to the charging
system.
Note: The charge indicator flashes to
confirm you have fully engaged the charging
coupler. Charging
The charge indicator shows the progress
of the charge. Starting at the bottom, the
four lights will either flash to indicate
charging in progress or remain illuminated
to indicate charge level. When all four
lights illuminate, charging is complete. The
charge indicator will turn off one minute
after reaching a full charge.
Note:
Exact charge time will depend on
ambient temperatures.
Stop Charging Press the charge unlock button
on the center console.
You can also press the charging system
stop button or touch the charge unlock
button in the touchscreen vehicle settings
menu.
Disconnecting the Charging Coupler
1. Press and hold the button on the charging coupler and disconnect from
the charging port.
Note: Do not try to disconnect the charging
coupler with force. This could damage the
charging port and charging coupler.
Note: You cannot disconnect the charging
coupler until charging has been stopped or
completed.
2. Replace the charge port cover.
3. Close the charge port door.
Note: To close the charge port door, press
the center rear edge of the charge port door
and then release.
Overriding the Lock
If DC charging has stopped and you are still
unable to disconnect the charging coupler,
you must complete the following button
sequence within 10 seconds.
114
Focus Electric (CDH) Battery Electric Vehicle (BEV), Canada/United States of America, HM5J 19A321 DA enUSA, Edition date: 201608, First Printing High Voltage BatteryE243056 E242991
Page 118 of 367
1. Press the charge unlock button on the
center console.
2. Touch the charge unlock button in the touchscreen vehicle settings menu.
3. Press the charge unlock button on the center console.
Note: A message requesting confirmation
that your vehicle is unplugged appears on
the instrument cluster. See Information
Messages (page 87).
4. Switch the power off, leave your vehicle and close the door.
5. After one minute, press and hold the button on the charging coupler and
disconnect from the charging port.
If the previous steps fail to unlock the
charging coupler, you may need to switch
the power off, then on, and off again and
wait another minute to allow the system
to reset.
If your first attempt was unsuccessful,
repeat steps 1 through 5.
If you are still unable to disconnect the
charging coupler, press the emergency
stop button on the charging system.
Note: For additional instructions, please
refer to information available from the
charging networks or the charging system
site.
Call the Ford Roadside Assistance at
1-800-241-3673 for US sold vehicles
traveling within the US or Canada and
1-800-665-2006 for Canadian sold
vehicles traveling with the US or Canada
for additional information.
HIGH VOLTAGE BATTERY CUT-
OFF SWITCH
The high voltage shut off operation shuts
off power from the high-voltage battery
after a collision, or if your vehicle receives
a substantial physical jolt. To reactivate your vehicle after either
event, perform the following steps:
1. Press the
START/STOP button to
power off your vehicle.
2. Wait for your vehicle to fully shut down
and the instrument cluster to turn off.
Note: Your vehicle may take between 30
to 90 seconds to shut down.
3. Press the brake pedal and press the START/STOP
button.
4. If your vehicle is not powered after this
sequence, repeat steps 1 through 3 up
to two more times.
Note: During this process, your vehicle
detects if the electrical system is safe and
reactivates. Once your vehicle determines
the electrical system safe, you can start your
vehicle as you would normally by pressing
the brake in combination with the
START/STOP
button.
Note: In the event your vehicle does not
reactivate after the third power cycle,
contact an authorized dealer.
115
Focus Electric (CDH) Battery Electric Vehicle (BEV), Canada/United States of America, HM5J 19A321 DA enUSA, Edition date: 201608, First Printing High Voltage Battery
Page 119 of 367
AUTOMATIC TRANSMISSION
Understanding the Positions of
Your Automatic Transmission
WARNING
Always set the parking brake fully
and make sure you shift the gearshift
lever to park (P). Switch the power
off and remove the key whenever you leave
your vehicle. The single speed transmission is built
specifically to handle the high rotational
speed range of an electric motor.
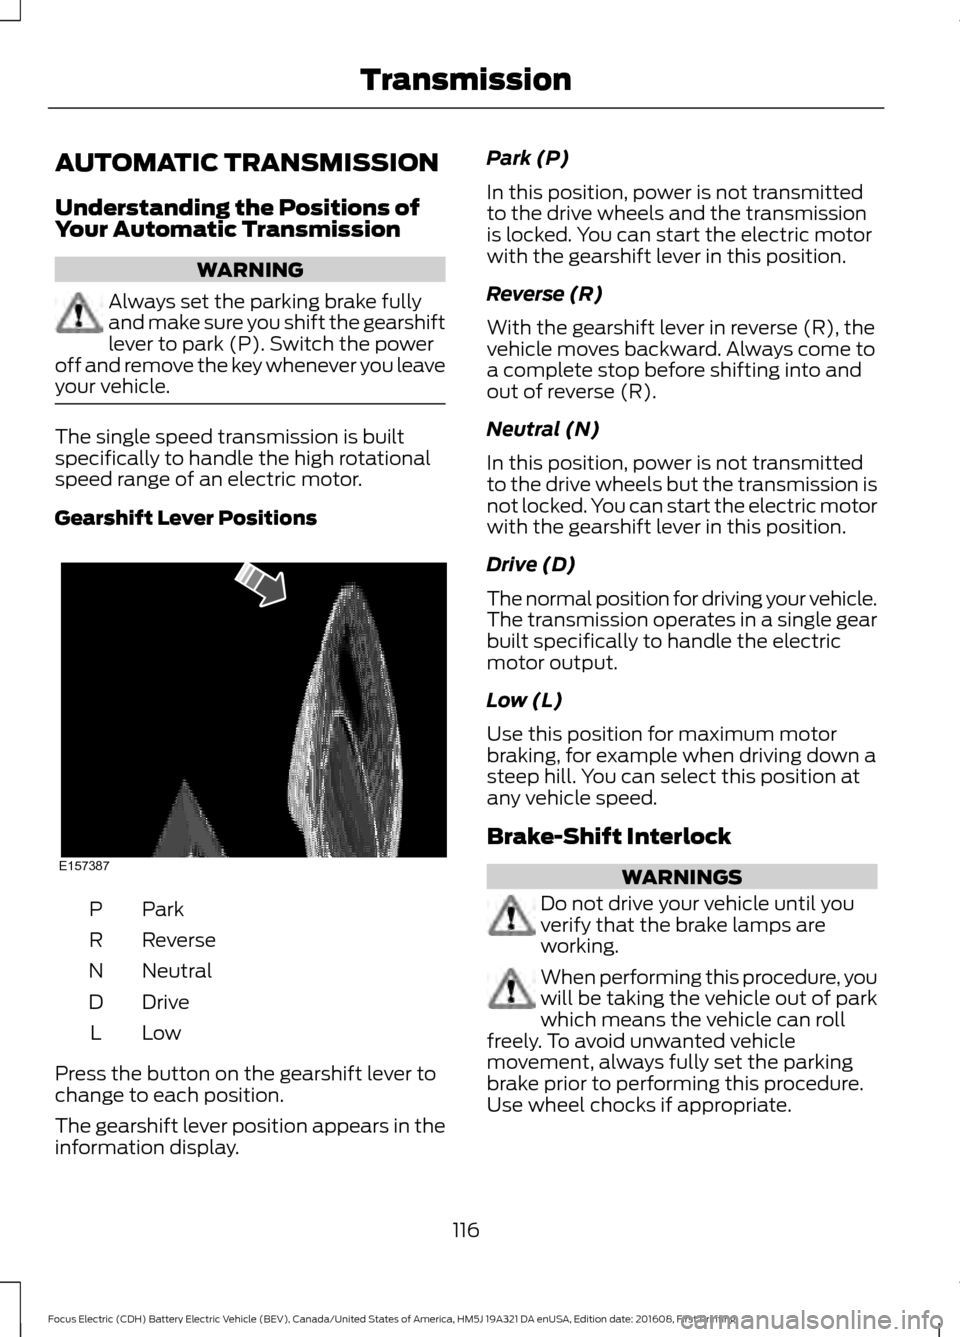
Gearshift Lever Positions
ParkP
Reverse
R
Neutral
N
Drive
D
LowL
Press the button on the gearshift lever to
change to each position.
The gearshift lever position appears in the
information display. Park (P)
In this position, power is not transmitted
to the drive wheels and the transmission
is locked. You can start the electric motor
with the gearshift lever in this position.
Reverse (R)
With the gearshift lever in reverse (R), the
vehicle moves backward. Always come to
a complete stop before shifting into and
out of reverse (R).
Neutral (N)
In this position, power is not transmitted
to the drive wheels but the transmission is
not locked. You can start the electric motor
with the gearshift lever in this position.
Drive (D)
The normal position for driving your vehicle.
The transmission operates in a single gear
built specifically to handle the electric
motor output.
Low (L)
Use this position for maximum motor
braking, for example when driving down a
steep hill. You can select this position at
any vehicle speed.
Brake-Shift Interlock
WARNINGS
Do not drive your vehicle until you
verify that the brake lamps are
working.
When performing this procedure, you
will be taking the vehicle out of park
which means the vehicle can roll
freely. To avoid unwanted vehicle
movement, always fully set the parking
brake prior to performing this procedure.
Use wheel chocks if appropriate.
116
Focus Electric (CDH) Battery Electric Vehicle (BEV), Canada/United States of America, HM5J 19A321 DA enUSA, Edition date: 201608, First Printing TransmissionE157387
Page 120 of 367
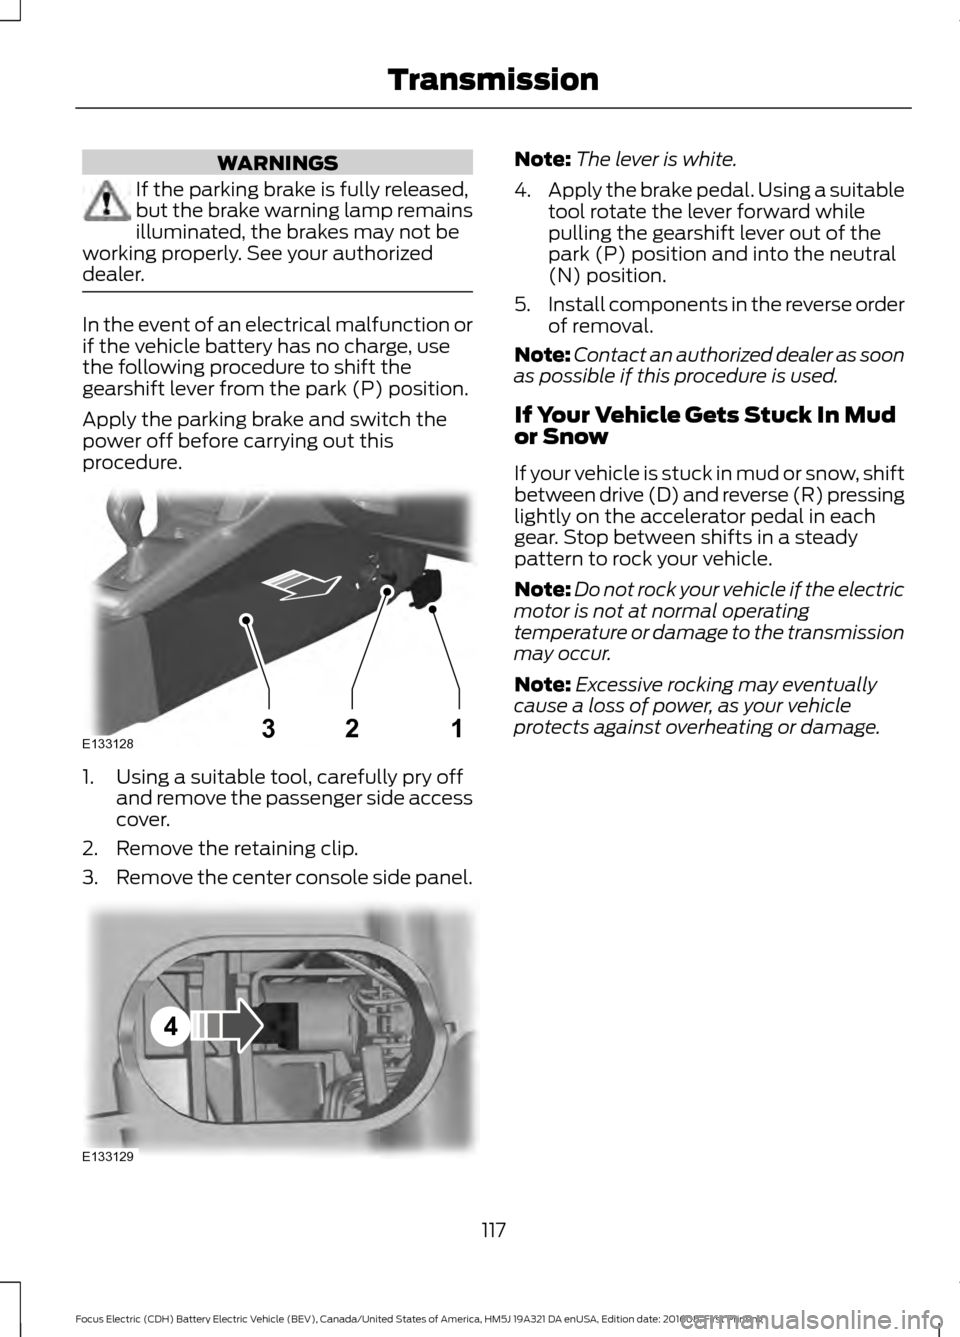
WARNINGS
If the parking brake is fully released,
but the brake warning lamp remains
illuminated, the brakes may not be
working properly. See your authorized
dealer. In the event of an electrical malfunction or
if the vehicle battery has no charge, use
the following procedure to shift the
gearshift lever from the park (P) position.
Apply the parking brake and switch the
power off before carrying out this
procedure.
1. Using a suitable tool, carefully pry off
and remove the passenger side access
cover.
2. Remove the retaining clip.
3. Remove the center console side panel. Note:
The lever is white.
4. Apply the brake pedal. Using a suitable
tool rotate the lever forward while
pulling the gearshift lever out of the
park (P) position and into the neutral
(N) position.
5. Install components in the reverse order
of removal.
Note: Contact an authorized dealer as soon
as possible if this procedure is used.
If Your Vehicle Gets Stuck In Mud
or Snow
If your vehicle is stuck in mud or snow, shift
between drive (D) and reverse (R) pressing
lightly on the accelerator pedal in each
gear. Stop between shifts in a steady
pattern to rock your vehicle.
Note: Do not rock your vehicle if the electric
motor is not at normal operating
temperature or damage to the transmission
may occur.
Note: Excessive rocking may eventually
cause a loss of power, as your vehicle
protects against overheating or damage.
117
Focus Electric (CDH) Battery Electric Vehicle (BEV), Canada/United States of America, HM5J 19A321 DA enUSA, Edition date: 201608, First Printing TransmissionE133128132 E133129
4
Page 121 of 367

GENERAL INFORMATION
Note:
Occasional brake noise is normal. If
a metal-to-metal, continuous grinding or
continuous squeal sound is present, the
brake linings may be worn-out. Have the
system checked by an authorized dealer. If
the vehicle has continuous vibration or
shudder in the steering wheel while braking,
have it checked by an authorized dealer.
Note: Brake dust may accumulate on the
wheels, even under normal driving
conditions. Some dust is inevitable as the
brakes wear and does not contribute to
brake noise. See Cleaning the Wheels
(page 185). See
Warning Lamps and
Indicators (page 77).
Wet brakes result in reduced braking
efficiency. Gently press the brake pedal a
few times when driving from a car wash or
standing water to dry the brakes.
Brake Over Accelerator
In the event the accelerator pedal
becomes stuck or entrapped, apply steady
and firm pressure to the brake pedal to
slow the vehicle and reduce engine power.
If you experience this condition, apply the
brakes and bring your vehicle to a safe
stop. Move the transmission to park (P),
switch the engine off and apply the parking
brake. Inspect the accelerator pedal for
any interference. If none are found and the
condition persists, have your vehicle towed
to the nearest authorized dealer.
Brake Assist
Brake assist detects when you brake
heavily by measuring the rate at which you
press the brake pedal. It provides
maximum braking efficiency as long as you
press the pedal. Brake assist can reduce
stopping distances in critical situations. Anti-lock Brake System
This system helps you maintain steering
control during emergency stops by keeping
the brakes from locking. This lamp momentarily
illuminates when you turn the
ignition on. If the light does not
illuminate during start up, remains on or
flashes, the system may be disabled. Have
the system checked by an authorized
dealer. If the anti-lock brake system is
disabled, normal braking is still effective. If the brake warning lamp
illuminates when you release the
parking brake, have the system
checked by an authorized dealer.
Regenerative Braking System
This feature is used to simulate the engine
braking of an internal combustion engine
and assist the standard brake system while
recovering some of the energy of motion
and storing it in the battery to improve the
range of your vehicle. The standard brake
system is designed to fully stop the car if
regenerative braking is not available.
During regenerative braking, the motor is
spun as a generator to create electrical
current. This recharges the battery and
slows the vehicle. In effect, once the
accelerator pedal is released, the motor
changes from an energy user to an energy
producer.
When the accelerator pedal is released or
the brake pedal is applied, the brake
controller automatically detects the
amount of deceleration requested and
optimizes how much of the deceleration
will be produced by regenerative braking.
The remaining portion is generated by
118
Focus Electric (CDH) Battery Electric Vehicle (BEV), Canada/United States of America, HM5J 19A321 DA enUSA, Edition date: 201608, First Printing BrakesE144522 E144522
Page 122 of 367
standard friction braking. When the battery
is almost fully charged, the amount of
regenerative braking is limited to avoid
overcharging, and the requested
deceleration is produced by standard
friction braking alone.
Regenerative braking does not take the
place of the standard friction brakes; it only
assists them. Regenerative braking has
also been designed to interact with the
anti-lock brake system. Regenerative
braking is disabled when the anti-lock
brake system is activated or the battery is
fully charged.
HINTS ON DRIVING WITH
ANTI-LOCK BRAKES
Note:
When the system is operating, the
brake pedal may pulse and may travel
further. Maintain pressure on the brake
pedal. You may also hear a noise from the
system. This is normal.
The anti-lock braking system will not
eliminate the risks when:
• You drive too closely to the vehicle in
front of you.
• Your vehicle is hydroplaning.
• You take corners too fast.
• The road surface is poor.
PARKING BRAKE WARNING
Always set the parking brake fully
and make sure you shift the gearshift
lever to park (P). Switch the ignition
off and remove the key whenever you leave
your vehicle. Note:
Do not press the release button while
pulling the lever up.
To apply the parking brake: 1. Press the foot brake pedal firmly.
2. Pull the parking brake lever up to its
fullest extent.
Note: If you park your vehicle on a hill and
facing uphill, shift the gearshift lever to park
(P) and turn the steering wheel away from
the curb.
Note: If you park your vehicle on a hill and
facing downhill, shift the gearshift lever to
park (P) and turn the steering wheel toward
the curb.
To release the parking brake:
1. Press the brake pedal firmly.
2. Pull the lever up slightly.
3. Press the release button and push the lever down.
HILL START ASSIST WARNINGS
The system does not replace the
parking brake. When you leave your
vehicle, always apply the parking
brake and shift the transmission into park
(P) for automatic transmission or first gear
for manual transmission. You must remain in your vehicle once
you have activated the system.
During all times, you are responsible
for controlling your vehicle,
supervising the system and
intervening, if required. If the engine is revved excessively, or
if a malfunction is detected, the
system will be deactivated.
The system makes it easier to pull away
when your vehicle is on a slope without the
need to use the parking brake.
119
Focus Electric (CDH) Battery Electric Vehicle (BEV), Canada/United States of America, HM5J 19A321 DA enUSA, Edition date: 201608, First Printing Brakes
Page 123 of 367

When the system is active, your vehicle will
remain stationary on the slope for two to
three seconds after you release the brake
pedal. This allows you time to move your
foot from the brake to the accelerator
pedal. The brakes are released
automatically once the engine has
developed sufficient torque to prevent your
vehicle from rolling down the slope. This
is an advantage when pulling away on a
slope, for example from a car park ramp,
traffic lights or when reversing uphill into
a parking space.
The system will activate automatically on
any slope that will cause significant vehicle
rollback. For vehicles with a manual
transmission, you can switch this feature
off using the information display. See
Information Displays (page 80). The
system will remain on or off depending on
how it was last set.
Note: There is no warning lamp to indicate
the system is either on or off.
Using Hill Start Assist
1. Press the brake pedal to bring your vehicle to a complete standstill. Keep
the brake pedal pressed and select an
uphill gear (for example, first (1) when
facing uphill or reverse (R) when facing
downhill).
2. If the sensors detect that your vehicle is on a slope, the system will activate
automatically.
3. When you remove your foot from the brake pedal, your vehicle will remain
on the slope without rolling away for
about two or three seconds. This hold
time will automatically be extended if
you are in the process of driving off.
4. Drive off in the normal manner. The brakes will release automatically. Switching the System On and Off
Vehicles with Manual Transmission
You can switch this feature on or off in the
information display. The system
remembers the last setting when you start
your vehicle.
Vehicles with Automatic Transmission
You cannot turn the system on or off.
When you switch the ignition on, the
system automatically turns on.
120
Focus Electric (CDH) Battery Electric Vehicle (BEV), Canada/United States of America, HM5J 19A321 DA enUSA, Edition date: 201608, First Printing Brakes