2017 FORD F450 SUPER DUTY ECU
[x] Cancel search: ECUPage 80 of 642
•Movement inside your vehicle.
•Change in vehicle inclination, forexample, unwanted towing.
Lock your vehicle using the remote controlor the power door lock control with theaccompanying door open and then closeall doors.
Note:Do not choose full monitor mode ifmovement within the vehicle is likely tooccur or when the vehicle is in transport.
Note:For correct operation of the interiormotion detection system, make sure allwindows are closed prior to arming thesystem. This helps prevent accidental alarmactivation due to external influences andmake sure of correct interior motiondetection. Additionally, the interior motionsensing system will not arm if any door isajar.
Arming the Alarm
The alarm is ready to arm when there isnot a key in the ignition. Lock your vehicleto arm the alarm.
The direction indicators flash once afteryou lock your vehicle. This indicates thealarm is in the pre-armed mode. It fullyarms after 20 seconds.
Disarming the Alarm
Disarm the alarm by any of the followingactions:
•Press the power door unlock buttonwithin the 20-second pre-armed mode.
•Unlock the doors with the remotecontrol or keyless entry keypad.
•Switch the ignition on or start yourvehicle.
•Use a key in the driver door lockcylinder to unlock your vehicle, thenswitch the ignition on within 12seconds.
Note:Pressing the panic button on theremote control stops the horn and directionindicators, but will not disarm the system.
77
Super Duty (TFE) Canada/United States of America, enUSA, Edition date: 201710, Second Printing
Security
Page 133 of 642

AdvanceTrac and Traction Control
ActionMessage
The system detects a condition that requires service. Contactan authorized dealer as soon as possible.Service AdvanceTrac
The status of the AdvanceTrac system after you switched itoff.AdvanceTrac Off
The status of the AdvanceTrac system after you switched iton.AdvanceTrac On
The status of the AdvanceTrac sport mode after you switchedit on.AdvanceTrac SPORTMODE
The status of the traction control system after you switchedit off. See Using Traction Control (page 225).Traction Control Off
The status of the traction control system after you switchedit on. See Using Traction Control (page 225).Traction Control On
Airbag
ActionMessage
Displays when the system detects a malfunction due to ablocked sensor.Occupant SensorBLOCKED RemoveObjects Near PassengerSeat
Alarm and Security
ActionMessage
Alarm triggered due to unauthorized entry. See Anti-TheftAlarm (page 76).Vehicle Alarm To StopAlarm, Start Vehicle.
130
Super Duty (TFE) Canada/United States of America, enUSA, Edition date: 201710, Second Printing
Information Displays
Page 160 of 642
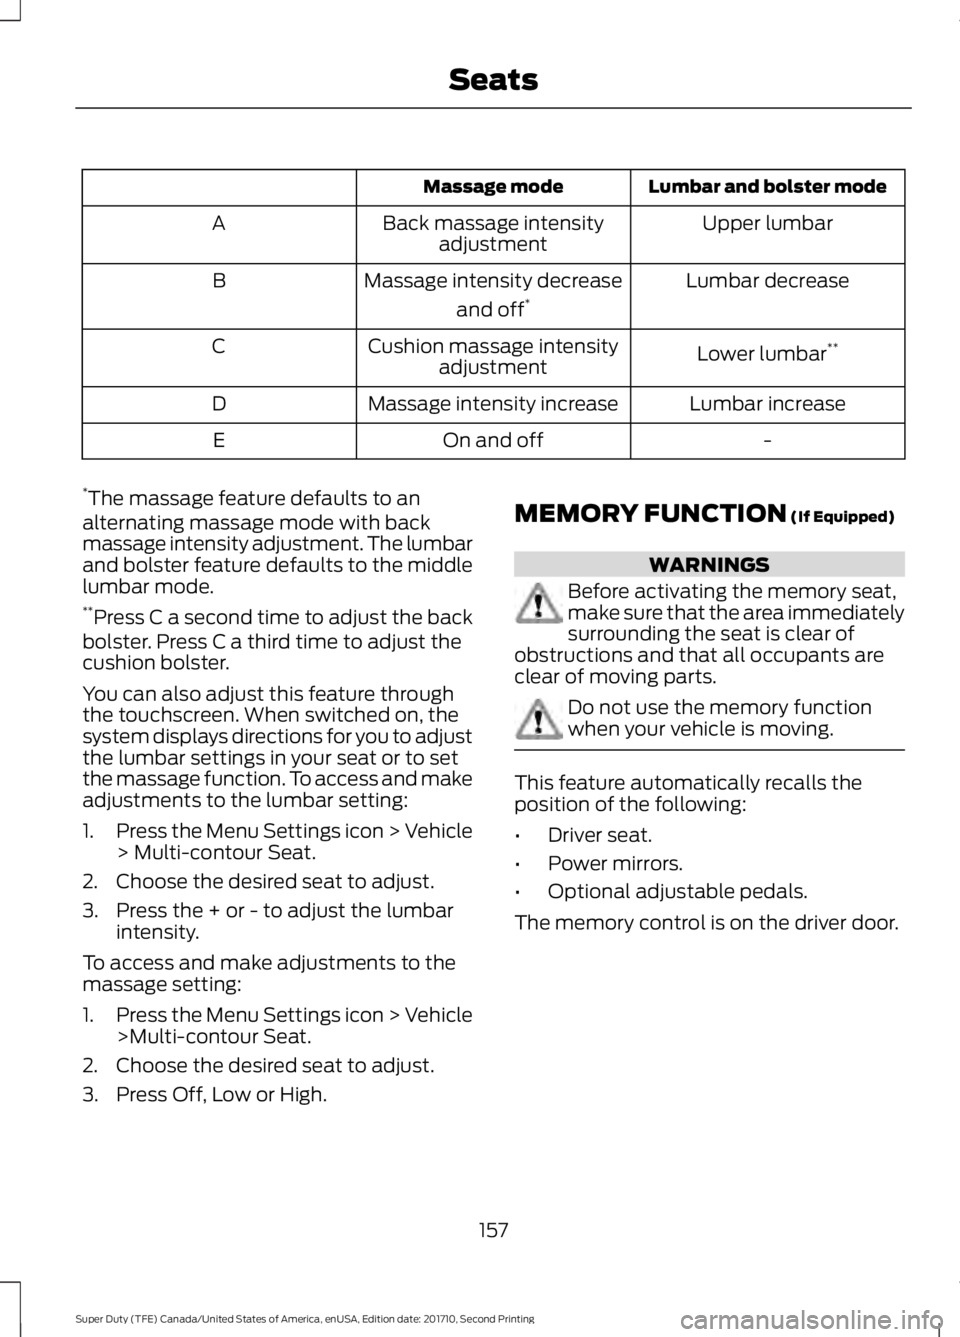
Lumbar and bolster modeMassage mode
Upper lumbarBack massage intensityadjustmentA
Lumbar decreaseMassage intensity decrease
and off*B
Lower lumbar**Cushion massage intensityadjustmentC
Lumbar increaseMassage intensity increaseD
-On and offE
*The massage feature defaults to analternating massage mode with backmassage intensity adjustment. The lumbarand bolster feature defaults to the middlelumbar mode.**Press C a second time to adjust the backbolster. Press C a third time to adjust thecushion bolster.
You can also adjust this feature throughthe touchscreen. When switched on, thesystem displays directions for you to adjustthe lumbar settings in your seat or to setthe massage function. To access and makeadjustments to the lumbar setting:
1.Press the Menu Settings icon > Vehicle> Multi-contour Seat.
2. Choose the desired seat to adjust.
3. Press the + or - to adjust the lumbarintensity.
To access and make adjustments to themassage setting:
1.Press the Menu Settings icon > Vehicle>Multi-contour Seat.
2. Choose the desired seat to adjust.
3. Press Off, Low or High.
MEMORY FUNCTION (If Equipped)
WARNINGS
Before activating the memory seat,make sure that the area immediatelysurrounding the seat is clear ofobstructions and that all occupants areclear of moving parts.
Do not use the memory functionwhen your vehicle is moving.
This feature automatically recalls theposition of the following:
•Driver seat.
•Power mirrors.
•Optional adjustable pedals.
The memory control is on the driver door.
157
Super Duty (TFE) Canada/United States of America, enUSA, Edition date: 201710, Second Printing
Seats
Page 161 of 642
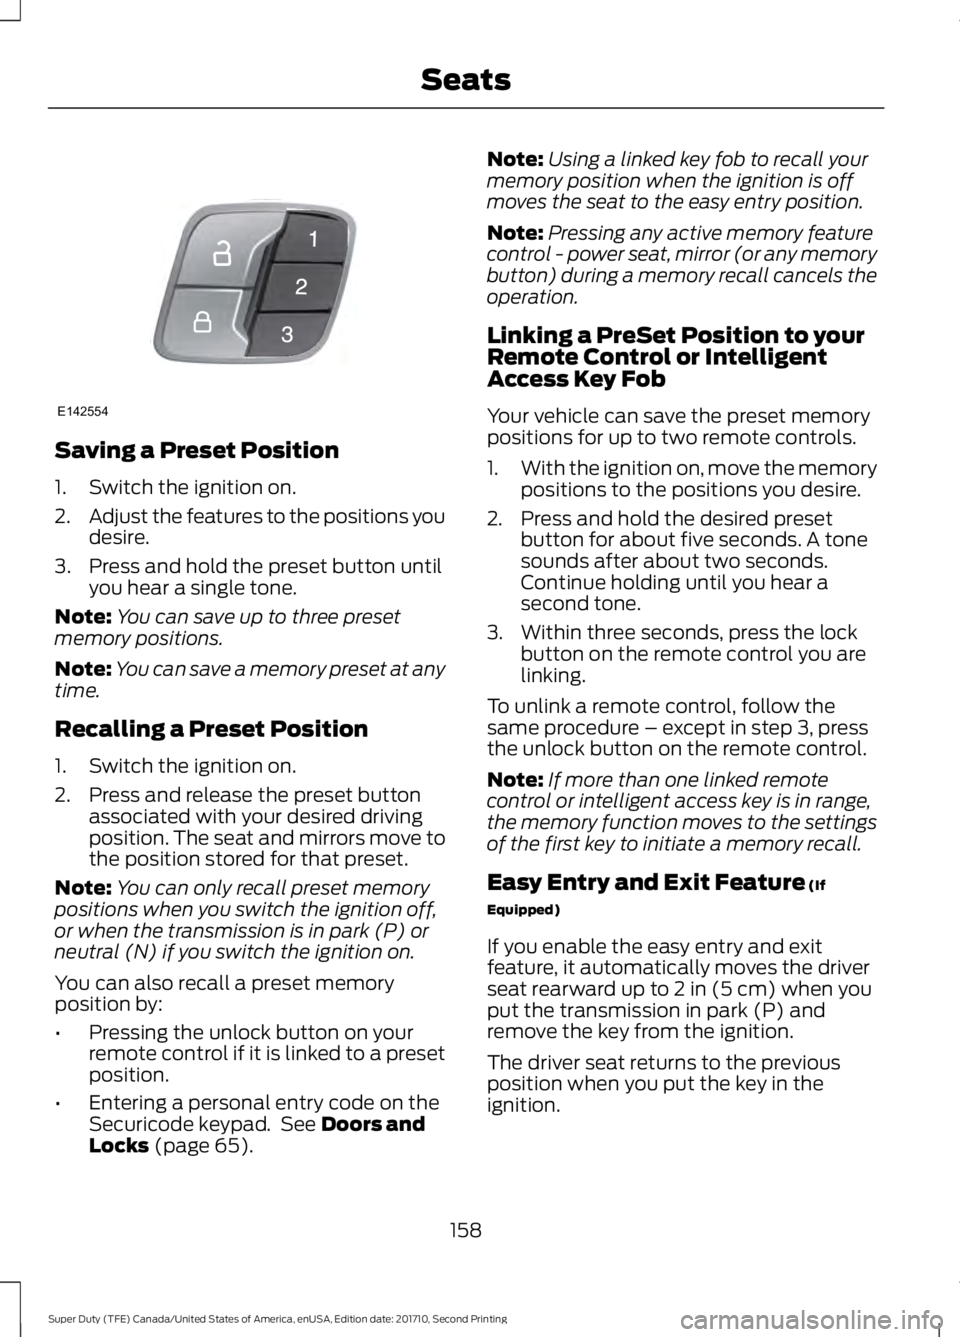
Saving a Preset Position
1. Switch the ignition on.
2.Adjust the features to the positions youdesire.
3. Press and hold the preset button untilyou hear a single tone.
Note:You can save up to three presetmemory positions.
Note:You can save a memory preset at anytime.
Recalling a Preset Position
1. Switch the ignition on.
2. Press and release the preset buttonassociated with your desired drivingposition. The seat and mirrors move tothe position stored for that preset.
Note:You can only recall preset memorypositions when you switch the ignition off,or when the transmission is in park (P) orneutral (N) if you switch the ignition on.
You can also recall a preset memoryposition by:
•Pressing the unlock button on yourremote control if it is linked to a presetposition.
•Entering a personal entry code on theSecuricode keypad. See Doors andLocks (page 65).
Note:Using a linked key fob to recall yourmemory position when the ignition is offmoves the seat to the easy entry position.
Note:Pressing any active memory featurecontrol - power seat, mirror (or any memorybutton) during a memory recall cancels theoperation.
Linking a PreSet Position to yourRemote Control or IntelligentAccess Key Fob
Your vehicle can save the preset memorypositions for up to two remote controls.
1.With the ignition on, move the memorypositions to the positions you desire.
2. Press and hold the desired presetbutton for about five seconds. A tonesounds after about two seconds.Continue holding until you hear asecond tone.
3. Within three seconds, press the lockbutton on the remote control you arelinking.
To unlink a remote control, follow thesame procedure – except in step 3, pressthe unlock button on the remote control.
Note:If more than one linked remotecontrol or intelligent access key is in range,the memory function moves to the settingsof the first key to initiate a memory recall.
Easy Entry and Exit Feature (If
Equipped)
If you enable the easy entry and exitfeature, it automatically moves the driverseat rearward up to 2 in (5 cm) when youput the transmission in park (P) andremove the key from the ignition.
The driver seat returns to the previousposition when you put the key in theignition.
158
Super Duty (TFE) Canada/United States of America, enUSA, Edition date: 201710, Second Printing
SeatsE142554
Page 166 of 642
2. Lift the cushion to gain access to thestorage compartment.
The cupholder is located inside the storagecompartment. You can also flip thecupholder so that it faces forward. SeeCenter Console (page 170).
Cushion Lock
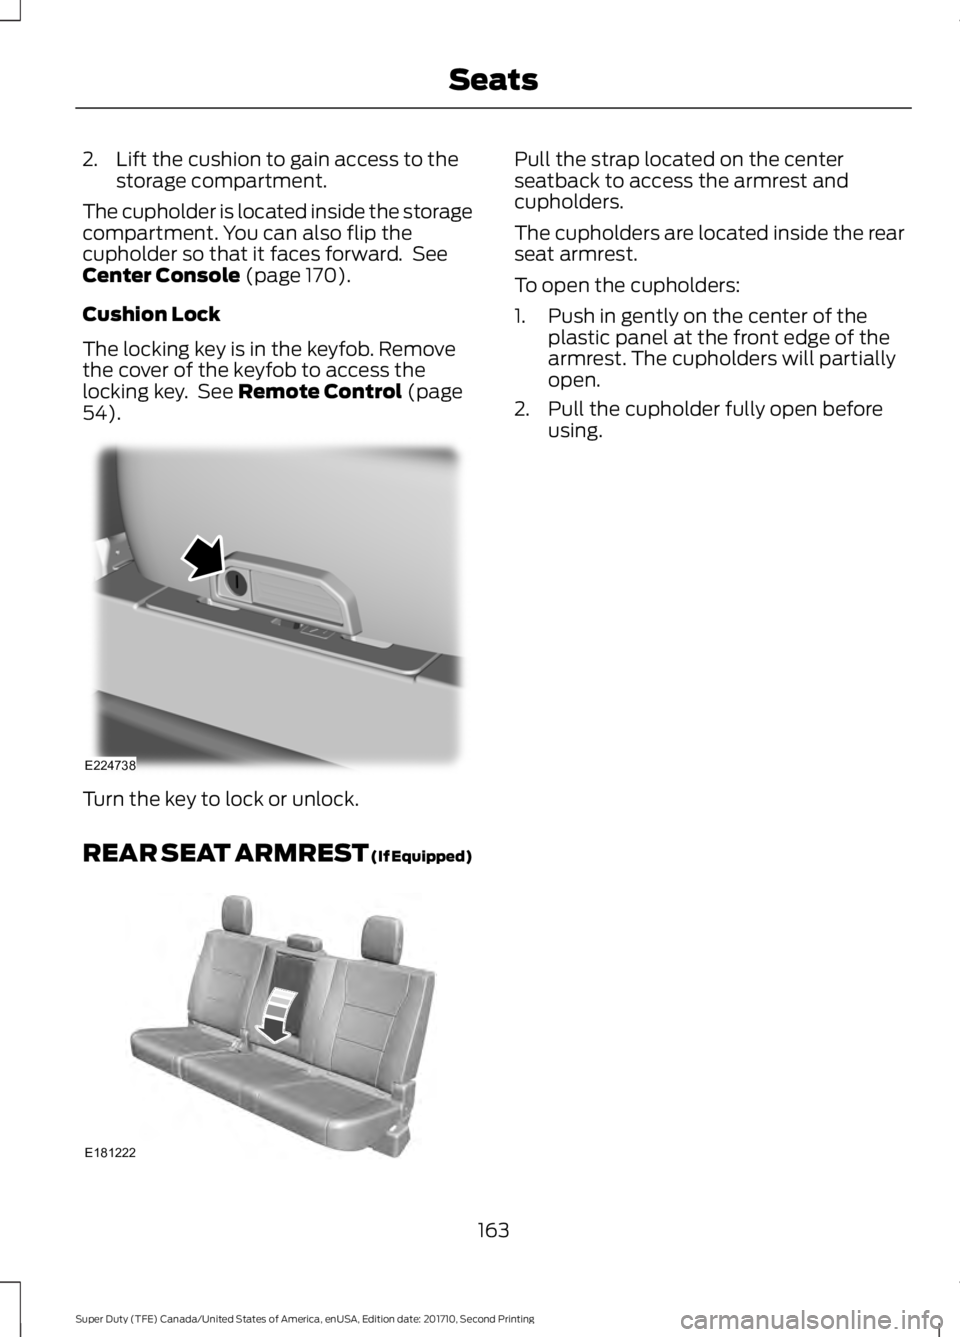
The locking key is in the keyfob. Removethe cover of the keyfob to access thelocking key. See Remote Control (page54).
Turn the key to lock or unlock.
REAR SEAT ARMREST (If Equipped)
Pull the strap located on the centerseatback to access the armrest andcupholders.
The cupholders are located inside the rearseat armrest.
To open the cupholders:
1. Push in gently on the center of theplastic panel at the front edge of thearmrest. The cupholders will partiallyopen.
2. Pull the cupholder fully open beforeusing.
163
Super Duty (TFE) Canada/United States of America, enUSA, Edition date: 201710, Second Printing
SeatsE224738 E181222
Page 167 of 642
HomeLink Wireless ControlSystem
WARNINGS
Make sure that the garage door andsecurity device are free fromobstruction when you areprogramming. Do not program the systemwith the vehicle in the garage.
Do not use the system with anygarage door opener that does nothave the safety stop and reversefeature as required by U.S. Federal SafetyStandards (this includes any garage dooropener manufactured before April 1, 1982).A garage door opener which cannot detectan object, signaling the door to stop andreverse, does not meet current federalsafety standards. Using a garage dooropener without these features increasesthe risk of serious injury or death.
Note:Make sure you keep the originalremote control transmitter for use in othervehicles as well as for future systemprogramming.
Note:We recommend that upon the saleor lease termination of your vehicle, youerase the programmed function buttons forsecurity reasons. See Erasing the FunctionButton Codes later in this section.
Note:You can program a maximum ofthree devices. To change or replace any ofthe three devices after it has been initiallyprogrammed, you must first erase thecurrent settings. See Erasing the FunctionButton Codes.
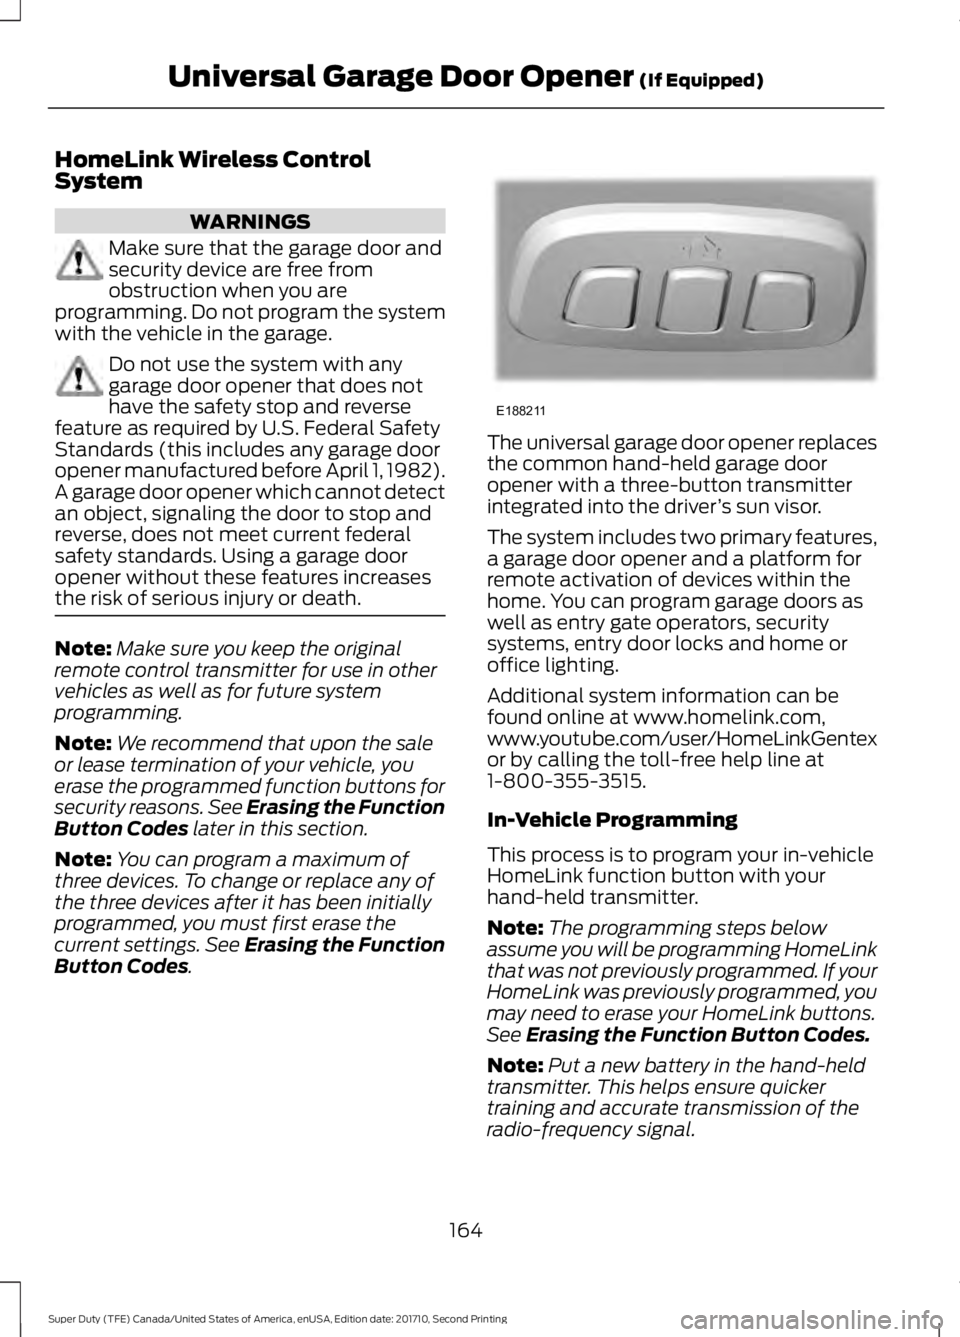
The universal garage door opener replacesthe common hand-held garage dooropener with a three-button transmitterintegrated into the driver’s sun visor.
The system includes two primary features,a garage door opener and a platform forremote activation of devices within thehome. You can program garage doors aswell as entry gate operators, securitysystems, entry door locks and home oroffice lighting.
Additional system information can befound online at www.homelink.com,www.youtube.com/user/HomeLinkGentexor by calling the toll-free help line at1-800-355-3515.
In-Vehicle Programming
This process is to program your in-vehicleHomeLink function button with yourhand-held transmitter.
Note:The programming steps belowassume you will be programming HomeLinkthat was not previously programmed. If yourHomeLink was previously programmed, youmay need to erase your HomeLink buttons.See Erasing the Function Button Codes.
Note:Put a new battery in the hand-heldtransmitter. This helps ensure quickertraining and accurate transmission of theradio-frequency signal.
164
Super Duty (TFE) Canada/United States of America, enUSA, Edition date: 201710, Second Printing
Universal Garage Door Opener (If Equipped)E188211
Page 189 of 642
Vehicles with engines configured for usewith high sulfur diesel fuel are onlyavailable for sale in countries where ultralow sulfur diesel fuel is generally notavailable or mandated by the government.Vehicles originally sold in a ultra low sulfurdiesel fuel market that are subsequentlyexported to non- ultra low sulfur diesel fuelmarkets will need to be retrofitted (at thecustomer’s expense using Ford authorizeddealer service parts) in order to be reliablyoperated on non- ultra low sulfur dieselfuel.
Biodiesel
WARNINGS
Do not use home heating oil,agricultural fuel, raw fats and oils,waste cooking greases, biodieselfuels greater than 20% or any diesel fuelnot intended for highway use. Damage tothe fuel injection system, engine andexhaust catalyst can occur if an improperfuel is used. Do not add gasoline, gasoholor alcohol to diesel fuel. This practicecreates a serious fire hazard and engineperformance problems.
Do not mix diesel fuel with gasoline,gasohol or alcohol. This could causean explosion resulting in personalinjury.
Do not add gasoline, gasohol oralcohol to diesel fuel. This practicecreates a serious fire hazard resultingin personal injury and engine performanceproblems.
Do not use home heating oil or anydiesel fuel not intended for highwayuse. Damage to the fuel injectionsystem, engine, exhaust catalyst and dieselparticulate filter can occur if an improperfuel is used. Red dye is used to identifyfuels intended for agricultural andnon-highway use.
You may operate your vehicle on dieselfuels containing up to 20% biodiesel, alsoknown as B20.
Biodiesel fuel is a chemically convertedproduct from renewable fuel sources, suchas vegetable oils, animal fats and wastecooking greases.
To help achieve acceptable engineperformance and durability when usingbiodiesel in your vehicle:
•Confirm the biodiesel content of thefuel to be B20 (20% biodiesel) or less
•Only use biodiesel fuel of good qualitythat complies with industry standards
•Follow the recommended servicemaintenance intervals. SeeScheduled Maintenance (page 573).
•Do not store biodiesel fuel in the fueltank for more than 1 month
•Consider changing brands or reducingbiodiesel content if you have coldtemperature fuel gelling issues or afrequent LOW FUEL PRESSUREmessage appearing
•Do NOT use raw oils, fats or wastecooking greases
Use of biodiesel in concentrations greaterthan 20% may cause damage to yourvehicle, including engine and/or exhaustafter-treatment hardware (exhaustcatalyst and particulate filter) failures.Concentrations greater than 20% can alsocause fuel filter restrictions that may resultin a lack of power or damage to fuelsystem components, including fuel pumpand fuel injector failures.
SAE 5W-40 or SAE 15W-40 oil isrecommended for fuels with greater than5% biodiesel (B5). Refer to the Specialoperating conditions section under theSchedule Maintenance chapter for moreinformation about oil change intervals andother maintenance when operating onbiodiesel.
186
Super Duty (TFE) Canada/United States of America, enUSA, Edition date: 201710, Second Printing
Fuel and Refueling
Page 208 of 642
AUTOMATIC TRANSMISSION
WARNING
Always apply the parking brake fullyand make sure you shift into park (P).Switch the ignition off and removethe key whenever you leave your vehicle.
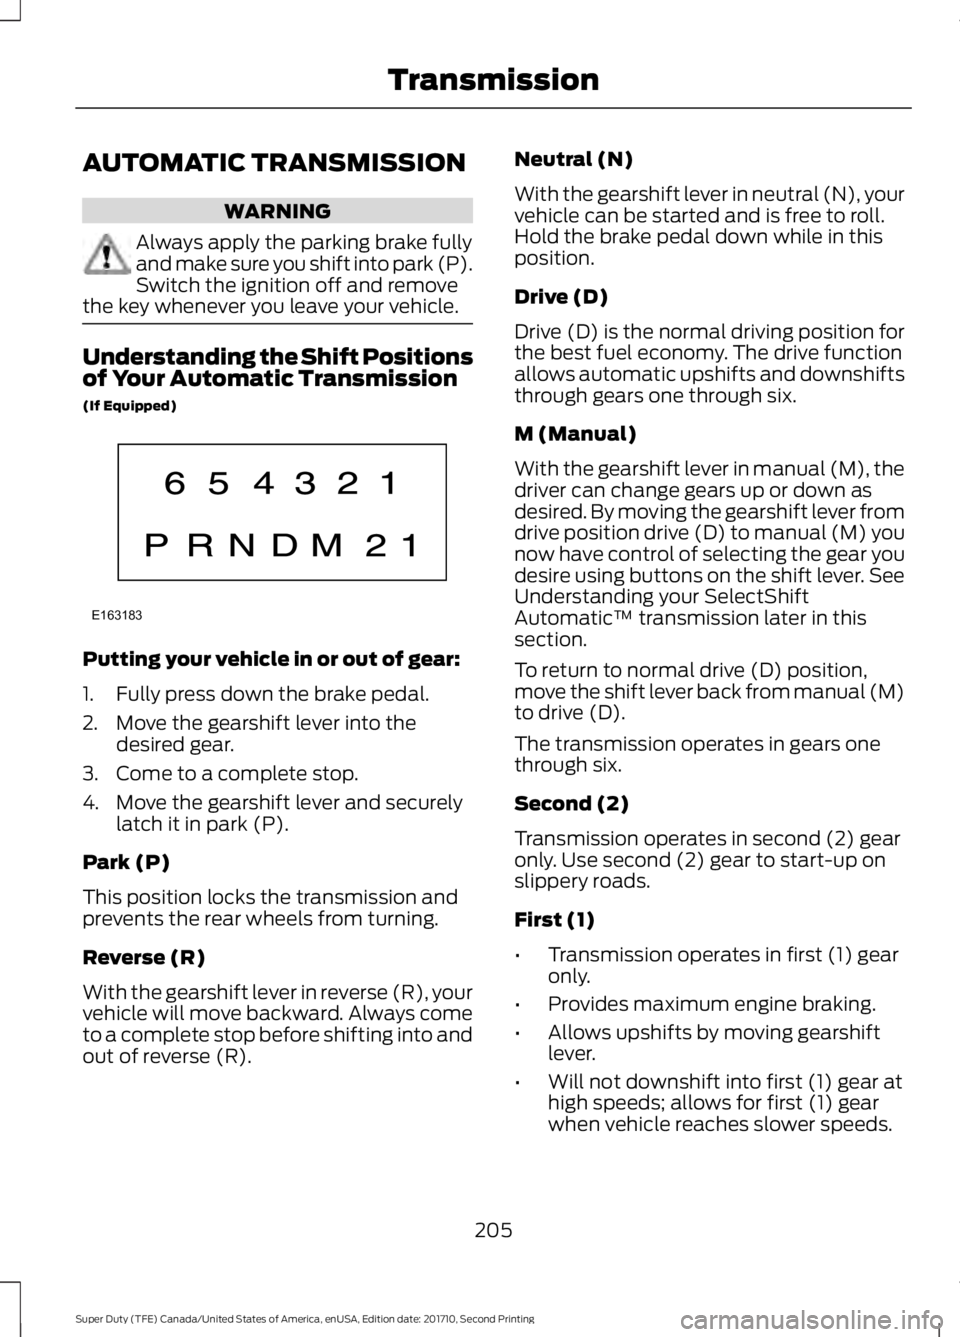
Understanding the Shift Positionsof Your Automatic Transmission
(If Equipped)
Putting your vehicle in or out of gear:
1. Fully press down the brake pedal.
2. Move the gearshift lever into thedesired gear.
3. Come to a complete stop.
4. Move the gearshift lever and securelylatch it in park (P).
Park (P)
This position locks the transmission andprevents the rear wheels from turning.
Reverse (R)
With the gearshift lever in reverse (R), yourvehicle will move backward. Always cometo a complete stop before shifting into andout of reverse (R).
Neutral (N)
With the gearshift lever in neutral (N), yourvehicle can be started and is free to roll.Hold the brake pedal down while in thisposition.
Drive (D)
Drive (D) is the normal driving position forthe best fuel economy. The drive functionallows automatic upshifts and downshiftsthrough gears one through six.
M (Manual)
With the gearshift lever in manual (M), thedriver can change gears up or down asdesired. By moving the gearshift lever fromdrive position drive (D) to manual (M) younow have control of selecting the gear youdesire using buttons on the shift lever. SeeUnderstanding your SelectShiftAutomatic™ transmission later in thissection.
To return to normal drive (D) position,move the shift lever back from manual (M)to drive (D).
The transmission operates in gears onethrough six.
Second (2)
Transmission operates in second (2) gearonly. Use second (2) gear to start-up onslippery roads.
First (1)
•Transmission operates in first (1) gearonly.
•Provides maximum engine braking.
•Allows upshifts by moving gearshiftlever.
•Will not downshift into first (1) gear athigh speeds; allows for first (1) gearwhen vehicle reaches slower speeds.
205
Super Duty (TFE) Canada/United States of America, enUSA, Edition date: 201710, Second Printing
TransmissionE163183