2017 FORD F450 SUPER DUTY mirror
[x] Cancel search: mirrorPage 161 of 642
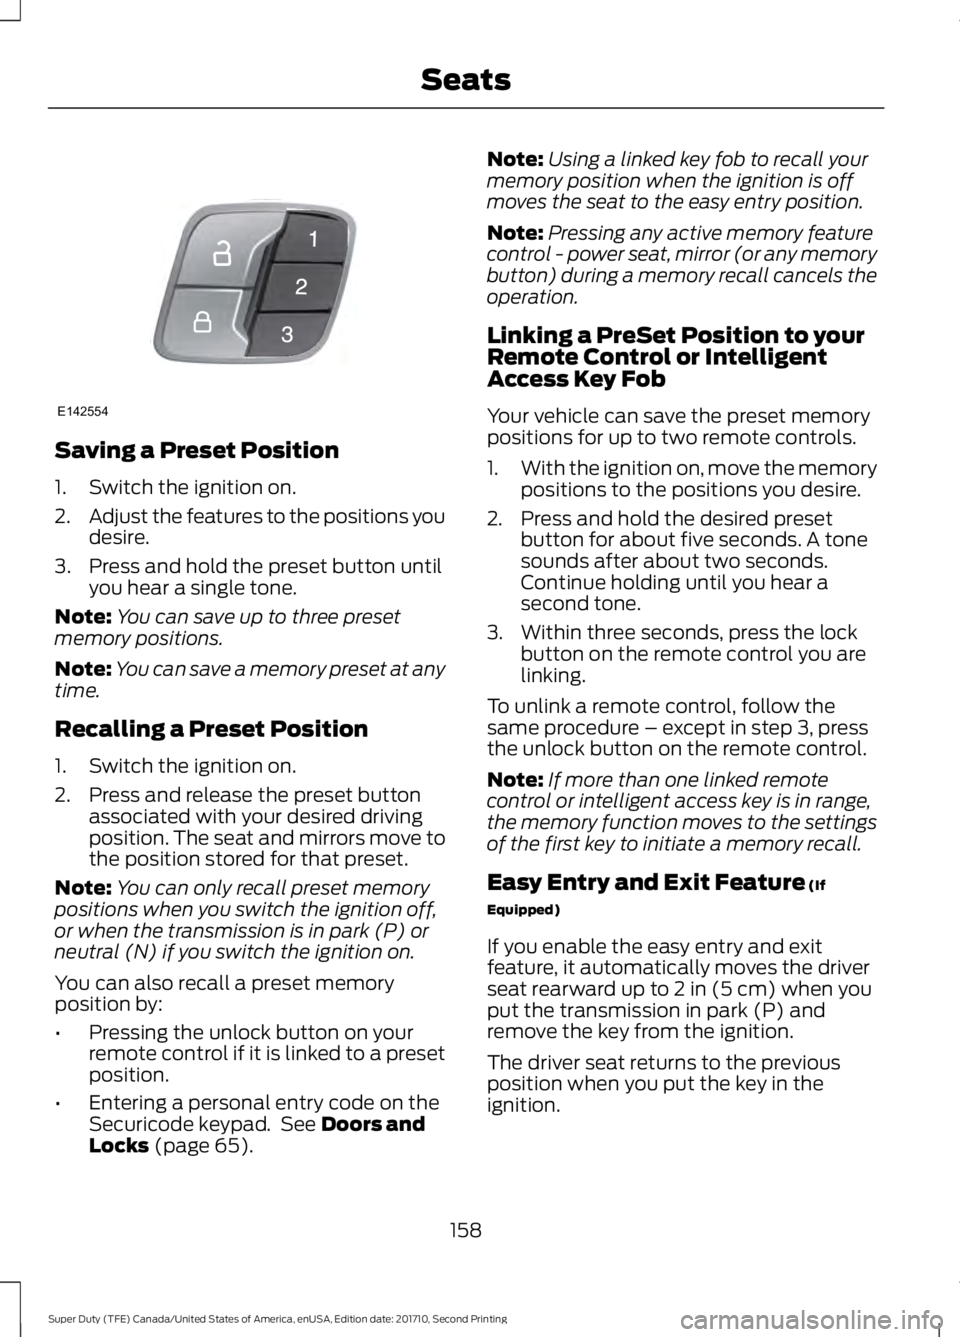
Saving a Preset Position
1. Switch the ignition on.
2.Adjust the features to the positions youdesire.
3. Press and hold the preset button untilyou hear a single tone.
Note:You can save up to three presetmemory positions.
Note:You can save a memory preset at anytime.
Recalling a Preset Position
1. Switch the ignition on.
2. Press and release the preset buttonassociated with your desired drivingposition. The seat and mirrors move tothe position stored for that preset.
Note:You can only recall preset memorypositions when you switch the ignition off,or when the transmission is in park (P) orneutral (N) if you switch the ignition on.
You can also recall a preset memoryposition by:
•Pressing the unlock button on yourremote control if it is linked to a presetposition.
•Entering a personal entry code on theSecuricode keypad. See Doors andLocks (page 65).
Note:Using a linked key fob to recall yourmemory position when the ignition is offmoves the seat to the easy entry position.
Note:Pressing any active memory featurecontrol - power seat, mirror (or any memorybutton) during a memory recall cancels theoperation.
Linking a PreSet Position to yourRemote Control or IntelligentAccess Key Fob
Your vehicle can save the preset memorypositions for up to two remote controls.
1.With the ignition on, move the memorypositions to the positions you desire.
2. Press and hold the desired presetbutton for about five seconds. A tonesounds after about two seconds.Continue holding until you hear asecond tone.
3. Within three seconds, press the lockbutton on the remote control you arelinking.
To unlink a remote control, follow thesame procedure – except in step 3, pressthe unlock button on the remote control.
Note:If more than one linked remotecontrol or intelligent access key is in range,the memory function moves to the settingsof the first key to initiate a memory recall.
Easy Entry and Exit Feature (If
Equipped)
If you enable the easy entry and exitfeature, it automatically moves the driverseat rearward up to 2 in (5 cm) when youput the transmission in park (P) andremove the key from the ignition.
The driver seat returns to the previousposition when you put the key in theignition.
158
Super Duty (TFE) Canada/United States of America, enUSA, Edition date: 201710, Second Printing
SeatsE142554
Page 235 of 642
stationary or receding object farther than12 in (30 cm) from the corners of thebumper, the tone sounds for only threeseconds. Once the system detects anobject approaching, the warning soundsagain.
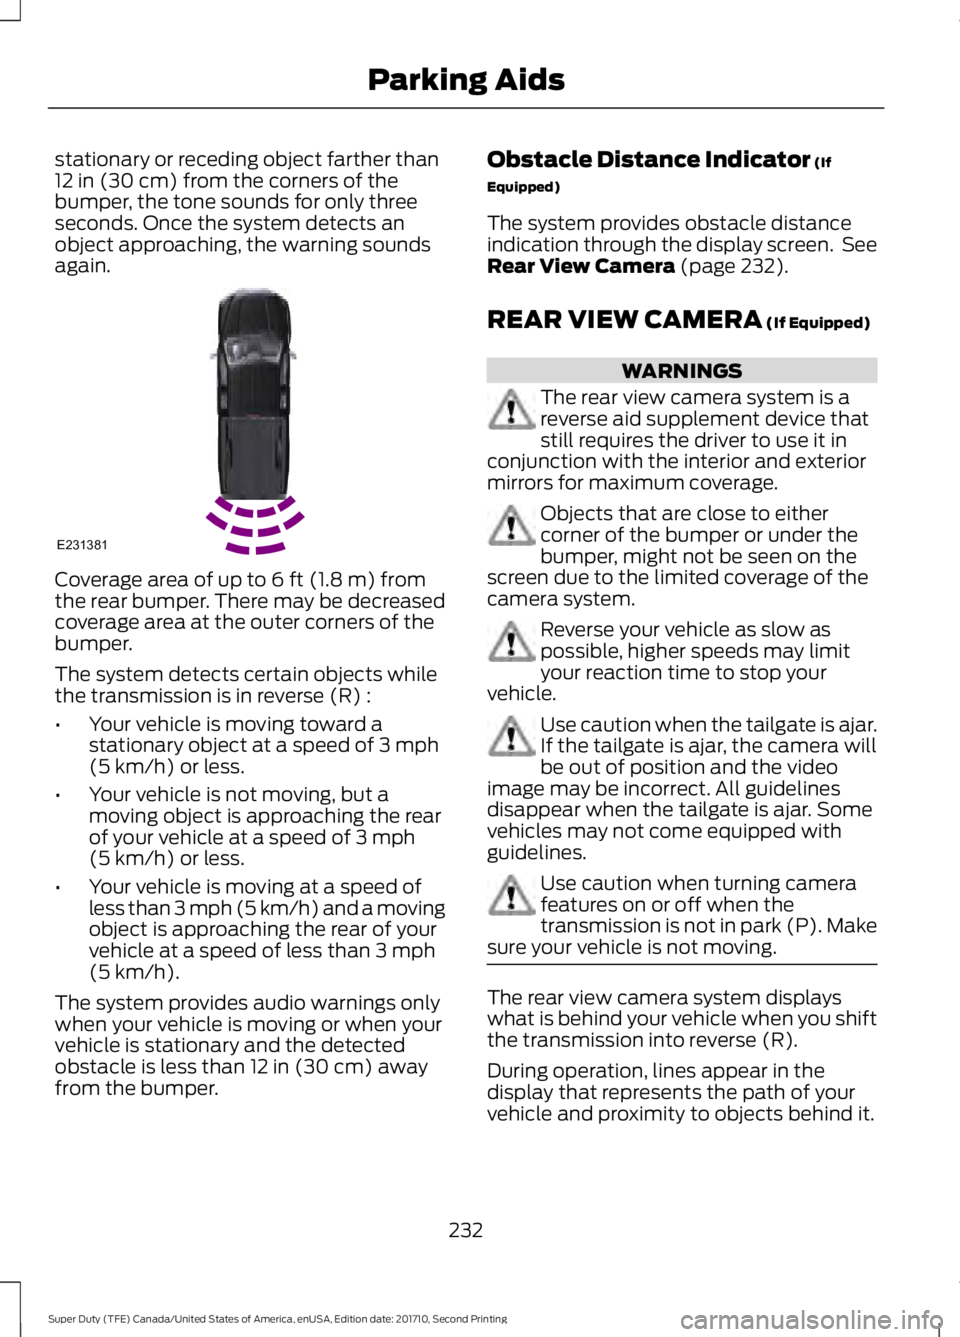
Coverage area of up to 6 ft (1.8 m) fromthe rear bumper. There may be decreasedcoverage area at the outer corners of thebumper.
The system detects certain objects whilethe transmission is in reverse (R) :
•Your vehicle is moving toward astationary object at a speed of 3 mph(5 km/h) or less.
•Your vehicle is not moving, but amoving object is approaching the rearof your vehicle at a speed of 3 mph(5 km/h) or less.
•Your vehicle is moving at a speed ofless than 3 mph (5 km/h) and a movingobject is approaching the rear of yourvehicle at a speed of less than 3 mph(5 km/h).
The system provides audio warnings onlywhen your vehicle is moving or when yourvehicle is stationary and the detectedobstacle is less than 12 in (30 cm) awayfrom the bumper.
Obstacle Distance Indicator (If
Equipped)
The system provides obstacle distanceindication through the display screen. SeeRear View Camera (page 232).
REAR VIEW CAMERA (If Equipped)
WARNINGS
The rear view camera system is areverse aid supplement device thatstill requires the driver to use it inconjunction with the interior and exteriormirrors for maximum coverage.
Objects that are close to eithercorner of the bumper or under thebumper, might not be seen on thescreen due to the limited coverage of thecamera system.
Reverse your vehicle as slow aspossible, higher speeds may limityour reaction time to stop yourvehicle.
Use caution when the tailgate is ajar.If the tailgate is ajar, the camera willbe out of position and the videoimage may be incorrect. All guidelinesdisappear when the tailgate is ajar. Somevehicles may not come equipped withguidelines.
Use caution when turning camerafeatures on or off when thetransmission is not in park (P). Makesure your vehicle is not moving.
The rear view camera system displayswhat is behind your vehicle when you shiftthe transmission into reverse (R).
During operation, lines appear in thedisplay that represents the path of yourvehicle and proximity to objects behind it.
232
Super Duty (TFE) Canada/United States of America, enUSA, Edition date: 201710, Second Printing
Parking AidsE231381
Page 237 of 642

Active guidelinesA
CenterlineB
Fixed guideline: Green zoneC
Fixed guideline: Yellow zoneD
Fixed guideline: Red zoneE
Rear bumperF
To use active guidelines, turn the steeringwheel to point the guidelines toward anintended path. If the steering wheelposition is changed while reversing, thevehicle might deviate from the originalintended path.
The active guidelines fade in and outdepending on the steering wheel position.The active guidelines are not shown whenthe steering wheel position is straight.
Always use caution while reversing.Objects in the red zone are closest to yourvehicle and objects in the green zone arefarther away. Objects are getting closer toyour vehicle as they move from the greenzone to the yellow or red zones. Use theside view mirrors and rear view mirror toget better coverage on both sides and rearof your vehicle.
Obstacle Distance Indicator
The system will provide an image of yourvehicle and the sensor zones. The zoneswill highlight green, yellow and red whenthe parking aid sensors detect an object inthe coverage area.
Rear Camera Delay
Selectable settings for this feature are ONand OFF.
234
Super Duty (TFE) Canada/United States of America, enUSA, Edition date: 201710, Second Printing
Parking AidsABCD
F
E
E142436 E190459
Page 238 of 642
When shifting the transmission out ofreverse (R) and into any gear other thanpark (P), the camera image remains in thedisplay until:
•Your vehicle speed sufficientlyincreases.
•You shift your vehicle into park (P).
•You apply the parking brake on vehicleswith a manual transmission.
360 DEGREE CAMERA (If Equipped)
WARNINGS
The 360 degree camera system stillrequires the driver to use it inconjunction with looking out of thewindows, and checking the interior andexterior mirrors for maximum coverage.
Objects that are close to eithercorner of the bumper or under thebumper, might not be seen on thescreen due to the limited coverage of thecamera system.
Use caution when turning camerafeatures on or off when thetransmission is not in park (P). Makesure your vehicle is not moving.
Note:The 360 degree camera system turnsoff when your vehicle is in motion at lowspeed, except when in reverse (R).
The 360 degree camera system consistsof front, side and rear cameras. Thesystem:
•Allows you to see what is directly infront or behind your vehicle.
•Provides cross traffic view in front andbehind your vehicle.
•Allows you to see a top-down view ofthe area outside your vehicle, includingthe blind spots.
•Provides visibility around your vehicleto you in parking maneuvers such as:
•Centering in a parking space.
•Obstacles near vehicle.
•Parallel parking.
Camera Views
The camera button is located onthe instrument panel and allowsyou to toggle through differentcamera views.
When in park (P), neutral (N) or drive (D),only images from the front cameras aredisplayed. Press the camera button todisplay the front camera image on thedisplay screen.
When in reverse (R), only images from therear cameras are displayed. When you shiftinto reverse (R), the rear view cameraimage automatically shows on the displayscreen.
Advanced Camera Views (If Equipped)
Additional camera views may beavailable for vehicles withspecific features. Press the smallcamera icon shown on the top left cornerof the display screen to open the cameraview menu.
235
Super Duty (TFE) Canada/United States of America, enUSA, Edition date: 201710, Second Printing
Parking AidsE205884 E233726
Page 239 of 642
The following camera views can beaccessed in park (P), neutral (N) or drive(D) when you press the camera button:
•Front 360 + Normal: Contains thenormal front camera view next to a360 degree camera view.
•Front Normal View: Provides animage of what is directly in front of yourvehicle.
•Front Split View: Provides anextended view of what is in front ofyour vehicle by using the front and sidecameras.
The following camera views can beaccessed when you shift into reverse (R):
•Rear 360 + Normal: Contains thenormal rear camera view next to a 360degree camera view. Press the zoom(+) button to quickly access RearNormal View from this screen.
•Rear Normal View: Provides an imageof what is directly behind your vehicle.
•Rear Split View: Provides anextended view of what is behind yourvehicle by using the rear and sidecameras.
•Rear High View: Provides an imageof your truck bed and can be used toassist you when backing up to align andhitch a fifth wheel or gooseneck trailer.
•Auxiliary View: Provides a rear viewimage from the back of your trailerwhile reversing.
•Trailer Reverse Guidance View:Provides an image of the rear of yourvehicle using the side cameras, usefulwhen reversing with a trailer. Use thearrows at the bottom of the screen toadjust the side camera position.
Keep Out Zone
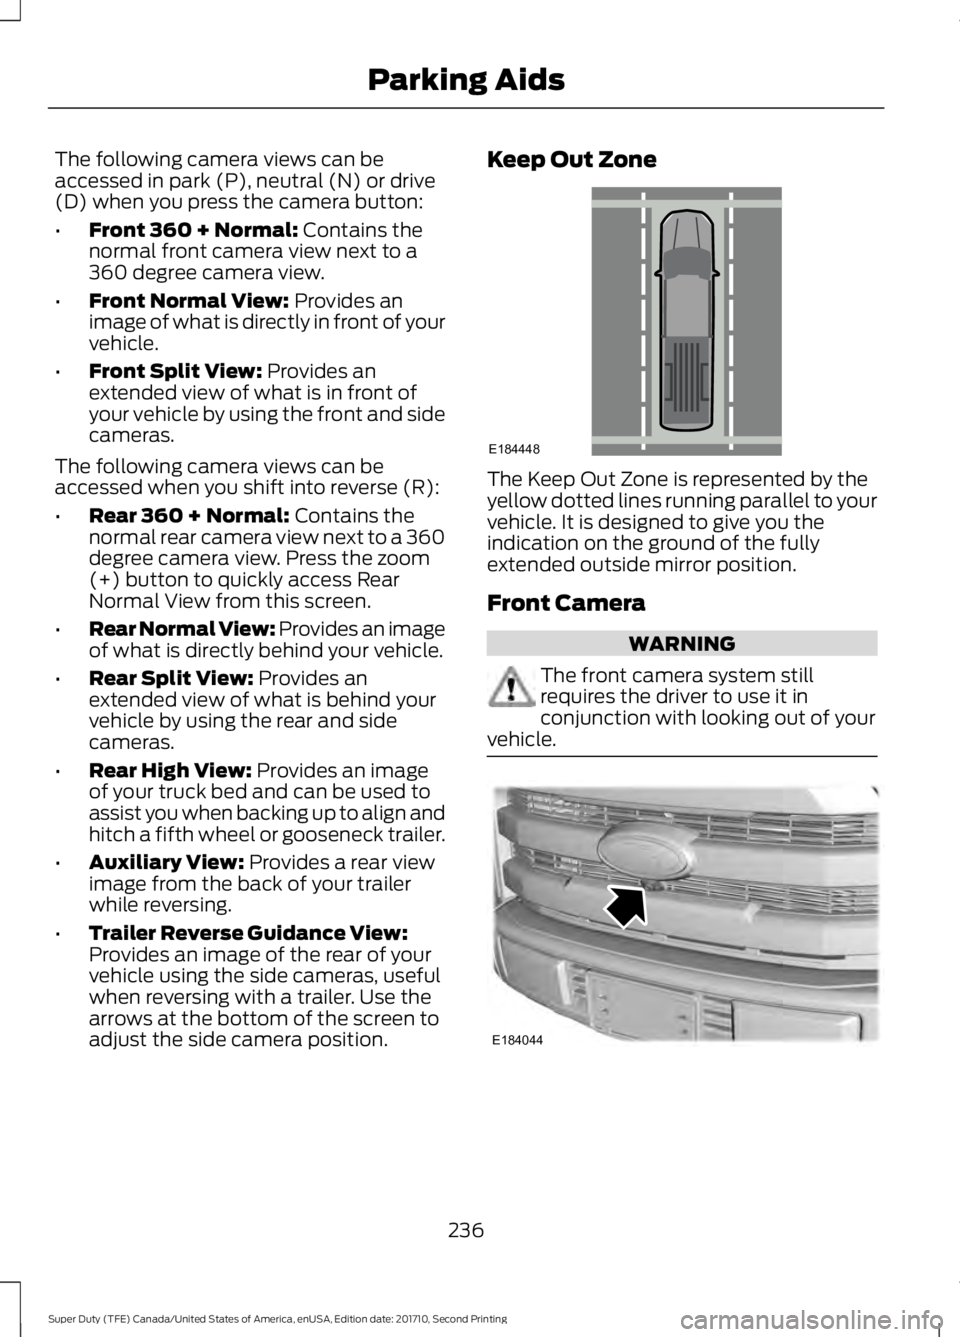
The Keep Out Zone is represented by theyellow dotted lines running parallel to yourvehicle. It is designed to give you theindication on the ground of the fullyextended outside mirror position.
Front Camera
WARNING
The front camera system stillrequires the driver to use it inconjunction with looking out of yourvehicle.
236
Super Duty (TFE) Canada/United States of America, enUSA, Edition date: 201710, Second Printing
Parking AidsE184448 E184044
Page 240 of 642
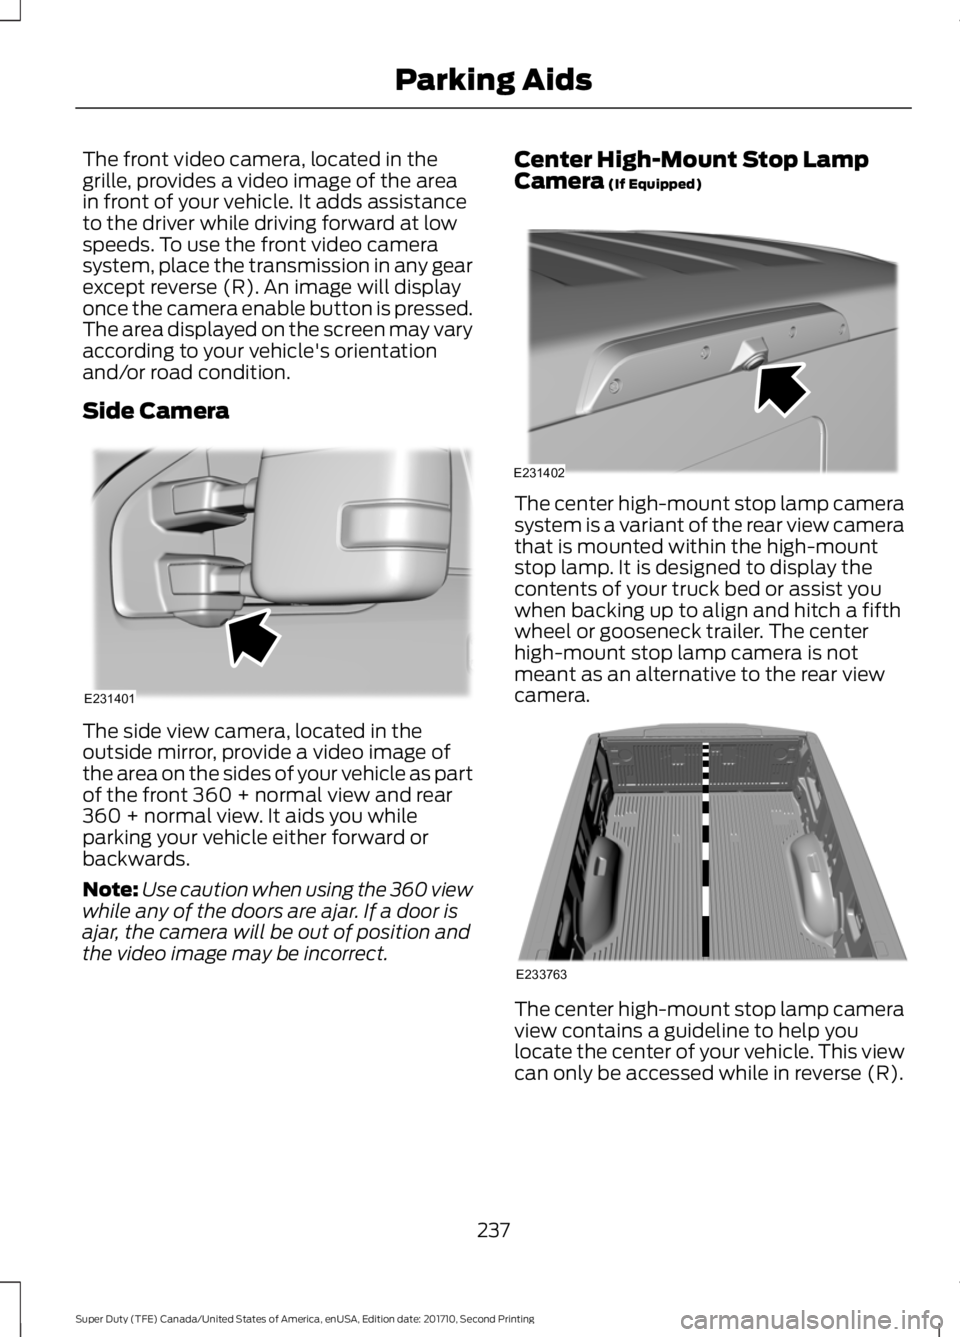
The front video camera, located in thegrille, provides a video image of the areain front of your vehicle. It adds assistanceto the driver while driving forward at lowspeeds. To use the front video camerasystem, place the transmission in any gearexcept reverse (R). An image will displayonce the camera enable button is pressed.The area displayed on the screen may varyaccording to your vehicle's orientationand/or road condition.
Side Camera
The side view camera, located in theoutside mirror, provide a video image ofthe area on the sides of your vehicle as partof the front 360 + normal view and rear360 + normal view. It aids you whileparking your vehicle either forward orbackwards.
Note:Use caution when using the 360 viewwhile any of the doors are ajar. If a door isajar, the camera will be out of position andthe video image may be incorrect.
Center High-Mount Stop LampCamera (If Equipped)
The center high-mount stop lamp camerasystem is a variant of the rear view camerathat is mounted within the high-mountstop lamp. It is designed to display thecontents of your truck bed or assist youwhen backing up to align and hitch a fifthwheel or gooseneck trailer. The centerhigh-mount stop lamp camera is notmeant as an alternative to the rear viewcamera.
The center high-mount stop lamp cameraview contains a guideline to help youlocate the center of your vehicle. This viewcan only be accessed while in reverse (R).
237
Super Duty (TFE) Canada/United States of America, enUSA, Edition date: 201710, Second Printing
Parking AidsE231401 E231402 E233763
Page 250 of 642
LANE KEEPING SYSTEM (If
Equipped)
WARNING
The system is designed to aid thedriver. It is not intended to replaceyour attention and judgment. You arestill responsible to drive with due care andattention.
Note:The system works as long as thecamera can detect one lane marking at aspeed above 40 mph (64 km/h).
Note:The system may not function if thecamera is blocked or there is damage to thewindshield.
The Lane Keeping System automaticallydetects and tracks the road lane markingsusing a camera mounted behind theinterior review view mirror. The systemnotifies you to stay in your lane when thefront camera detects an unintentional lanechange is likely to occur.
Switching the System On and Off
Note:The system on or off setting is storeduntil it is manually changed, unless a MyKeyis detected. If the system detects a MyKey,it defaults to on and the mode is set to alert.
Note:If a MyKey is detected, pressing thebutton will not affect the on or off status ofthe system. You can only change the modeand intensity settings.
Press the button located on thecenter console to switch thesystem on or off.
System Settings
The system sensitivity and intensity canbe adjusted through the display screen.See General Information (page 111). Thesystem remembers the last selection. Youdo not need to readjust the setting eachtime you turn on your vehicle.
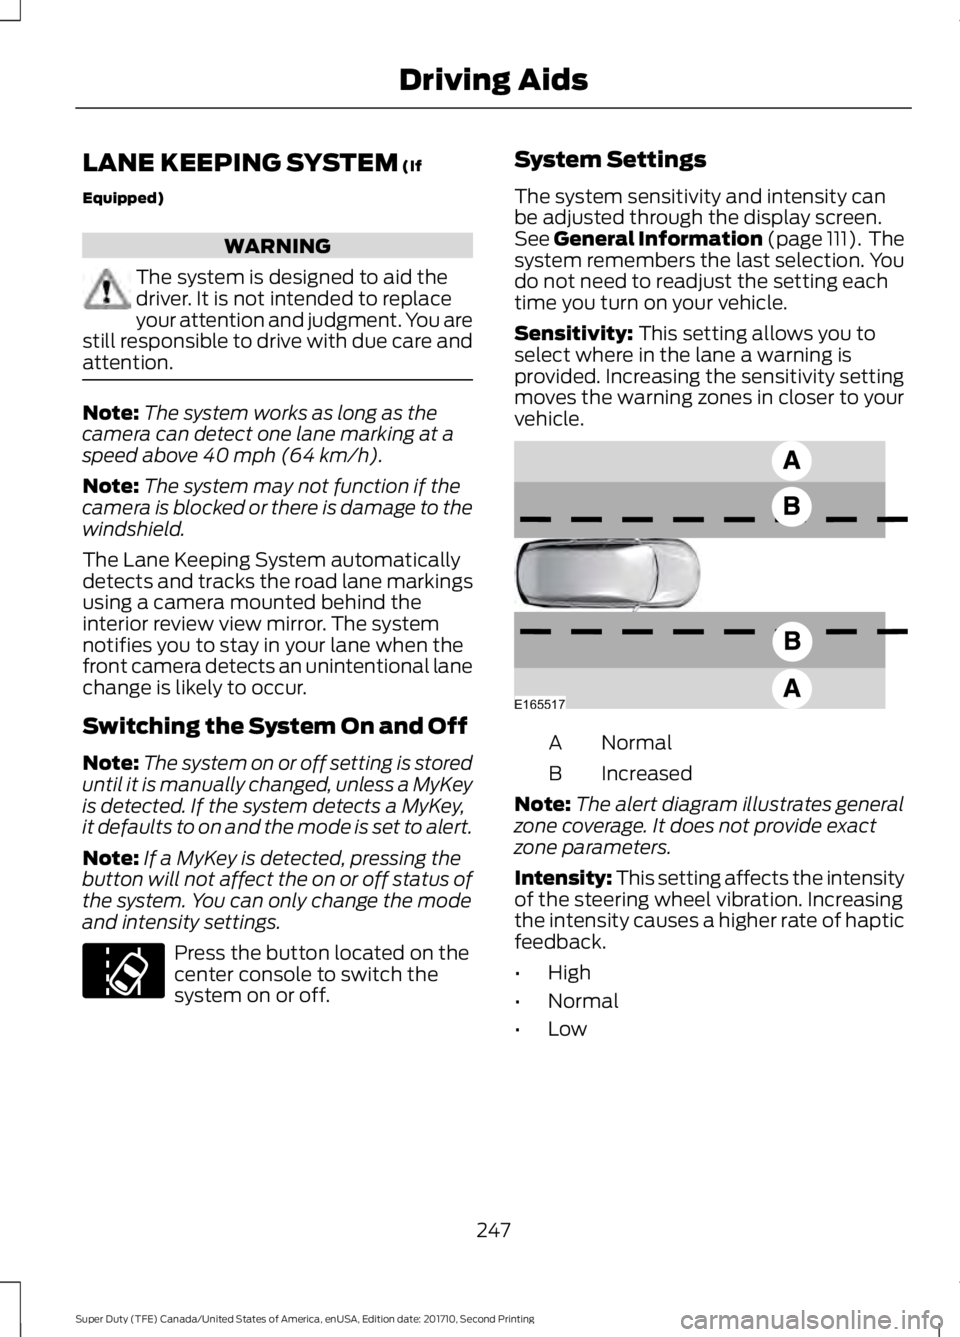
Sensitivity: This setting allows you toselect where in the lane a warning isprovided. Increasing the sensitivity settingmoves the warning zones in closer to yourvehicle.
NormalA
IncreasedB
Note:The alert diagram illustrates generalzone coverage. It does not provide exactzone parameters.
Intensity: This setting affects the intensityof the steering wheel vibration. Increasingthe intensity causes a higher rate of hapticfeedback.
•High
•Normal
•Low
247
Super Duty (TFE) Canada/United States of America, enUSA, Edition date: 201710, Second Printing
Driving AidsE173233 E165517
Page 252 of 642
Why is the feature not available (line markings are gray) when I can see the lane markingson the road?
Previous feature activation happened within the last one second
Ambiguous lane markings (mainly in construction zones)
Rapid transition from light to dark or vice versa
Sudden offset in lane markings
ABS or AdvanceTrac activation
Camera blockage due to dirt, grime, fog, frost or water on the windshield
Driving too close to the vehicle in front of you
Transitioning between no lane markings to lane markings or vice versa
Standing water on the road
Faint lane markings (partial yellow lane markings on concrete roads)
Lane width too narrow or too wide
Camera not calibrated after a windshield replacement
Driving on tight roads or on uneven roads
Vehicle accessories such as snow plows
BLIND SPOT INFORMATION
SYSTEM (If Equipped)
WARNING
Never use the Blind SpotInformation System as areplacement for using the interiorand exterior mirrors or looking over yourshoulder before changing lanes. The BlindSpot Information System is not areplacement for careful driving.
Note:The Blind Spot Information Systemdoes not prevent contact with other vehiclesor objects; nor detect parked vehicles,people, animals or infrastructure (fences,guardrails, trees). It is only designed to alertyou to moving vehicles in the blind spotzones.
Note:When a vehicle passes quicklythrough the blind spot zone, typically fewerthan two seconds, the system does nottrigger.
249
Super Duty (TFE) Canada/United States of America, enUSA, Edition date: 201710, Second Printing
Driving Aids