2017 FORD EXPEDITION EL tow
[x] Cancel search: towPage 132 of 500
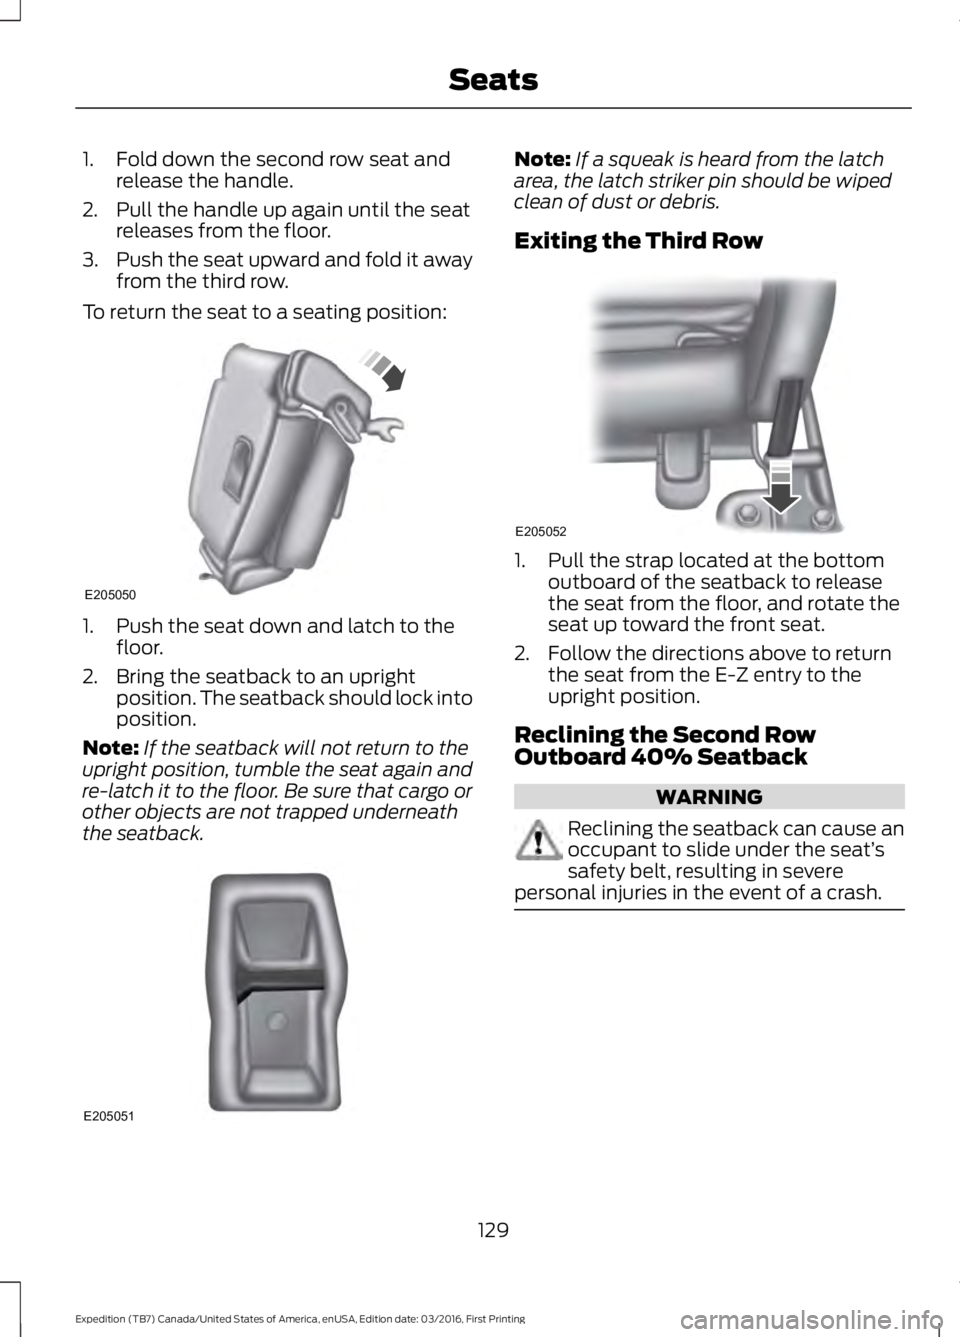
1. Fold down the second row seat andrelease the handle.
2. Pull the handle up again until the seatreleases from the floor.
3.Push the seat upward and fold it awayfrom the third row.
To return the seat to a seating position:
1. Push the seat down and latch to thefloor.
2. Bring the seatback to an uprightposition. The seatback should lock intoposition.
Note:If the seatback will not return to theupright position, tumble the seat again andre-latch it to the floor. Be sure that cargo orother objects are not trapped underneaththe seatback.
Note:If a squeak is heard from the latcharea, the latch striker pin should be wipedclean of dust or debris.
Exiting the Third Row
1. Pull the strap located at the bottomoutboard of the seatback to releasethe seat from the floor, and rotate theseat up toward the front seat.
2. Follow the directions above to returnthe seat from the E-Z entry to theupright position.
Reclining the Second RowOutboard 40% Seatback
WARNING
Reclining the seatback can cause anoccupant to slide under the seat’ssafety belt, resulting in severepersonal injuries in the event of a crash.
129
Expedition (TB7) Canada/United States of America, enUSA, Edition date: 03/2016, First Printing
SeatsE205050 E205051 E205052
Page 146 of 500
CENTER CONSOLE (If Equipped)
Stow items in the cup holder carefully asitems may become loose during hardbraking, acceleration or crashes, includinghot drinks which may spill.
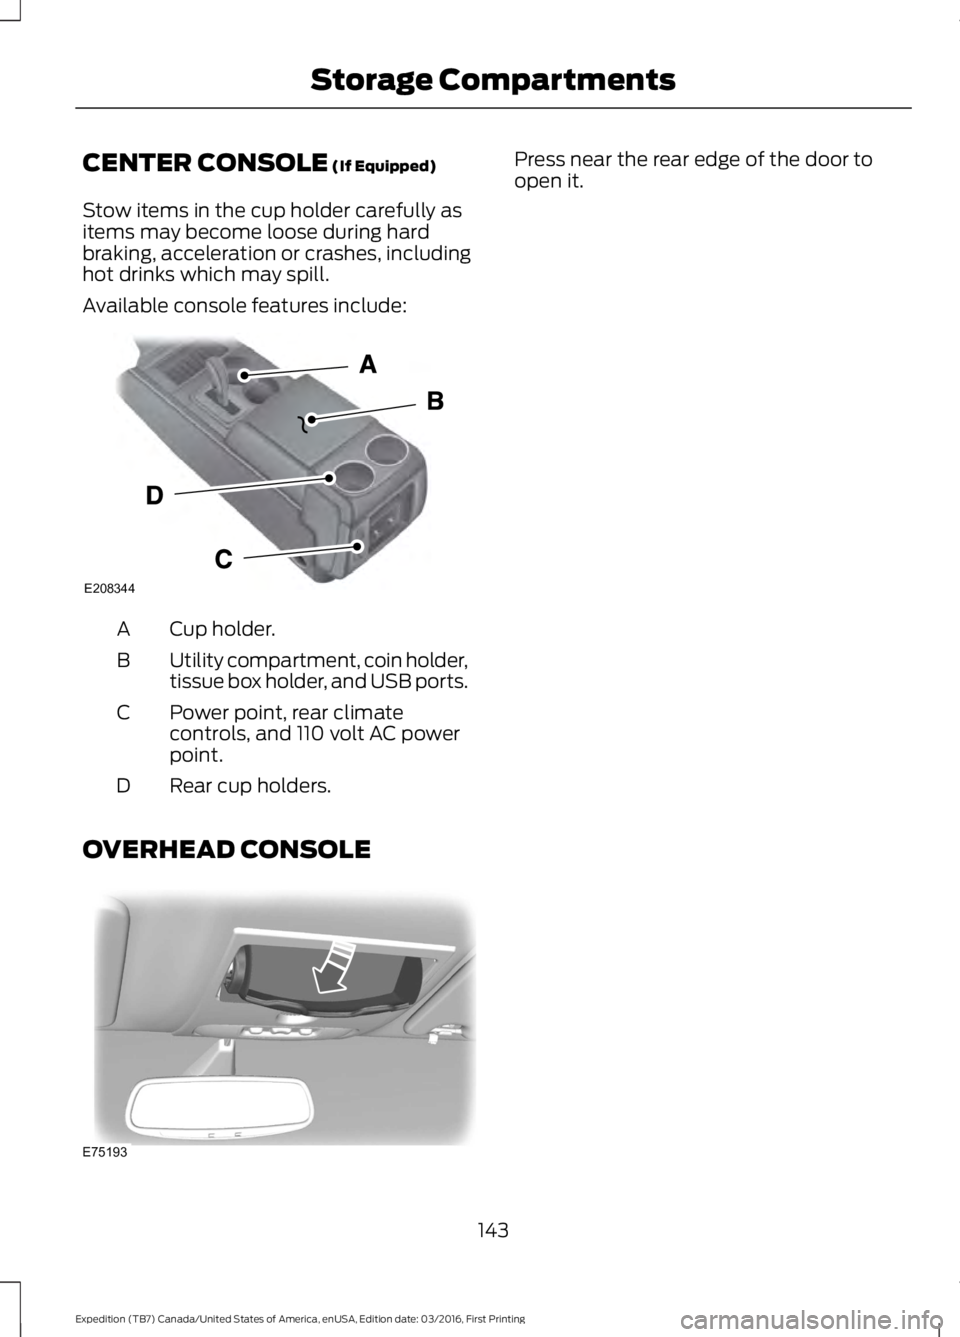
Available console features include:
Cup holder.A
Utility compartment, coin holder,tissue box holder, and USB ports.B
Power point, rear climatecontrols, and 110 volt AC powerpoint.
C
Rear cup holders.D
OVERHEAD CONSOLE
Press near the rear edge of the door toopen it.
143
Expedition (TB7) Canada/United States of America, enUSA, Edition date: 03/2016, First Printing
Storage CompartmentsE208344 E75193
Page 152 of 500
We recommend that you do the followingfor a safe and correct operation:
•Use a 16-gauge outdoor extension cordthat is product certified byUnderwriter’s Laboratory (UL) orCanadian Standards Association(CSA). This extension cord must besuitable for use outdoors, in coldtemperatures, and be clearly markedSuitable for Use with OutdoorAppliances. Do not use an indoorextension cord outdoors. This couldresult in an electric shock or become afire hazard.
•Use as short an extension cord aspossible.
•Do not use multiple extension cords.
•Make sure that when in operation, theextension cord plug and heater cordplug connections are free and clear ofwater. This could cause an electricshock or fire.
•Make sure your vehicle is parked in aclean area, clear of combustibles.
•Make sure the heater, heater cord andextension cord are firmly connected.
•Check for heat anywhere in theelectrical hookup once the system hasbeen operating for approximately 30minutes.
•Make sure the system is unplugged andproperly stowed before starting anddriving your vehicle. Make sure theprotective cover seals the prongs of theblock heater cord plug when not in use.
•Make sure the heater system ischecked for proper operation beforewinter.
Using the Engine Block Heater
Make sure the receptacle terminals areclean and dry prior to use. Clean them witha dry cloth if necessary.
The heater uses 0.4 to 1.0 kilowatt-hoursof energy per hour of use. The system doesnot have a thermostat. It achievesmaximum temperature afterapproximately three hours of operation.Using the heater longer than three hoursdoes not improve system performance andunnecessarily uses electricity.
149
Expedition (TB7) Canada/United States of America, enUSA, Edition date: 03/2016, First Printing
Starting and Stopping the Engine
Page 154 of 500
FUEL QUALITY
Choosing the Right Fuel
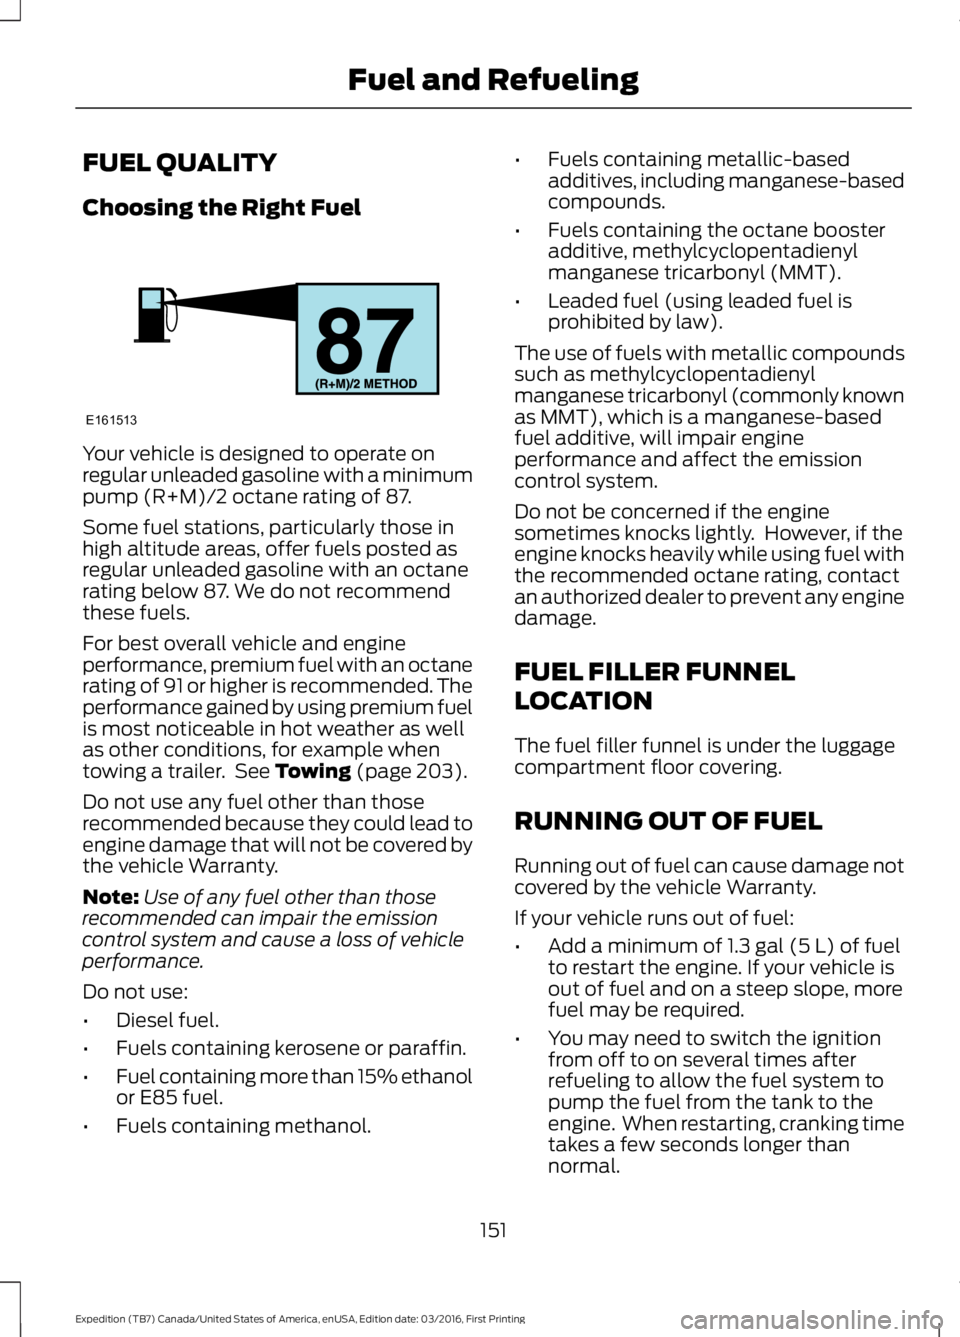
Your vehicle is designed to operate onregular unleaded gasoline with a minimumpump (R+M)/2 octane rating of 87.
Some fuel stations, particularly those inhigh altitude areas, offer fuels posted asregular unleaded gasoline with an octanerating below 87. We do not recommendthese fuels.
For best overall vehicle and engineperformance, premium fuel with an octanerating of 91 or higher is recommended. Theperformance gained by using premium fuelis most noticeable in hot weather as wellas other conditions, for example whentowing a trailer. See Towing (page 203).
Do not use any fuel other than thoserecommended because they could lead toengine damage that will not be covered bythe vehicle Warranty.
Note:Use of any fuel other than thoserecommended can impair the emissioncontrol system and cause a loss of vehicleperformance.
Do not use:
•Diesel fuel.
•Fuels containing kerosene or paraffin.
•Fuel containing more than 15% ethanolor E85 fuel.
•Fuels containing methanol.
•Fuels containing metallic-basedadditives, including manganese-basedcompounds.
•Fuels containing the octane boosteradditive, methylcyclopentadienylmanganese tricarbonyl (MMT).
•Leaded fuel (using leaded fuel isprohibited by law).
The use of fuels with metallic compoundssuch as methylcyclopentadienylmanganese tricarbonyl (commonly knownas MMT), which is a manganese-basedfuel additive, will impair engineperformance and affect the emissioncontrol system.
Do not be concerned if the enginesometimes knocks lightly. However, if theengine knocks heavily while using fuel withthe recommended octane rating, contactan authorized dealer to prevent any enginedamage.
FUEL FILLER FUNNEL
LOCATION
The fuel filler funnel is under the luggagecompartment floor covering.
RUNNING OUT OF FUEL
Running out of fuel can cause damage notcovered by the vehicle Warranty.
If your vehicle runs out of fuel:
•Add a minimum of 1.3 gal (5 L) of fuelto restart the engine. If your vehicle isout of fuel and on a steep slope, morefuel may be required.
•You may need to switch the ignitionfrom off to on several times afterrefueling to allow the fuel system topump the fuel from the tank to theengine. When restarting, cranking timetakes a few seconds longer thannormal.
151
Expedition (TB7) Canada/United States of America, enUSA, Edition date: 03/2016, First Printing
Fuel and RefuelingE161513
Page 162 of 500
AUTOMATIC TRANSMISSION
WARNINGS
Always set the parking brake fullyand make sure you shift the gearshiftlever to park (P). Switch the ignitionoff and remove the key whenever you leaveyour vehicle.
Do not use the tow/haul featurewhen driving in icy or slipperyconditions as the increased enginebraking can cause the rear wheels to slideand your vehicle to swing around with thepossible loss of vehicle control.
Understanding the Shift Positionsof your Automatic Transmission
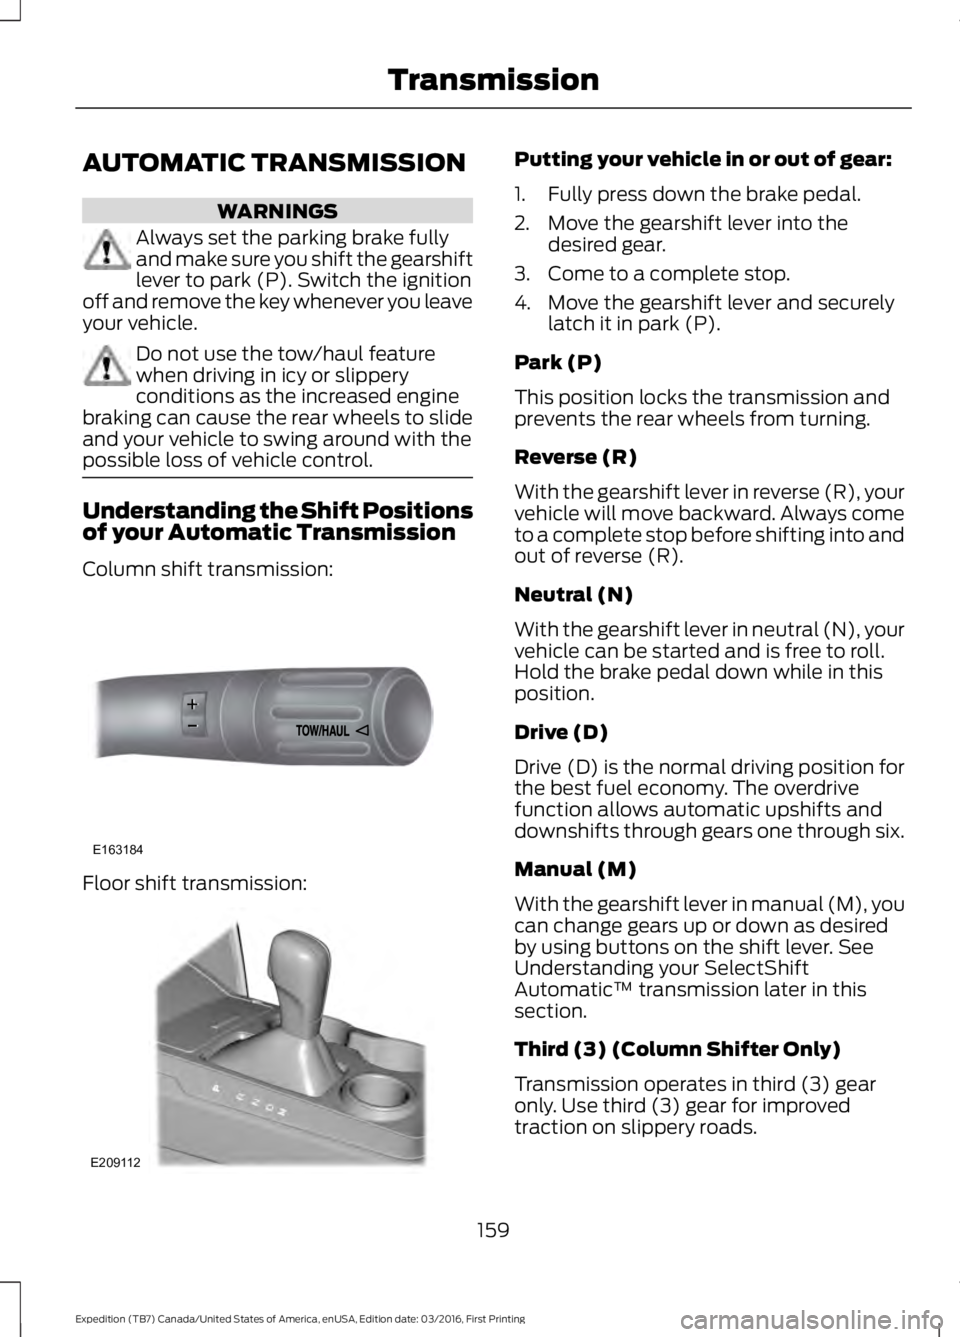
Column shift transmission:
Floor shift transmission:
Putting your vehicle in or out of gear:
1. Fully press down the brake pedal.
2. Move the gearshift lever into thedesired gear.
3. Come to a complete stop.
4. Move the gearshift lever and securelylatch it in park (P).
Park (P)
This position locks the transmission andprevents the rear wheels from turning.
Reverse (R)
With the gearshift lever in reverse (R), yourvehicle will move backward. Always cometo a complete stop before shifting into andout of reverse (R).
Neutral (N)
With the gearshift lever in neutral (N), yourvehicle can be started and is free to roll.Hold the brake pedal down while in thisposition.
Drive (D)
Drive (D) is the normal driving position forthe best fuel economy. The overdrivefunction allows automatic upshifts anddownshifts through gears one through six.
Manual (M)
With the gearshift lever in manual (M), youcan change gears up or down as desiredby using buttons on the shift lever. SeeUnderstanding your SelectShiftAutomatic™ transmission later in thissection.
Third (3) (Column Shifter Only)
Transmission operates in third (3) gearonly. Use third (3) gear for improvedtraction on slippery roads.
159
Expedition (TB7) Canada/United States of America, enUSA, Edition date: 03/2016, First Printing
TransmissionE163184 E209112
Page 163 of 500
Second (2)
Transmission operates in second (2) gearonly. Use second (2) gear to start-up onslippery roads.
First (1)
•Transmission operates in first (1) gearonly.
•Provides maximum engine braking.
•Allows upshifts by moving gearshiftlever.
•Will not downshift into first (1) gear athigh speeds; allows for first (1) gearwhen vehicle reaches slower speeds.
Tow/Haul Mode
WARNING
Do not use the tow/haul featurewhen driving in icy or slipperyconditions as the increased enginebraking can cause the rear wheels to slideand your vehicle to swing around with thepossible loss of vehicle control.
To activate tow/haul, press thebutton on the gearshift leveronce. The TOW HAUL indicatorlight will illuminate in the instrumentcluster.
The tow/haul feature:
•Delays upshifts to reduce the frequencyof transmission shifting.
•Provides engine braking in all forwardgears, which will slow your vehicle andassist you in controlling your vehiclewhen descending a grade.
•Depending on driving conditions andload conditions, may downshift thetransmission, slow your vehicle andcontrol your vehicle speed whendescending a hill, without pressing theaccelerator pedal. The amount ofdownshift braking provided will varybased upon the amount the brakepedal is pressed.
The tow/haul feature improvestransmission operation when towing atrailer or a heavy load. All transmissiongear ranges are available when usingtow/haul.
To deactivate the tow/haul feature andreturn to normal driving mode, press thebutton on the gearshift lever twice. TheTOW HAUL light will deactivate. Tow/haulwill also deactivate when you power downyour vehicle.
Forced Downshifts
•Allowed in drive (D) with the tow/haulfeature on or off.
•Press the accelerator to the floor.
•Allows transmission to select anappropriate gear.
160
Expedition (TB7) Canada/United States of America, enUSA, Edition date: 03/2016, First Printing
TransmissionE161509
Page 165 of 500
Manual (M)
Moving the gearshift lever to the manual(M) position will allow you to manuallyselect the gear you desire. Only the currentgear will display. Use the buttons on thegearshift lever to manually select gears.
Press the + button to upshift or the –button to downshift. Return thetransmission to a different gearshiftposition to deactivate manual control.
Upshift to the recommended shift speedsaccording to the following chart:
Upshifts when accelerating (recommended for best fuel economy)
Shift from:
15 mph (24 km/h)1 – 2
25 mph (40 km/h)2 – 3
40 mph (64 km/h)3 – 4
45 mph (72 km/h)4 – 5
50 mph (80 km/h)5 – 6
Brake-Shift Interlock
WARNINGS
Do not drive your vehicle until youverify that the brake lamps areworking.
When doing this procedure, you needto take the transmission out of park(P) which means your vehicle canroll freely. To avoid unwanted vehiclemovement, always fully set the parkingbrake prior to doing this procedure. Usewheels chocks if appropriate.
If the parking brake is fully released,but the brake warning lamp remainsilluminated, the brakes may not beworking properly. Have your vehiclechecked as soon as possible.
Your vehicle is equipped with a brake-shiftinterlock feature that prevents moving thegearshift lever from park (P) when theignition is in the on position and the brakepedal is not pressed.
If you cannot move the gearshift lever outof park (P) position with the ignition in theon position and the brake pedal pressed,a malfunction may have occurred. It ispossible that a fuse has blown or yourvehicle’s brake lamps are not operatingproperly. See Fuse Specification Chart(page 233).
If the fuse is not blown and the brakelamps are working properly, the followingprocedure will allow you to move thegearshift lever from park (P):
Column-shifter
1. Apply the parking brake. Turn theignition key to the off position, thenremove the key.
2. Move the steering column to the fulldown and full rearward position(toward the driver’s seat).
3. Remove the gearshift lever boot.
162
Expedition (TB7) Canada/United States of America, enUSA, Edition date: 03/2016, First Printing
Transmission
Page 166 of 500
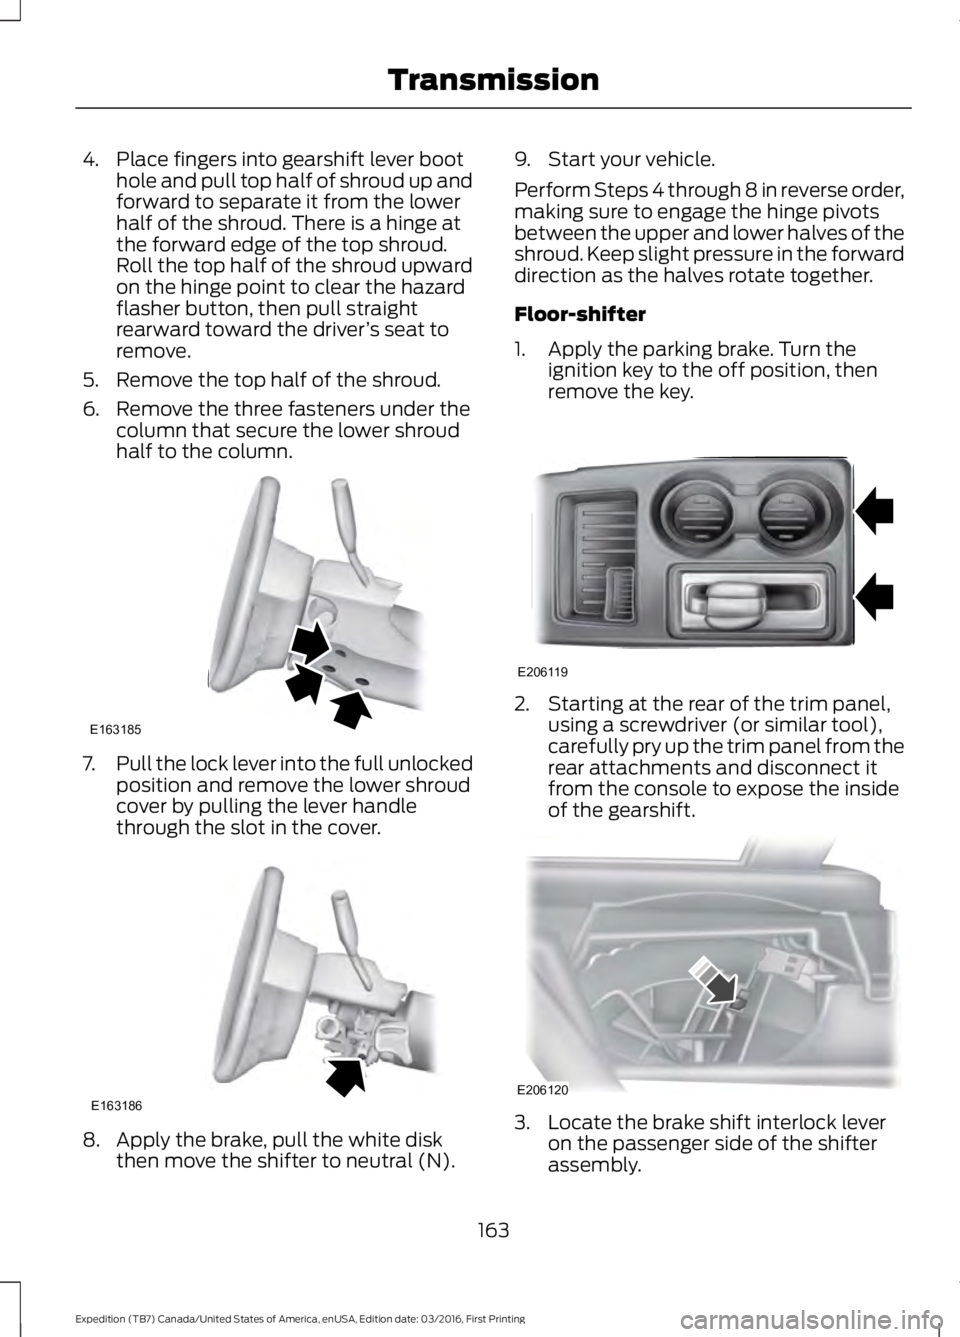
4. Place fingers into gearshift lever boothole and pull top half of shroud up andforward to separate it from the lowerhalf of the shroud. There is a hinge atthe forward edge of the top shroud.Roll the top half of the shroud upwardon the hinge point to clear the hazardflasher button, then pull straightrearward toward the driver’s seat toremove.
5. Remove the top half of the shroud.
6. Remove the three fasteners under thecolumn that secure the lower shroudhalf to the column.
7.Pull the lock lever into the full unlockedposition and remove the lower shroudcover by pulling the lever handlethrough the slot in the cover.
8. Apply the brake, pull the white diskthen move the shifter to neutral (N).
9. Start your vehicle.
Perform Steps 4 through 8 in reverse order,making sure to engage the hinge pivotsbetween the upper and lower halves of theshroud. Keep slight pressure in the forwarddirection as the halves rotate together.
Floor-shifter
1. Apply the parking brake. Turn theignition key to the off position, thenremove the key.
2. Starting at the rear of the trim panel,using a screwdriver (or similar tool),carefully pry up the trim panel from therear attachments and disconnect itfrom the console to expose the insideof the gearshift.
3. Locate the brake shift interlock leveron the passenger side of the shifterassembly.
163
Expedition (TB7) Canada/United States of America, enUSA, Edition date: 03/2016, First Printing
TransmissionE163185 E163186 E206119 E206120