2017 FORD EXPEDITION EL tow
[x] Cancel search: towPage 83 of 500
EXTERIOR MIRRORS
Power Exterior Mirrors
WARNING
Do not adjust the mirrors when yourvehicle is moving.
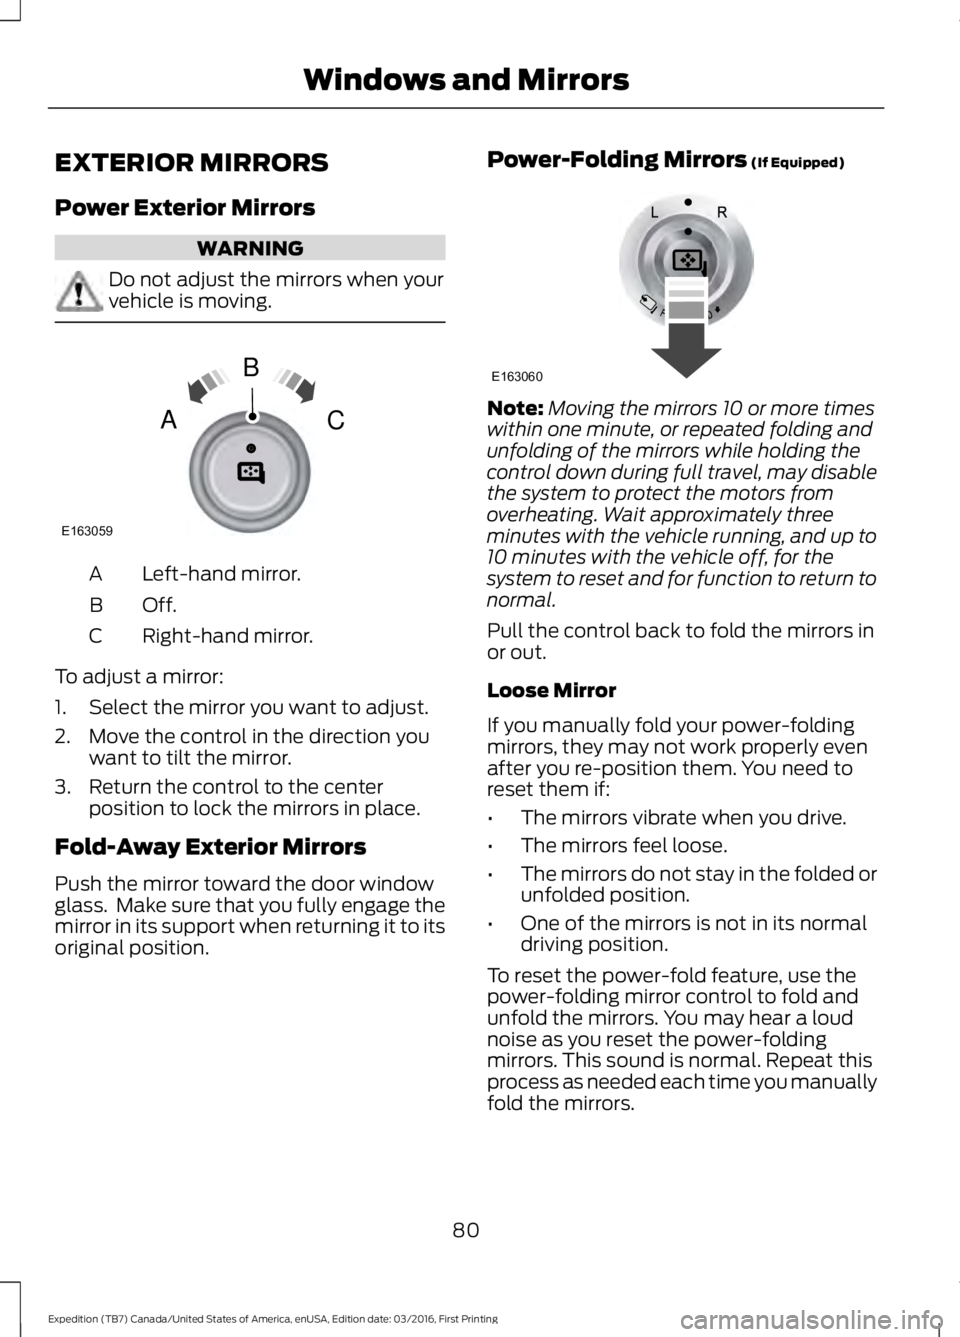
Left-hand mirror.A
Off.B
Right-hand mirror.C
To adjust a mirror:
1. Select the mirror you want to adjust.
2. Move the control in the direction youwant to tilt the mirror.
3. Return the control to the centerposition to lock the mirrors in place.
Fold-Away Exterior Mirrors
Push the mirror toward the door windowglass. Make sure that you fully engage themirror in its support when returning it to itsoriginal position.
Power-Folding Mirrors (If Equipped)
Note:Moving the mirrors 10 or more timeswithin one minute, or repeated folding andunfolding of the mirrors while holding thecontrol down during full travel, may disablethe system to protect the motors fromoverheating. Wait approximately threeminutes with the vehicle running, and up to10 minutes with the vehicle off, for thesystem to reset and for function to return tonormal.
Pull the control back to fold the mirrors inor out.
Loose Mirror
If you manually fold your power-foldingmirrors, they may not work properly evenafter you re-position them. You need toreset them if:
•The mirrors vibrate when you drive.
•The mirrors feel loose.
•The mirrors do not stay in the folded orunfolded position.
•One of the mirrors is not in its normaldriving position.
To reset the power-fold feature, use thepower-folding mirror control to fold andunfold the mirrors. You may hear a loudnoise as you reset the power-foldingmirrors. This sound is normal. Repeat thisprocess as needed each time you manuallyfold the mirrors.
80
Expedition (TB7) Canada/United States of America, enUSA, Edition date: 03/2016, First Printing
Windows and MirrorsE163059
B
AC E163060
Page 85 of 500

The rear view mirror may have to beadjusted to its lower arm position toprevent interference when the childmindermirror is extended down.
REAR QUARTER WINDOWS (If
Equipped)
WARNINGS
Do not leave children unattended inyour vehicle and do not let them playwith the power windows. They mayseriously injure themselves.
When closing the power windows,you should verify they are free ofobstructions and make sure thatchildren and pets are not in the proximityof the window openings.
Press and hold the VENT control to openthe rear quarter windows.
Pull and hold the VENT control to closethe rear quarter windows.
Note:Vehicles without a moonroof will onlyhave the VENT control.
SUN VISORS
Rotate the sun visor toward the sidewindow and extend it rearward for extrashade.
Illuminated Vanity Mirror
Lift the cover to switch the lamp on.
MOONROOF (If Equipped)
WARNINGS
Do not let children play with themoonroof or leave them unattendedin the vehicle. They may seriouslyhurt themselves.
82
Expedition (TB7) Canada/United States of America, enUSA, Edition date: 03/2016, First Printing
Windows and MirrorsE205283 E138666 E162197
Page 86 of 500
WARNINGS
When closing the moonroof, youshould verify that it is free ofobstructions and make sure thatchildren and pets are not in the proximityof the roof opening.
You can manually open or close the slidingshade when the moonroof is closed. Pullthe shade toward the front of your vehicleto close it.
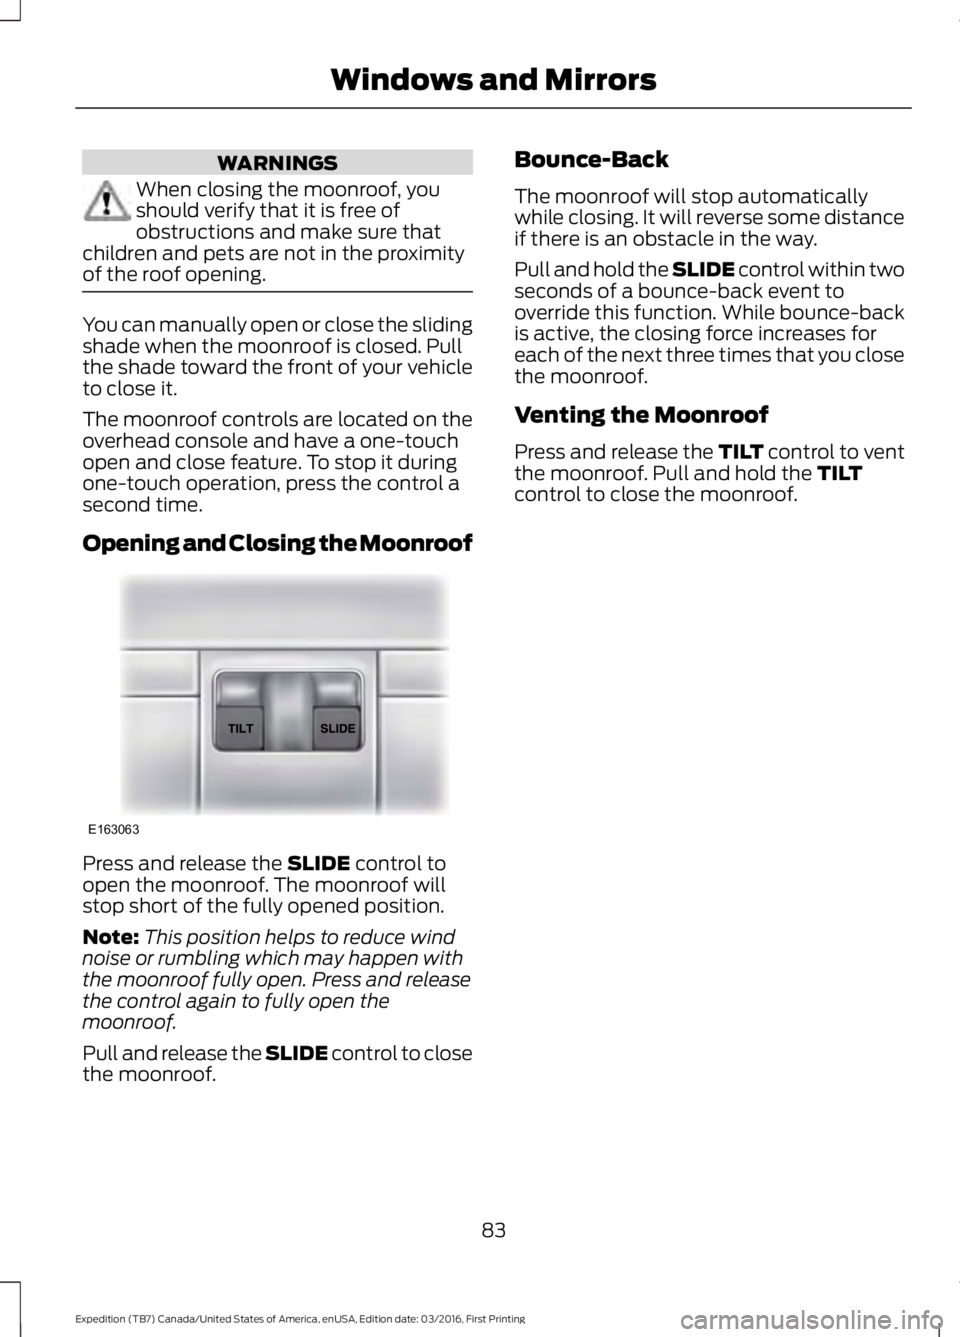
The moonroof controls are located on theoverhead console and have a one-touchopen and close feature. To stop it duringone-touch operation, press the control asecond time.
Opening and Closing the Moonroof
Press and release the SLIDE control toopen the moonroof. The moonroof willstop short of the fully opened position.
Note:This position helps to reduce windnoise or rumbling which may happen withthe moonroof fully open. Press and releasethe control again to fully open themoonroof.
Pull and release the SLIDE control to closethe moonroof.
Bounce-Back
The moonroof will stop automaticallywhile closing. It will reverse some distanceif there is an obstacle in the way.
Pull and hold the SLIDE control within twoseconds of a bounce-back event tooverride this function. While bounce-backis active, the closing force increases foreach of the next three times that you closethe moonroof.
Venting the Moonroof
Press and release the TILT control to ventthe moonroof. Pull and hold the TILTcontrol to close the moonroof.
83
Expedition (TB7) Canada/United States of America, enUSA, Edition date: 03/2016, First Printing
Windows and MirrorsE163063
Page 88 of 500
Vehicle Settings and Personalization
See General Information (page 91).
Fuel Gauge
Note:The fuel gauge may vary slightlywhen your vehicle is moving or on a gradient.
Switch the ignition on. The fuel gaugeindicates approximately how much fuelremains in the fuel tank. The arrowadjacent to the fuel pump symbolindicates on which side of your vehicle thefuel filler door is located.
The needle should move toward F whenyou refuel your vehicle. If the needle pointsto E after adding fuel, this indicates yourvehicle needs service soon.
After refueling, the needle may not alwaysreturn to the exact same position. This isnormal.
Note:It may take a short time for theneedle to reach F after leaving the gasstation. This is normal and depends uponthe slope of pavement at the gas station.
Note:The fuel amount dispensed into thetank is a little less or more than the gaugeindicated. This is normal and depends uponthe slope of pavement at the gas station.
Note:If the gas station nozzle shuts offbefore the tank is full, try a different gaspump nozzle.
Note:There is a small reserve left in thetank when the fuel gauge reaches empty.
Low Fuel Reminder
A low reminder displays when the distanceto empty reaches 50 miles (80 km) toempty.
Note:The low fuel reminder can appear atdifferent fuel gauge positions depending onfuel economy conditions. This variation isnormal.
Engine Coolant Temperature Gauge
Shows the temperature of the enginecoolant. At normal operating temperature,the needle remains in the center section.If the needle enters the red section, theengine is overheating. Stop the engine,switch the ignition off and determine thecause once the engine has cooled down.
Note:Do not restart the engine until youconclude the cause of overheating.
WARNING
Never remove the coolant reservoircap while the engine is running or hot.The hot coolant is under pressureand may cause serious burns.
85
Expedition (TB7) Canada/United States of America, enUSA, Edition date: 03/2016, First Printing
Instrument Cluster
Page 92 of 500
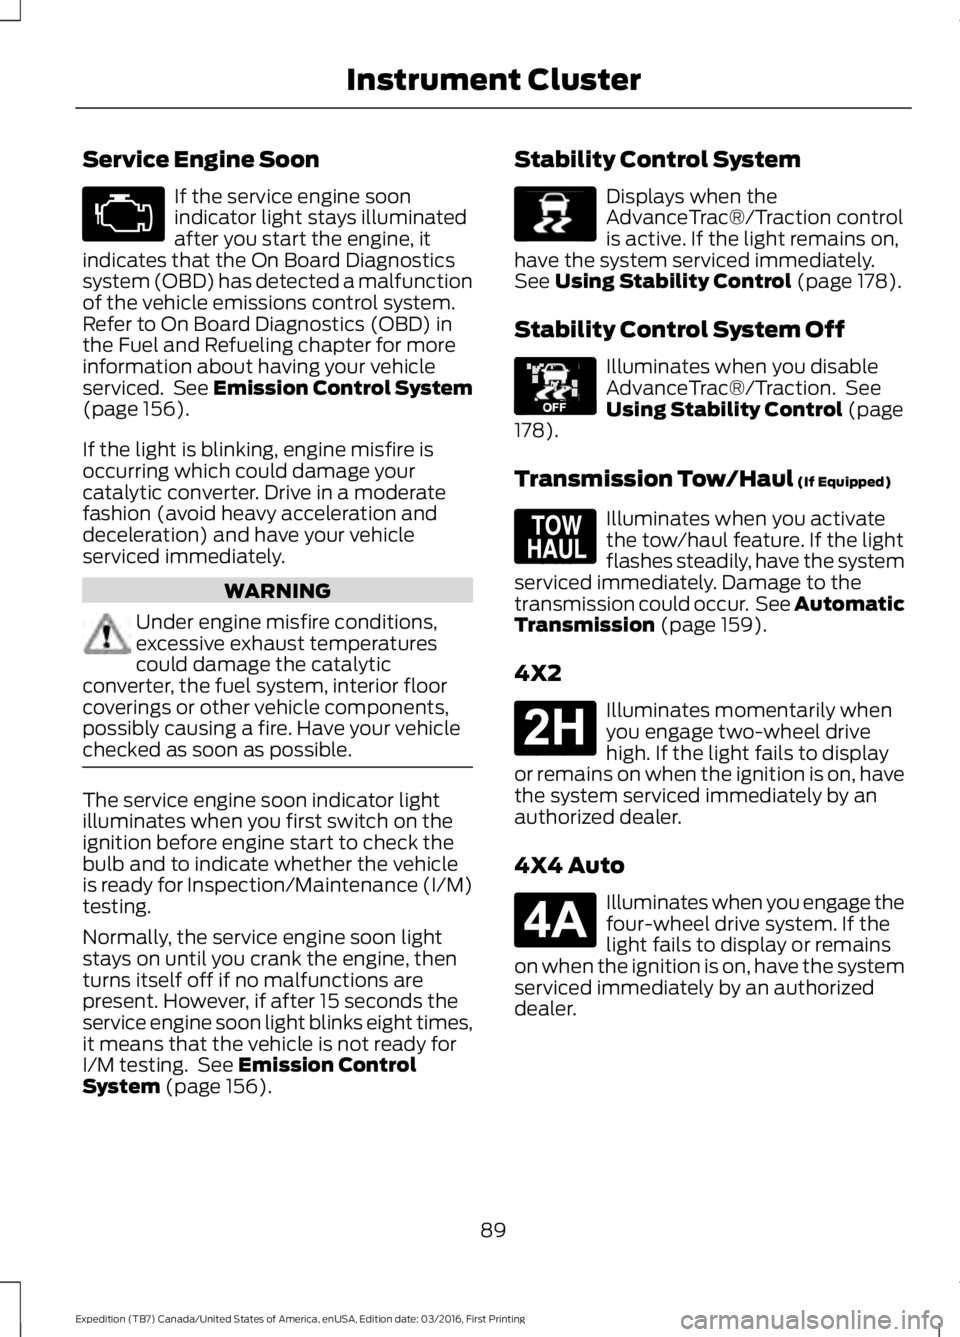
Service Engine Soon
If the service engine soonindicator light stays illuminatedafter you start the engine, itindicates that the On Board Diagnosticssystem (OBD) has detected a malfunctionof the vehicle emissions control system.Refer to On Board Diagnostics (OBD) inthe Fuel and Refueling chapter for moreinformation about having your vehicleserviced. See Emission Control System(page 156).
If the light is blinking, engine misfire isoccurring which could damage yourcatalytic converter. Drive in a moderatefashion (avoid heavy acceleration anddeceleration) and have your vehicleserviced immediately.
WARNING
Under engine misfire conditions,excessive exhaust temperaturescould damage the catalyticconverter, the fuel system, interior floorcoverings or other vehicle components,possibly causing a fire. Have your vehiclechecked as soon as possible.
The service engine soon indicator lightilluminates when you first switch on theignition before engine start to check thebulb and to indicate whether the vehicleis ready for Inspection/Maintenance (I/M)testing.
Normally, the service engine soon lightstays on until you crank the engine, thenturns itself off if no malfunctions arepresent. However, if after 15 seconds theservice engine soon light blinks eight times,it means that the vehicle is not ready forI/M testing. See Emission ControlSystem (page 156).
Stability Control System
Displays when theAdvanceTrac®/Traction controlis active. If the light remains on,have the system serviced immediately.See Using Stability Control (page 178).
Stability Control System Off
Illuminates when you disableAdvanceTrac®/Traction. SeeUsing Stability Control (page178).
Transmission Tow/Haul (If Equipped)
Illuminates when you activatethe tow/haul feature. If the lightflashes steadily, have the systemserviced immediately. Damage to thetransmission could occur. See AutomaticTransmission (page 159).
4X2
Illuminates momentarily whenyou engage two-wheel drivehigh. If the light fails to displayor remains on when the ignition is on, havethe system serviced immediately by anauthorized dealer.
4X4 Auto
Illuminates when you engage thefour-wheel drive system. If thelight fails to display or remainson when the ignition is on, have the systemserviced immediately by an authorizeddealer.
89
Expedition (TB7) Canada/United States of America, enUSA, Edition date: 03/2016, First Printing
Instrument Cluster E138639 E130458 E161509 E181778 E181781
Page 96 of 500
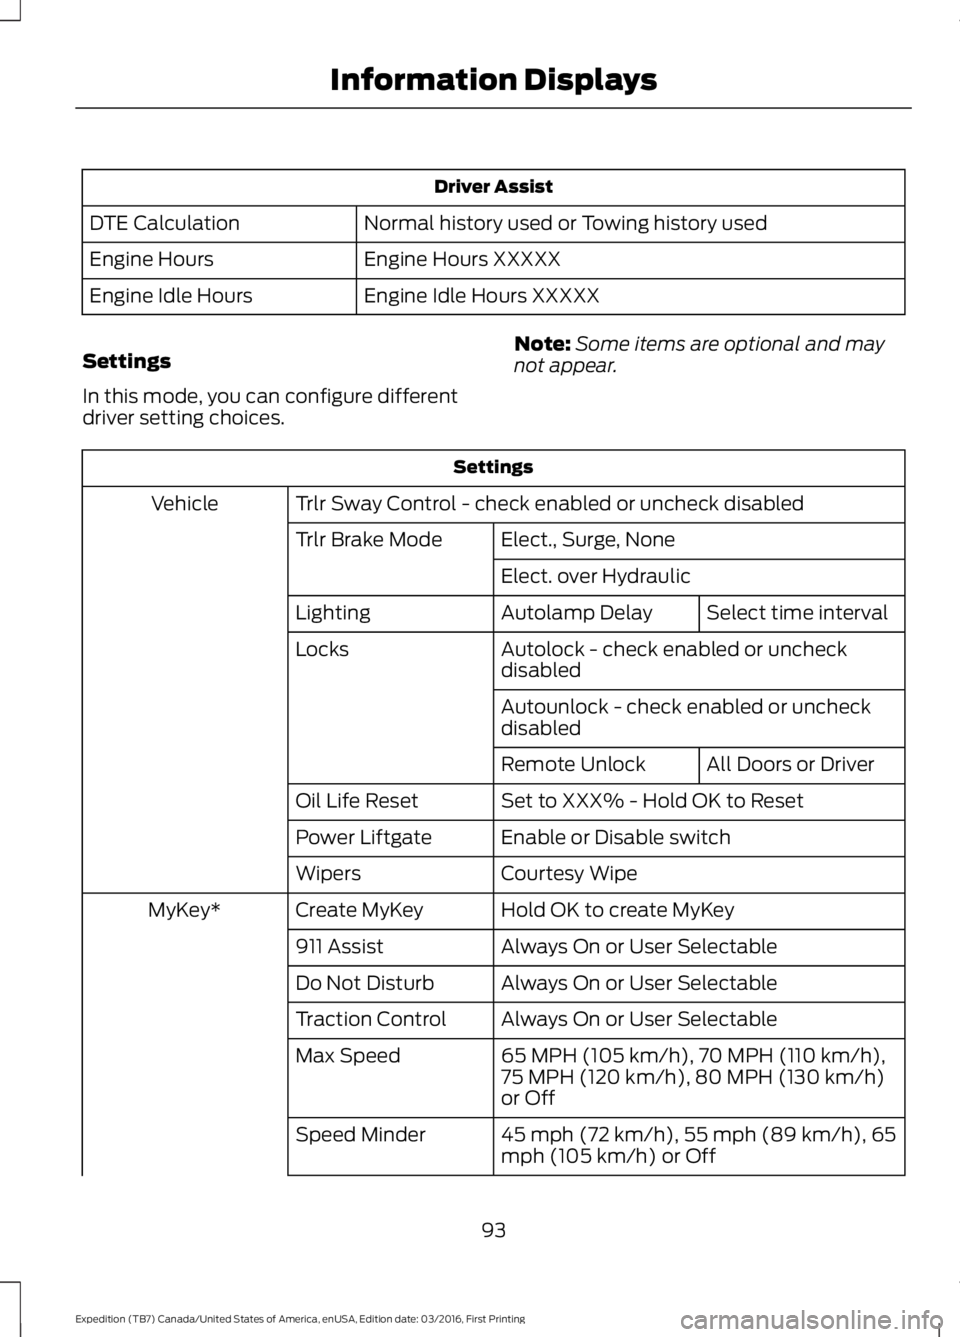
Driver Assist
Normal history used or Towing history usedDTE Calculation
Engine Hours XXXXXEngine Hours
Engine Idle Hours XXXXXEngine Idle Hours
Settings
In this mode, you can configure differentdriver setting choices.
Note:Some items are optional and maynot appear.
Settings
Trlr Sway Control - check enabled or uncheck disabledVehicle
Elect., Surge, NoneTrlr Brake Mode
Elect. over Hydraulic
Select time intervalAutolamp DelayLighting
Autolock - check enabled or uncheckdisabledLocks
Autounlock - check enabled or uncheckdisabled
All Doors or DriverRemote Unlock
Set to XXX% - Hold OK to ResetOil Life Reset
Enable or Disable switchPower Liftgate
Courtesy WipeWipers
Hold OK to create MyKeyCreate MyKeyMyKey*
Always On or User Selectable911 Assist
Always On or User SelectableDo Not Disturb
Always On or User SelectableTraction Control
65 MPH (105 km/h), 70 MPH (110 km/h),75 MPH (120 km/h), 80 MPH (130 km/h)or Off
Max Speed
45 mph (72 km/h), 55 mph (89 km/h), 65mph (105 km/h) or OffSpeed Minder
93
Expedition (TB7) Canada/United States of America, enUSA, Edition date: 03/2016, First Printing
Information Displays
Page 97 of 500
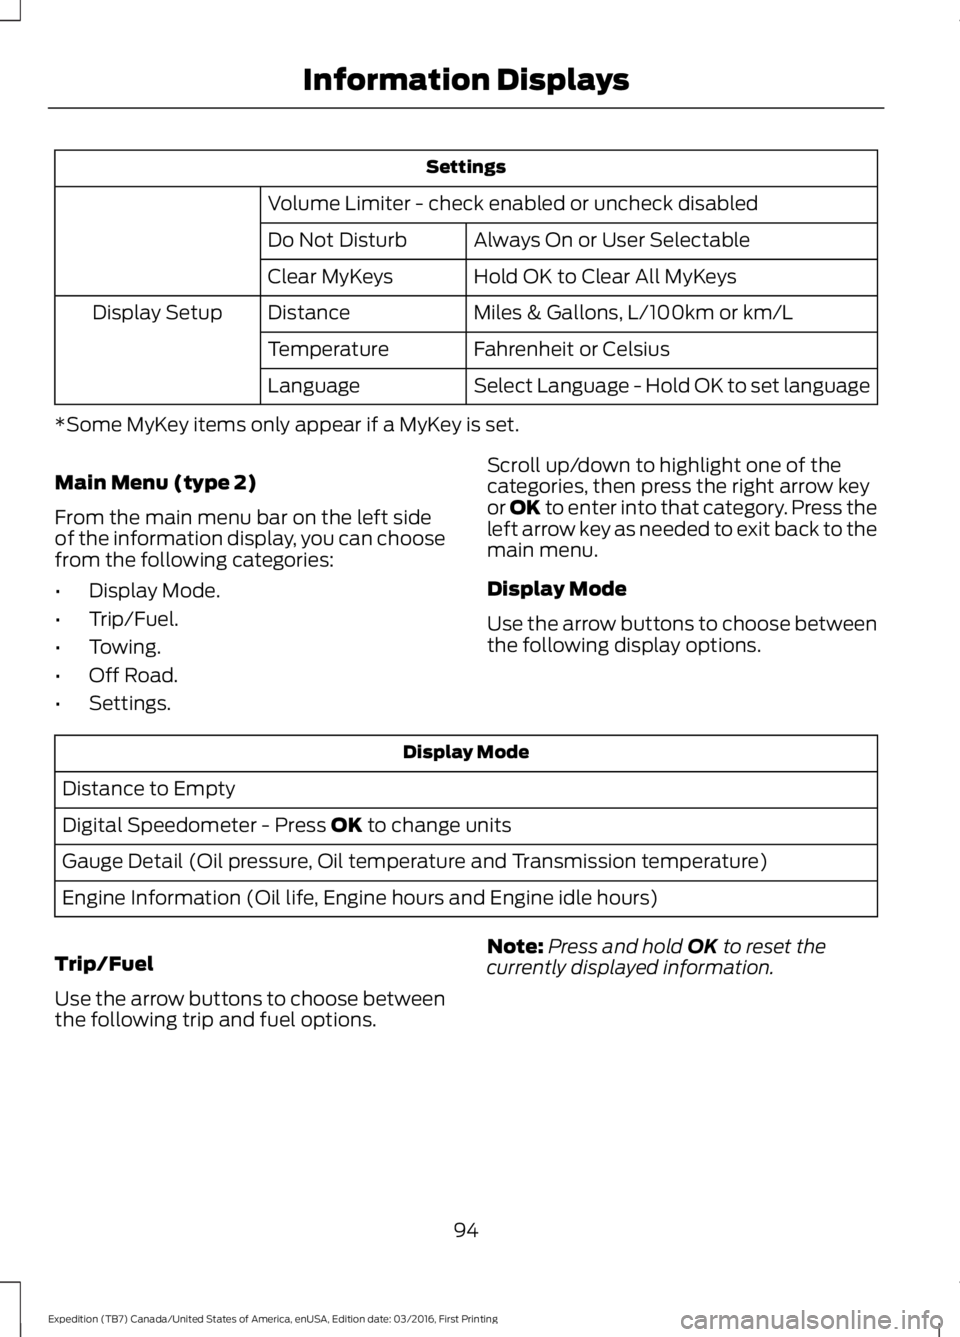
Settings
Volume Limiter - check enabled or uncheck disabled
Always On or User SelectableDo Not Disturb
Hold OK to Clear All MyKeysClear MyKeys
Miles & Gallons, L/100km or km/LDistanceDisplay Setup
Fahrenheit or CelsiusTemperature
Select Language - Hold OK to set languageLanguage
*Some MyKey items only appear if a MyKey is set.
Main Menu (type 2)
From the main menu bar on the left sideof the information display, you can choosefrom the following categories:
•Display Mode.
•Trip/Fuel.
•Towing.
•Off Road.
•Settings.
Scroll up/down to highlight one of thecategories, then press the right arrow keyor OK to enter into that category. Press theleft arrow key as needed to exit back to themain menu.
Display Mode
Use the arrow buttons to choose betweenthe following display options.
Display Mode
Distance to Empty
Digital Speedometer - Press OK to change units
Gauge Detail (Oil pressure, Oil temperature and Transmission temperature)
Engine Information (Oil life, Engine hours and Engine idle hours)
Trip/Fuel
Use the arrow buttons to choose betweenthe following trip and fuel options.
Note:Press and hold OK to reset thecurrently displayed information.
94
Expedition (TB7) Canada/United States of America, enUSA, Edition date: 03/2016, First Printing
Information Displays
Page 98 of 500
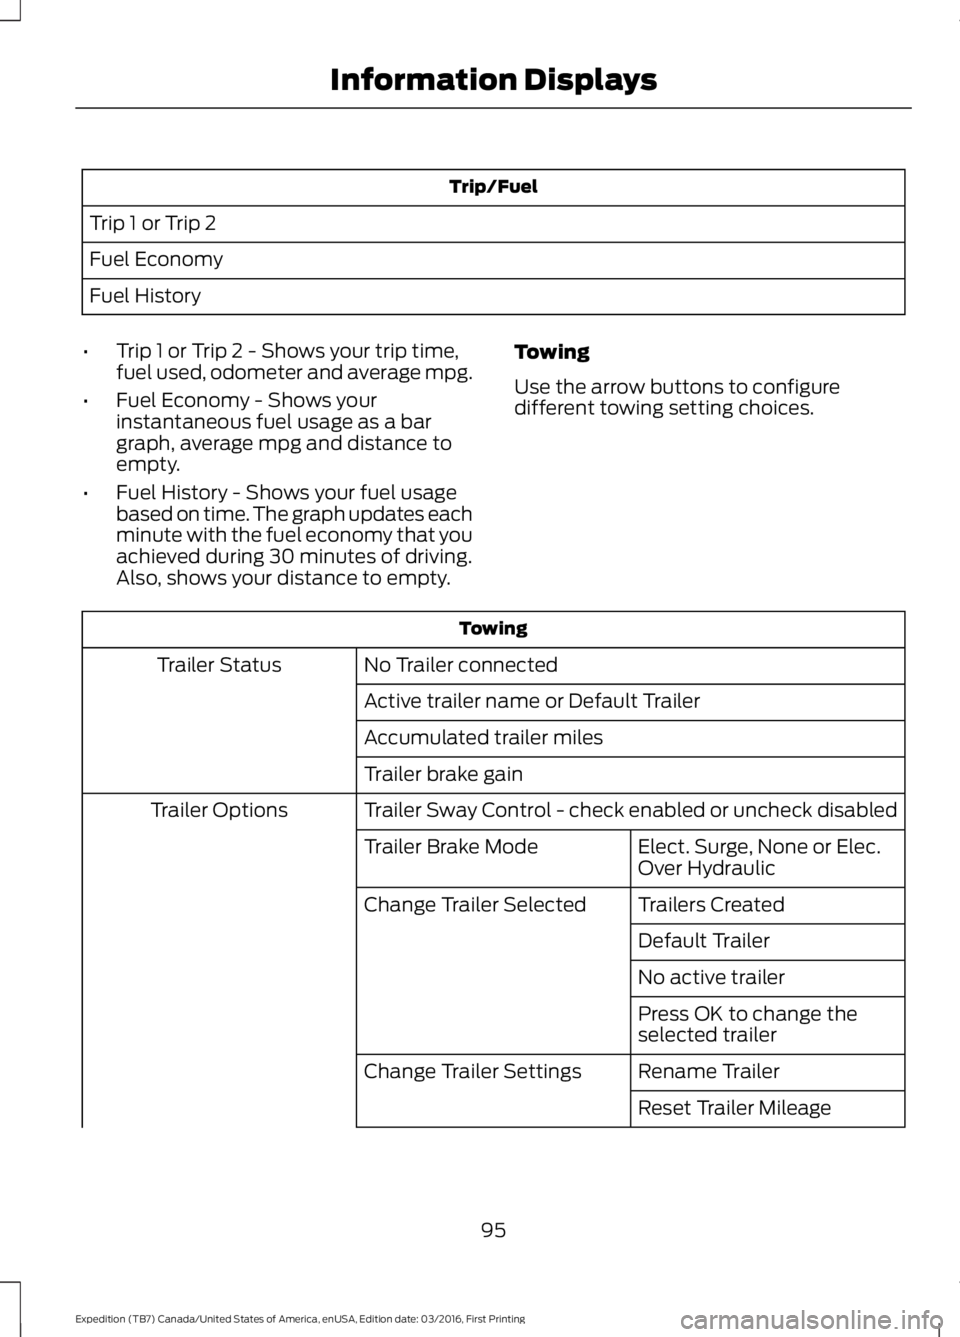
Trip/Fuel
Trip 1 or Trip 2
Fuel Economy
Fuel History
•Trip 1 or Trip 2 - Shows your trip time,fuel used, odometer and average mpg.
•Fuel Economy - Shows yourinstantaneous fuel usage as a bargraph, average mpg and distance toempty.
•Fuel History - Shows your fuel usagebased on time. The graph updates eachminute with the fuel economy that youachieved during 30 minutes of driving.Also, shows your distance to empty.
Towing
Use the arrow buttons to configuredifferent towing setting choices.
Towing
No Trailer connectedTrailer Status
Active trailer name or Default Trailer
Accumulated trailer miles
Trailer brake gain
Trailer Sway Control - check enabled or uncheck disabledTrailer Options
Elect. Surge, None or Elec.Over HydraulicTrailer Brake Mode
Trailers CreatedChange Trailer Selected
Default Trailer
No active trailer
Press OK to change theselected trailer
Rename TrailerChange Trailer Settings
Reset Trailer Mileage
95
Expedition (TB7) Canada/United States of America, enUSA, Edition date: 03/2016, First Printing
Information Displays