2017 DODGE GRAND CARAVAN instrument cluster
[x] Cancel search: instrument clusterPage 276 of 530

NOTE:If your vehicle has experienced any damage in the
area where the sensor is located, even if the fascia is not
damaged, the sensor may have become misaligned. Take
your vehicle to an authorized dealer to verify sensor
alignment. Having a sensor that is misaligned will result in
the BSM not operating to specification.
Calibrate Compass
Push the RIGHTarrow button to calibrate the com-
pass.
Compass Variance
Refer to “Instrument Cluster Display” in “Understanding
Your Instrument Panel” for further information.
CYBERSECURITY
Your vehicle may be a connected vehicle and may be
equipped with both wired and wireless networks. These
networks allow your vehicle to send and receive informa-
tion. This information allows systems and features in your
vehicle to function properly.
Your vehicle may be equipped with certain security fea-
tures to reduce the risk of unauthorized and unlawful
access to vehicle systems and wireless communications.
Vehicle software technology continues to evolve over time and FCA US LLC, working with its suppliers, evaluates
and takes appropriate steps as needed. Similar to a com-
puter or other devices, your vehicle may require software
updates to improve the usability and performance of your
systems or to reduce the potential risk of unauthorized and
unlawful access to your vehicle systems.
The risk of unauthorized and unlawful access to your
vehicle systems may still exist, even if the most recent
version of vehicle software (such as Uconnect software) is
installed.
WARNING!
•
It is not possible to know or to predict all of the
possible outcomes if your vehicle’s systems are
breached. It may be possible that vehicle systems,
including safety related systems, could be impaired
or a loss of vehicle control could occur that may
result in an accident involving serious injury or
death.
• ONLY insert media (e.g., USB, SD card, or CD) into
your vehicle if it came from a trusted source. Media
of unknown origin could possibly contain malicious
software, and if installed in your vehicle, it may
(Continued)
274 UNDERSTANDING YOUR INSTRUMENT PANEL
Page 334 of 530
NOTE:
•It is not necessary to move the temperature settings. The
system automatically adjusts the temperature, mode and
fan speed to provide comfort as quickly as possible.
• The temperature can be displayed in English or Metric
units by selecting the “Display Units of Measure in”
customer-programmable feature. Refer to “Instrument
Cluster Display” in this Section.
To provide you with maximum comfort in the automatic
mode, during cold start-ups, the blower fan will remain on
low until the engine warms up. The fan will engage
immediately if the Defrost mode is selected, or by changing
the front blower knob setting.
Manual Operation Override
This system offers a full complement of manual override
features. The AUTO symbol in the front ATC display will
be turned off when the system is being used in the manual
mode.
NOTE: The system will not automatically sense the pres-
ence of fog, mist or ice on the windshield. DEFROST mode
must be manually selected to clear the windshield and side
glass.
Air Conditioning (A/C)
The Air Conditioning (A/C) button allows the operator to
manually activate or deactivate the air conditioning sys-
tem. When in A/C mode with the ATC set to a cool
temperature, dehumidified air flows through the air out-
lets. If Economy mode is desired, push the A/C button to
turn off the A/C mode in the ATC display and deactivate
the A/C system.
NOTE:
• If the system is in Mix or Defrost Mode, the A/C can be
turned off, but the A/C system shall remain active to
prevent fogging of the windows.
• If not operating in AUTO mode, the system will not
automatically sense the presence of fog, mist or ice on
the windshield. DEFROST mode must be manually
selected to clear the windshield and side glass.
• If fog or mist appears on the windshield or side glass,
select Defrost mode and adjust blower speed if needed.
Controlling The Rear Climate Controls From The
Front ATC Panel
The Three-Zone ATC system allows for adjustment of the
rear climate controls from the front ATC panel.
332 UNDERSTANDING YOUR INSTRUMENT PANEL
Page 337 of 530
Once the desired temperature is displayed, the ATC System
will automatically achieve and maintain that comfort level.
When the system is set up for your comfort level, it is not
necessary to change the settings. You will experience the
greatest efficiency by simply allowing the system to func-
tion automatically.
NOTE:
•It is not necessary to move the temperature settings. The
system automatically adjusts the temperature, mode and
fan speed to provide comfort as quickly as possible.
• The temperature can be displayed in English or Metric
units by selecting the “Display Units of Measure in”
customer-programmable feature. Refer to the “Instru-
ment Cluster Display” in this Section.
Rear Blower Control
The rear blower control knob can be manually set to off, or
any fixed blower speed, by rotating the knob from low to
high. This allows the rear seat occupants to control the
volume of air circulated in the rear of the vehicle.
CAUTION!
Interior air enters the Rear Automatic Temperature
Control System through an intake grille, located in the
right side trim panel behind the third row seats. The
heater outlets are located in the right side trim panel,
just behind the sliding door. Do not block or place
objects directly in front of the inlet grille or heater
outlets. The electrical system could overload causing
damage to the blower motor.
Rear Temperature Control
To change the temperature in the rear of the vehicle, rotate
the temperature knob counterclockwise to lower the tem-
perature, and clockwise to increase the temperature. The
rear temperature settings are displayed in the front ATC
panel.
When rear controls are locked by the front system, the Rear
Temperature Lock symbol on the temperature knob is
illuminated and any rear overhead adjustments are ig-
nored.
4
UNDERSTANDING YOUR INSTRUMENT PANEL 335
Page 349 of 530
•The overall driving performance will be more conserva-
tive.
• Some ECON mode functions may be temporarily inhib-
ited based on temperature and other factors.
Six-Speed Automatic Transmission
The transmission gear position display (located in the
instrument cluster) indicates the transmission gear range.
You must press the brake pedal to move the gear selector
out of PARK (Refer to “Brake/Transmission Shift Interlock
System” in this section). To drive, move the gear selector
from PARK or NEUTRAL to the DRIVE position.
The electronically-controlled transmission provides a pre-
cise shift schedule. The transmission electronics are self-
calibrating; therefore, the first few shifts on a new vehicle
may be somewhat abrupt. This is a normal condition, and
precision shifts will develop within a few hundred miles
(kilometers). Only shift from DRIVE to PARK or REVERSE when the
accelerator pedal is released and the vehicle is stopped. Be
sure to keep your foot on the brake pedal when shifting
between these gears.
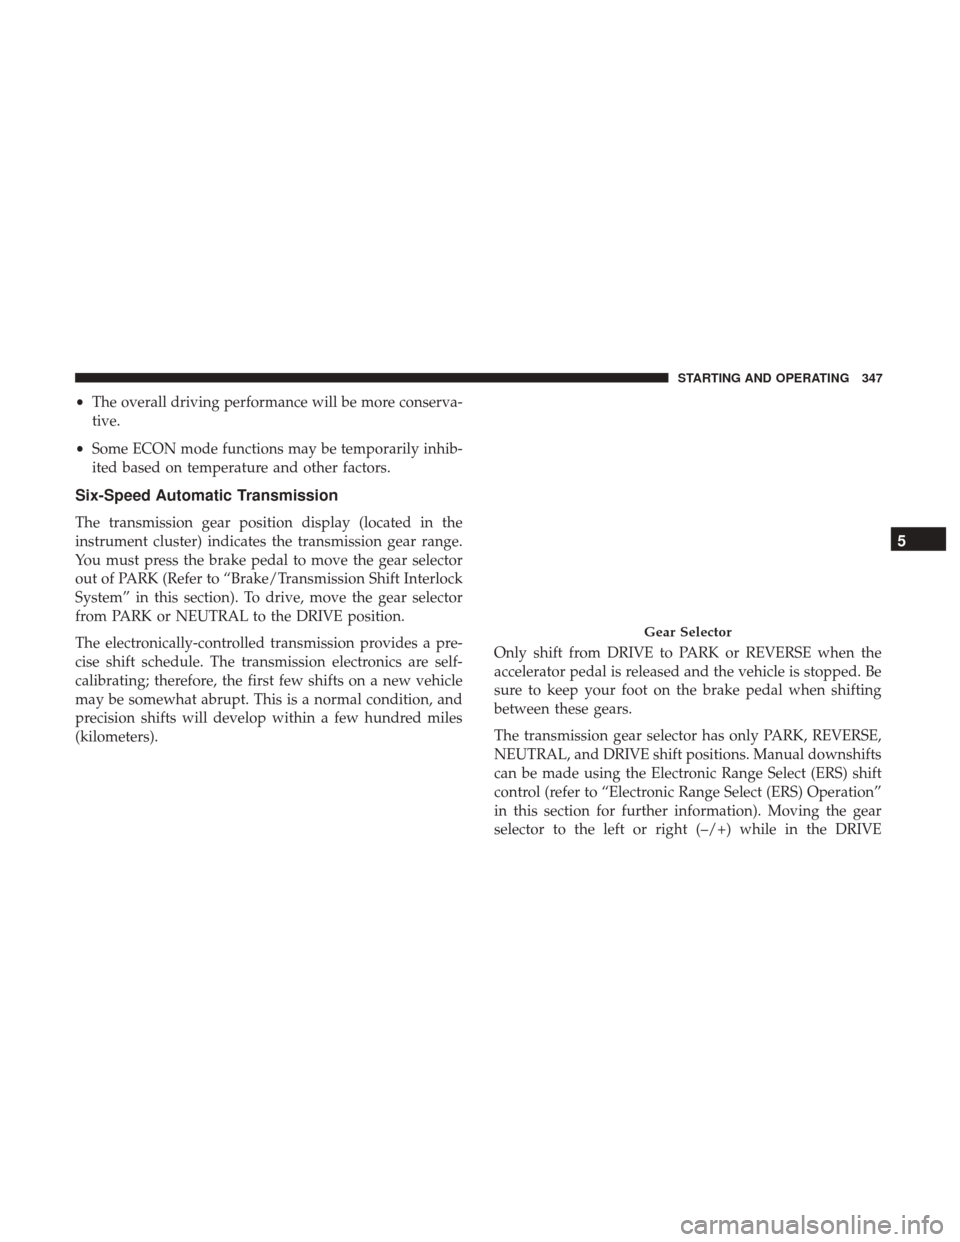
The transmission gear selector has only PARK, REVERSE,
NEUTRAL, and DRIVE shift positions. Manual downshifts
can be made using the Electronic Range Select (ERS) shift
control (refer to “Electronic Range Select (ERS) Operation”
in this section for further information). Moving the gear
selector to the left or right (–/+) while in the DRIVE
Gear Selector
5
STARTING AND OPERATING 347
Page 350 of 530
position will select the highest available transmission gear,
and will display that gear in the instrument cluster as 1, 2,
3, etc.
Gear Ranges
DO NOT race the engine when shifting from PARK or
NEUTRAL into another gear range.
NOTE:After selecting any gear range, wait a moment to
allow the selected gear to engage before accelerating. This
is especially important when the engine is cold.
PARK (P)
This range supplements the parking brake by locking the
transmission. The engine can be started in this range.
Never attempt to use PARK while the vehicle is in motion.
Apply the parking brake when leaving the vehicle in this
range.
When parking on a level surface, you may shift the
transmission into PARK first, and then apply the parking
brake.
When parking on a hill, apply the parking brake before
shifting the transmission to PARK, otherwise the load on
the transmission locking mechanism may make it difficult
to move the gear selector out of PARK. As an added precaution, turn the front wheels toward the curb on a
downhill grade, and away from the curb on an uphill
grade.
When exiting the vehicle, always:
•
Apply the parking brake.
• Shift the transmission into PARK.
• Turn the engine OFF.
• Remove the key fob.WARNING!
•Never use the PARK position as a substitute for the
parking brake. Always apply the parking brake fully
when parked to guard against vehicle movement and
possible injury or damage.
• Your vehicle could move and injure you and others if
it is not in PARK. Check by trying to move the gear
selector out of PARK with the brake pedal released.
Make sure the transmission is in PARK before leav-
ing the vehicle.
• It is dangerous to shift out of PARK or NEUTRAL if
the engine speed is higher than idle speed. If your
(Continued)
348 STARTING AND OPERATING
Page 354 of 530
NOTE:Even if the transmission can be reset, we recom-
mend that you visit your authorized dealer at your earliest
possible convenience. Your authorized dealer has diagnos-
tic equipment to determine if the problem could recur.
If the transmission cannot be reset, authorized dealer
service is required.
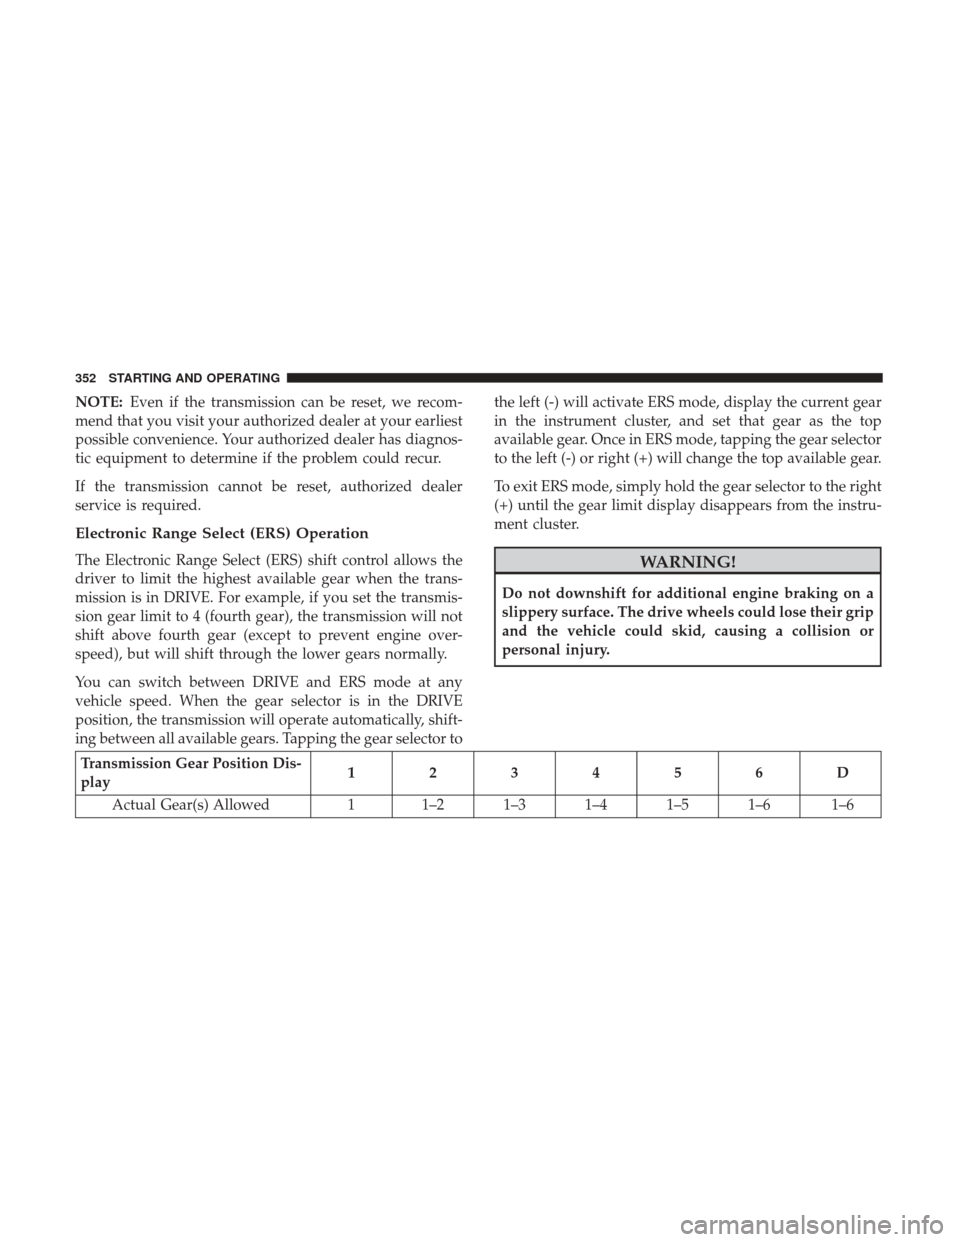
Electronic Range Select (ERS) Operation
The Electronic Range Select (ERS) shift control allows the
driver to limit the highest available gear when the trans-
mission is in DRIVE. For example, if you set the transmis-
sion gear limit to 4 (fourth gear), the transmission will not
shift above fourth gear (except to prevent engine over-
speed), but will shift through the lower gears normally.
You can switch between DRIVE and ERS mode at any
vehicle speed. When the gear selector is in the DRIVE
position, the transmission will operate automatically, shift-
ing between all available gears. Tapping the gear selector to the left (-) will activate ERS mode, display the current gear
in the instrument cluster, and set that gear as the top
available gear. Once in ERS mode, tapping the gear selector
to the left (-) or right (+) will change the top available gear.
To exit ERS mode, simply hold the gear selector to the right
(+) until the gear limit display disappears from the instru-
ment cluster.WARNING!
Do not downshift for additional engine braking on a
slippery surface. The drive wheels could lose their grip
and the vehicle could skid, causing a collision or
personal injury.
Transmission Gear Position Dis-
play
123456D
Actual Gear(s) Allowed 1 1–2 1–3 1–4 1–5 1–6 1–6
352 STARTING AND OPERATING
Page 359 of 530

WARNING!
Fluid level should be checked on a level surface and
with the engine off to prevent injury from moving
parts and to ensure accurate fluid level reading. Do not
overfill. Use only manufacturer’s recommended power
steering fluid.
If necessary, add fluid to restore to the proper indicated
level. With a clean cloth, wipe any spilled fluid from all
surfaces.
PARKING BRAKE
Before leaving the vehicle, make sure that the parking
brake is fully applied and place the gear selector in the
PARK position.
The foot operated parking brake is positioned below the
lower left corner of the instrument panel. To apply the park
brake, firmly push the park brake pedal fully. To release the
parking brake, press the park brake pedal a second time
and let your foot up as you feel the brake disengage. When the parking brake is applied with the ignition switch
in the ON position, the “Brake Warning Light” in the
instrument cluster will illuminate.
NOTE:
•
When the parking brake is applied and the automatic
transmission is placed in gear, the “Brake Warning
Light” will flash. If vehicle speed is detected, a chime
will sound to alert the driver. Fully release the parking
brake before attempting to move the vehicle.
• This light only shows that the parking brake is applied.
It does not show the degree of brake application.Parking Brake
5
STARTING AND OPERATING 357
Page 365 of 530
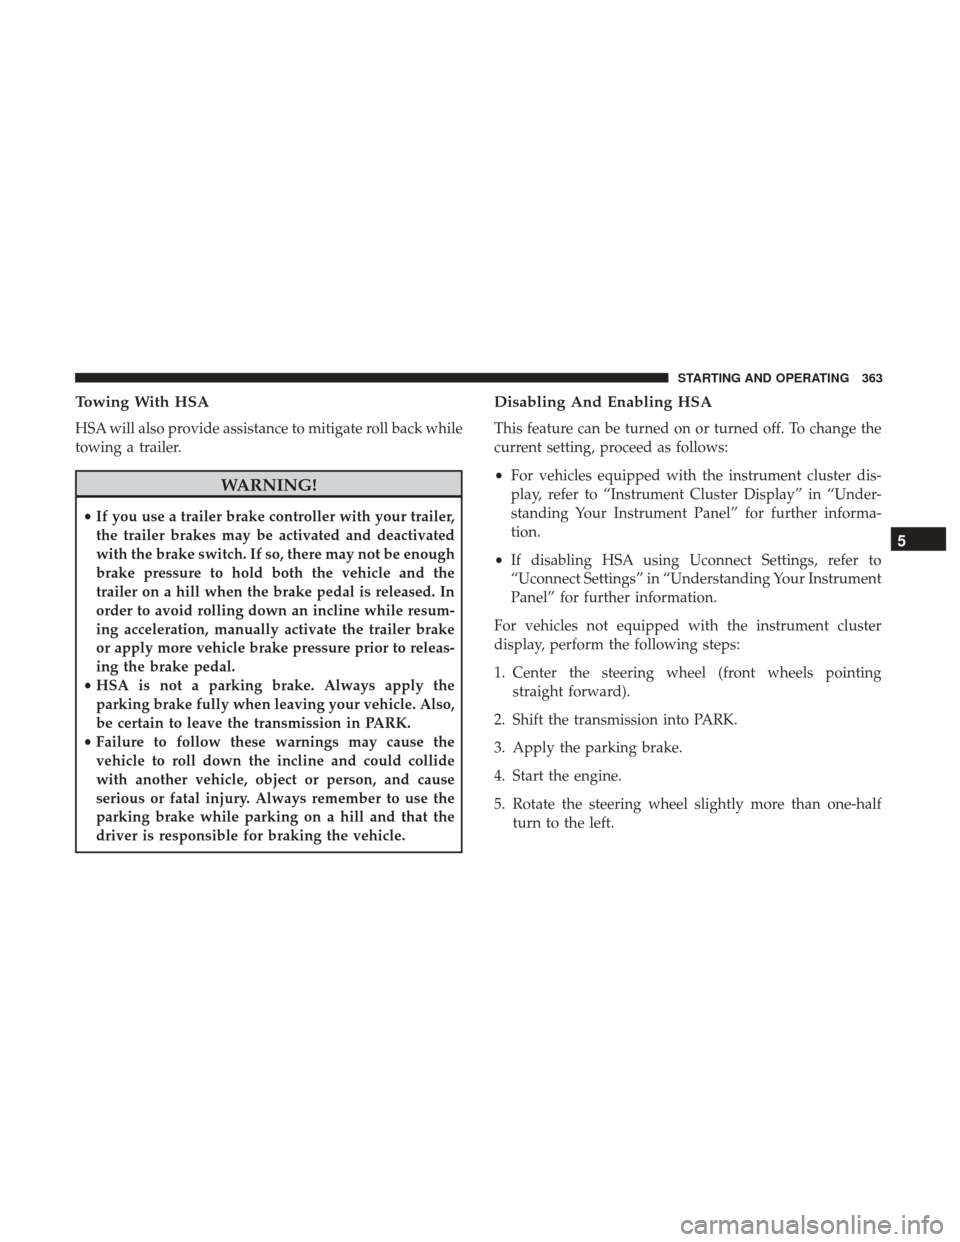
Towing With HSA
HSA will also provide assistance to mitigate roll back while
towing a trailer.
WARNING!
•If you use a trailer brake controller with your trailer,
the trailer brakes may be activated and deactivated
with the brake switch. If so, there may not be enough
brake pressure to hold both the vehicle and the
trailer on a hill when the brake pedal is released. In
order to avoid rolling down an incline while resum-
ing acceleration, manually activate the trailer brake
or apply more vehicle brake pressure prior to releas-
ing the brake pedal.
• HSA is not a parking brake. Always apply the
parking brake fully when leaving your vehicle. Also,
be certain to leave the transmission in PARK.
• Failure to follow these warnings may cause the
vehicle to roll down the incline and could collide
with another vehicle, object or person, and cause
serious or fatal injury. Always remember to use the
parking brake while parking on a hill and that the
driver is responsible for braking the vehicle.
Disabling And Enabling HSA
This feature can be turned on or turned off. To change the
current setting, proceed as follows:
• For vehicles equipped with the instrument cluster dis-
play, refer to “Instrument Cluster Display” in “Under-
standing Your Instrument Panel” for further informa-
tion.
• If disabling HSA using Uconnect Settings, refer to
“Uconnect Settings” in “Understanding Your Instrument
Panel” for further information.
For vehicles not equipped with the instrument cluster
display, perform the following steps:
1. Center the steering wheel (front wheels pointing straight forward).
2. Shift the transmission into PARK.
3. Apply the parking brake.
4. Start the engine.
5. Rotate the steering wheel slightly more than one-half turn to the left.
5
STARTING AND OPERATING 363