2017 CITROEN RELAY lock
[x] Cancel search: lockPage 98 of 292

96
using the touch screen audio
system
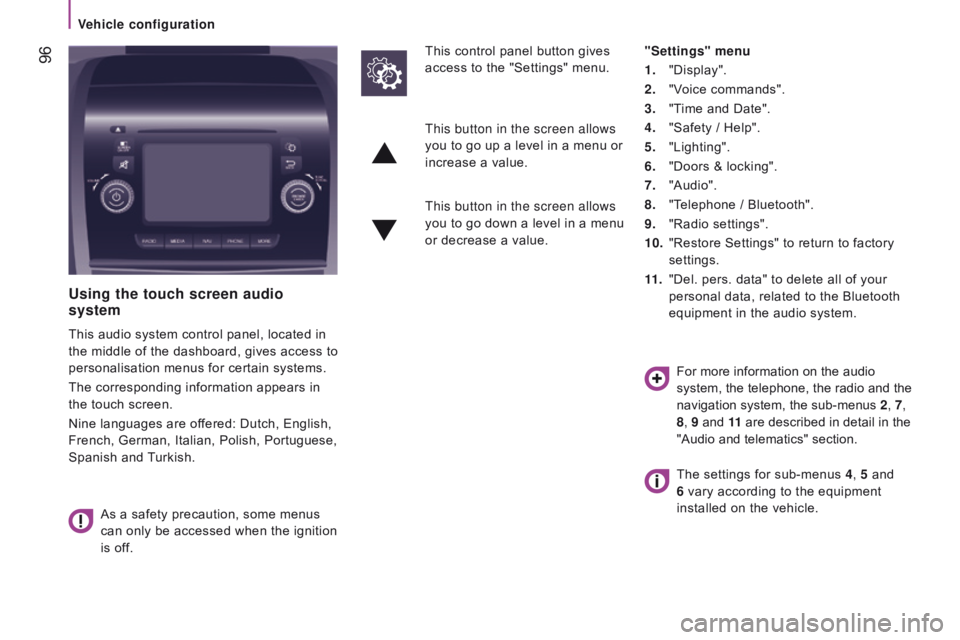
This audio system control panel, located in
the middle of the dashboard, gives access to
personalisation menus for certain systems.
The corresponding information appears in
the touch screen.
Nine languages are offered: Dutch, English,
French, German, Italian, Polish, Portuguese,
Spanish and Turkish.
As a safety precaution, some menus
can only be accessed when the ignition
is off. This control panel button gives
access to the "Settings" menu.
"Settings" menu
1.
"Display".
2.
"V
oice commands".
3.
"T
ime and Date".
4.
"Safety / Help".
5.
"Lighting".
6.
"Doors & locking".
7.
"Audio".
8.
"T
elephone / Bluetooth".
9.
"Radio settings".
10.
"Restore Settings" to return to factory
settings.
11 .
"Del. pers. data" to delete all of your
personal data, related to the Bluetooth
equipment in the audio system.
This button in the screen allows
you to go up a level in a menu or
increase a value.
This button in the screen allows
you to go down a level in a menu
or decrease a value.
For more information on the audio
system, the telephone, the radio and the
navigation system, the sub-menus 2, 7,
8 , 9 and 11 are described in detail in the
"Audio and telematics" section.
The settings for sub-menus 4 , 5 and
6 vary according to the equipment
installed on the vehicle.
Vehicle configuration
Page 99 of 292

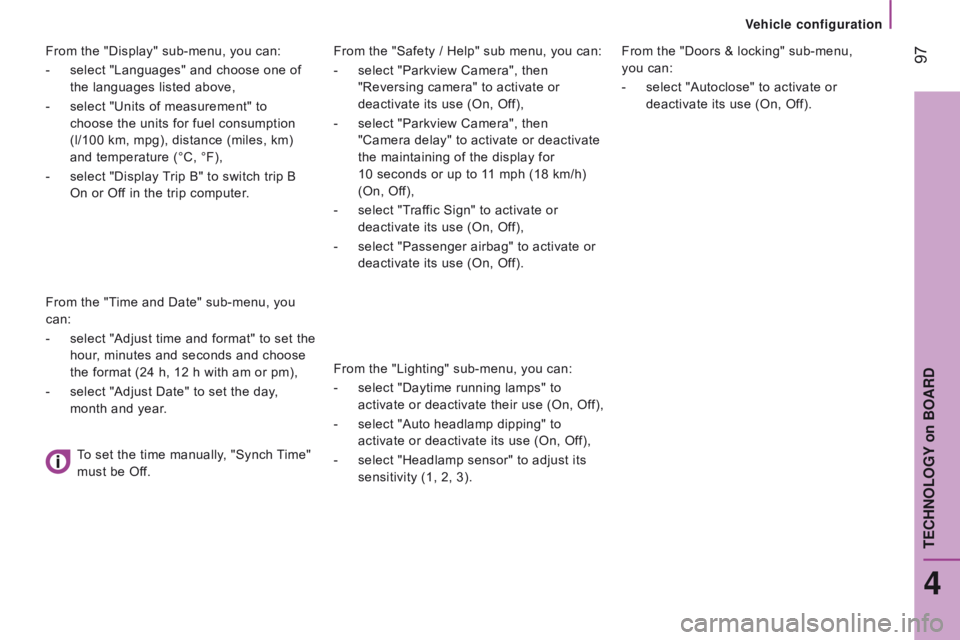
97From the "Safety / Help" sub menu, you can:
-
select "Parkview Camera", then
"Reversing camera" to activate or
deactivate its use (On, Off),
-
select "Parkview Camera", then
"Camera delay" to activate or deactivate
the maintaining of the display for
10
seconds or up to 11 mph (18 km/h)
(On, Off),
-
select "T
raffic Sign" to activate or
deactivate its use (On, Off),
-
select "Passenger airbag" to activate or
deactivate its use (On, Off).
From the "Lighting" sub-menu, you can:
-
select "Daytime running lamps" to
activate or deactivate their use (On, Off),
-
select "Auto headlamp dipping" to
activate or deactivate its use (On, Off),
-
select "Headlamp sensor" to adjust its
sensitivity (1, 2, 3). From the "Doors & locking" sub-menu,
you
can:
-
select "Autoclose" to activate or
deactivate its use (On, Off).
From the "Display" sub-menu, you can:
-
select "Languages" and choose one of
the languages listed above,
-
select "Units of measurement" to
choose the units for fuel consumption
(l/100
km, mpg), distance (miles, km)
and temperature (°C, °F),
-
select "Display
Trip B" to switch trip B
On or Off in the trip computer.
From the "Time and Date" sub-menu, you
can:
-
select "Adjust time and format" to set the
hour, minutes and seconds and choose
the format (24 h, 12 h with am or pm),
-
select "Adjust Date" to set the day
,
month and year.
To set the time manually, "Synch Time"
must be Off.
4
TECHNOLOGYon BOARD
V
Page 106 of 292

104
PAr KI n G B r AKEH A z A rd WA rn I n G LAMPS
Press this button, the direction indicators
flash.
They can operate with the ignition off.Applying
Pull the parking brake lever up to immobilise
your vehicle.
Check that the parking brake is applied
firmly before leaving the vehicle.Pull on the parking brake lever, only
with the vehicle stationary.
releasing
Pull the lever up slightly and press the
button to lower the parking brake lever.In the exceptional case of use of the
parking brake when the vehicle is
moving, apply the brake by pulling gently
to avoid locking the rear wheels (risk of
skidding).
If the parking brake is still on or has not
been released properly, this is indicated
by this warning lamp which comes on in
the instrument panel.
When parking on a slope, direct your wheels towards
the pavement and pull the parking brake lever up.
There is no advantage in engaging a gear after
parking the vehicle, particularly if the vehicle is
loaded.
The hazard warning lamps should only
be used in dangerous situations, when
stopping in an emergency or when
driving in unusual conditions.
driving safely
Page 107 of 292

105
HOrn
Press the centre of the steering wheel.
Anti-lock braking system and
electronic brake force distribution
Linked systems which improve the stability
and manoeuvrability of your vehicle when
braking, in particular on poor or slippery
surfaces.
Operation
The anti-lock braking system comes into
operation automatically when there is a risk
of wheel lock.
Normal operation of the ABS may make
itself felt by slight vibration of the brake
pedal accompanied by some noise.
When braking in an emergency
, press
very firmly without releasing the
pressure.
Switching off
These systems cannot be deactivated by
the
driver.
BrAKInG ASSIStA nc E SYS t EMS
Group of supplementary systems which help
you to obtain optimum braking in complete
safety in emergency situations:
-
anti-lock braking system (ABS),
-
electronic brake force distribution
(EBFD),
-
emergency braking assistance (EBA).
5
driving safely
SAFEtY
Page 108 of 292

106
Good practice
The ABS system does not provide shorter
braking distances. On very slippery surfaces
(black ice, oil...) the ABS can extend braking
distances. For emergency braking, press the
brake pedal hard and do not release it, even
on a slipper surface; you will then be able to
steer the vehicle and avoid an obstacle.
When replacing wheels (tyres and
rims), ensure that they conform to the
manufacturer's recommendations.Emergency braking assistance
System which, in an emergency, enables
you to obtain the optimum braking pressure
more quickly, thus reducing the stopping
distance.
Operation
It is triggered by the speed at which the
brake pedal is pressed.
The effect of this is a reduction in the
resistance of the pedal and an increase in
braking efficiency.
Switching off
This system cannot be deactivated by
the driver.
Operating fault
If this warning lamp comes on,
accompanied by an audible signal
and a message in the instrument
panel screen, it indicates a fault with
the anti-lock braking system which could result in
loss of control of the vehicle when braking.
For maximum braking efficiency, a
bedding-in period of around 300 miles
(500 kilometres) is needed. During this
period it is recommended that you avoid
harsh, repeated or prolonged braking. If this warning lamp comes on,
together with the ABS warning
lamp, accompanied by a message
in the instrument panel screen,
it indicates a fault with the electronic brake
force distribution which could result in loss
of control of the vehicle when braking. When braking in an emergency, press
firmly without releasing the pressure.
You must stop as soon as it is safe to do so.
In either case, contact a CITROËN dealer or
a qualified workshop.
driving safely
Page 120 of 292

118
cAB SEAt BELt S
If you install a front bench seat as
an accessory, it it must be fitted with
approved seat belts.
Fastening
Pull the strap in front of you with an even
movement, ensuring that it does not twist.
Engage the tongue in its buckle.
Check that the seat belt is fastened securely
and that the automatic locking system is
operating correctly by pulling the strap
rapidly.
unfastening
Press the red button on the buckle, the
seat belt reels in automatically but you are
advised to guide it.
As a safety measure, these operations
should not be carried out while the
vehicle is moving.
Seat belts not fastened
warning lamp
If the driver's seat belt is unfastened,
START mode of Stop & Start will not be
invoked. Engine restarting is only possible
with the ignition key. When the vehicle is started, this warning
lamp comes on, accompanied by an
increasing audible signal, if the driver and/
or the front passenger has not fastened their
seat belt.
The alert operates both for versions with
an individual passenger front seat and for
versions with a 2-seat front bench seat.
The driver's seat is fitted with a pyrotechnic
pretensioner and a force limiter.
On versions with a passenger's front airbag,
the passenger's seat is also fitted with a
pyrotechnic pretensioner and a force limiter.
The front bench seat is fitted with two seat
belts.
Height adjustment
For the driver or outer passenger seat,
squeeze the control at the adjustable top
mounting, slide the assembly, then release
at the desired position to lock it.
The height of the seat belt for the centre
seat cannot be adjusted.
Seat belts
Page 121 of 292

119
rEAr SEAt BELt S
The rear seats/bench seats are fitted with
three-point seat belts and inertia reels.
The centre seat has a seat belt guide and
inertia reel, solid with the seat back.
A carrier is provided at each outer seat to
allow the seat belt buckle to be secured
when not in use.
Good practice
The driver must ensure that passengers use
the seat belts correctly and that they are all
strapped in securely before moving off.
Wherever you are seated in the vehicle,
always fasten your seat belt, even for short
journeys.
The seat belts are fitted with an inertia reel
which automatically adjusts the length of the
strap to your size.
Do not use accessories (clothes pegs, clips,
safety pins, etc.) which allow the seat belt
straps to fit loosely.
You can unfasten the seat belt by pressing
the red button on the buckle. Guide the seat
belt after unfastening.
Ensure that the seat belt has reeled in
correctly after use.
After folding or moving a seat or a rear
bench seat, ensure that the seat belt has
reeled in correctly and that the buckle is
ready to accommodate the tongue.
The airbag warning lamp also
comes on if the pretensioners are
deployed. Contact a CITROËN
dealer or a qualified workshop.
In the event of an impact
Only for the front seats, and depending on
the nature and seriousness of the impact,
the pretensioning device may be deployed
before and independently of inflation of the
airbags. It instantly tightens the seat belts
against the body of the occupants.
Deployment of the pretensioners is
accompanied by a slight discharge of
harmless smoke and a noise, due to the
activation of the pyrotechnic cartridge
incorporated in the system.
The force limiter reduces the pressure of the
seat belt against the body of the occupants.
The pyrotechnic pretensioners are active
when the ignition is switched on and the
seat belt fastened.
The inertia reels are fitted with a device
which automatically locks the strap in the
event of a collision or emergency braking or
if the vehicle rolls over.
5
SAFEtY
Seat belts
Page 123 of 292

121
Impact resistance
Your vehicle has been designed to limit
the forces on the passenger compartment
as much as possible in the event of a
collision, the engine compartment adopts
a progressive deformation structure and
the front doors have been reinforced to
contribute to the rigidity of the whole.
Anti-theft protection
Your vehicle, in the van version, comprises
two zones with separate locking: the cab
and the load space.
Depending on the way in which it is used,
this function provides increased protection
both for your personal belongings and for
your merchandise.
An exterior protection alarm with anti-tilt
detection is available (as standard or as an
option) in certain countries.Details of these functions are given
in the "Ready to go - Front and rear
doors" section.
5
SAFEtY
Improved safety and security