Page 22 of 292
20
FrOnt dOOrSc hild lock
This prevents opening of the sliding side
door from the inside.
Press the control located on the edge of the
side door.
Use the corresponding button on the remote
control or use the key in the driver's door
lock barrel to unlock.
Pull the handle towards you.
SLIdInG SIdE dOOr
Take care not to obstruct the guide space
on the floor in order for the door to slide
correctly.
From outside
Pull the handle towards you then towards
the rear.
From inside
To unlock and open, push the handle
towards the rear.
Ensure that the door opens fully in order
for the latch at the bottom of the door to
engage.
To release and close, pull the handle while
sliding the door.
Do not drive with the sliding side door
open.
Access
Page 24 of 292

22
LOcKInG / unLOcKInG FrOM InSIdEd oor open warning lamp
If this warning lamp comes on,
check that all of the doors and
the bonnet are closed correctly.
reversing camera
With the vehicle stationary, opening the rear
doors activates the camera and sends the
image to the screen fitted in the cab.
cab and load space
Pressing permits electric central
locking and unlocking, when the
doors are closed.
The doors can still be opened from the
inside. If one of the doors is open or is not
closed correctly, the central locking
does not work. The indicator lamp in the control:
Load space
Press to lock or unlock the side
door and rear doors from the cab.
The indicator lamp remains on
when locked
Anti-intrusion security
When the vehicle is started, the
system locks the cab and load space
doors automatically when you reach
approximately
12 mph (20 km/h).
If none of the doors is opened during the
journey, the locking remains active.
Activation/deactivation of the system
The system setting is made with the MO
d E
button: in the "Autoclose" menu, select "ON"
or "OFF".
-
comes on when the doors
are locked and the ignition is
switched on,
-
then flashes when the doors
are locked when stationary
with the engine off.
The control is not active when the vehicle
has been locked using the remote control or
the key from the outside.
Good practice
If you decide to drive with the doors locked,
be aware that this could make access to the
vehicle by the emergency services more
difficult in an emergency. Refer to the "Technology on board -
Vehicle configuration" section.
Access
Page 42 of 292

40
IGnItIOn SWItcH
StOP position: steering lock.
The ignition is off.
MA
r position: ignition on.
Certain accessories can be used.
AV V position: starter.
The starter is operated.
Starting the engine
Engine immobiliser warning lamp
If this warning lamp comes
on, use another key and have
the faulty key checked by a
CITROËN dealer.
d
iesel pre-heating warning lamp
With the parking brake applied
and the gearbox in neutral, turn
the key to the MA
r position.
Wait for this warning lamp to go off then
operate the starter (AV V position) until the
engine starts.
The period of illumination of the warning
lamp depends on the climatic conditions.
d
oor or bonnet open warning lamp
If this warning lamp comes on,
check that the doors and bonnet
are closed correctly.
Switching off the engine
Stop the vehicle and apply the parking
brake, then, with the engine at idle, return
the key to the S
t
OP
position.
In low temperatures
In mountainous and/or cold areas, it is
advisable to use a "winter" type fuel suited
to low or minus temperatures.
Avoid attaching heavy objects to the
key or the remote control, which would
weigh down on its blade in the ignition
switch and could cause a malfunction.
It could adversely affect the deployment of
the front airbag. With the engine hot, the warning lamp
comes on for a few moments, you can start
the engine without waiting.
As soon as the engine is running, release
the key.
Starting and switching off
Page 43 of 292

41
BAttE rY S tA nd BY SYS t EM
If the vehicle is not to be used for a
prolonged period, such as for winter storage,
for example, it is strongly recommended that
the battery be placed on standby in order to
protect it and optimise its service life. To place the battery on standby:
-
Switch of
f the engine (S t
OP
position).
-
Press the red button, then turn the key
to the BA
tt
position.
The battery goes into standby about
7 minutes later.
This time is necessary to:
-
Allow the user to get out of the vehicle
and lock the doors with the remote
control.
-
Ensure that all of the vehicle's electrical
systems are deactivated.
When the battery is on standby,
access to the vehicle is only possible
by unlocking the vehicle using the key in the
lock barrel in the driver's door.
After placing the battery on standby
,
settings (time, date, radio station
presets...) are memorised. To take the battery out of standby:
-
T
urn the key to the MA r position.
-
Start
the engine normally (AV V
position).
2
rEAdY tO GO
Starting and switching off
Page 87 of 292
85
Controls located at the bottom
of the dashboard on the driver's
side allow the driver to switch the
passenger spotlamp on or off.
reading lamps
These are controlled by the switches.
The driver's switch controls both reading
lamps simultaneously.
The passenger switch controls either the
driver's reading lamp or the passenger's
reading lamp.
courtesy lamp
It can be activated by means of:
-
the switches located on the courtesy
lamp, with the ignition on -
runn I n G
position,
-
opening or closing one of the front
doors,
-
locking/unlocking the vehicle.
It switches of
f automatically:
-
if the switch is not pressed to the right or
to the left,
-
in all cases after 15 minutes, if the doors
remain open,
-
or when the ignition is switched on.
Overhead storage compartment
This is located above the sun visors.
Maximum load: approximately 20 kg.
3
EASE OF uSE and cOMFOrt
Life on board
Page 95 of 292
93Menu...Press... Sub-menu… Press... Select…c onfirm
and quit Enables you to...
1
Speed
beep ON
Increase
Activate / Deactivate the audible
signal indicating exceeding of
the programmed speed and
select the speed.
Decrease
OFF
2
Headlamp
sensor Increase
Set the sensitivity of the
sunshine sensor (1 to 3).
Decrease
3
Activation
Trip B Activate
Display a second distance
"Trip B".
Deactivate
4
T
raffic Sign Activate
Activate / Deactivate the reading
of traffic signs.
Deactivate
5
Setting the
time Hours/Minutes
Increase
Set the clock.
Decrease
Time format 24
Select the clock display mode.
12
6
Setting the
date Year/Month/
Day Activate
Set the date.
Deactivate
7
Autoclose While moving ON
Activate / Deactivate automatic
door locking above approx
12
mph (20 km/h)
OFF
4
tEcHnOLOGY on BOArd
Vehicle configuration
Page 98 of 292

96
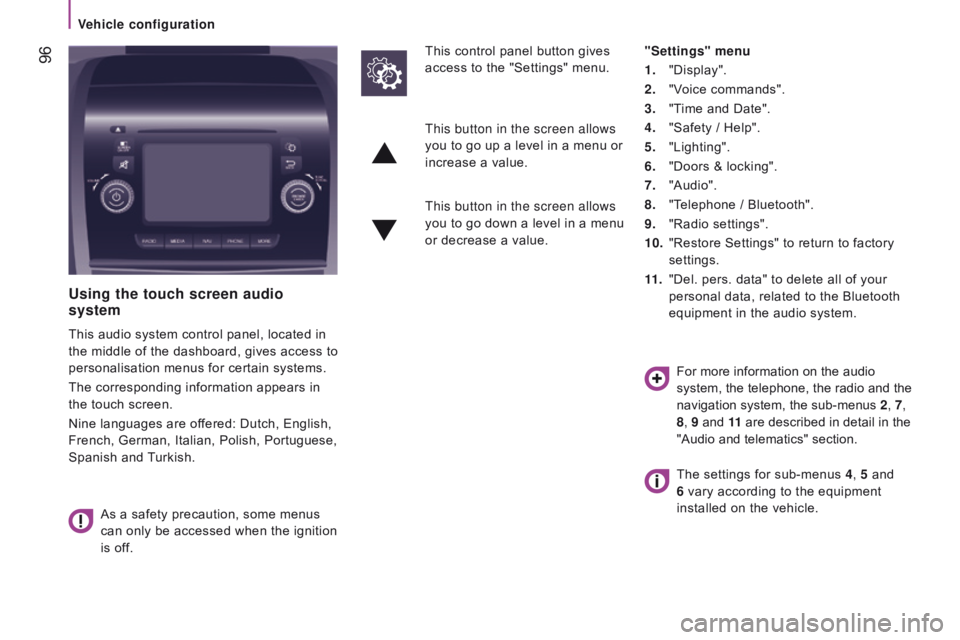
using the touch screen audio
system
This audio system control panel, located in
the middle of the dashboard, gives access to
personalisation menus for certain systems.
The corresponding information appears in
the touch screen.
Nine languages are offered: Dutch, English,
French, German, Italian, Polish, Portuguese,
Spanish and Turkish.
As a safety precaution, some menus
can only be accessed when the ignition
is off. This control panel button gives
access to the "Settings" menu.
"Settings" menu
1.
"Display".
2.
"V
oice commands".
3.
"T
ime and Date".
4.
"Safety / Help".
5.
"Lighting".
6.
"Doors & locking".
7.
"Audio".
8.
"T
elephone / Bluetooth".
9.
"Radio settings".
10.
"Restore Settings" to return to factory
settings.
11 .
"Del. pers. data" to delete all of your
personal data, related to the Bluetooth
equipment in the audio system.
This button in the screen allows
you to go up a level in a menu or
increase a value.
This button in the screen allows
you to go down a level in a menu
or decrease a value.
For more information on the audio
system, the telephone, the radio and the
navigation system, the sub-menus 2, 7,
8 , 9 and 11 are described in detail in the
"Audio and telematics" section.
The settings for sub-menus 4 , 5 and
6 vary according to the equipment
installed on the vehicle.
Vehicle configuration
Page 99 of 292

97From the "Safety / Help" sub menu, you can:
-
select "Parkview Camera", then
"Reversing camera" to activate or
deactivate its use (On, Off),
-
select "Parkview Camera", then
"Camera delay" to activate or deactivate
the maintaining of the display for
10
seconds or up to 11 mph (18 km/h)
(On, Off),
-
select "T
raffic Sign" to activate or
deactivate its use (On, Off),
-
select "Passenger airbag" to activate or
deactivate its use (On, Off).
From the "Lighting" sub-menu, you can:
-
select "Daytime running lamps" to
activate or deactivate their use (On, Off),
-
select "Auto headlamp dipping" to
activate or deactivate its use (On, Off),
-
select "Headlamp sensor" to adjust its
sensitivity (1, 2, 3). From the "Doors & locking" sub-menu,
you
can:
-
select "Autoclose" to activate or
deactivate its use (On, Off).
From the "Display" sub-menu, you can:
-
select "Languages" and choose one of
the languages listed above,
-
select "Units of measurement" to
choose the units for fuel consumption
(l/100
km, mpg), distance (miles, km)
and temperature (°C, °F),
-
select "Display
Trip B" to switch trip B
On or Off in the trip computer.
From the "Time and Date" sub-menu, you
can:
-
select "Adjust time and format" to set the
hour, minutes and seconds and choose
the format (24 h, 12 h with am or pm),
-
select "Adjust Date" to set the day
,
month and year.
To set the time manually, "Synch Time"
must be Off.
4
TECHNOLOGYon BOARD
V