Page 386 of 774
384
1
2
2
2
Spacetourer-VP_en_Chap10b_NAC-1_ed01-2016
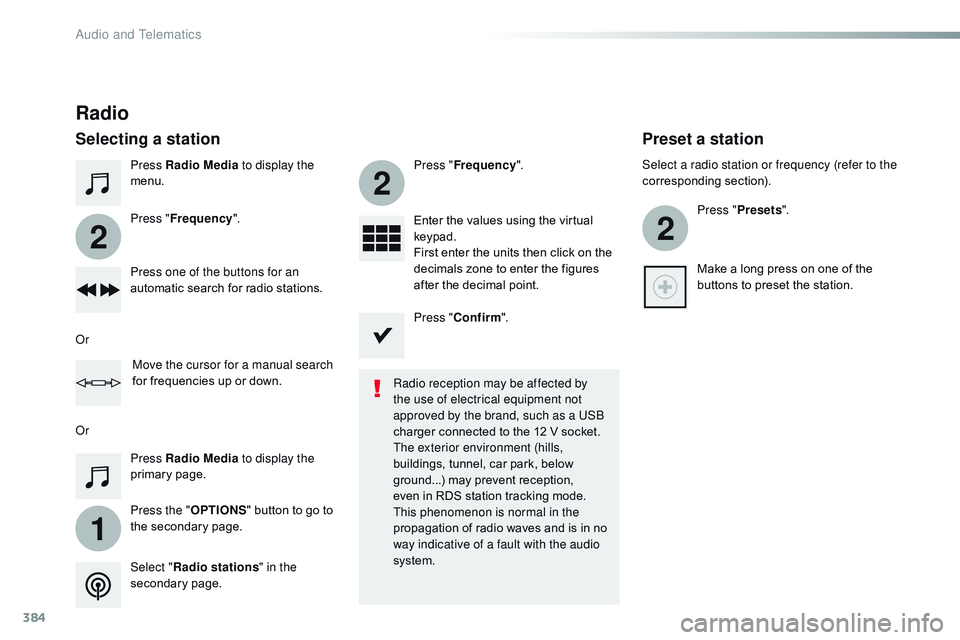
Press Radio Media to display the
menu.
Press the " OPTIONS" button to go to
the secondary page. Press " Frequency ". Press "
Frequency ".
Enter the values using the virtual
keypad.
First enter the units then click on the
decimals zone to enter the figures
after the decimal point.
Press one of the buttons for an
automatic search for radio stations.
Press Radio Media
to display the
primary page.
Radio
Selecting a station
Radio reception may be affected by
the use of electrical equipment not
approved by the brand, such as a USB
charger connected to the 12 V socket.
The exterior environment (hills,
buildings, tunnel, car park, below
ground...) may prevent reception,
even in RDS station tracking mode.
This phenomenon is normal in the
propagation of radio waves and is in no
way indicative of a fault with the audio
system.
Select " Radio stations " in the
secondary page.
Or
Or
Move the cursor for a manual search
for frequencies up or down. Select a radio station or frequency (refer to the
corresponding section).
Press "Presets ".
Make a long press on one of the
buttons to preset the station.
Preset a station
Press " Confirm ".
Audio and Telematics
Page 401 of 774
399
2
3
Spacetourer-VP_en_Chap10b_NAC-1_ed01-2016
on the steering mounted button.
Using the telephone is not
recommended while driving.
Park the vehicle.
Make the call using the steering
mounted controls.
Making a call
Calling a new number
Press Telephone
to display the
primary page.
Enter the phone number using the
digital keypad.
Press " Call" to start the call.
Calling a contact
Press Telephone to display the
primary page.
Or make a long press
on the steering mounted TEL button.
Select " Contact ".
Select the desired contact from the list offered. Select "Call".
Calling a recently used number
Press Telephone to display the
primary page.
Make a long press
Select " Calls".
Select the desired contact from the list offered. It is always possible to make a call
directly from the telephone; as a safety
measure, first park the vehicle.
Or
.
Audio and Telematics
Page 410 of 774
408
3
4
5
6
7
1
19
Spacetourer-VP_en_Chap10b_NAC-1_ed01-2016
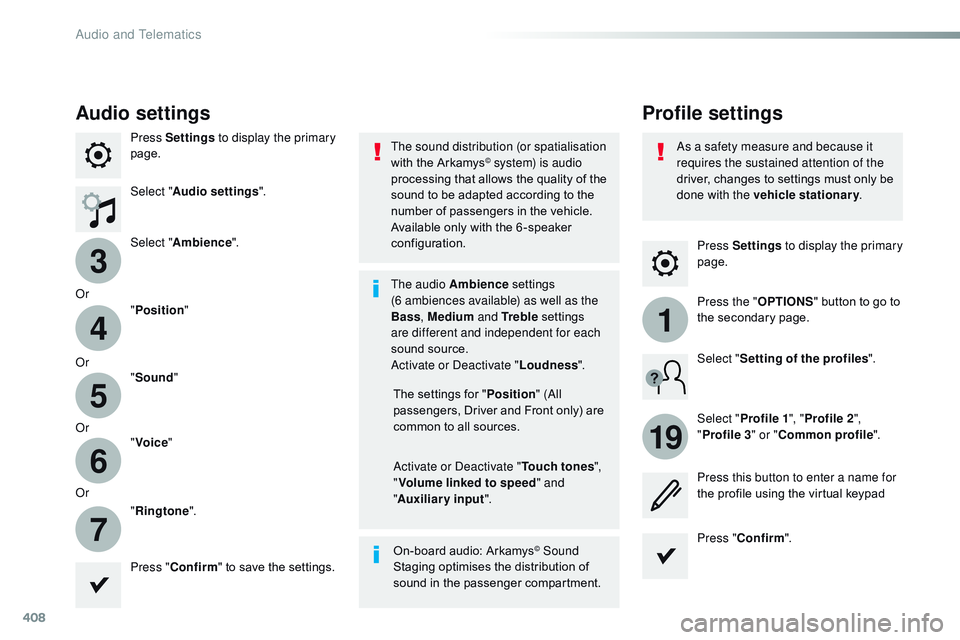
Press Settings to display the primary
page.
Profile settings
Audio settings
Press Settings to display the primary
page.
Select " Audio settings ".
Select " Ambience ".
Or "Position "
Or "Sound "
Or "Voice "
Or "Ringtone ".
On-board audio: Arkamys
© Sound
Staging optimises the distribution of
sound in the passenger compartment. The settings for " Position" (All
passengers, Driver and Front only) are
common to all sources.
Activate or Deactivate " Touch tones",
" Volume linked to speed " and
" Auxiliary input ".
The sound distribution (or spatialisation
with the Arkamys
© system) is audio
processing that allows the quality of the
sound to be adapted according to the
number of passengers in the vehicle.
Available only with the 6 -speaker
configuration.
The audio Ambience settings
(6
ambiences available) as well as the
Bass , Medium and Tr e b l e settings
are different and independent for each
sound source.
Activate or Deactivate " Loudness".
Press " Confirm " to save the settings. Press "
Confirm ".
Press the "
OPTIONS" button to go to
the secondary page.
Select " Profile 1 ", "Profile 2 ",
" Profile 3 " or "Common profile ".
Select "
Setting of the profiles ".
Press this button to enter a name for
the profile using the virtual keypad
As a safety measure and because it
requires the sustained attention of the
driver, changes to settings must only be
done with the vehicle stationary
.
Audio and Telematics
Page 413 of 774
411
1
17
18
Spacetourer-VP_en_Chap10b_NAC-1_ed01-2016
Press Settings to display the primary
page.
Press the " OPTIONS" button to go to
the secondary page.
Select "
Date".
Select "Time".
Select "
Setting the time- date ".
Adjustment of the time and date is only
available if synchronisation with GPS is
deactivated.
The change between winter and
summer time is done by changing the
time zone. The system does not automatically
manage the change between winter
and summer time (depending on
c ountr y).
Setting the time
Press this button to define the date.
Press this button to adjust the time
using the virtual keypad.
Press "
Confirm ". Press "
Confirm ".
Press " Confirm ".
Press this button to define the time
zone.
Select the display format of the date.
Select the display format for
the
time (12h / 24h).
Activate or deactivate
synchronisation with GPS (UTC).
.
Audio and Telematics
Page 429 of 774
427
11
1
7
8
Spacetourer-VP_en_Chap10c_RCC-1_ed01-2016
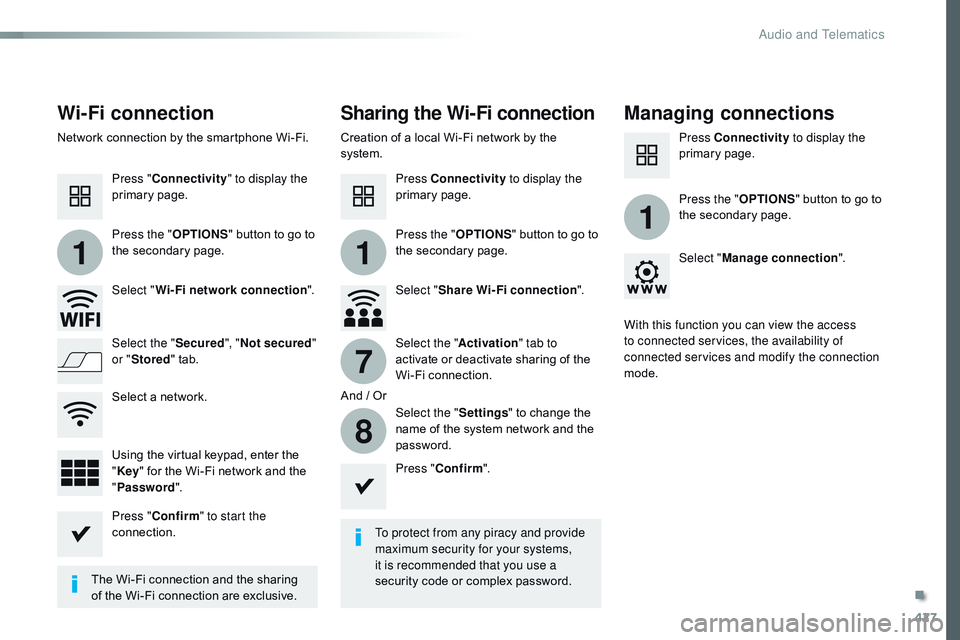
Wi-Fi connectionSharing the Wi-Fi connectionManaging connections
To protect from any piracy and provide
maximum security for your systems,
it is recommended that you use a
security code or complex password.
The Wi-Fi connection and the sharing
of the Wi-Fi connection are exclusive. Press "
Confirm ".
Press " Confirm " to start the
connection. Press " Connectivity " to display the
primary page.
Network connection by the smartphone Wi-Fi. Creation of a local Wi-Fi network by the
system.
Press Connectivity to display the
primary page. Press Connectivity
to display the
primary page.
Press the " OPTIONS" button to go to
the secondary page. Press the "
OPTIONS" button to go to
the secondary page. Press the "
OPTIONS" button to go to
the secondary page.
Select " Wi-Fi network connection ".Select "Share Wi-Fi connection ".Select "
Manage connection ".
And / Or
Select the "
Secured", "Not secured "
or " Stored " tab. Select the "
Activation" tab to
activate or deactivate sharing of the
Wi-Fi connection.
Select the " Settings" to change the
name of the system network and the
password. With this function you can view the access
to connected services, the availability of
connected services and modify the connection
mode.
Using the virtual keypad, enter the
" Key " for the Wi-Fi network and the
" Password ".
Select a network.
.
Audio and Telematics
Page 442 of 774
440
1
2
2
2
Spacetourer-VP_en_Chap10c_RCC-1_ed01-2016
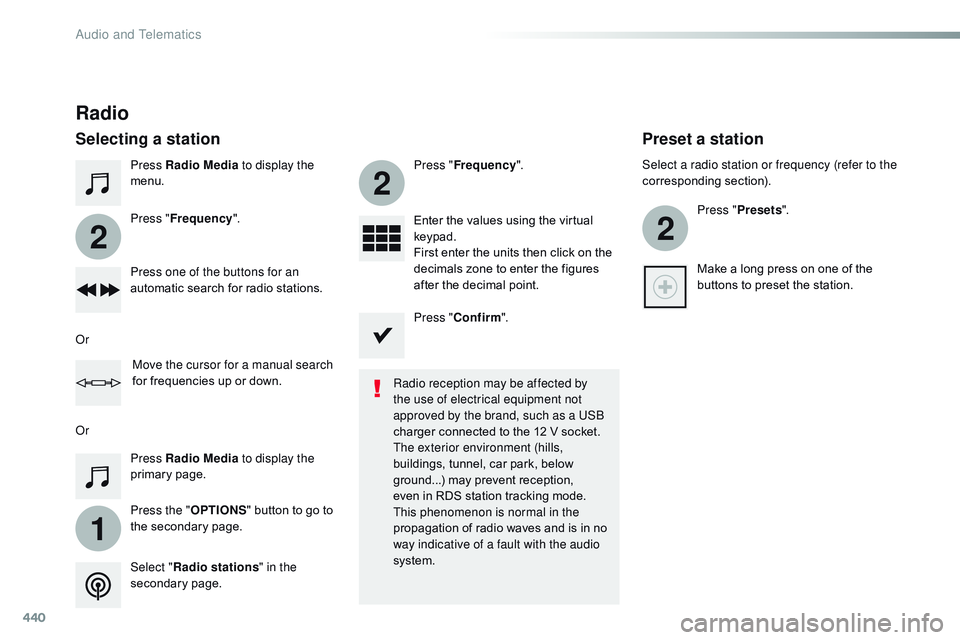
Press Radio Media to display the
menu.
Press the " OPTIONS" button to go to
the secondary page. Press " Frequency ". Press "
Frequency ".
Enter the values using the virtual
keypad.
First enter the units then click on the
decimals zone to enter the figures
after the decimal point.
Press one of the buttons for an
automatic search for radio stations.
Press Radio Media
to display the
primary page.
Radio
Selecting a station
Radio reception may be affected by
the use of electrical equipment not
approved by the brand, such as a USB
charger connected to the 12 V socket.
The exterior environment (hills,
buildings, tunnel, car park, below
ground...) may prevent reception,
even in RDS station tracking mode.
This phenomenon is normal in the
propagation of radio waves and is in no
way indicative of a fault with the audio
system.
Select " Radio stations " in the
secondary page.
Or
Or
Move the cursor for a manual search
for frequencies up or down. Select a radio station or frequency (refer to the
corresponding section).
Press "Presets ".
Make a long press on one of the
buttons to preset the station.
Preset a station
Press " Confirm ".
Audio and Telematics
Page 457 of 774
455
2
3
Spacetourer-VP_en_Chap10c_RCC-1_ed01-2016
on the steering mounted button.
Using the telephone is not
recommended while driving.
Park the vehicle.
Make the call using the steering
mounted controls.
Making a call
Calling a new number
Press Telephone
to display the
primary page.
Enter the phone number using the
digital keypad.
Press " Call" to start the call.
Calling a contact
Press Telephone to display the
primary page.
Or make a long press
on the steering mounted TEL button.
Select " Contact ".
Select the desired contact from the list offered. Select "Call".
Calling a recently used number
Press Telephone to display the
primary page.
Make a long press
Select " Calls".
Select the desired contact from the list offered. It is always possible to make a call
directly from the telephone; as a safety
measure, first park the vehicle.
Or
.
Audio and Telematics
Page 466 of 774
464
3
4
5
6
7
1
19
Spacetourer-VP_en_Chap10c_RCC-1_ed01-2016
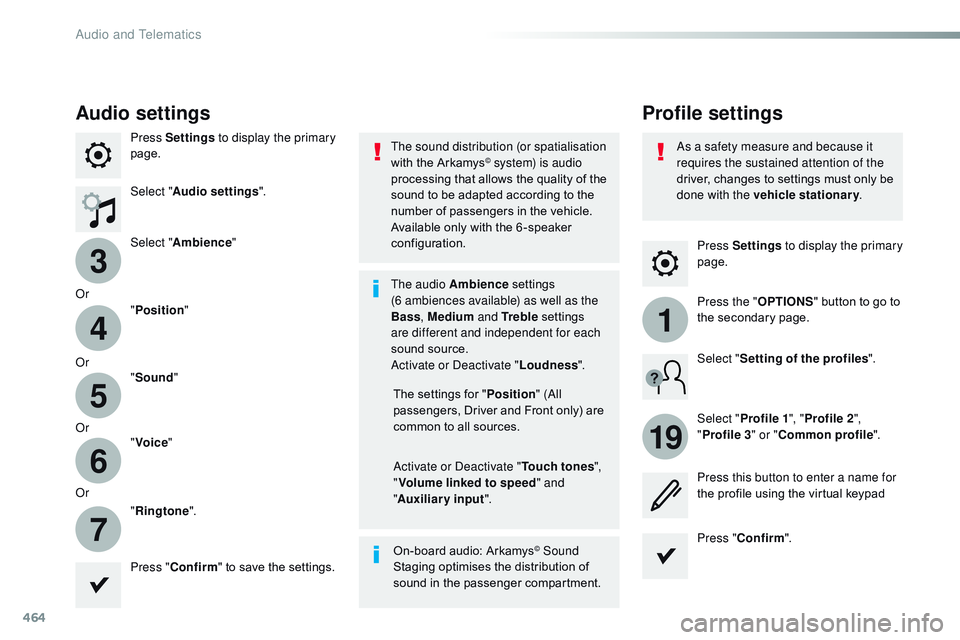
Press Settings to display the primary
page.
Profile settings
Audio settings
Press Settings to display the primary
page.
Select " Audio settings ".
Select " Ambience "
Or "Position "
Or "Sound "
Or "Voice "
Or "Ringtone ".
On-board audio: Arkamys
© Sound
Staging optimises the distribution of
sound in the passenger compartment. The settings for " Position" (All
passengers, Driver and Front only) are
common to all sources.
Activate or Deactivate " Touch tones",
" Volume linked to speed " and
" Auxiliary input ".
The sound distribution (or spatialisation
with the Arkamys
© system) is audio
processing that allows the quality of the
sound to be adapted according to the
number of passengers in the vehicle.
Available only with the 6 -speaker
configuration.
The audio Ambience settings
(6
ambiences available) as well as the
Bass , Medium and Tr e b l e settings
are different and independent for each
sound source.
Activate or Deactivate " Loudness".
Press " Confirm " to save the settings. Press "
Confirm ".
Press the "
OPTIONS" button to go to
the secondary page.
Select " Profile 1 ", "Profile 2 ",
" Profile 3 " or "Common profile ".
Select "
Setting of the profiles ".
Press this button to enter a name for
the profile using the virtual keypad
As a safety measure and because it
requires the sustained attention of the
driver, changes to settings must only be
done with the vehicle stationary
.
Audio and Telematics