Page 49 of 174

47
C-Zero_en_Chap03_ergonomie-et-confort_ed01-2016
Remote control*
This is used for remote control of the following
functions:
-
C
heck of the vehicle charge status.
-
P
rogramming of charging: start time and
duration of charging.
-
A
ctivation of the climate control functions
(heating, air conditioning, demisting).
In order to programme charging, the
following conditions must be met.
-
P
lace the drive selector in
position
P.
-
P
lace the switch on LOCK .
-
C
onnect the vehicle using the
normal charging cable.Buttons Display
1. On/Off, transmission of data.
2. M
ODE: used to scroll through the various
functions available (start of charging,
duration of charging, interior temperature).
3.
I
mmediate charging of the vehicle
(resetting of the programming values to
ze r o).
4.
S
ettings. 1.
D
ata transmission status indicator lamp.
2.
C
harging indicator lamp.
3.
F
ault warning lamp.
4.
B
attery charge status warning lamp.
5.
C
harging programming functions status
indicator lamp.
6.
C
harging time remaining indicator.
7.
I
nterior temperature function status
indicator lamp.
The remote control has a range of
approximately 100 metres.
* Depending on equipment.
3
Ease of use and comfort
Page 50 of 174

48
C-Zero_en_Chap03_ergonomie-et-confort_ed01-2016
If there is no action on the remote
control within 30 seconds, it will switch
off automatically.If the start of charging is programmed
without programming the duration of
charging, the battery will be charged
fully.The duration of charging can be
programmed between 0.5 and
19.5
hours. However, you can also
select the duration "-h": in this case,
charging will stop when the battery
is fully charged. This duration is the
default value.
On / Off Programming the duration
of charging
This function is used to programme the
duration of charging of your vehicle.
Switch on the remote control.
Press the MODE button to select the
programming of the duration of charging.
Extend the aerial.
Press and hold this button to switch
the remote control on or off.
Programming the start of
charging
This function is used to set the time remaining
before starting the charging of your vehicle.
(e.g. it is 19:00 at the time of programming, the
programmed charging start time is 2:00 hours:
charging will begin at 21:00).
Switch on the remote control.
This symbol is displayed on the screen.
Use the arrows to set the charging start time:
each press changes the time in steps of half
an hour.
Press the on/off button briefly to transmit the
data to the vehicle.
This symbol is displayed on the screen.
Use the arrows to set the charging time: each
press changes the time in steps of half an hour.
Press the on/off button briefly to transmit the
data to the vehicle.
If the duration of charging is
programmed without programming
the start time, the battery will be
charged immediately for the duration
programmed.
Ease of use and comfort
Page 51 of 174

49
C-Zero_en_Chap03_ergonomie-et-confort_ed01-2016
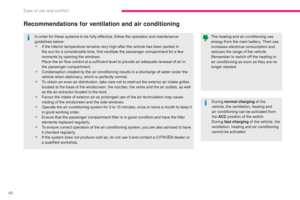
In order to programme the heating, air
conditioning or demisting functions, the
following conditions must be met.
-
T
he drive selector is in position P .
-
T
he switch is on LOCK .
-
T
he vehicle is connected using the
normal charging cable.
-
A
ll of the doors are closed correctly.
-
T
he battery charge level is
sufficient (one bar minimum).
Cancelling the programmed
settings
Using the remote control
Using the switch
Place the vehicle's switch in the ON position
then return it to the LOCK position.
Programming the interior temperature
Activation of the functions
Switch on the remote control.
Press the MODE button to select the interior
temperature programming.
This function is used to programme the
switching on of:
- t
he heating.
-
t
he air conditioning.
-
t
he demisting.
Press the immediate charging button,
then press the on/off button briefly to
transmit the data to the vehicle.
One of these symbols is displayed on the
screen. It indicates the current status of the
interior temperature.
Use the arrows to select the function required.
Press the on/off button briefly to transit the data
to the vehicle.
The progammed values set using
the remote control are cancelled
automatically each time the vehicle is
started.
For maximum effectiveness of
the programming of the interior
temperature, ensure that all of the
vehicle's windows are closed.
3
Ease of use and comfort
Page 52 of 174

50
C-Zero_en_Chap03_ergonomie-et-confort_ed01-2016
Battery charge level
indicator
You can check the charge status of the main
battery using the remote control.
Cooling: Switching on of the air
conditioning and ventilation in the
passenger compartment, via the
central vents.
Heating: Switching on of the heating
in the passenger compartment and
of the ventilation via the lower vents.
The heating of the driver's seat will
also be activated, if the function was
activated previously.
Demisting: Switching on of the
de-icing of the rear screen and
exterior mirrors (depending
on version), of the ventilation
and heating in the passenger
compartment, via the side vents,
of the heating of the driver's
seat, if the function was activated
previously.
Deactivation of the interior
temperature programming
function and cancellation of the
programmed settings. Battery fully charged.
Battery charge low. Battery at half charge.
Battery flat.
Do not discard the old batteries, take
them to an approved collection point.
Changing the batteriesFunctions available
Batter y type: CR2032
Unclip the housing then replace the 2 batteries.
Ease of use and comfort
Page 53 of 174
51
C-Zero_en_Chap03_ergonomie-et-confort_ed01-2016
Operating faults
Remote control
Indicator lampsStatus CausesActions / Observations
Flashes within approximately 10 seconds
after the remote control is switched on. A fault has occurred.
Switch the remote control off, then on
again.
Flashes within approximately 1 second
after the remote control is switched on. Electrical inter ference is preventing the
operation of the remote control or the
transmission of data.Move away from the sources of
interference.
Flashes within approximately 10 seconds
after the remote control is switched on. The aerial has not been extended. Extend the aerial.
The range of the remote control has
been exceeded.Move closer to the vehicle.
The switch is not in the LOCK position. Place the switch in the LOCK position.
3
Ease of use and comfort
Page 54 of 174

52
C-Zero_en_Chap03_ergonomie-et-confort_ed01-2016
Programming the charging
Programming the interior temperature
Indicator lampsStatus CausesActions / Observations
Flashes for a few seconds. The charging cable is not connected
c o r r e c t l y.Check the cable.
There is a problem with your electrical
installation. Have your electrical installation checked
by a professional.
Flashes for a few seconds. The charge of the main battery is not
sufficient.Charge the battery then start the
programming again.
Flashes for a few seconds. One of the vehicle's doors is open.Close all of the doors then start the
programming again.
The drive selector is not in position P .Place the drive selector in position P .
Indicator lamps
Status CausesActions / Observations
Flashes for a few seconds. The charging cable is not connected
c o r r e c t l y.Check the cable.
There is a problem with your electrical
installation. Have your electrical installation checked
by a professional.
Flashes for a few seconds. The drive selector is not in position P.Place the drive selector in position P .
Ease of use and comfort
Page 55 of 174

53
C-Zero_en_Chap04_eclairage-et-visibilite_ed01-2016
Lighting controls
Main lighting
The various front and rear lamps of the vehicle
are designed to adapt the lighting progressively
in relation to the climatic conditions and so
ensure the best visibility for the driver:
-
s
idelamps, to be seen,
-
d
ipped beam headlamps to see without
dazzling other drivers,
-
m
ain beam headlamps to see clearly when
the road is clear.
Additional lighting
Other lamps are provided to fulfil the
requirements of particular driving conditions:
-
a r
ear foglamp to be seen from a distance,
-
f
ront foglamps for even better visibility,
-
d
aytime running lamps to be seen during
the day.
Selection ring for main lighting
mode
Turn the ring to position the symbol required
facing the mark.
Automatic illumination of headlamps. Sidelamps only.
Dipped or main beam headlamps.
Stalk for switching headlamp beam
Pull the stalk to switch the lighting between
dipped / main beam headlamps.
In the lighting off and sidelamps modes, the
driver can switch on the main beam headlamps
temporarily ("headlamp flash") by maintaining a
pull on the stalk.
Displays
Illumination of the corresponding indicator lamp
in the instrument panel confirms the lighting
switched on.
Lighting off.
4
Lighting and visibility
Page 56 of 174

54
C-Zero_en_Chap04_eclairage-et-visibilite_ed01-2016
Front and rear foglamps
Foglamps selection ring.
The foglamps operate with the sidelamps and
dipped and main beam headlamps.Front and rear foglamps.
In good or rainy weather, both day
and night, the front foglamps and the
rear foglamp is prohibited. In these
situations, the power of its beam may
dazzle other drivers.
Do not forget to switch off the front
foglamps and the rear foglamp when
they are no longer necessary.
Lighting on reminder
There is an audible signal when the
driver's door is opened, to warn the
driver if the vehicle lighting is on, with
the ignition off.
Switching off the lighting stops the
audible signal.
F
T
o switch on the front foglamps, turn the
ring for wards once.
F
T
o switch on the rear foglamp, turn the ring
for wards twice.
F
T
o switch off the rear foglamp, turn the ring
rear wards twice.
F
T
o switch off the front foglamps, turn the
ring rear wards once.
The ring returns to its initial position
automatically.
The rear foglamp is switched off automatically
when you switch off the sidelamps, or the
dipped or main beam headlamps.
Lighting and visibility