Page 105 of 174
103
Using a public charging point for normal charging
Some public charging points include a charging cable.
In this case, use the cable provided.
In Mode 3, regardless of the power of the charging point, charging will be limited to 16 A maximum. For more information on the charging times,
refer to the Motor and main battery section.
Several types of electrical socket may be available for charging your vehicle.
Before starting the charging procedure, use the table below to identify the correct type of socket and use the corresponding charging cable.
Domestic power point "Mode 3 - Type 2" socket "Mode 3 - Type 3" socket
"Mode 2" cable
(supplied with your vehicle) "Mode 3 - Type 2" cable
(available as an accessory) "Mode 3 - Type 3" cable
(available as an accessory)
7
Practical information
Page 106 of 174

104
Check the compatibility of the charging
station and its charging cable with your
vehicle.F
P
ress latch 4 to open the socket cover.
F
E
nsure that there is no foreign body on the
vehicle's charging socket.
Fast charging*
F Apply the parking brake and put the drive selector in position P .
F
S
witch off all electrical consumers and turn
the ignition switch to the "LOCK" position.
F
P
ull lever 3 , located alongside the driver's
seat, door side, to open the access flap for
the fast charging socket (left-hand side of
the vehicle). Do not touch the metal end of the fast
charging socket or of the charging
cable.
Risk of electrocution and/or faults.
F
C
onnect the charging cable of the charging
station to the vehicle following the
instructions on use of the station.
If you wear a pacemaker
or other electrical medical
device, you must not use fast
charging.
Avoid going near a fast charging point.
However, should this occur, leave the area as
quickly as possible.
If necessary, ask someone else to charge
your vehicle.
* Depending on equipment.
Practical information
Page 107 of 174

105
F Check that the charging warning lamp in the instrument panel is
on fixed.
Fast charging stops automatically
when the main battery is around 80%
charged. It is possible to attain a charge
of 100% by restarting the procedure.
However, the time taken by this
additional charge will be relatively long,
as the charging rate is reduced. During fast charging, the vehicle's air
conditioning may start automatically,
if needed to cool the main battery. It is
therefore per fectly normal to hear the
noise of a fan running from outside the
vehicle and to see a puddle of water
form under the vehicle. As a safety measure, the motor will
not start when the charging cable is
connected to the vehicle's socket.
Also, any attempt to start the motor
interrupts the charging procedure. It
will then be necessary to disconnect
and reconnect the charging cable to
the vehicle's socket, then to restart the
charging following the instructions for
using the charging station.If the exterior temperature is
below
0 °C, the charging time may be
longer.
If the exterior temperature is
below
-25 °C, charging may not be
possible.
If this is not the case, charging has not started;
check the operating instructions for the
charging station. The charging warning lamp in the instrument
panel goes off when charging is complete.
F
D
isconnect the charging cable following
the instructions for the charging terminal.
F
C
lose the charging socket cover and
the
flap.
After charging, close the charging
socket cover and flap.
Take care to avoid the ingress of water
or dust into the socket, under its cover
or into the charging plug. Risk of fire or
electrocution.
Vehicle out of use for a long
period
When your vehicle is going to be out
of use for a long period, charge the
main battery completely every three
months (following the normal charging
procedure).
Before charging, check that the
12 V battery is not disconnected or
discharged. If this is the case, refer
to the "12 V battery" section for
reconnecting or charging the battery.
7
Practical information
Page 108 of 174
106
BonnetProtects the components in the front compartment and provides access for checking levels, charging the 12 V battery, changing fuses, etc.
F
P
ush the exterior safety catch B to the left
and raise the bonnet. F
O
pen the bonnet fully and on the right,
unclip the stay C from its holder.
F
F
it the stay C in one of the two notches to
hold the bonnet open.
F
O
pen the front right door.
F
P
ull the interior release lever A , located at
the bottom of the door aperture.
Opening Closing
F Take the stay out of the support notch.
F
C lip the stay in its housing.
F
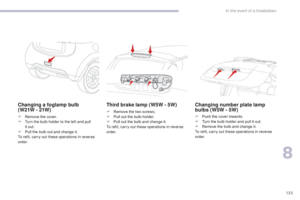
L
ower the bonnet and release it at the end
of its travel.
F
P
ull on the bonnet to check that it is fully
latched.
Do not press down on the middle of
the bonnet if it does not fully close, as
there is a risk of deforming it. Open the
bonnet fully and close it again.
The location of the interior release lever
prevents opening of the bonnet while
the front right door is closed.
Practical information
Page 109 of 174
107
1. Screenwash fluid reservoir.
2. Heater fluid reservoir.
3.
B
rake fluid reservoir.
4.
1
2 V battery.
5.
F
usebox.
Front compartment
To avoid damaging electrical
components, the use of a high pressure
jet washer in the front compartment is
strictly prohibited.
7
Practical information
Page 110 of 174
108
Rear compartmentLocated under the boot floor, this compartment gives access to the cooling system reservoir.
F
O
pen the boot.
F
D
etach the carpet retaining adhesive strip.
F
R
emove the boot carpet. F
R
emove the four "butter fly" screws.
F
R
emove the protective cover.F
C
heck the coolant level and top up if
necessary.
For more information on Checking
levels , refer to the corresponding
section.
When working in this compartment,
you must observe the safety
recommendations on the labels.
Practical information
Page 111 of 174

109
Checking levelsCheck all of these levels regularly and top them up if necessary, unless other wise indicated.
If a level drops significantly, have the corresponding system checked by a CITROËN dealer or a qualified workshop.Never do anything in the compartments
when the "Ready" lamp is on or when
your vehicle is being charged.
Take care when carrying out checks
in the front and rear compartments as
some parts of the compartments can
be very hot (risk of burns): wait at least
one hour after stopping the motor or the
end of the charging procedure before
carrying out any work.
Brake fluid level
The brake fluid level should be
between the "MIN" and "MA X"
marks. If it is not, check the brake
pad wear.
Changing the fluid
Refer to the manufacturer's service schedule
for details of the interval for this operation.
Fluid specification
The brake fluid must conform to the
manufacturer's recommendations.
Front compartment Heating system fluid level
Changing the fluid
This fluid does not have to be changed.
Fluid specification
The fluid must conform to the manufacturer's
recommendations. The level of this fluid should be between
the "L" MIN and "F" MA X marks.
Screenwash fluid level
Top up the level when necessary.
Fluid specification
For optimum cleaning and to avoid freezing,
this fluid must not be topped up or replaced
with plain water.
7
Practical information
Page 112 of 174

110
The coolant level should be between
the MIN "L" and MA X "F" marks.
Coolant levelAvoid prolonged contact of used fluids
with the skin.
Most of these fluids are harmful to
health and some are very corrosive.
Do not discard used fluids into sewers
or onto the ground.
Take used fluids to a CITROËN dealer
or a qualified workshop (France) or to
an authorised waste disposal site.
Used products
Rear compartment
Changing the coolant
The coolant does not have to be changed.
Coolant specification
The coolant must conform to the
manufacturer's recommendations. As the cooling system is pressurised, wait at
least one hour after switching off the motor
and/or the end of the charging cycle before
carrying out any work.
To avoid any risk of scalding, unscrew the cap
by two turns to allow the pressure to drop.
When the pressure has dropped, remove the
cap and top up the level.
12 V battery electrolyte
level
Remove the battery protective cover to check
this level.
For more information on the 12 V battery, refer
to the corresponding section.
The level of this fluid should be between the
MIN "LOWER LEVEL" and MA X "UPPER
LEVEL" marks.
If necessary, top up using distilled water by
removing the caps of the different battery
compartments.
Check the electrolyte level at least once
per month.
Practical information