2017 CHEVROLET ORLANDO instrument cluster
[x] Cancel search: instrument clusterPage 121 of 372
Black plate (21,1)Chevrolet Orlando Owner Manual - 2013 - CRC - 6/5/12
Instruments and Controls 5-21
Door Ajar Light
For base level clusters this light
comes on above the Driver
Information Center (DIC). For
uplevel clusters, this light comes on
in the Driver Information Center
(DIC) when a door is open or not
securely latched.
Before driving, check that all doors
are properly closed.
Information Displays
Driver Information
Center (DIC)
The DIC displays information about
your vehicle. It also displays
warning messages if a system
problem is detected. SeeVehicle
Messages on page 5‑24 for more
information. All messages appear in
the DIC display located in the center
of the instrument panel cluster.
DIC Operation and Displays
The DIC has different displays
which can be accessed by using the
DIC buttons on the turn signal lever
located on the left side of the
steering wheel. The DIC displays
trip, fuel, and warning messages if a
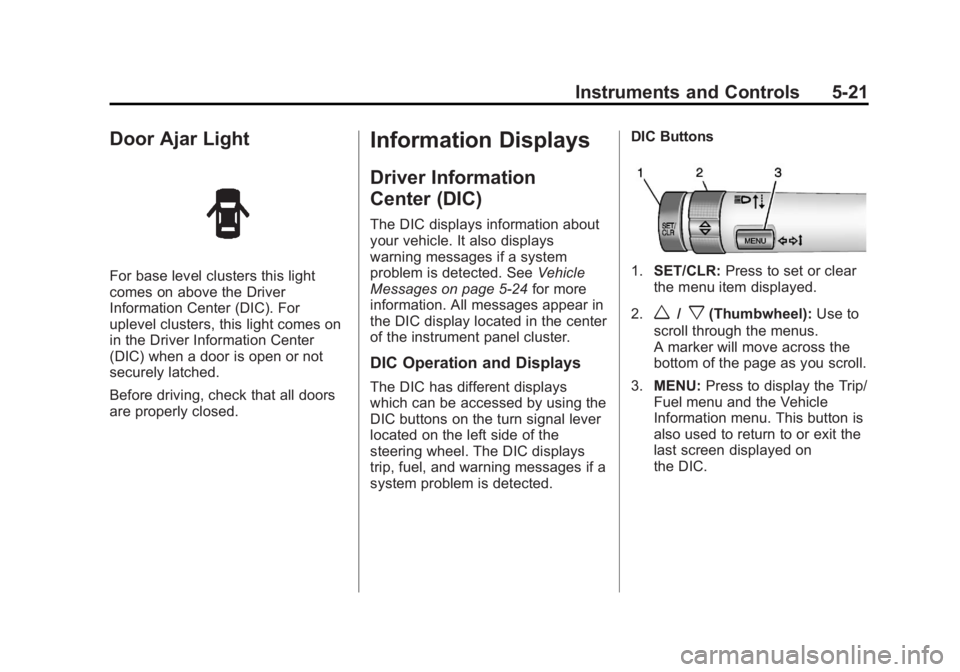
system problem is detected. DIC Buttons
1.
SET/CLR: Press to set or clear
the menu item displayed.
2.
w/x(Thumbwheel): Use to
scroll through the menus.
A marker will move across the
bottom of the page as you scroll.
3. MENU: Press to display the Trip/
Fuel menu and the Vehicle
Information menu. This button is
also used to return to or exit the
last screen displayed on
the DIC.
Page 123 of 372

Black plate (23,1)Chevrolet Orlando Owner Manual - 2013 - CRC - 6/5/12
Instruments and Controls 5-23
Fuel Used
This display shows the approximate
liters (L) or gallons (gal) of fuel that
have been used since last reset.
The fuel used can be reset by
pressing the SET/CLR button while
the Fuel Used display is showing.
Vehicle Information Menu
Items
Press MENU on the turn signal
lever until the Vehicle Information
menu is displayed. Use
w/xto
scroll through the menu items. Not
all items are available on every
vehicle. The following is a list of all
of the possible menu items:
.Units
.Tire Pressure
.Remaining Oil Life
.Battery Voltage
.Blank Display Units
Move
w/xto change between
metric or US when the Unit display
is active. Press SET/CLR to confirm
the setting. On some models, you
will have to select 1, 2, or 3 for the
Unit display. 1 is Imperial units, 2 is
US units, and 3 is metric units. This
will change the displays on the
cluster and DIC to the type of
measurements you select.
Tire Pressure
The display may show a vehicle
with the approximate pressures of
all four tires. Tire pressure is
displayed in either kilopascal (kPa)
or in pounds per square inch (psi).
On some models, this display only
allows for matching of the TPMS
sensors. In this case, the display
will show TIRE LEARN. See Tire
Pressure Monitor System on
page 10‑44 andTire Pressure
Monitor Operation on page 10‑45 for
more information. Remaining Oil Life
This display shows an estimate of
the oil's remaining useful life.
If REMAINING OIL LIFE 99% is
displayed, that means 99% of the
current oil life remains. On some
models, this display is shown
as
:%.
When the remaining oil life is low,
the CHANGE ENGINE OIL SOON
message, or code 82, will appear on
the display. See Engine Oil
Messages on page 5‑26 and
“Vehicle Messages (Base Level)”
following. The oil should be
changed as soon as possible. See
Engine Oil on page 10‑7. In addition
to the engine oil life system
monitoring the oil life, additional
maintenance is recommended in the
Maintenance Schedule in this
manual. See Maintenance Schedule
on page 11‑2 for more information.
Page 136 of 372

Black plate (2,1)Chevrolet Orlando Owner Manual - 2013 - CRC - 6/5/12
6-2 Lighting
5(Headlamps):Turns the
headlamps on together with the
lamps listed below. A warning chime
sounds if the driver door is opened
when the ignition switch is off and
the headlamps are on.
.Parking Lamps
.Taillamps
.License Plate Lamps
.Instrument Panel Lights
.Sidemarker Lamps
#(Front Fog Lamps): For
vehicles with fog lamps, press to
turn the lamps on or off.
See Front Fog Lamps on page 6‑5.
When the lights are on,
;will be
lit. See Lamps On Reminder on
page 5‑20.
Headlamp High/
Low-Beam Changer
3(Headlamp High/Low-Beam
Changer): Push the turn signal
lever away from you to turn the high
beams on.
Push the lever again or pull the
lever toward you to return to low
beams.
This indicator light turns on in the
instrument cluster when the
high-beam headlamps are on.
Flash-to-Pass
To flash the high beams, pull the
turn signal lever all the way toward
you. Then release it.
Daytime Running
Lamps (DRL)
Daytime Running Lamps (DRL) can
make it easier for others to see the
front of your vehicle during the day.
Fully functional daytime running
lamps are required on all vehicles
first sold in Canada.
This indicator light turns on in the
instrument cluster when the DRL
are on.
A light sensor on top of the
instrument panel makes the DRL
work, so be sure it is not covered.
Page 138 of 372
Black plate (4,1)Chevrolet Orlando Owner Manual - 2013 - CRC - 6/5/12
6-4 Lighting
Lights On with Wipers
If the windshield wipers are
activated in daylight with the
engine on, and the exterior lamp
control is in AUTO, the headlamps,
parking lamps, and other exterior
lamps come on. The transition time
for the lamps coming on varies
based on wiper speed. When the
wipers are not operating, these
lamps turn off. Move the exterior
lamp control to
Por;to disable
this feature.
Hazard Warning Flashers
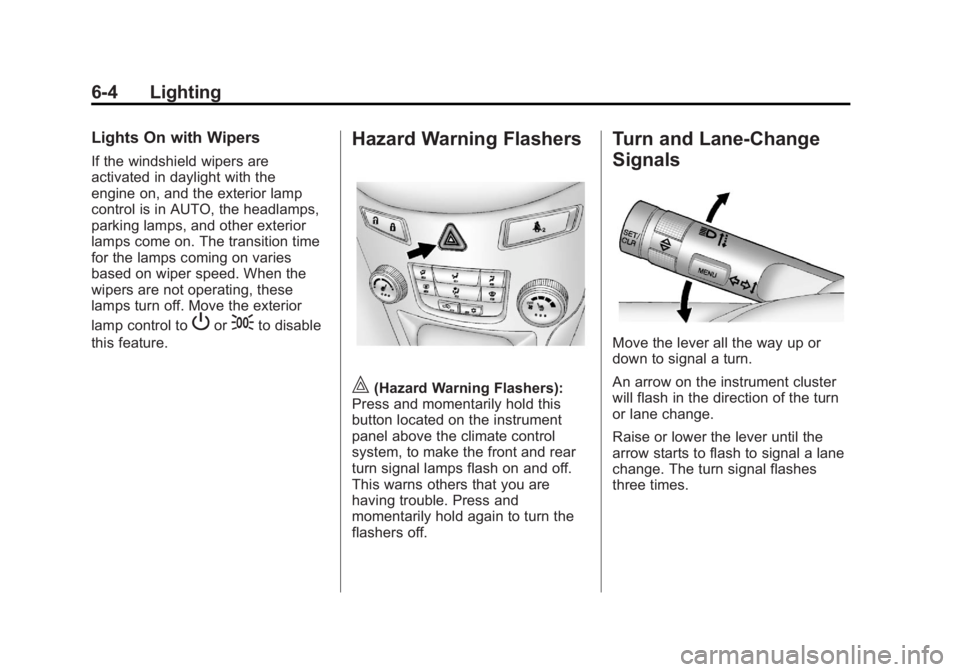
|(Hazard Warning Flashers):
Press and momentarily hold this
button located on the instrument
panel above the climate control
system, to make the front and rear
turn signal lamps flash on and off.
This warns others that you are
having trouble. Press and
momentarily hold again to turn the
flashers off.
Turn and Lane-Change
Signals
Move the lever all the way up or
down to signal a turn.
An arrow on the instrument cluster
will flash in the direction of the turn
or lane change.
Raise or lower the lever until the
arrow starts to flash to signal a lane
change. The turn signal flashes
three times.
Page 139 of 372
Black plate (5,1)Chevrolet Orlando Owner Manual - 2013 - CRC - 6/5/12
Lighting 6-5
The lever returns to its neutral
position when it is released.
If after signaling a turn or lane
change the arrow flashes rapidly or
does not come on, a signal bulb
may be burned out. Replace any
burned out bulbs. If a bulb is not
burned out, check the fuse. See
Fuses and Circuit Breakers on
page 10‑31orBulb Replacement on
page 10‑25.
Turn Signal On Chime
If the turn signal is left on for more
than 1.2 km (0.75 mi), a chime will
sound at each flash of the turn
signal. To turn the chime off, move
the turn signal lever to the neutral
position.Front Fog Lamps
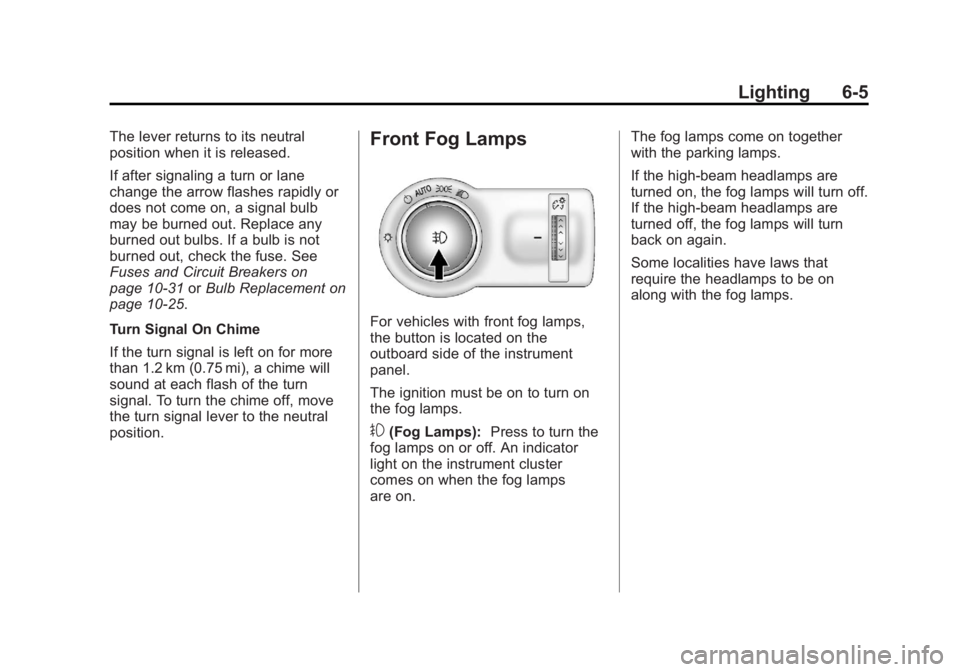
For vehicles with front fog lamps,
the button is located on the
outboard side of the instrument
panel.
The ignition must be on to turn on
the fog lamps.
#(Fog Lamps): Press to turn the
fog lamps on or off. An indicator
light on the instrument cluster
comes on when the fog lamps
are on. The fog lamps come on together
with the parking lamps.
If the high-beam headlamps are
turned on, the fog lamps will turn off.
If the high-beam headlamps are
turned off, the fog lamps will turn
back on again.
Some localities have laws that
require the headlamps to be on
along with the fog lamps.
Page 201 of 372
Black plate (21,1)Chevrolet Orlando Owner Manual - 2013 - CRC - 6/5/12
Driving and Operating 9-21
Running the Vehicle
While Parked
It is better not to park with the
engine running.
If the vehicle is left with the engine
running, follow the proper steps to
be sure the vehicle will not move.
SeeShifting Into Park on page 9‑18
and Engine Exhaust on page 9‑20.
If the vehicle has a manual
transmission, see Parking on
page 9‑20.
If parking on a hill and pulling a
trailer, see Driving Characteristics
and Towing Tips on page 9‑42.
Automatic
Transmission
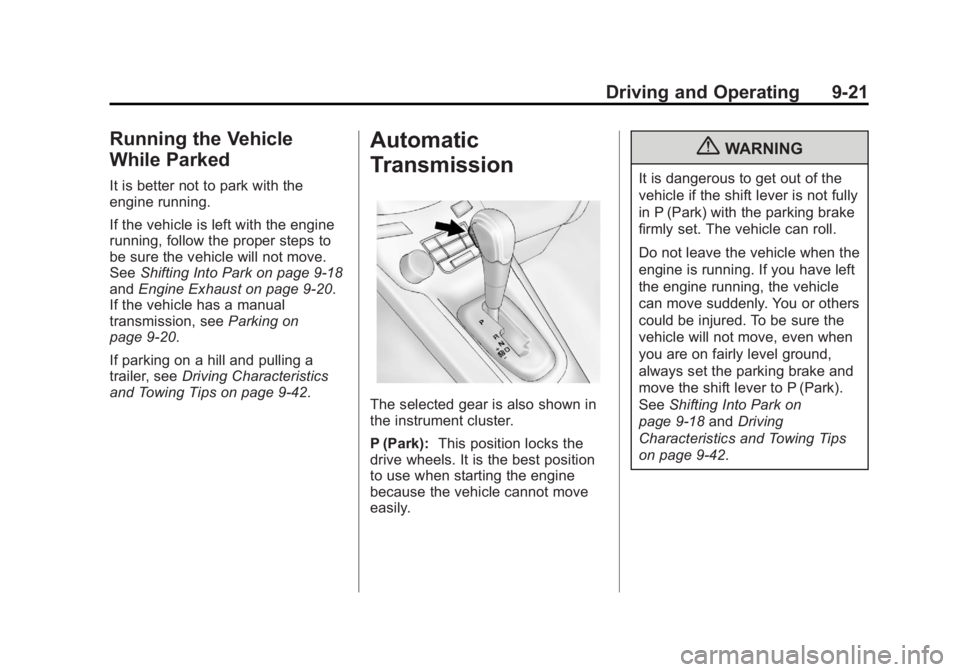
The selected gear is also shown in
the instrument cluster.
P (Park): This position locks the
drive wheels. It is the best position
to use when starting the engine
because the vehicle cannot move
easily.
{WARNING
It is dangerous to get out of the
vehicle if the shift lever is not fully
in P (Park) with the parking brake
firmly set. The vehicle can roll.
Do not leave the vehicle when the
engine is running. If you have left
the engine running, the vehicle
can move suddenly. You or others
could be injured. To be sure the
vehicle will not move, even when
you are on fairly level ground,
always set the parking brake and
move the shift lever to P (Park).
See Shifting Into Park on
page 9‑18 andDriving
Characteristics and Towing Tips
on page 9‑42.
Page 205 of 372
Black plate (25,1)Chevrolet Orlando Owner Manual - 2013 - CRC - 6/5/12
Driving and Operating 9-25
3 (Third), 4 (Fourth), 5 (Fifth) and
6 (Sixth):Shift into 3 (Third),
4 (Fourth), 5 (Fifth) and 6 (Sixth) the
same way you do for 2 (Second).
Slowly let up on the clutch pedal as
you press the accelerator pedal.
For the best fuel economy, use
6 (Sixth) gear whenever vehicle
speed and driving conditions allow.
The vehicle may have an up-shift
light in the instrument cluster.
It shows when to shift to the next
higher gear for the best fuel
economy.
During normal driving, upshifts
should occur between 1,300 and
2,500 rpm, and downshifts should
occur between 1,500 and
1,000 rpm. To stop, let up on the accelerator
pedal and press the brake pedal.
Just before the vehicle stops, press
the clutch pedal and the brake
pedal, and shift to Neutral.
Neutral:
Use this position when
you start or idle the engine. The
shift lever is in Neutral when it is
centered in the shift pattern, not in
any gear.
R (Reverse): To back up, with the
vehicle at a complete stop, press
down the clutch pedal. Then pull up
the ring on the shift lever, and shift
into R (Reverse). Let up on the
clutch pedal slowly while pressing
the accelerator pedal.
If the gear does not engage, shift
the transmission to neutral, release
the clutch pedal and press it back
down. Repeat the gear selection.
{WARNING
If you skip a gear when you
downshift, you could lose control
of the vehicle. You could injure
yourself or others. Do not shift
down more than one gear at a
time when you downshift.
Notice: Do not skip gears
while upshifting. This can
cause premature wear in the
transmission. The repairs would
not be covered by the vehicle
warranty.
Page 223 of 372
Black plate (43,1)Chevrolet Orlando Owner Manual - 2013 - CRC - 6/5/12
Driving and Operating 9-43
Before starting, check all trailer hitch
parts and attachments, safety
chains, electrical connectors, lamps,
tires and mirrors. If the trailer has
electric brakes, start the
combination moving and then apply
the trailer brake controller by hand
to be sure the brakes work.
During the trip, check occasionally
to be sure that the load is secure
and the lamps and any trailer
brakes still work.
Towing with a Stability Control
System
When towing, the sound of the
stability control system might be
heard. The system is reacting to the
vehicle movement caused by the
trailer, which mainly occurs during
cornering. This is normal when
towing heavier trailers.
Following Distance
Stay at least twice as far behind the
vehicle ahead as you would when
driving the vehicle without a trailer.This can help to avoid situations
that require heavy braking and
sudden turns.
Passing
More passing distance is needed
when towing a trailer. Because the
rig is longer, it is necessary to go
farther beyond the passed vehicle
before returning to the lane.
Backing Up
Hold the bottom of the steering
wheel with one hand. To move the
trailer to the left, move your hand to
the left. To move the trailer to the
right, move your hand to the right.
Always back up slowly and,
if possible, have someone
guide you.
Making Turns
Notice:
Making very sharp turns
while trailering could cause the
trailer to come in contact with the
vehicle. The vehicle could be
damaged. Avoid making very
sharp turns while trailering. When turning with a trailer, make
wider turns than normal so the
trailer will not strike soft shoulders,
curbs, road signs, trees or other
objects. Use the turn signal well in
advance and avoid jerky or sudden
maneuvers.
Turn Signals When Towing a
Trailer
The turn signal indicators on the
instrument cluster flash whenever
signaling a turn or lane change.
Properly hooked up, the trailer
lamps also flash, telling other
drivers the vehicle is turning,
changing lanes or stopping.
When towing a trailer, the arrows on
the instrument cluster flash for turns
even if the bulbs on the trailer are
burned out. Check occasionally to
be sure the trailer bulbs are still
working.
Driving on Grades
Reduce speed and shift to a
lower gear before starting down
a long or steep downgrade.