2017 CHEVROLET ORLANDO seat adjustment
[x] Cancel search: seat adjustmentPage 7 of 372

Black plate (1,1)Chevrolet Orlando Owner Manual - 2013 - CRC - 6/5/12
In Brief 1-1
In Brief
Instrument Panel
Instrument Panel . . . . . . . . . . . . . . 1-2
Initial Drive Information
Initial Drive Information . . . . . . . . 1-4
Remote Keyless Entry (RKE)System . . . . . . . . . . . . . . . . . . . . . . 1-4
Remote Vehicle Start . . . . . . . . . 1-4
Door Locks . . . . . . . . . . . . . . . . . . . 1-5
Liftgate . . . . . . . . . . . . . . . . . . . . . . . . 1-6
Windows . . . . . . . . . . . . . . . . . . . . . . 1-6
Seat Adjustment . . . . . . . . . . . . . . 1-6
Second Row Seats . . . . . . . . . . . 1-8
Third Row Seats . . . . . . . . . . . . . . 1-8
Heated Seats . . . . . . . . . . . . . . . . . 1-8
Head Restraint Adjustment . . . . 1-8
Safety Belts . . . . . . . . . . . . . . . . . . . 1-9
Mirror Adjustment . . . . . . . . . . . . . 1-9
Steering Wheel Adjustment . . . . . . . . . . . . . . . . . 1-10
Interior Lighting . . . . . . . . . . . . . . 1-10
Exterior Lighting . . . . . . . . . . . . . 1-11
Windshield Wiper/Washer . . . . 1-12
Climate Controls . . . . . . . . . . . . . 1-13
Transmission . . . . . . . . . . . . . . . . 1-14
Vehicle Features
Radio(s) . . . . . . . . . . . . . . . . . . . . . 1-14
Satellite Radio . . . . . . . . . . . . . . . 1-15
Portable Audio Devices . . . . . . 1-16
Bluetooth
®. . . . . . . . . . . . . . . . . . . 1-16
Steering Wheel Controls . . . . . 1-16
Cruise Control . . . . . . . . . . . . . . . 1-17
Driver Information
Center (DIC) . . . . . . . . . . . . . . . 1-17
Ultrasonic Parking Assist . . . . 1-17
Storage Compartments . . . . . . 1-18
Power Outlets . . . . . . . . . . . . . . . 1-18
Performance and Maintenance
Traction Control System (TCS) . . . . . . . . . . . . . . 1-18
StabiliTrak
®System . . . . . . . . . 1-19
Tire Pressure Monitor . . . . . . . . 1-19
Tire Sealant and
Compressor Kit . . . . . . . . . . . . . 1-19
Engine Oil Life System . . . . . . 1-20
Driving for Better Fuel Economy . . . . . . . . . . . . . . . . . . . 1-20
Roadside Assistance Program . . . . . . . . . . . . . . . . . . . . 1-20
OnStar
®. . . . . . . . . . . . . . . . . . . . . 1-21
Page 9 of 372

Black plate (3,1)Chevrolet Orlando Owner Manual - 2013 - CRC - 6/5/12
In Brief 1-3
1.Air Vents on page 8‑6.
2. Turn and Lane-Change Lever. See Turn and Lane-Change
Signals on page 6‑4.
Headlamp High/Low-Beam
Changer on page 6‑2.
3. Instrument Cluster on page 5‑8.
4. Windshield Wiper/Washer on
page 5‑3.
Rear Window Wiper/Washer on
page 5‑4.
5. Infotainment on page 7‑1.
6. Infotainment Display.
7. Light Sensor. See Automatic
Headlamp System on page 6‑3.
8. Instrument Panel Storage on
page 4‑1.
USB Port and Auxiliary Input
Jack (Inside Instrument Panel
Storage). See Auxiliary Devices
on page 7‑15
9. CD Player on page 7‑13. 10. TCS/StabiliTrak Button. See
StabiliTrak®System on
page 9‑29.
11. Exterior Lamp Controls on
page 6‑1.
Instrument Panel Illumination
Control on page 6‑6.
Front Fog Lamps on page 6‑5.
12. Hood Release. See Hood on
page 10‑4.
13. Front Storage on page 4‑1.
14. Data Link Connector (DLC) (Out of View). See Malfunction
Indicator Lamp on page 5‑12.
15. Cruise Control on page 9‑31.
16. Steering Wheel Adjustment on
page 5‑2.
17. Horn on page 5‑3.
18. Steering Wheel Controls on
page 5‑3.
19. Power Door Locks on
page 2‑7. 20.
Heated Front Seats on
page 3‑6 (If Equipped).
21. Climate Control Systems on
page 8‑1.
Automatic Climate Control
System on page 8‑3.
22. Shift Lever. See Automatic
Transmission on page 9‑21 or
Manual Transmission on
page 9‑24.
23. Parking Brake on page 9‑27.
24. Power Outlets on page 5‑6.
25. Hazard Warning Flashers on
page 6‑4.
26. Passenger Safety Belt Reminder Light. See Safety
Belt Reminders on page 5‑10.
Page 12 of 372
Black plate (6,1)Chevrolet Orlando Owner Manual - 2013 - CRC - 6/5/12
1-6 In Brief
Presso{again to deactivate the
lockout switch.
See Safety Locks on page 2‑7.
Liftgate
Unlock the vehicle before opening
the liftgate.
Press the touch pad located in the
handle of the liftgate, above the
license plate, and lift up to open.
Do not press the touch pad while
closing the liftgate. This will cause
the liftgate to be unlatched.
Always close the liftgate before
driving.
For more information see Liftgate on
page 2‑8.
Windows
Power Windows
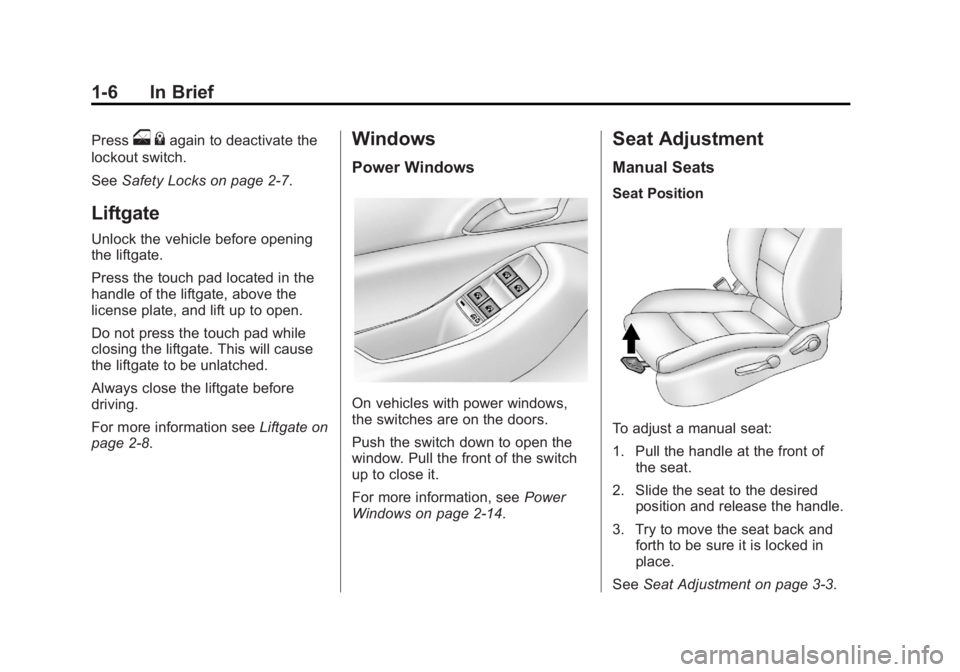
On vehicles with power windows,
the switches are on the doors.
Push the switch down to open the
window. Pull the front of the switch
up to close it.
For more information, see Power
Windows on page 2‑14.
Seat Adjustment
Manual Seats
Seat Position
To adjust a manual seat:
1. Pull the handle at the front of the seat.
2. Slide the seat to the desired position and release the handle.
3. Try to move the seat back and forth to be sure it is locked in
place.
See Seat Adjustment on page 3‑3.
Page 13 of 372
Black plate (7,1)Chevrolet Orlando Owner Manual - 2013 - CRC - 6/5/12
In Brief 1-7
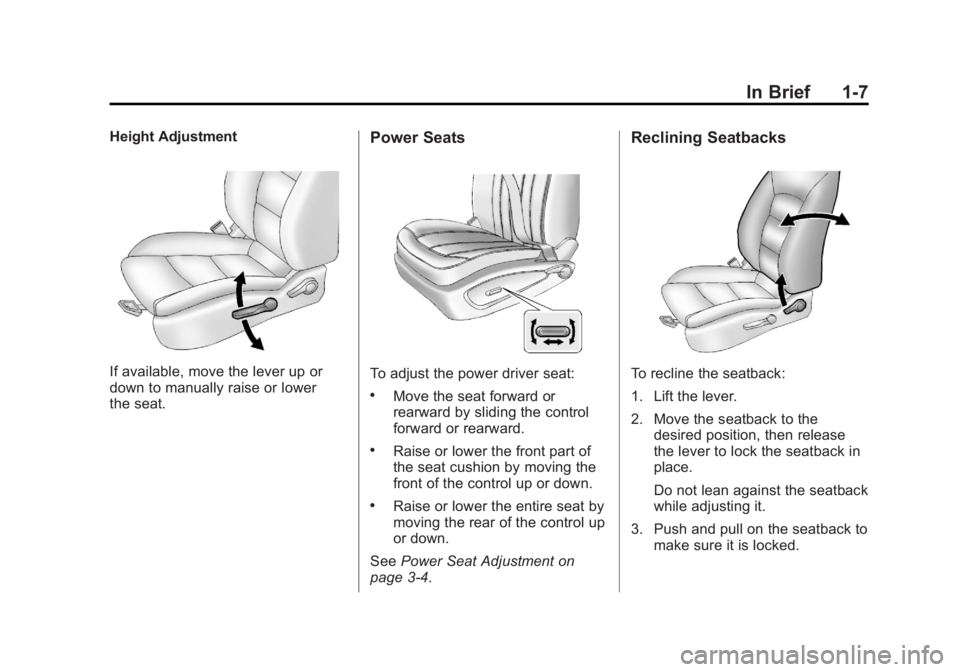
Height Adjustment
If available, move the lever up or
down to manually raise or lower
the seat.
Power Seats
To adjust the power driver seat:
.Move the seat forward or
rearward by sliding the control
forward or rearward.
.Raise or lower the front part of
the seat cushion by moving the
front of the control up or down.
.Raise or lower the entire seat by
moving the rear of the control up
or down.
See Power Seat Adjustment on
page 3‑4.
Reclining Seatbacks
To recline the seatback:
1. Lift the lever.
2. Move the seatback to the desired position, then release
the lever to lock the seatback in
place.
Do not lean against the seatback
while adjusting it.
3. Push and pull on the seatback to make sure it is locked.
Page 14 of 372

Black plate (8,1)Chevrolet Orlando Owner Manual - 2013 - CRC - 6/5/12
1-8 In Brief
To return the seatback to an upright
position:
1. Lift the lever fully withoutapplying pressure to the
seatback, and the seatback
returns to the upright position.
2. Push and pull on the seatback to make sure it is locked.
See Reclining Seatbacks on
page 3‑4.
Second Row Seats
The second row seats can be
tumbled to provide access to the
third row seat, and the seatbacks
can be reclined or folded forward.
See Second Row Seats on
page 3‑8.
Third Row Seats
The third row seats can be stowed
for more cargo space. See Third
Row Seats on page 3‑12.
Heated Seats
Automatic Climate Control System
Buttons Shown
If available, the buttons are on the
instrument panel, near the center.
To operate, the engine must be
running.
Press
LorMto heat the driver or
passenger seat.
See Heated Front Seats on
page 3‑6.
Head Restraint
Adjustment
Do not drive until the head restraints
for all occupants are installed and
adjusted properly.
To achieve a comfortable seating
position, change the seatback
recline angle as little as necessary
while keeping the seat and the head
restraint height in the proper
position.
See Head Restraints on page 3‑2
and Seat Adjustment on page 3‑3.
Page 47 of 372
Black plate (1,1)Chevrolet Orlando Owner Manual - 2013 - CRC - 6/5/12
Seats and Restraints 3-1
Seats and
Restraints
Head Restraints
Head Restraints . . . . . . . . . . . . . . . 3-2
Front Seats
Seat Adjustment . . . . . . . . . . . . . . 3-3
Power Seat Adjustment . . . . . . . 3-4
Reclining Seatbacks . . . . . . . . . . 3-4
Front Seat Armrest . . . . . . . . . . . . 3-6
Heated Front Seats . . . . . . . . . . . 3-6
Folding Seatback . . . . . . . . . . . . . 3-7
Rear Seats
Second Row Seats . . . . . . . . . . . 3-8
Third Row Seats . . . . . . . . . . . . . 3-12
Safety Belts
Safety Belts . . . . . . . . . . . . . . . . . . 3-15
How to Wear Safety BeltsProperly . . . . . . . . . . . . . . . . . . . . 3-16 Lap-Shoulder Belt . . . . . . . . . . . 3-17
Safety Belt Use During
Pregnancy . . . . . . . . . . . . . . . . . . 3-22
Safety Belt Extender . . . . . . . . . 3-22
Safety System Check . . . . . . . . 3-23
Safety Belt Care . . . . . . . . . . . . . 3-23
Replacing Safety Belt System Parts after a Crash . . . . . . . . . 3-23
Airbag System
Airbag System . . . . . . . . . . . . . . . 3-24
Where Are the Airbags? . . . . . 3-26
When Should an AirbagInflate? . . . . . . . . . . . . . . . . . . . . . 3-27
What Makes an Airbag Inflate? . . . . . . . . . . . . . . . . . . . . . 3-28
How Does an Airbag
Restrain? . . . . . . . . . . . . . . . . . . . 3-28
What Will You See after an Airbag Inflates? . . . . . . . . . . . . 3-29
Servicing the Airbag-Equipped Vehicle . . . . . . . . . . . . . . . . . . . . . 3-30 Adding Equipment to the
Airbag-Equipped Vehicle . . . 3-30
Airbag System Check . . . . . . . . 3-31
Replacing Airbag System Parts after a Crash . . . . . . . . . 3-31
Child Restraints
Older Children . . . . . . . . . . . . . . . 3-32
Infants and Young
Children . . . . . . . . . . . . . . . . . . . . 3-34
Child Restraint Systems . . . . . 3-36
Where to Put the Restraint . . . 3-38
Lower Anchors and Tethers for Children (LATCH
System) . . . . . . . . . . . . . . . . . . . . 3-39
Replacing LATCH System Parts After a Crash . . . . . . . . . 3-44
Securing Child Restraints (Rear Seat) . . . . . . . . . . . . . . . . . 3-44
Securing Child Restraints (Front Passenger Seat) . . . . 3-46
Page 49 of 372
Black plate (3,1)Chevrolet Orlando Owner Manual - 2013 - CRC - 6/5/12
Seats and Restraints 3-3
Rear Seats
The vehicle's second row seats
have adjustable head restraints in
the outboard seating positions. The
vehicle's third row seats have head
restraints in the outboard seating
positions that cannot be adjusted.
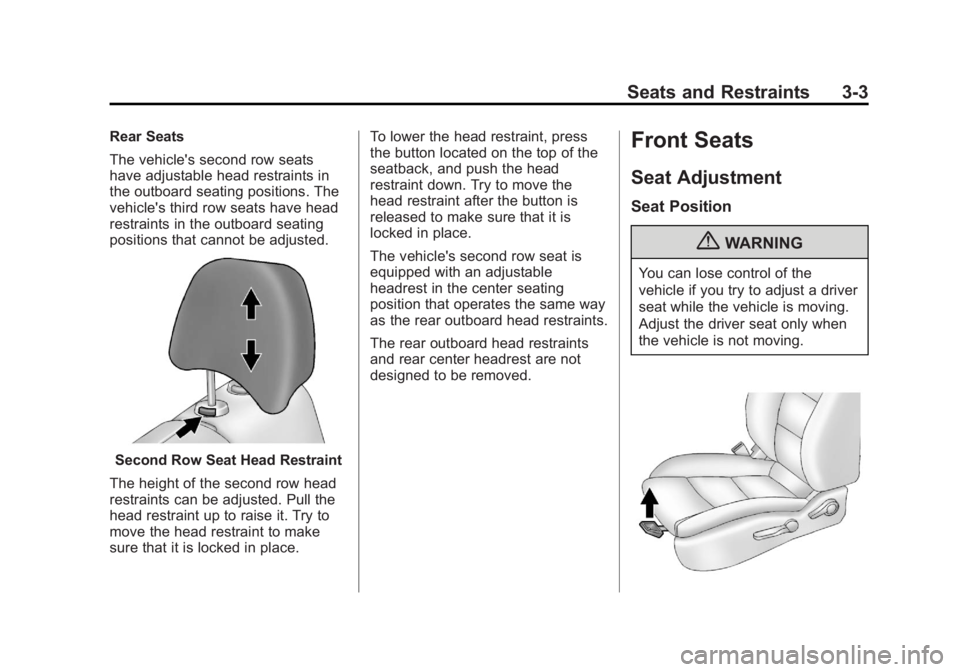
Second Row Seat Head Restraint
The height of the second row head
restraints can be adjusted. Pull the
head restraint up to raise it. Try to
move the head restraint to make
sure that it is locked in place. To lower the head restraint, press
the button located on the top of the
seatback, and push the head
restraint down. Try to move the
head restraint after the button is
released to make sure that it is
locked in place.
The vehicle's second row seat is
equipped with an adjustable
headrest in the center seating
position that operates the same way
as the rear outboard head restraints.
The rear outboard head restraints
and rear center headrest are not
designed to be removed.
Front Seats
Seat Adjustment
Seat Position
{WARNING
You can lose control of the
vehicle if you try to adjust a driver
seat while the vehicle is moving.
Adjust the driver seat only when
the vehicle is not moving.
Page 50 of 372
Black plate (4,1)Chevrolet Orlando Owner Manual - 2013 - CRC - 6/5/12
3-4 Seats and Restraints
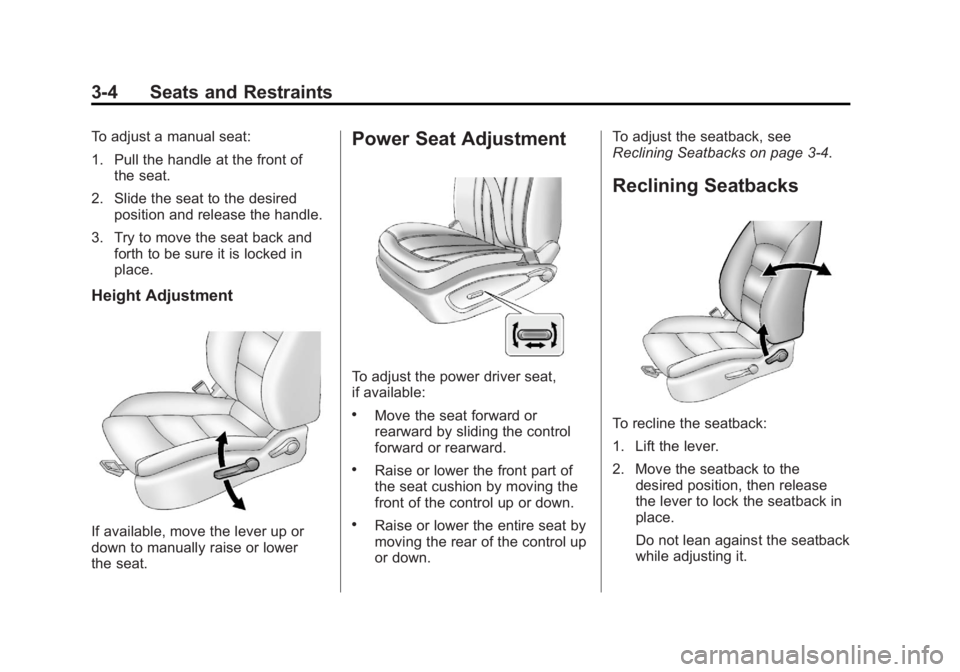
To adjust a manual seat:
1. Pull the handle at the front ofthe seat.
2. Slide the seat to the desired position and release the handle.
3. Try to move the seat back and forth to be sure it is locked in
place.
Height Adjustment
If available, move the lever up or
down to manually raise or lower
the seat.
Power Seat Adjustment
To adjust the power driver seat,
if available:
.Move the seat forward or
rearward by sliding the control
forward or rearward.
.Raise or lower the front part of
the seat cushion by moving the
front of the control up or down.
.Raise or lower the entire seat by
moving the rear of the control up
or down. To adjust the seatback, see
Reclining Seatbacks on page 3‑4.
Reclining Seatbacks
To recline the seatback:
1. Lift the lever.
2. Move the seatback to the
desired position, then release
the lever to lock the seatback in
place.
Do not lean against the seatback
while adjusting it.