2017 CHEVROLET ORLANDO ECO mode
[x] Cancel search: ECO modePage 20 of 372

Black plate (14,1)Chevrolet Orlando Owner Manual - 2013 - CRC - 6/5/12
1-14 In Brief
6. Driver and Passenger HeatedSeats (If Equipped)
7. Power
8. Recirculation
9. MODE (Air Delivery Mode)
10. AQS (Air Quality Sensor)
11. Air Conditioning
See Climate Control Systems on
page 8‑1 orAutomatic Climate
Control System on page 8‑3 (If
Equipped).
Transmission
Driver Shift Control (DSC)
Driver Shift Control (DSC) allows
you to shift an automatic
transmission similar to a manual
transmission. To use the DSC
feature:
1. Move the shift lever from D (Drive) to the left into the (+) or
(−) manual position. 2. Press the shift lever forward (+)
to upshift or rearward (−) to
downshift. An M and the current
gear will be displayed in the
Driver Information Center (DIC).
See Manual Mode on page 9‑23.
Up‐Shift Light
If the vehicle has a manual
transmission, it will have an up-shift
light that indicates when to shift to
the next higher gear for the best fuel
economy.
SeeManual Transmission on
page 9‑24.
Vehicle Features
Radio(s)
O
: Press to turn the system on
and off. Turn to increase or
decrease the volume.
BAND: Press to choose between
FM, AM, or SiriusXM®, if equipped.
MENU: Turn to select radio
stations. Press to select a menu.
g: Press to seek the previous
station or track.
l: Press to seek the next station
or track.
Buttons 1 to 6: Press to save and
select favorite stations.
INFO: Press to show available
information about the current station
or track.
For more information about these
and other radio features, see
Operation on page 7‑4.
Page 74 of 372
Black plate (28,1)Chevrolet Orlando Owner Manual - 2013 - CRC - 6/5/12
3-28 Seats and Restraints
The vehicle has seat-mounted side
impact and roof-rail airbags. See
Airbag System on page 3‑24.
Seat-mounted side impact and
roof-rail airbags are intended to
inflate in moderate to severe side
crashes, depending on the location
of the impact. In addition, these
roof-rail airbags are intended to
inflate during a rollover or in a
severe frontal impact. Seat-mounted
side impact and roof-rail airbags will
inflate if the crash severity is above
the system's designed threshold
level. The threshold level can vary
with specific vehicle design.
Seat-mounted side impact airbags
are not intended to inflate in frontal
impacts, near frontal impacts,
rollovers, or rear impacts. Roof-rail
airbags are not intended to inflate in
rear impacts. A seat-mounted side
impact airbag is intended to inflate
on the side of the vehicle that is
struck. Both roof-rail airbags will
inflate when either side of the
vehicle is struck, or if the sensingsystem predicts that the vehicle is
about to roll over on its side, or in a
severe frontal impact.
In any particular crash, no one can
say whether an airbag should have
inflated simply because of the
vehicle damage or repair costs.
What Makes an Airbag
Inflate?
In a deployment event, the sensing
system sends an electrical signal
triggering a release of gas from the
inflator. Gas from the inflator fills the
airbag causing the bag to break out
of the cover. The inflator, the airbag,
and related hardware are all part of
the airbag module.
For airbag location, see
Where Are
the Airbags? on page 3‑26.
How Does an Airbag
Restrain?
In moderate to severe frontal or
near frontal collisions, even belted
occupants can contact the steering wheel or the instrument panel. In
moderate to severe side collisions,
even belted occupants can contact
the inside of the vehicle.
Airbags supplement the protection
provided by safety belts by
distributing the force of the impact
more evenly over the
occupant's body.
Rollover capable roof-rail airbags
are designed to help contain the
head and chest of occupants in the
outboard seating positions in the
first and second rows. The rollover
capable roof-rail airbags are
designed to help reduce the risk of
full or partial ejection in rollover
events, although no system can
prevent all such ejections.
But airbags would not help in many
types of collisions, primarily
because the occupant's motion is
not toward those airbags. See
When
Should an Airbag Inflate? on
page 3‑27.
Page 122 of 372
Black plate (22,1)Chevrolet Orlando Owner Manual - 2013 - CRC - 6/5/12
5-22 Instruments and Controls
Trip/Fuel Menu Items
Press MENU on the turn signal
lever until the Trip/Fuel Information
menu displays. Use
w/xto
scroll through the menu items. Not
all items are available on every
vehicle. The following is a list of all
possible menu items:
.Trip 1
.Trip 2
.Fuel Range
.Average Fuel Economy
.Instantaneous Fuel Economy
.Average Speed
.Fuel Used
Trip 1 and Trip 2
These displays show the current
distance traveled, in either
kilometers (km) or miles (mi), from
the last reset for the trip odometer.
Some models have one trip
odometer and some have two. The
trip odometer can be reset to zero by pressing and holding the SET/
CLR button while the trip odometer
display is showing.
Fuel Range
This displays the approximate
distance the vehicle can be driven
without refueling. The fuel range
estimate is based on an average of
the vehicle's fuel economy over
recent driving history and the
amount of fuel remaining in the fuel
tank. On some models, this display
is shown as
.km (mi). Fuel range
cannot be reset.
Average Fuel Economy
The Average Fuel Economy display
shows the approximate average
liters per 100 kilometers (L/100 km)
or miles per gallon (mpg). This
number is based on the number of
L/100 km (mpg) recorded since the
last time this menu item was reset.
On some models, this display is
shown as
c .L/100 km (mpg). Reset the average consumption by
pressing SET/CLR when it is
displayed.
Instantaneous Fuel Economy
The Instantaneous Fuel Economy
display shows the current fuel
economy in liters per 100 kilometers
(L/100 km) or miles per gallon
(mpg). This number reflects only the
fuel economy that the vehicle has
right now and changes frequently as
driving conditions change. Unlike
average fuel economy, this display
cannot be reset.
Average Speed
This displays the average speed of
the vehicle in kilometers per hour
(km/h) or miles per hour (mph). This
average is based on the various
vehicle speeds recorded since the
last reset. On some models, this
display is shown as
ckm/h (mph).
Reset the average speed by
pressing SET/CLR when it is
displayed.
Page 123 of 372

Black plate (23,1)Chevrolet Orlando Owner Manual - 2013 - CRC - 6/5/12
Instruments and Controls 5-23
Fuel Used
This display shows the approximate
liters (L) or gallons (gal) of fuel that
have been used since last reset.
The fuel used can be reset by
pressing the SET/CLR button while
the Fuel Used display is showing.
Vehicle Information Menu
Items
Press MENU on the turn signal
lever until the Vehicle Information
menu is displayed. Use
w/xto
scroll through the menu items. Not
all items are available on every
vehicle. The following is a list of all
of the possible menu items:
.Units
.Tire Pressure
.Remaining Oil Life
.Battery Voltage
.Blank Display Units
Move
w/xto change between
metric or US when the Unit display
is active. Press SET/CLR to confirm
the setting. On some models, you
will have to select 1, 2, or 3 for the
Unit display. 1 is Imperial units, 2 is
US units, and 3 is metric units. This
will change the displays on the
cluster and DIC to the type of
measurements you select.
Tire Pressure
The display may show a vehicle
with the approximate pressures of
all four tires. Tire pressure is
displayed in either kilopascal (kPa)
or in pounds per square inch (psi).
On some models, this display only
allows for matching of the TPMS
sensors. In this case, the display
will show TIRE LEARN. See Tire
Pressure Monitor System on
page 10‑44 andTire Pressure
Monitor Operation on page 10‑45 for
more information. Remaining Oil Life
This display shows an estimate of
the oil's remaining useful life.
If REMAINING OIL LIFE 99% is
displayed, that means 99% of the
current oil life remains. On some
models, this display is shown
as
:%.
When the remaining oil life is low,
the CHANGE ENGINE OIL SOON
message, or code 82, will appear on
the display. See Engine Oil
Messages on page 5‑26 and
“Vehicle Messages (Base Level)”
following. The oil should be
changed as soon as possible. See
Engine Oil on page 10‑7. In addition
to the engine oil life system
monitoring the oil life, additional
maintenance is recommended in the
Maintenance Schedule in this
manual. See Maintenance Schedule
on page 11‑2 for more information.
Page 160 of 372
Black plate (18,1)Chevrolet Orlando Owner Manual - 2013 - CRC - 6/5/12
7-18 Infotainment System
Phone
Bluetooth (Overview)
For vehicles equipped with
Bluetooth capability, the system can
interact with many cell phones,
allowing:
.Placement and receipt of calls in
a hands-free mode.
.Sharing of the cell phone’s
address book or contact list with
the vehicle.
To minimize driver distraction,
before driving, and with the vehicle
parked:
.Become familiar with the
features of the cell phone.
Organize the phone book and
contact lists clearly and delete
duplicate or rarely used entries.
If possible, program speed dial
or other shortcuts.
.Review the controls and
operation of the infotainment
system.
.Pair cell phone(s) to the vehicle.
The system may not work with
all cell phones. See “Pairing”in
this section for more information.
.If the cell phone has voice
dialing capability, learn to use
that feature to access the
address book or contact list. See
“Voice Pass-Thru” in this section
for more information.
.See “Storing and Deleting Phone
Numbers” in this section for
more information.
{WARNING
When using a cell phone, it can
be distracting to look too long or
too often at the screen of the
phone or the infotainment
(navigation) system. Taking your
eyes off the road too long or too
often could cause a crash
resulting in injury or death. Focus
your attention on driving. Vehicles with a Bluetooth system
can use a Bluetooth‐capable cell
phone with a Hands‐Free Profile to
make and receive phone calls. The
infotainment system and voice
recognition are used to control the
system. The system can be used
while in ON/RUN or ACC/
ACCESSORY. The range of the
Bluetooth system can be up to 9.1 m
(30 ft). Not all phones support all
functions and not all phones work
with the Bluetooth system. See
www.gm.com/bluetooth for more
information about compatible
phones.Bluetooth Controls
Use the buttons located on the
infotainment system and the
steering wheel to operate the
Bluetooth system.
Steering Wheel Controls
b/g(Push To Talk):
Press to
answer incoming calls, confirm
system information, and start voice
recognition.
Page 178 of 372

Black plate (4,1)Chevrolet Orlando Owner Manual - 2013 - CRC - 6/5/12
8-4 Climate Controls
MODE (Air Delivery Mode):Press
to change the direction of the
airflow. The current mode appears
in the display screen. Automatic
operation is cancelled and manual
mode is initiated. Press AUTO to
return to automatic operation.
To change the current mode, select
one of the following:
Y(Vent): Air is directed to the
instrument panel outlets.
\(Bi-level): Air is divided
between the instrument panel
outlets and the floor outlets.
C(Tri-level): Air is divided
between the windshield, instrument
panel, and floor outlets.
[(Floor): Air is directed to the
floor outlets.
-(Defog): Clears the windows of
fog or moisture. Air is directed to the
windshield and floor outlets.
0(Defrost): Clears the
windshield of fog or frost more
quickly. Air is directed to the
windshield.
#(Air Conditioning): Press to
turn the automatic air conditioning
on or off. If the fan is turned off or
the outside temperature falls below
freezing, the air conditioning
compressor will not run.
Press AUTO to return to automatic
operation and the air conditioner
runs as needed. When the indicator
light is on, the air conditioner runs
automatically to cool the air inside
the vehicle or to dry the air needed
to defog the windshield faster.
h(Recirculation): Press to turn
on recirculation. An indicator light
comes on. Air is recirculated to
quickly cool the inside of the vehicle
or prevent outside air and odors
from entering.
Automatic Air Recirculation:
When the AUTO indicator light is
on, the air is automatically
recirculated as needed to help
quickly cool the inside of the
vehicle. AQS (Air Quality Sensor):
For
vehicles with an air quality sensor,
the climate control system adjusts to
limit some exhaust fumes from
being pulled inside your vehicle.
Press the AQS button on the
climate control to activate the air
quality sensor. The air quality
sensor will not maintain recirculation
for an extended period to prevent
the air inside the vehicle from
becoming too dry or stuffy.
To adjust the sensitivity of the
Air Quality Control, see “Climate
and Air Quality” underVehicle
Personalization on page 5‑30.
Auto Defog: The climate control
system may have a sensor to
automatically detect high humidity
inside the vehicle. When high
humidity is detected, the climate
control system may adjust to
outside air supply and turn on the
air conditioner. If the climate control
system does not detect possible
window fogging, it returns to normal
operation. To turn Auto Defog off or
Page 181 of 372
Black plate (1,1)Chevrolet Orlando Owner Manual - 2013 - CRC - 6/5/12
Driving and Operating 9-1
Driving and
Operating
Driving Information
Distracted Driving . . . . . . . . . . . . . 9-2
Defensive Driving . . . . . . . . . . . . . 9-2
Drunk Driving . . . . . . . . . . . . . . . . . 9-3
Control of a Vehicle . . . . . . . . . . . 9-3
Braking . . . . . . . . . . . . . . . . . . . . . . . 9-3
Steering . . . . . . . . . . . . . . . . . . . . . . . 9-3
Off-Road Recovery . . . . . . . . . . . . 9-4
Loss of Control . . . . . . . . . . . . . . . . 9-4
Driving on Wet Roads . . . . . . . . . 9-5
Highway Hypnosis . . . . . . . . . . . . 9-6
Hill and Mountain Roads . . . . . . 9-6
Winter Driving . . . . . . . . . . . . . . . . . 9-7
If the Vehicle Is Stuck . . . . . . . . . 9-8
Vehicle Load Limits . . . . . . . . . . . 9-9
Starting and Operating
New Vehicle Break-In . . . . . . . . 9-13
Ignition Positions . . . . . . . . . . . . 9-14
Starting the Engine . . . . . . . . . . 9-16
Engine Heater . . . . . . . . . . . . . . . 9-17
Retained AccessoryPower (RAP) . . . . . . . . . . . . . . . 9-18
Shifting Into Park . . . . . . . . . . . . 9-18 Shifting out of Park . . . . . . . . . . 9-19
Parking . . . . . . . . . . . . . . . . . . . . . . 9-20
Parking over Things
That Burn . . . . . . . . . . . . . . . . . . 9-20
Engine Exhaust
Engine Exhaust . . . . . . . . . . . . . . 9-20
Running the Vehicle WhileParked . . . . . . . . . . . . . . . . . . . . . 9-21
Automatic Transmission
Automatic Transmission . . . . . 9-21
Manual Mode . . . . . . . . . . . . . . . . 9-23
Manual Transmission
Manual Transmission . . . . . . . . 9-24
Brakes
Antilock BrakeSystem (ABS) . . . . . . . . . . . . . . 9-26
Parking Brake . . . . . . . . . . . . . . . 9-27
Brake Assist . . . . . . . . . . . . . . . . . 9-27
Ride Control Systems
Traction Control System (TCS) . . . . . . . . . . . . . . 9-28
StabiliTrak
®System . . . . . . . . . 9-29
Cruise Control
Cruise Control . . . . . . . . . . . . . . . 9-31
Object Detection Systems
Ultrasonic Parking Assist . . . . 9-33
Rear Vision Camera (RVC) . . . . . . . . . . . . . 9-35
Fuel
Fuel . . . . . . . . . . . . . . . . . . . . . . . . . 9-38
Recommended Fuel . . . . . . . . . 9-38
Gasoline Specifications . . . . . . 9-38
California FuelRequirements . . . . . . . . . . . . . . 9-38
Fuels in Foreign Countries . . . 9-39
Fuel Additives . . . . . . . . . . . . . . . 9-39
Filling the Tank . . . . . . . . . . . . . . 9-40
Filling a Portable Fuel Container . . . . . . . . . . . . . . . . . . . 9-41
Towing
General TowingInformation . . . . . . . . . . . . . . . . . 9-42
Driving Characteristics and Towing Tips . . . . . . . . . . . . . . . . 9-42
Trailer Towing . . . . . . . . . . . . . . . . 9-45
Towing Equipment . . . . . . . . . . . 9-46
Conversions and Add-Ons
Add-On Electrical Equipment . . . . . . . . . . . . . . . . . 9-47
Page 204 of 372
Black plate (24,1)Chevrolet Orlando Owner Manual - 2013 - CRC - 6/5/12
9-24 Driving and Operating
The transmission will only allow
you to shift into gears appropriate
for the vehicle speed and engine
revolutions per minute (rpm). The
transmission will not automatically
shift to the next lower gear if the
engine rpm is too high, nor to the
next higher gear when the maximum
engine rpm is reached.
If shifting is prevented for any
reason, the currently selected gear
will flash multiple times, indicating
that the transmission has not shifted
gears.
While in the DSC mode, the
transmission will automatically
downshift when the vehicle comes
to a stop. This will allow for more
power during take-off.
When accelerating the vehicle from
a stop in snowy and icy conditions,
you may want to shift into second
gear. A higher gear allows the
vehicle to gain more traction on
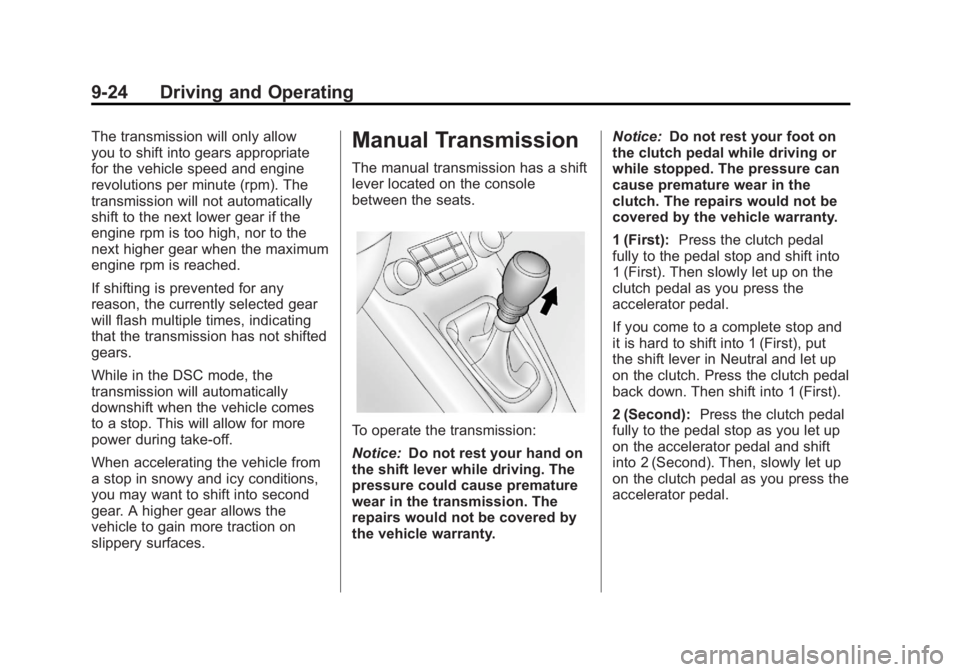
slippery surfaces.Manual Transmission
The manual transmission has a shift
lever located on the console
between the seats.
To operate the transmission:
Notice:Do not rest your hand on
the shift lever while driving. The
pressure could cause premature
wear in the transmission. The
repairs would not be covered by
the vehicle warranty. Notice:
Do not rest your foot on
the clutch pedal while driving or
while stopped. The pressure can
cause premature wear in the
clutch. The repairs would not be
covered by the vehicle warranty.
1 (First): Press the clutch pedal
fully to the pedal stop and shift into
1 (First). Then slowly let up on the
clutch pedal as you press the
accelerator pedal.
If you come to a complete stop and
it is hard to shift into 1 (First), put
the shift lever in Neutral and let up
on the clutch. Press the clutch pedal
back down. Then shift into 1 (First).
2 (Second): Press the clutch pedal
fully to the pedal stop as you let up
on the accelerator pedal and shift
into 2 (Second). Then, slowly let up
on the clutch pedal as you press the
accelerator pedal.