2017 CHEVROLET EXPRESS CARGO VAN towing
[x] Cancel search: towingPage 184 of 346
Chevrolet Express Owner Manual (GMNA-Localizing-U.S./Canada/Mexico-9967827) - 2017 - crc - 5/6/16
Driving and Operating 183
Warning (Continued)
.There are holes or openingsin the vehicle body fromdamage or aftermarketmodifications that are notcompletely sealed.
If unusual fumes are detected or
if it is suspected that exhaust is
coming into the vehicle:
.Drive it only with thewindows completely down.
.Have the vehicle repairedimmediately.
Never park the vehicle with the
engine running in an enclosed
area such as a garage or a
building that has no fresh air
ventilation.
Running the Vehicle
While Parked
It is better not to park with theengine running.
If the vehicle is left with the enginerunning, follow the proper steps tobe sure the vehicle will not move.SeeShifting Into Park0180andEngine Exhaust0182.
If parking on a hill and pulling atrailer, seeDriving Characteristicsand Towing Tips0202.
Automatic
Transmission
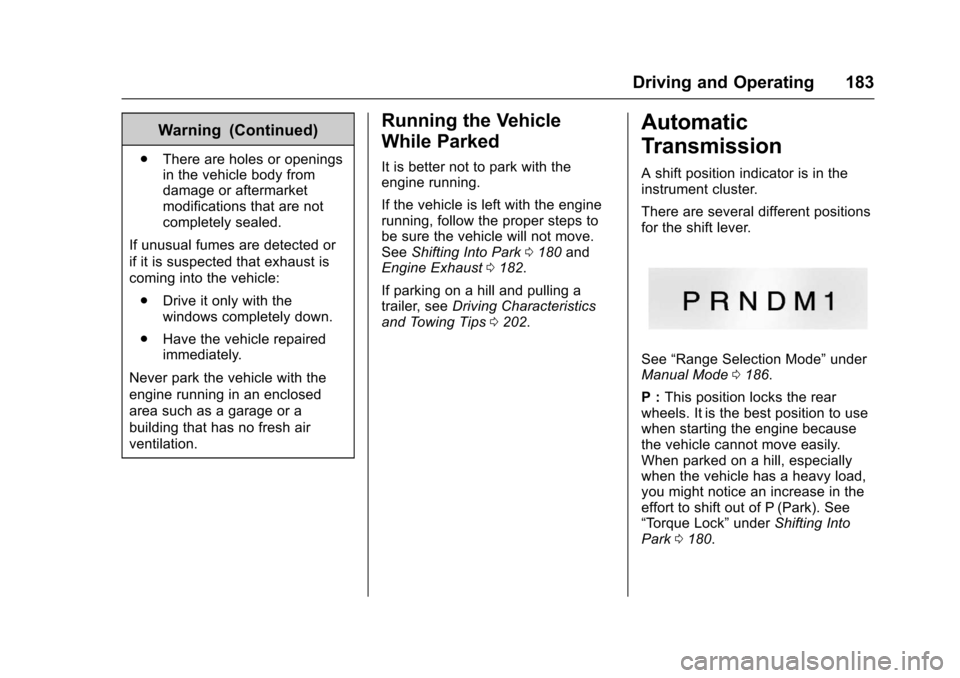
Ashiftpositionindicatorisintheinstrument cluster.
There are several different positionsfor the shift lever.
See“Range Selection Mode”underManual Mode0186.
P:This position locks the rearwheels. It is the best position to usewhen starting the engine becausethe vehicle cannot move easily.When parked on a hill, especiallywhen the vehicle has a heavy load,you might notice an increase in theeffort to shift out of P (Park). See“To r q u e L o c k”underShifting IntoPark0180.
Page 186 of 346
Chevrolet Express Owner Manual (GMNA-Localizing-U.S./Canada/Mexico-9967827) - 2017 - crc - 5/6/16
Driving and Operating 185
By doing this, the vehicle shiftsdown to the next gear and hasmore power.
D(Drive) can be used when towingatrailer,carryingaheavyload,or driving on steep hills. You mightwant to shift the transmission to alower gear selection if thetransmission shifts too often.
Downshifting the transmission inslippery road conditions could resultin skidding. See“Skidding”underLoss of Control0167.
The vehicle has a shift stabilizationfeature that adjusts the transmissionshifting to the current drivingconditions in order to reduce rapidupshifts and downshifts. This shiftstabilization feature is designed todetermine, before making anupshift, if the engine is able tomaintain vehicle speed by analyzingthings such as vehicle speed,throttle position, and vehicle load.If the shift stabilization featuredetermines that a current vehiclespeed cannot be maintained, thetransmission does not upshift andinstead holds the current gear.
In some cases, this could appear tobe a delayed shift, however thetransmission is operating normally.
The transmission uses adaptiveshift controls. Adaptive shift controlscontinually compare key shiftparameters to pre-programmedideal shifts stored in thetransmission’scomputer.Thetransmission constantly makesadjustments to improve vehicleperformance according to how thevehicle is being used, such as withaheavyloadorwhenthetemperature changes. During thisadaptive shift control process,shifting might feel different as thetransmission determines the bestsettings.
The shift quality of a new vehiclemay not be ideal because theadaptive shift control process maynot have determined the bestsettings for a particular shift orcondition. Shift quality will improvewith continued driving.
When temperatures are very cold,the transmission's gear shiftingcould be delayed, providing more
stable shifts until the engine warmsup. Shifts could be more noticeablewith a cold transmission. Thisdifference in shifting is normal.
M:This position lets drivers selectthe range of gears appropriate forcurrent driving conditions. If thevehicle has this feature, see“RangeSelection Mode”underManualMode0186.
3:This position is also used fornormal driving. It reduces vehiclespeed more than D (Drive) withoutusing the brakes. You might choose3(Third) instead of D(Drive) whendriving on hilly, winding roads; whentowing a trailer, so there is lessshifting between gears; and whengoing down a steep hill. See“RangeSelection Mode”underManualMode0186.
2:This position reduces vehiclespeed even more than 3 (Third)without using the brakes. You canuse 2 (Second) on hills. It can helpcontrol vehicle speed as you godown steep mountain roads, butthen you would also want to use the
Page 187 of 346
Chevrolet Express Owner Manual (GMNA-Localizing-U.S./Canada/Mexico-9967827) - 2017 - crc - 5/6/16
186 Driving and Operating
brakes off and on. See“RangeSelection Mode”underManualMode0186.
If you manually select 2 (Second) inan automatic transmission, thetransmission will start insecond gear. You can use thisfeature for reducing the speed of therear wheels when trying to start thevehicle from a stop on slippery roadsurfaces.
1:This position reduces vehiclespeed without using the brakes.Yo u c a n u s e i t f o r m a j o r / s e v e r edowngrades where the vehiclewould otherwise accelerate due tosteepness of grade. When you shiftto 1 (First) it provides the lowestgear appropriate to current roadspeed and continues to downshiftas the vehicle slows, eventuallydownshifting to 1 (First) gear. Thetransmission can be held in 1 (First)gear using Range Selection Modeor the shift lever. See“RangeSelection Mode”underManualMode0186.
Caution
Spinning the tires or holding the
vehicle in one place on a hill
using only the accelerator pedal
may damage the transmission.
The repair will not be covered by
the vehicle warranty. If you are
stuck, do not spin the tires. When
stopping on a hill, use the brakes
to hold the vehicle in place.
Normal Mode Grade Braking
This mode is enabled when thevehicle is started, but is not enabledin Range Selection Mode. It assistsin maintaining desired vehiclespeeds when driving on downhillgrades by using the engine andtransmission to slow the vehicle.The first time the system activatesfor each ignition key cycle, a DICmessage will be displayed. SeeTr a n s m i s s i o n M e s s a g e s011 8.
To d i s a b l e o r e n a b l e N o r m a l M o d eGrade Braking within the currentignition key cycle, press and holdthe Tow/Haul button for
three seconds. A DIC messagedisplays. SeeTr a n s m i s s i o nMessages011 8.
For other forms of grade braking,seeTo w / H a u l M o d e0187andCruise Control0192.
Manual Mode
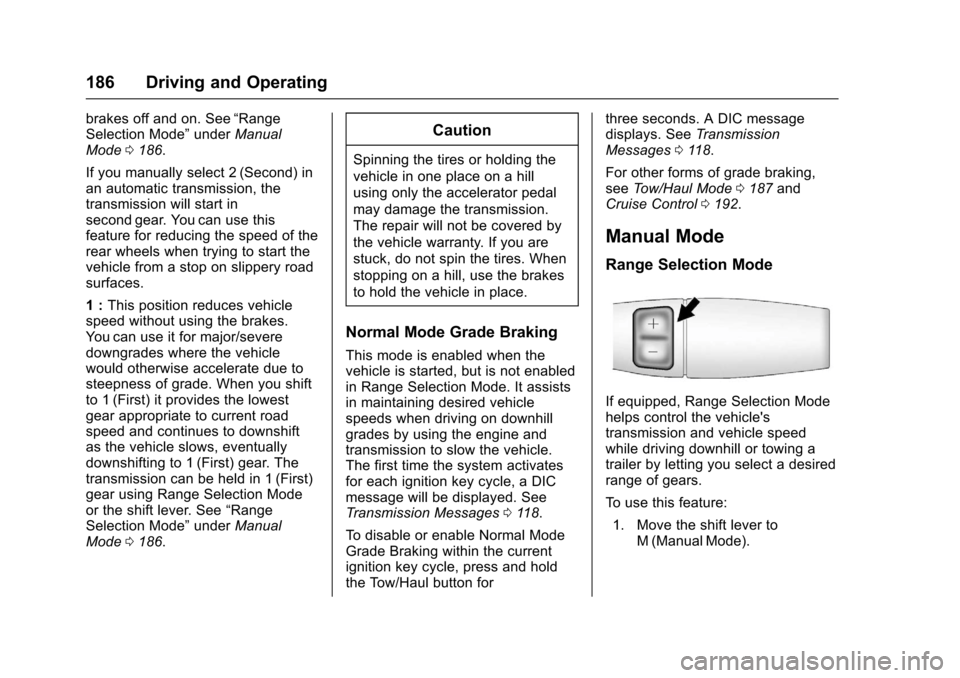
Range Selection Mode
If equipped, Range Selection Modehelps control the vehicle'stransmission and vehicle speedwhile driving downhill or towing atrailer by letting you select a desiredrange of gears.
To u s e t h i s f e a t u r e :
1. Move the shift lever toM(ManualMode).
Page 188 of 346
Chevrolet Express Owner Manual (GMNA-Localizing-U.S./Canada/Mexico-9967827) - 2017 - crc - 5/6/16
Driving and Operating 187
2. Press the +/✓buttons on theshift lever, to select the desiredrange of gears for currentdriving conditions.
When M (Manual Mode) is selectedanumberdisplaysintheDICnexttothe M indicating the current gear.
This number is the highest gear thatcan be used. However, the vehiclecan automatically shift to lowergears as it adjusts to drivingconditions. This means that allgears below that number areavailable. When 5 (Fifth) is selected,1(First) through 5(Fifth) gears areautomatically shifted by the vehicle,but 6 (Sixth) cannot be used untilthe +/✓button on the steeringcolumn lever is used to change tothe gear.
Grade Braking is not available whenRange Selection Mode is active.SeeTo w / H a u l M o d e0187.
While using Range Selection Mode,cruise control and the Tow/HaulMode can be used.
Caution
Spinning the tires or holding the
vehicle in one place on a hill
using only the accelerator pedal
may damage the transmission.
The repair will not be covered by
the vehicle warranty. If you are
stuck, do not spin the tires. When
stopping on a hill, use the brakes
to hold the vehicle in place.
Low Traction Mode
Low Traction Mode can assist invehicle acceleration when roadconditions are slippery. While thevehicle is at a stop, select thesecond gear range using RangeSelection Mode. This will limittorque to the wheels after it detectswheel slip, preventing the tires fromspinning.
Tow/Haul Mode
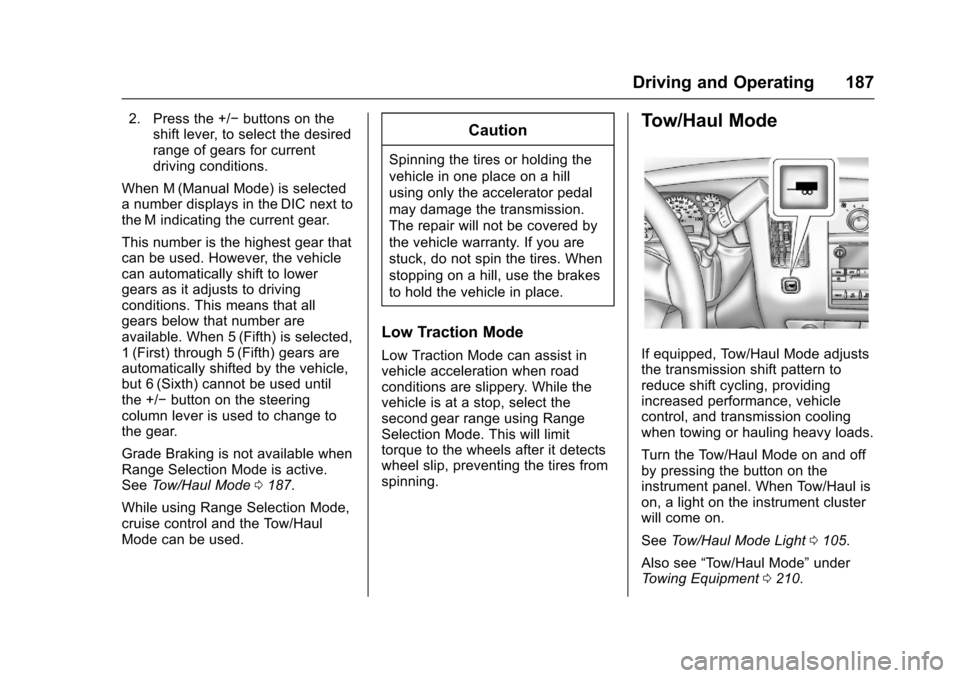
If equipped, Tow/Haul Mode adjuststhe transmission shift pattern toreduce shift cycling, providingincreased performance, vehiclecontrol, and transmission coolingwhen towing or hauling heavy loads.
Turn the Tow/Haul Mode on and offby pressing the button on theinstrument panel. When Tow/Haul ison, a light on the instrument clusterwill come on.
SeeTo w / H a u l M o d e L i g h t0105.
Also see“To w / H a u l M o d e”underTo w i n g E q u i p m e n t0210.
Page 190 of 346
Chevrolet Express Owner Manual (GMNA-Localizing-U.S./Canada/Mexico-9967827) - 2017 - crc - 5/6/16
Driving and Operating 189
Using ABS
Do not pump the brakes. Just holdthe brake pedal down firmly and letABS work. You may hear the ABSpump or motor operating and feelthe brake pedal pulsate. This isnormal.
Braking in Emergencies
ABS allows you to steer and brakeat the same time. In manyemergencies, steering can helpmore than even the very bestbraking.
Parking Brake
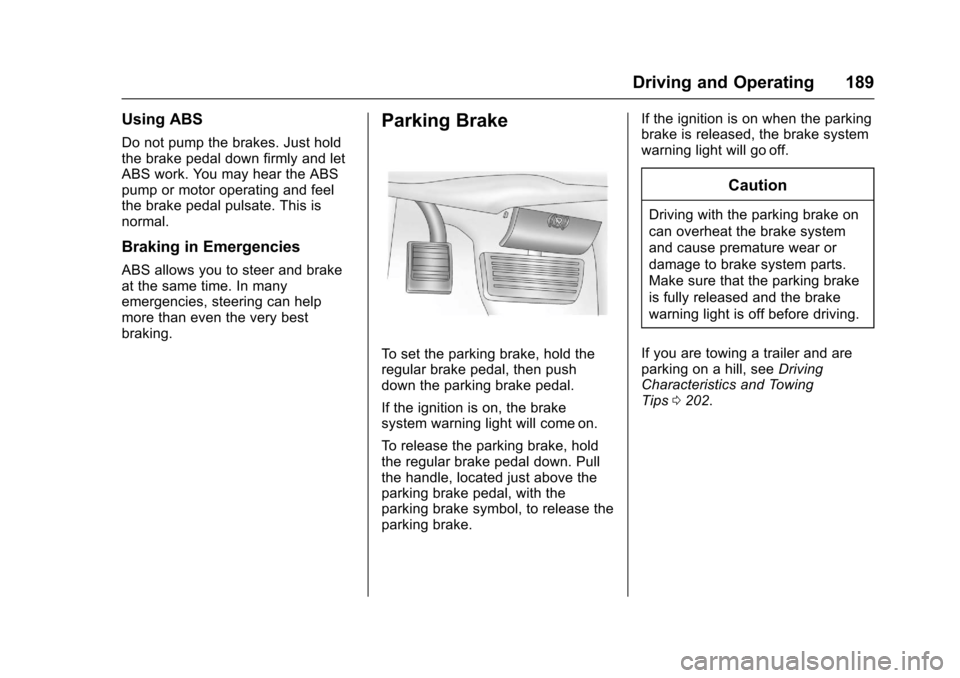
To s e t t h e p a r k i n g b r a k e , h o l d t h eregular brake pedal, then pushdown the parking brake pedal.
If the ignition is on, the brakesystem warning light will come on.
To r e l e a s e t h e p a r k i n g b r a k e , h o l dthe regular brake pedal down. Pullthe handle, located just above theparking brake pedal, with theparking brake symbol, to release theparking brake.
If the ignition is on when the parkingbrake is released, the brake systemwarning light will go off.
Caution
Driving with the parking brake on
can overheat the brake system
and cause premature wear or
damage to brake system parts.
Make sure that the parking brake
is fully released and the brake
warning light is off before driving.
If you are towing a trailer and areparking on a hill, seeDrivingCharacteristics and TowingTips0202.
Page 198 of 346
Chevrolet Express Owner Manual (GMNA-Localizing-U.S./Canada/Mexico-9967827) - 2017 - crc - 5/6/16
Driving and Operating 197
During any of these fault conditions,the display will be blank and theindicator will flash while the vehicleis in R (Reverse) or until theconditions return to normal.
Parking Assist
If equipped, the Rear Parking Assist(RPA) system uses sensors on therear bumper to assist with parkingand avoiding objects while inR(Reverse).
{Warning
The parking assist system does
not detect children, pedestrians,
bicyclists, animals, or objects
below the bumper or that are too
close or too far from the vehicle.
It is not available at speeds
greater than 8 km/h (5 mph). To
prevent injury, death, or vehicle
damage, even with parking assist,
always check the area around the
vehicle and check all mirrors
before backing.
How the System Works
RPA comes on automatically whenthe shift lever is moved intoR(Reverse). A single beep soundsto indicate the system is working.
RPA operates only at speeds lessthan 8 km/h (5 mph).
An obstacle detection is indicatedby beeps. The time between beepsgets shorter as the vehicleapproaches the obstacle. Repeatedbeeps are heard when the distanceis less than 30 cm (12 in).
To b e d e t e c t e d , o b j e c t s m u s t b e a tleast 25 cm (10 in) off the groundand below rear door level. Objectsmust also be within 2.5 m (8 ft) fromthe rear bumper. This distance maybe less during warmer or humidweather.
Turning the System On and Off
The system can be disabled throughthe Driver Information Center (DIC).See“Park Assist”underDriverInformation Center (DIC)0108.
RPA defaults to the on setting eachtime the vehicle is started.
Turn RPA off when towing a trailer.
When the System Does Not
Seem to Work Properly
The following messages may bedisplayed on the DIC:
SERVICE PARK ASSIST :If thismessage occurs, take the vehicle toyour dealer for repair.
PA R K A S S I S T O F F :This messageoccurs if the driver disables thesystem or if the vehicle is drivenabove 8 km/h (5 mph) inR(Reverse).
PA R K A S S T B L O C K E D S E EOWNERS MANUAL :Thismessage can occur under thefollowing conditions:
.The sensors are not clean. Keepthe rear bumper free of mud,dirt, snow, ice, slush, and frost.The message may not clear untilfrost or ice has melted all aroundand inside the sensor.
Page 203 of 346
Chevrolet Express Owner Manual (GMNA-Localizing-U.S./Canada/Mexico-9967827) - 2017 - crc - 5/6/16
202 Driving and Operating
Caution (Continued)
indicator lamp to light, and could
damage the fuel tank and
emissions system. See
Malfunction Indicator Lamp
(Check Engine Light)0102.
Filling a Portable Fuel
Container
{Warning
Filling a portable fuel container
while it is in the vehicle can cause
fuel vapors that can ignite either
by static electricity or other
means. You or others could be
badly burned and the vehicle
could be damaged. Always:
.Use approved fuelcontainers.
.Remove the container fromthe vehicle, trunk, or pickupbed before filling.
(Continued)
Warning (Continued)
.Place the container on theground.
.Place the nozzle inside thefill opening of the containerbefore dispensing fuel, andkeep it in contact with the fillopening until filling iscomplete.
.Fill the container no morethan 95% full to allow forexpansion.
.Do not smoke, lightmatches, or use lighterswhile pumping fuel.
.Avoid using cell phones orother electronic devices.
Trailer Towing
General Towing
Information
Only use towing equipment that hasbeen designed for the vehicle.Contact your dealer or traileringdealer for assistance with preparingthe vehicle for towing a trailer. Readthe entire section before towing atrailer.
For towing a disabled vehicle, seeTo w i n g t h e V e h i c l e0286.Fortowing the vehicle behind anothervehicle such as a motor home, seeRecreational Vehicle Towing0286.
Driving Characteristics
and Towing Tips
Driving with a Trailer
When towing a trailer:
.Become familiar with the stateand local laws that apply totrailer towing.
Page 204 of 346
Chevrolet Express Owner Manual (GMNA-Localizing-U.S./Canada/Mexico-9967827) - 2017 - crc - 5/6/16
Driving and Operating 203
.The trailer must be equippedwith brakes adequate for theintended use. A loaded trailerweighing more than 680 kg(1,500 lb) must be equipped withits own brake system, withbrakes working on all axles.Trailer braking equipmentconforming to CanadianStandards Association (CSA)requirement CAN3-D313, or itsequivalent, is recommended.
.Do not tow a trailer during thefirst 800 km (500 mi) to preventdamage to the engine, axle,or other parts.
.Then during the first 800 km(500 mi) of trailer towing, do notdrive over 80 km/h (50 mph) anddo not make starts at full throttle.
.Vehicles can tow in D (Drive).The Tow/Haul Mode may beused if the transmission shiftstoo often. SeeTo w / H a u lMode0187.
.Turn off Park Assist whentowing.
{Warning
When towing a trailer, exhaust
gases may collect at the rear of
the vehicle and enter if the
liftgate, trunk/hatch, or rear-most
window is open.
When towing a trailer:
.Do not drive with theliftgate, trunk/hatch,or rear-most window open.
.Fully open the air outlets onor under the instrumentpanel.
.Also adjust the climatecontrol system to a settingthat brings in only outsideair. See“Climate ControlSystems”in the Index.
For more information about
carbon monoxide, seeEngine
Exhaust0182.
To w i n g a t r a i l e r r e q u i r e s a c e r t a i namount of experience. Thecombination you are driving islonger and not as responsive as the
vehicle itself. Get acquainted withthe handling and braking of the rigbefore setting out for the open road.
The structure, tires, and brakes ofthe trailer must be rated to carry theload. Inadequate trailer equipmentcan cause the combination tooperate in an unexpected or unsafemanner.
Before starting, check all trailer hitchparts and attachments, safetychains, electrical connectors, lamps,tires, and mirrors. Get familiar withthe handling and braking of the rig.If the trailer has electric brakes, startthe combination moving and thenapply the trailer brake controller byhand to be sure the brakes work.
During the trip, check occasionallyto be sure that the load is secureand the lamps and any trailerbrakes still work.
Following Distance
Stay at least twice as far behind thevehicle ahead as you would whendriving the vehicle without a trailer.This can help to avoid heavybraking and sudden turns.