Page 39 of 369
38
Interface SettingsHeader Clock Display
System Setup
Header Clock Display
HSETTINGS button System Settings Others Header Clock Display
Selects whether the clock display comes on. Rotate i to select an option. Press
u .
The following option are available:
• On (factory default): The system displa ys the clock in the audio/information
screen.
• Off : Disables the feature.
Page 41 of 369

40
Personal InformationAddress Book
System Setup
Address Book
HSETTINGS button Navi Settings Personal Info Address Book
Store up to 200 address entries in two ad dress books (Driver 1 and Driver 2). You can
add, edit, and delete information in the address books.
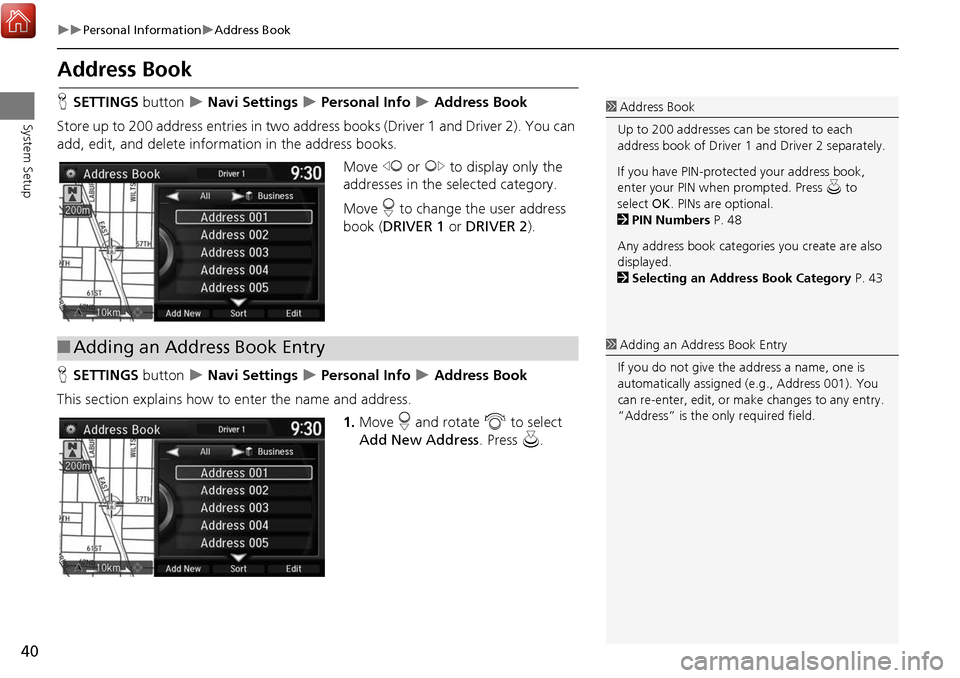
Move w or y to display only the
addresses in the selected category.
Move r to change the user address
book ( DRIVER 1 or DRIVER 2 ).
H SETTINGS button
Navi Settings Personal Info Address Book
This section explains how to enter the name and address.
1.Move r and rotate i to select
Add New Address . Press u.
1Address Book
Up to 200 addresses can be stored to each
address book of Driver 1 and Driver 2 separately.
If you have PIN-protec ted your address book,
enter your PIN when prompted. Press u to
select OK. PINs are optional.
2 PIN Numbers P. 48
Any address book categories you create are also
displayed.
2 Selecting an Address Book Category P. 43
■Adding an Address Book Entry1 Adding an Address Book Entry
If you do not give the address a name, one is
automatically assigned (e.g., Address 001). You
can re-enter, edit, or make changes to any entry.
“Address” is the only required field.
Page 42 of 369
41
Personal InformationAddress Book
System Setup
2.Rotate i to select an item. Press
u .
The following items are available:
• Name: Edits the name of the entry.
• Address : Edits the address of the entry.
• Phone No. : Edits the phone number of the entry.
• Category : Specifies the category of the entry.
• Alert : Alerts you when you approach the address entry.
On : Beeps and displays a message when your vehicle gets near the entry.
Off (factory default): Disables the feature.
3.Rotate i to select Name. Press
u .
4. Enter a name or title. Move r to
select OK.
5. Rotate i to select Address. Press
u .
6. Rotate i to select an item for
specifying the address. Press u.
Continued
Page 43 of 369

42
Personal InformationAddress Book
System Setup
The following items are available:
• Current Position: Select your current location.
• Address: Enter an address on the character input screen when prompted.
2
Address P. 90
• Previous Destinations: Select a previous destination.
2
Previous Destination P. 97
• Place Name: Enter the name of a place/landmark.
2
Place Name P. 102
• Local Search: Sets a destination by using Local Search.
2
Local Search P. 100
• Place Category: Select a category to search for a place/landmark (e.g., Banking,
Lodging).
2
Place Category P. 98
• More Search Methods : Displays additional search method entries.
2
Entering a Destination P. 88
H SETTINGS button
Navi Settings Personal Info Address Book
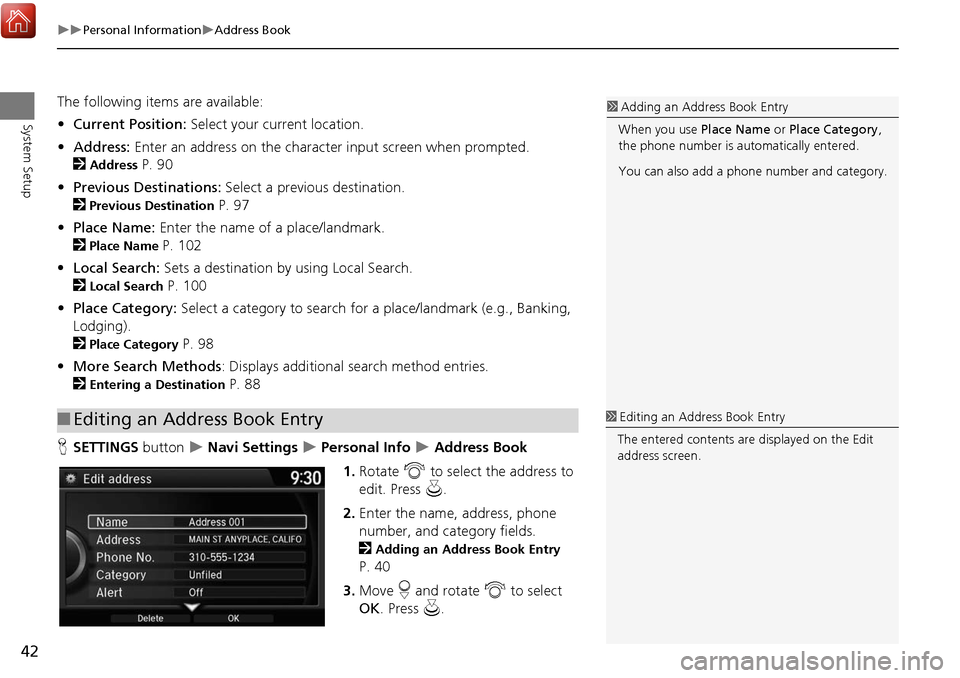
1. Rotate i to select the address to
edit. Press u.
2. Enter the name, address, phone
number, and category fields.
2
Adding an Address Book Entry
P. 40
3. Move r and rotate i to select
OK . Press u.
■Editing an Address Book Entry
1 Adding an Address Book Entry
When you use Place Name or Place Category ,
the phone number is au tomatically entered.
You can also add a phone number and category.
1 Editing an Address Book Entry
The entered contents are displayed on the Edit
address screen.
Page 44 of 369

43
Personal InformationAddress Book
System Setup
HSETTINGS button Navi Settings Personal Info Address Book
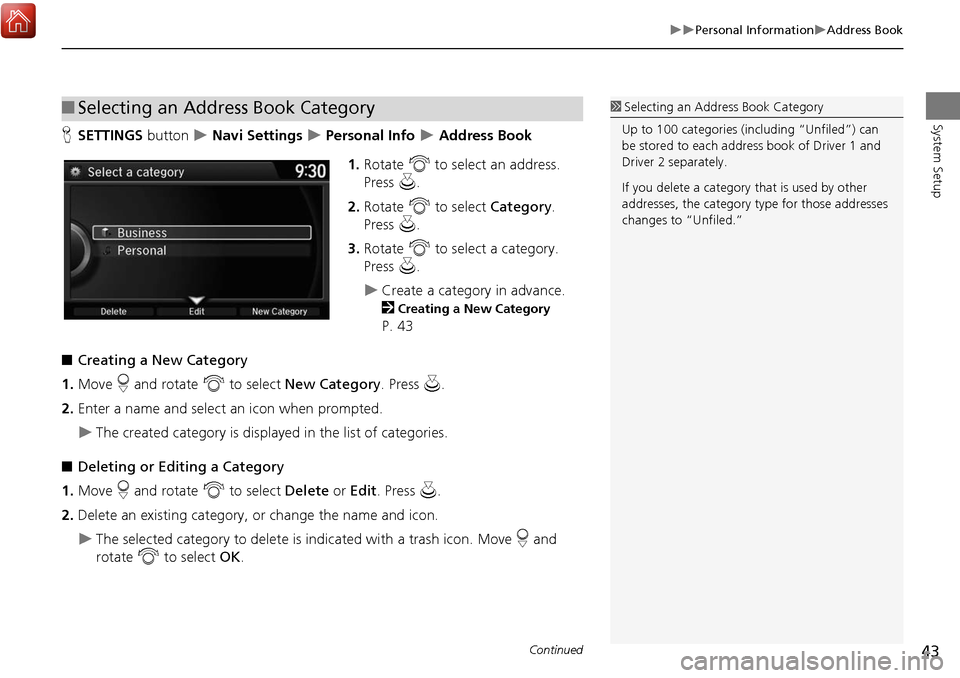
1. Rotate i to select an address.
Press u.
2. Rotate i to select Category .
Press u.
3. Rotate i to select a category.
Press u.
Create a category in advance.
2
Creating a New Category
P. 43
■ Creating a New Category
1. Move r and rotate i to select New Category . Press u.
2. Enter a name and select an icon when prompted.
The created category is displayed in the list of categories.
■ Deleting or Editing a Category
1. Move r and rotate i to select Delete or Edit. Press u.
2. Delete an existing category, or change the name and icon.
The selected category to delete is indicated with a trash icon. Move r and
rotate i to select OK .
■Selecting an Address Book Category1 Selecting an Addr ess Book Category
Up to 100 categories (inc luding “Unfiled”) can
be stored to each addr ess book of Driver 1 and
Driver 2 se parately.
If you delete a category that is used by other
addresses, the category type for those addresses
changes to “Unfiled.”
Continued
Page 49 of 369

48
Personal InformationPIN Numbers
System Setup
PIN Numbers
HSETTINGS button Navi Settings Personal Info PIN Number
Set a four-digit PIN for protecting persona l addresses and your home address. Once
you set a PIN, you are prompted to enter it whenever you access a personal address
or a home address.
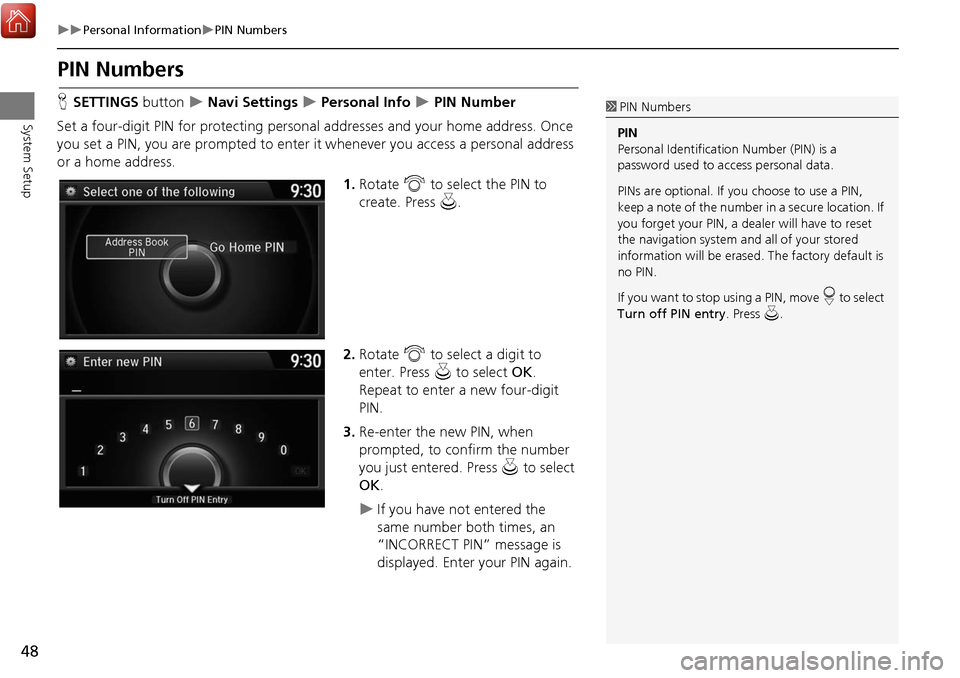
1.Rotate i to select the PIN to
create. Press u.
2. Rotate i to select a digit to
enter. Press u to select OK .
Repeat to enter a new four-digit
PIN.
3. Re-enter the new PIN, when
prompted, to confirm the number
you just entered. Press u to select
OK .
If you have not entered the
same number both times, an
“INCORRECT PIN” message is
displayed. Enter your PIN again.
1PIN Numbers
PIN
Personal Identification Number (PIN) is a
password used to access personal data.
PINs are optional. If you choose to use a PIN,
keep a note of the number in a secure location. If
you forget your PIN, a dealer will have to reset
the navigation system a nd all of your stored
information will be erased . The factory default is
no PIN.
If you want to stop using a PIN, move
r to select
Turn off PIN entry . Press u.
Page 54 of 369
53
Personal InformationDownload POI
System Setup2.Rotate i to select an item. Press
u .
The following items are available:
• Alert Setting : Alerts you when you approach the places/landmarks in the
category.
On : Beeps and displays a message when your vehicle gets near the places/
landmarks in the category.
Off (factory default): Disables the feature.
• Delete Category : Deletes all places/landmarks and icon in the selected category.
• Edit Icon: Changes the category icon.
Page 57 of 369
56
RoutingRoute Preference
System Setup
HSETTINGS button Navi Settings Routing Route Preference
You can select desired routes by sorting the route list. The three top routes can be
displayed on the Select a route screen.
2Viewing the Routes P. 113
1.Move r and rotate i to select
Optimal Routes . Press u.
2. Rotate i to select a list item to
move. Press u.
3. Rotate i to select a desired
location. Press u .
4. Move r and rotate i to select
OK . Press u.
■Optimal Routes1 Optimal Routes
Optimal Routes is a subscription service. For
more information, contact an Acura dealer or
visit www.acura.ca/owners/acuralink .