Page 145 of 265

Climate control143●manual air recirculation 4
● Heated seats +/ß 3 42
Automatic mode AUTO
Basic setting for maximum comfort: ● Press AUTO, the air distribution
and fan speed are regulated
automatically. The LED in the
button illuminates to indicate
activation.
● Press A/C to switch on optimal
cooling and demisting. The LED in the button illuminates to
indicate activation.
● Set the preselected temperature by turning rotary knob TEMP.
Recommended temperature is
22 °C.
● Open all air vents to allow optimised air distribution in
automatic mode.
The fan speed regulation in automatic mode can be changed in the Info
display.
Vehicle personalisation 3 92.
Temperature preselection
Set temperature to the desired value.
The selected temperature is indicated in the display.
If the minimum temperature Lo is set,
the climate control system runs at
maximum cooling, when cooling A/C
is switched on.
If the maximum temperature Hi is set,
the climate control system runs at
maximum heating.
Demisting and defrosting the
windows V
●
Press V or VMAX. The LED in
the button illuminates to indicate
activation. When VMAX is
selected, air is directed to the
windscreen and the fan runs at a
Page 146 of 265

144Climate controlhigher speed. Fog or frost is
cleared from the windscreen more quickly.
● Temperature and air distribution are set automatically and the fan
runs at high speed.
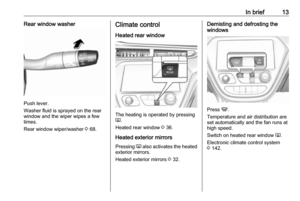
● Switch on heated rear window Ü.
● To return to previous mode: press V, to return to automatic
mode: press AUTO.
Settings of automatic rear window
heating can be changed in the
Info display. Vehicle personalisation
3 92.
System on or off ON/OFF Cooling, fan and automatic mode can
be switched off by pressing ON/OFF.
Manual settings Climate control system settings can
be changed by activating the buttons
and rotary knobs as described below.
Changing a setting will deactivate
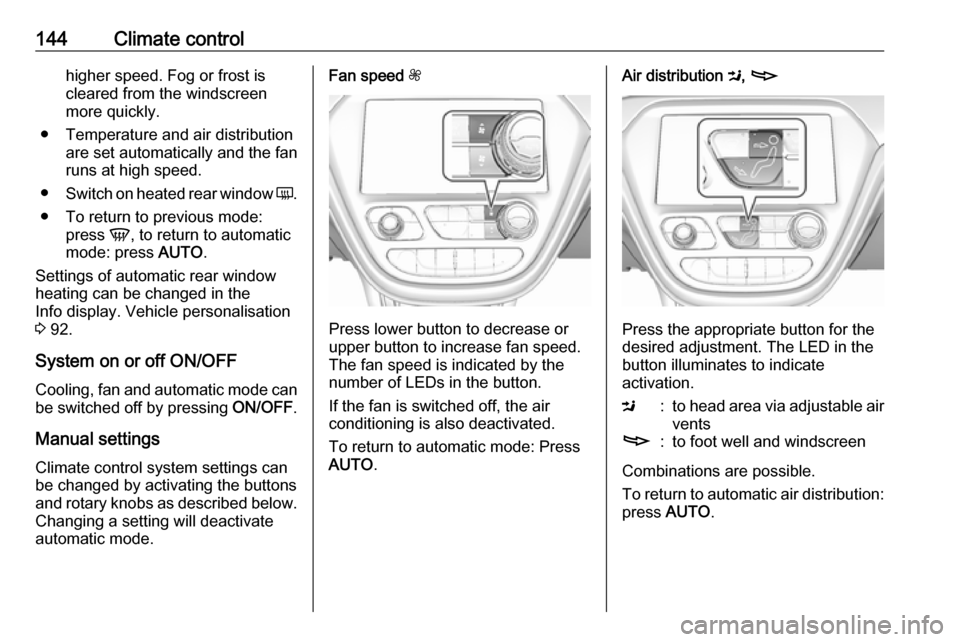
automatic mode.Fan speed Z
,
Press lower button to decrease or
upper button to increase fan speed.
The fan speed is indicated by the
number of LEDs in the button.
If the fan is switched off, the air
conditioning is also deactivated.
To return to automatic mode: Press
AUTO .
Air distribution M, 2
Press the appropriate button for the
desired adjustment. The LED in the
button illuminates to indicate
activation.
M:to head area via adjustable air
vents2:to foot well and windscreen
Combinations are possible.
To return to automatic air distribution:
press AUTO .
Page 147 of 265

Climate control145Manual air recirculation 4
Touch 4 to activate the air
recirculation mode.
Touch 4 again to deactivate
recirculation mode.
If selected, the touch screen button
will illuminate to indicate that air is
being recirculated. This helps to
quickly cool the air inside the vehicle or prevent outside air and odours
from entering.
Touching 4 deactivatels air
recirculation. Press AUTO to return to
automatic operation; recirculation
runs automatically as needed.
9 Warning
The exchange of fresh air is
reduced in air recirculation mode.
In operation without cooling the air humidity increases, so the
windows may mist up from inside.
The quality of the passenger
compartment air deteriorates,
which may cause the vehicle
occupants to feel drowsy.
Engine assisted heating
Operated by pressing O on the radio
remote control.
The climate control system will default
to an appropriate heating or cooling
mode and the rear window heating
will turn on in the event of cold outside temperatures.
Remote start 3 17.
Air vents
Adjustable air vents
At least one air vent must be open
while cooling is on.
Page 148 of 265
146Climate control
Direct the flow of air by tilting and
swivelling the slats.
The airflow may be restricted if the
slats are directed towards the
windows. Keep the air vents open for proper system performance.
9 Warning
Do not attach any objects to the
slats of the air vents. Risk of
damage and injury in case of an
accident.
Fixed air vents
Additional air vents are located
beneath the windscreen and door windows and in the foot wells.Maintenance
Air intake
The air intake in front of the
windscreen in the engine
compartment must be kept clear to
allow air intake. Remove any leaves,
dirt or snow.
Pollen filter The pollen filter cleans dust, soot,
pollen and spores from the air
entering the vehicle through the air
intake.
Page 149 of 265
Climate control147Additionally, an active carbon filter
reduces odours.
Air conditioning regular operation
In order to ensure continuously
efficient performance, cooling must
be operated for a few minutes once a
month, irrespective of the weather
and time of year. Operation with
cooling is not possible when the
outside temperature is too low.
Service For optimal cooling performance, it is
recommended to annually check the
climate control system, starting
three years after initial vehicle
registration, including:
● functionality and pressure test
● heating functionality
● leakage check
● check of drive belts
● cleaning of condenser and evaporator drainage
● performance check
Page 150 of 265

148Driving and operatingDriving and
operatingDriving hints ............................... 148
Driving economically ...............148
Control of the vehicle ...............149
Starting and operating ...............149
New vehicle running-in ............149
Power button ........................... 149
Retained power off ..................151
Starting and stopping the vehicle .................................... 151
Parking .................................... 152
Electric vehicle operation modes ........................................ 154
Operation ................................. 154
Drive modes ............................ 154
Electric drive unit .......................155
Operation ................................. 155
Brakes ........................................ 158
Antilock brake system .............158
Parking brake .......................... 159
Regenerative braking ..............160
Ride control systems .................162
Traction Control system ..........162
Electronic Stability Control ......163Driver assistance systems .........164
Cruise control .......................... 164
Speed limiter ........................... 165
Forward collision alert .............167
Following distance indication ...169
Active emergency braking .......169
Front pedestrian protection .....172
Parking assist .......................... 174
Side blind spot alert .................181
Lane change alert ....................183
Panoramic view system ...........184
Rear view camera ...................185
Rear cross traffic alert .............187
Traffic sign assistant ................188
Lane keep assist .....................191
Charging .................................... 193
Programmable charging ..........197
Programmed charging override .................................. 203
Charging status .......................204
Charge cord ............................. 205
Electrical requirements ............208
Towing ....................................... 209
General information .................209Driving hints
Driving economically The following advice is intended to
help maximise energy efficiency and
range.
In colder temperatures, while these
efficiency tips will help, the electric
vehicle's driving range may be lower
due to higher energy usage.
The weight of additional cargo in the
vehicle affects efficiency and range.
Avoid carrying more than is needed.
Avoid unnecessary use of electrical
accessories. Power used for
functions other than propelling the
vehicle will reduce electric vehicle
range.
Always keep the tyres properly
inflated and the vehicle properly
aligned.
Driving style
Avoid unnecessary rapid
accelerations and decelerations.
Use cruise control when appropriate.
Page 151 of 265

Driving and operating149Avoid shifting to N to coast. The
vehicle recovers energy while
coasting and braking in D or L.
Efficiency gauge in the instrument
cluster
Driving efficiency gauge 3 75.
Drive mode and gear mode selection
Use normal drive mode when
possible.
Sport mode provides more
responsive acceleration than normal
mode but can reduce energy
efficiency.
Use L in heavy stop‐and‐go traffic or
when travelling downhill. L requires
less brake pedal application and
provides a controlled, efficient way to
slow the vehicle down.
Control of the vehicleCaution
Drive carefully whenever the road
has a steep incline or when driving over a ramp or bump, etc.
Pedals
To ensure the pedal travel is
uninhibited, there must be no mats in
the area of the pedals.
Use only floor mats, which fit properly and are fixed by the retainers on the
driver side.Starting and operating
New vehicle running-in Avoid making hard stops for the first
300 km.
Hard stops with new brake linings can
lead to premature wear. Follow this
breaking-in guideline every time you
get new brake linings. Following
break-in, vehicle speed and load can be gradually increased.
Power button
Electronic key must be inside the
vehicle.
Page 152 of 265

150Driving and operatingIf the vehicle will not start, place the
radio remote control in the transmitter
pocket, inside the centre console.
Starting and stopping the vehicle
3 151.Switching on the vehicle
With the vehicle off and the brake
pedal applied, pressing the POWER
m once will place the vehicle in
accessory power mode. When 4
illuminates in the instrument cluster, the vehicle is ready to be driven. This could take up to 15 seconds atextremely cold temperatures.
Press POWER m once more. Release
button after starting procedure
begins.Switching off the vehicle
With the vehicle in P, press
POWER m briefly in each mode or
when engine is running and vehicle is
stationary. Some functions remain
active until driver's door is opened.
If the vehicle is not in P when
switching off the vehicle, P will be
automatically engaged before the
vehicle is switched off.A chime will sound if the driver's door is opened while the vehicle is
switched on. Always press
POWER m to switch off the vehicle
before exiting the vehicle.Emergency shut off during driving
If the vehicle needs to be switched off during driving in case of emergency,
press POWER m for more than
two seconds or press twice briefly
within five seconds.
Starting and stopping the vehicle
3 151.
Service mode
This power mode is available forservice and diagnostics and to verify
the proper operation of the service
vehicle soon control indicator as may
be required for emission inspection
purposes.
With the vehicle switched off and the brake pedal not applied, pressing and
holding POWER m for more than five
seconds will place the vehicle in
service mode. The instruments and
audio systems will operate as they do in accessory power mode, but the
vehicle will not be able to be driven.
The propulsion system will not start in service mode. Press POWERm again
to switch the vehicle off.Caution
Service mode will discharge the
12-volt vehicle battery. Do not use
service mode for an extended
period, or the vehicle may not
start.
Operation in case of failure
If the vehicle does not start due to a
low radio remote control battery, a
message will be displayed in the
Driver Information Centre.
To still drive the vehicle, proceed as
follows:
1. Open the centre console and remove the small tray from the
centre console. Place the radio
remote control in the pocket with
the buttons facing the bottom of
the vehicle.
Other objects, e.g. other keys,
transponder, tags, coins etc. must
be removed.