2016 VOLVO XC90 T8 light
[x] Cancel search: lightPage 147 of 546
INSTRUMENTS AND CONTROLS
* Option/accessory, for more information, see Introduction.145
Related information
•City Safety
™ troubleshooting (p. 295)
• Lighting panel and controls (p. 140)
Active Bending Lights
*
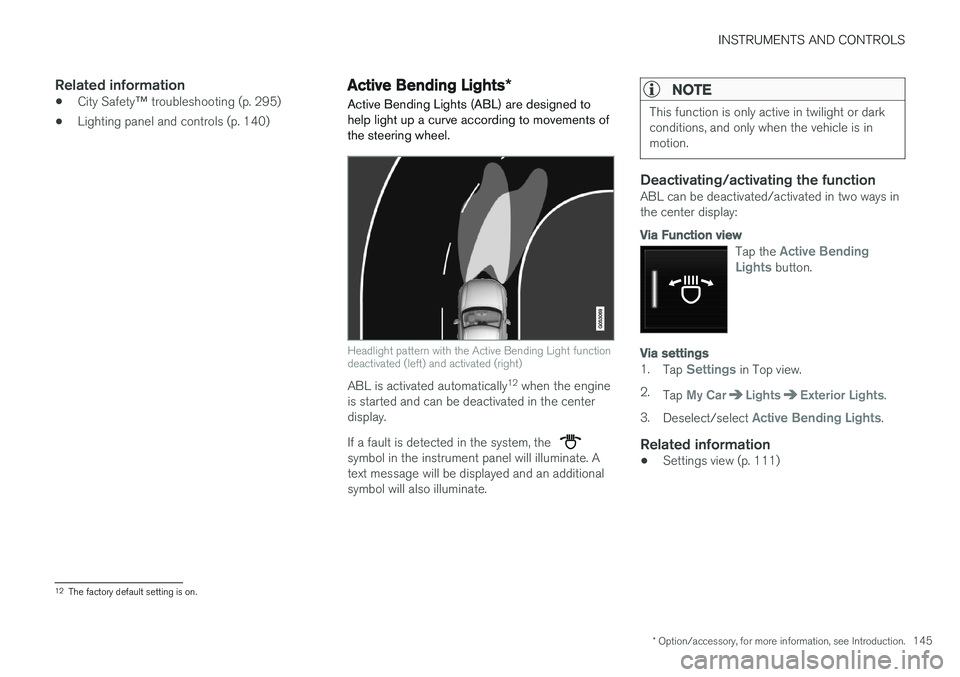
Active Bending Lights (ABL) are designed to help light up a curve according to movements ofthe steering wheel.
Headlight pattern with the Active Bending Light function deactivated (left) and activated (right)
ABL is activated automatically 12
when the engine
is started and can be deactivated in the center display. If a fault is detected in the system, the
symbol in the instrument panel will illuminate. A text message will be displayed and an additionalsymbol will also illuminate.
NOTE
This function is only active in twilight or dark conditions, and only when the vehicle is inmotion.
Deactivating/activating the functionABL can be deactivated/activated in two ways in the center display:
Via Function view
Tap the Active Bending
Lights button.
Via settings
1. Tap Settings in Top view.
2. Tap
My CarLightsExterior Lights.
3. Deselect/select
Active Bending Lights.
Related information
• Settings view (p. 111)
12
The factory default setting is on.
Page 148 of 546

INSTRUMENTS AND CONTROLS
* Option/accessory, for more information, see Introduction.
146
Brake lights The brake lights illuminate automatically when the brakes are applied.
In addition to illuminating when the brake pedal is depressed, the brake lights also illuminate whenone of the driver support systems (e.g., adaptivecruise control, City Safety or collision warning)slow the vehicle.
Related information
• Adaptive Cruise Control (ACC)
* (p. 266)
• City Safety
™ (p. 287)
• Emergency brake lights (p. 350)
Rear fog lights
The rear fog lights are considerably brighter than the normal taillights and should be used onlywhen conditions such as fog, rain, snow, smokeor dust reduce visibility for other vehicles to lessthan 500 ft. (150 meters).
Rear fog light button
The rear fog lights can only be used when:
• the ignition is in mode
II or if the engine is
running and the left-side steering wheel lev- er's thumb wheel is in the
or position
Press the button to turn the fog lights on/off. The rear fog light indicator symbol
in the
instrument panel illuminates when the rear fog lights are switched on. The rear fog lights turn off automatically when the start knob is turned to STOP or when the light switch is turned to the
or posi-
tions.
Related information
• Lighting panel and controls (p. 140)
Page 149 of 546
INSTRUMENTS AND CONTROLS
147
Hazard warning flashers
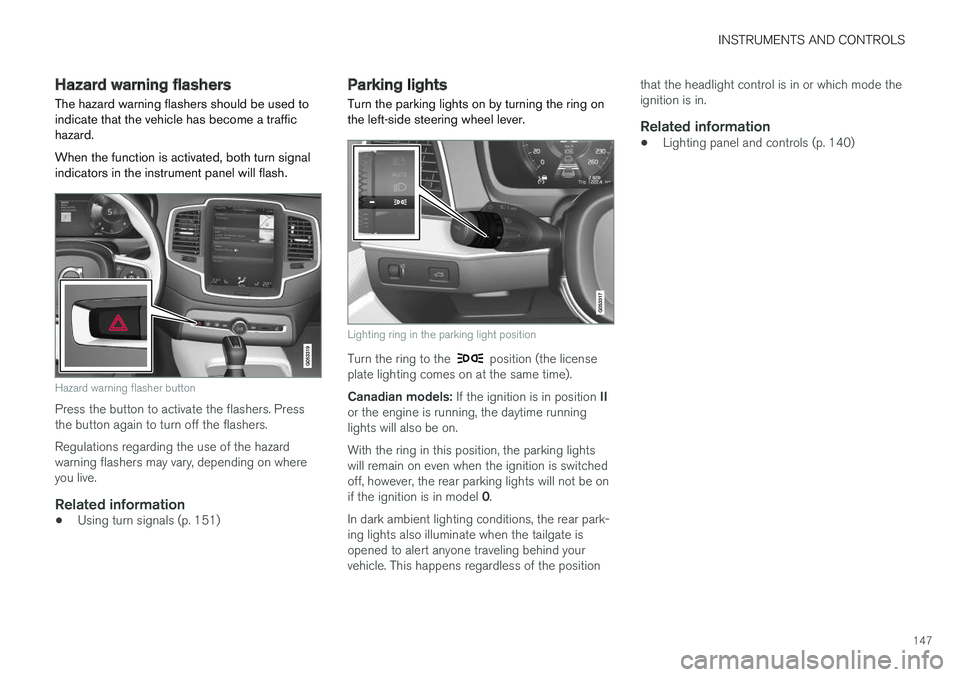
The hazard warning flashers should be used to indicate that the vehicle has become a traffichazard. When the function is activated, both turn signal indicators in the instrument panel will flash.
Hazard warning flasher button
Press the button to activate the flashers. Press the button again to turn off the flashers. Regulations regarding the use of the hazard warning flashers may vary, depending on whereyou live.
Related information
• Using turn signals (p. 151)
Parking lights Turn the parking lights on by turning the ring on the left-side steering wheel lever.
Lighting ring in the parking light position
Turn the ring to the position (the license
plate lighting comes on at the same time). Canadian models: If the ignition is in position II
or the engine is running, the daytime running lights will also be on. With the ring in this position, the parking lights will remain on even when the ignition is switchedoff, however, the rear parking lights will not be on if the ignition is in model 0.
In dark ambient lighting conditions, the rear park- ing lights also illuminate when the tailgate isopened to alert anyone traveling behind yourvehicle. This happens regardless of the position that the headlight control is in or which mode theignition is in.
Related information
•
Lighting panel and controls (p. 140)
Page 150 of 546

INSTRUMENTS AND CONTROLS
* Option/accessory, for more information, see Introduction.
148
Approach lighting
Approach lighting activates the parking lights, outer door handle lights *, license plate lighting,
courtesy lighting and footwell lighting when you approach the vehicle.
This function is activated by unlocking the car. The time interval for this lighting can be set on the center display. The function can be deactivated/activated in the center display: 1. Tap
Settings in Top view.
2. Tap
My CarLightsExterior Lights.
3. Deselect/select
Welcome Light.
Related information
• Settings view (p. 111)
• Home safe lighting (p. 148)
• Remote key (p. 235)
Home safe lighting
The home safe lighting function illuminates the area in front of the vehicle in dark conditions.
This function turns on the headlights, parking lights, outer door handle lights *, license plate
lights, front ceiling lighting and footwell lighting for a set amount of time. The length of time that these lights remain illumi- nated can be set in the center display: 1. Tap
Settings in Top view.
2. Tap
My CarLightsExterior LightsHome Safety Lights.
3. Select
Off, 30 sec, 60 sec or 90 sec.
To activate home safe lighting: 1. Switch off the ignition (mode 0).
2. Push the turn signal lever as far as possible towards the dashboard and release it.
3. Exit the vehicle and lock the doors.
Related information
• Using the center display (p. 49)
• Settings view (p. 111)
Passenger compartment lighting
The passenger compartment lighting is con- trolled using the buttons in the ceiling above thefront and rear seats.
All passenger compartment lighting can be turned on and off manually within 30 minutesafter:
• the vehicle is unlocked but the engine has not been started
• the engine is switched off and the ignition is in mode
0.
Front interior lighting
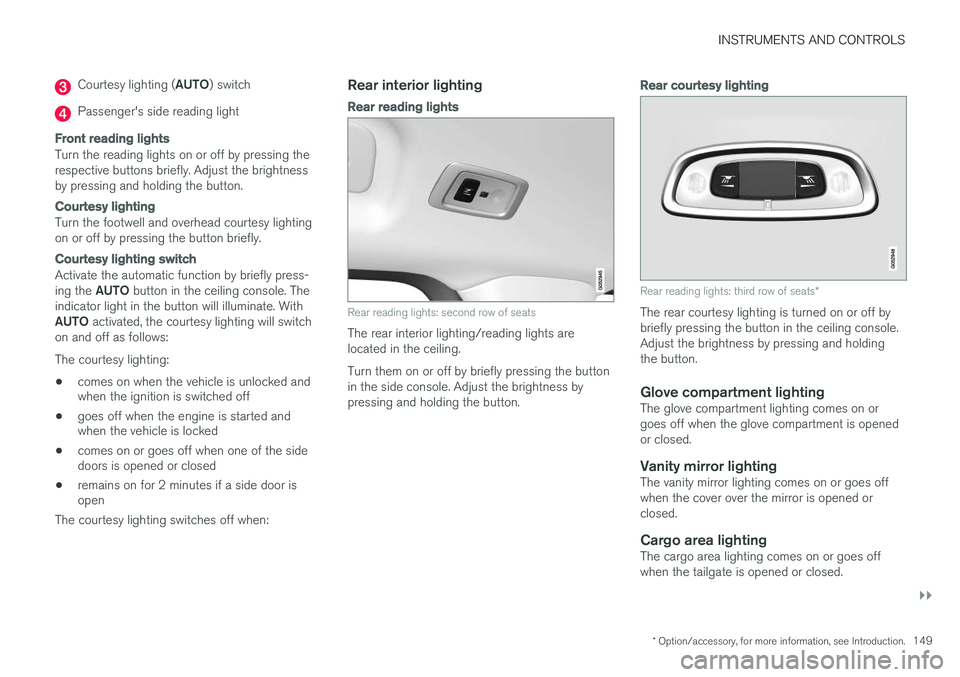
Controls in the ceiling console for front reading lights and courtesy lighting
Driver's side reading light
Courtesy lighting
Page 151 of 546
INSTRUMENTS AND CONTROLS
}}
* Option/accessory, for more information, see Introduction.149
Courtesy lighting (AUTO) switch
Passenger's side reading light
Front reading lights
Turn the reading lights on or off by pressing the respective buttons briefly. Adjust the brightnessby pressing and holding the button.
Courtesy lighting
Turn the footwell and overhead courtesy lighting on or off by pressing the button briefly.
Courtesy lighting switch
Activate the automatic function by briefly press- ing the AUTO button in the ceiling console. The
indicator light in the button will illuminate. WithAUTO activated, the courtesy lighting will switch
on and off as follows: The courtesy lighting: • comes on when the vehicle is unlocked and when the ignition is switched off
• goes off when the engine is started andwhen the vehicle is locked
• comes on or goes off when one of the sidedoors is opened or closed
• remains on for 2 minutes if a side door isopen
The courtesy lighting switches off when:
Rear interior lighting
Rear reading lights
Rear reading lights: second row of seats
The rear interior lighting/reading lights are located in the ceiling. Turn them on or off by briefly pressing the button in the side console. Adjust the brightness bypressing and holding the button.
Rear courtesy lighting
Rear reading lights: third row of seats *
The rear courtesy lighting is turned on or off by briefly pressing the button in the ceiling console.Adjust the brightness by pressing and holdingthe button.
Glove compartment lightingThe glove compartment lighting comes on orgoes off when the glove compartment is openedor closed.
Vanity mirror lightingThe vanity mirror lighting comes on or goes offwhen the cover over the mirror is opened orclosed.
Cargo area lightingThe cargo area lighting comes on or goes offwhen the tailgate is opened or closed.
Page 152 of 546
||
INSTRUMENTS AND CONTROLS
* Option/accessory, for more information, see Introduction.
150
Ground lightingThe ground lighting comes on or goes off when a door is opened or closed.
Doorsill lightingThe doorsill lighting comes on or goes off when adoor is opened or closed.
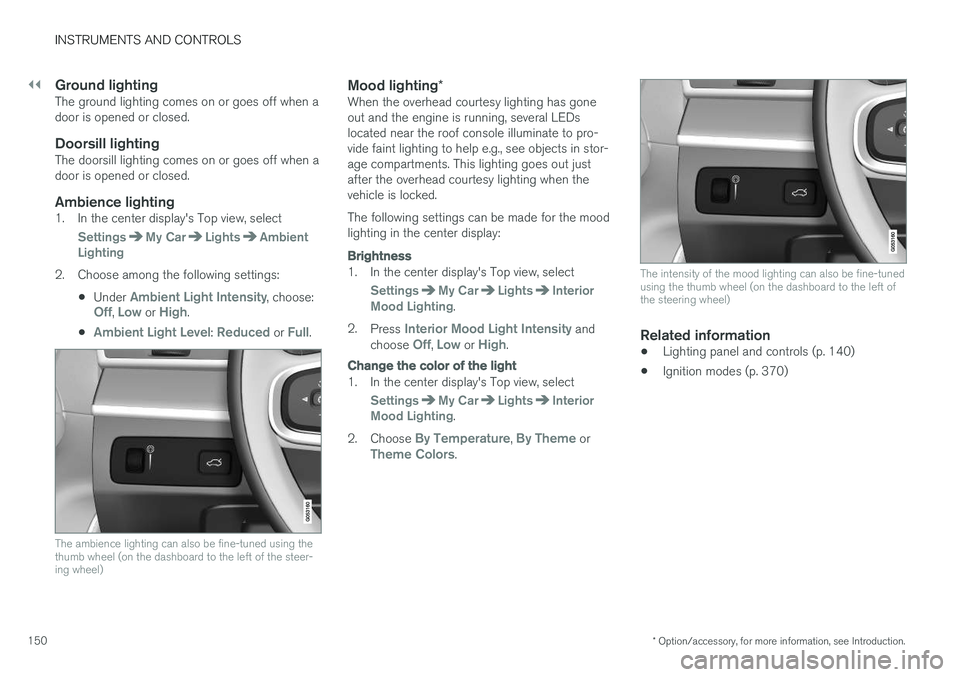
Ambience lighting1. In the center display's Top view, select
SettingsMy CarLightsAmbient
Lighting
2. Choose among the following settings:
•Under
Ambient Light Intensity, choose:Off, Low or High.
•
Ambient Light Level: Reduced or Full.
The ambience lighting can also be fine-tuned using the thumb wheel (on the dashboard to the left of the steer-ing wheel)
Mood lighting *When the overhead courtesy lighting has gone out and the engine is running, several LEDslocated near the roof console illuminate to pro-vide faint lighting to help e.g., see objects in stor-age compartments. This lighting goes out justafter the overhead courtesy lighting when thevehicle is locked. The following settings can be made for the mood lighting in the center display:
Brightness
1. In the center display's Top view, select
SettingsMy CarLightsInterior
Mood Lighting.
2. Press
Interior Mood Light Intensity and
choose Off, Low or High.
Change the color of the light
1. In the center display's Top view, select
SettingsMy CarLightsInterior
Mood Lighting.
2. Choose
By Temperature, By Theme orTheme Colors.
The intensity of the mood lighting can also be fine-tuned using the thumb wheel (on the dashboard to the left ofthe steering wheel)
Related information
• Lighting panel and controls (p. 140)
• Ignition modes (p. 370)
Page 153 of 546
INSTRUMENTS AND CONTROLS
}}
151
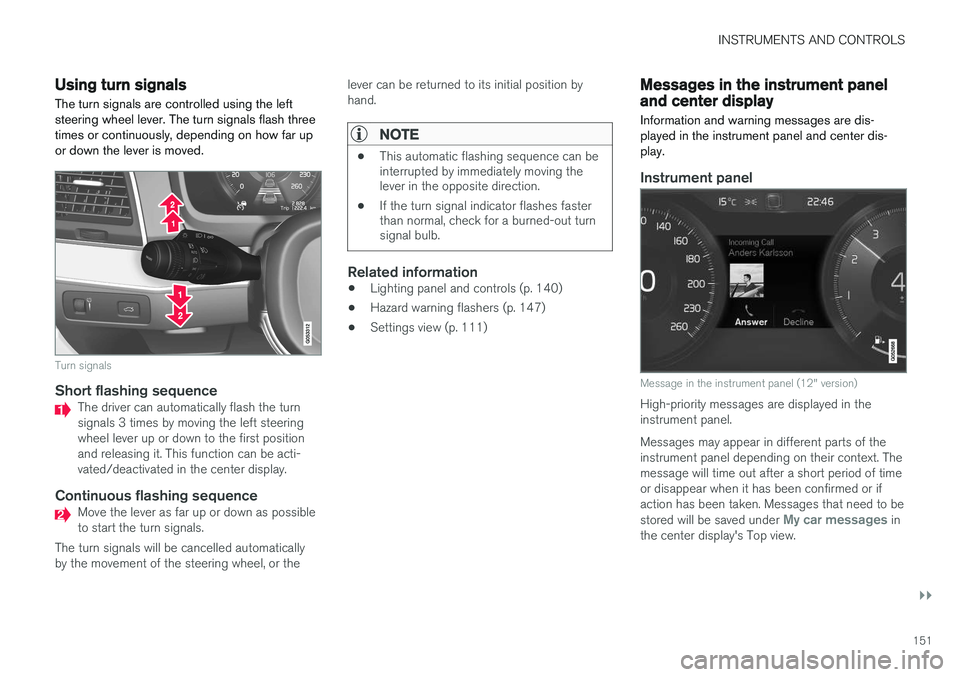
Using turn signals
The turn signals are controlled using the left steering wheel lever. The turn signals flash threetimes or continuously, depending on how far upor down the lever is moved.
Turn signals
Short flashing sequenceThe driver can automatically flash the turn signals 3 times by moving the left steeringwheel lever up or down to the first positionand releasing it. This function can be acti-vated/deactivated in the center display.
Continuous flashing sequenceMove the lever as far up or down as possible to start the turn signals.
The turn signals will be cancelled automaticallyby the movement of the steering wheel, or the lever can be returned to its initial position byhand.
NOTE
•
This automatic flashing sequence can be interrupted by immediately moving thelever in the opposite direction.
• If the turn signal indicator flashes fasterthan normal, check for a burned-out turnsignal bulb.
Related information
•Lighting panel and controls (p. 140)
• Hazard warning flashers (p. 147)
• Settings view (p. 111)
Messages in the instrument panel and center display Information and warning messages are dis- played in the instrument panel and center dis-play.
Instrument panel
Message in the instrument panel (12" version)
High-priority messages are displayed in the instrument panel. Messages may appear in different parts of the instrument panel depending on their context. Themessage will time out after a short period of timeor disappear when it has been confirmed or ifaction has been taken. Messages that need to be stored will be saved under
My car messages in
the center display's Top view.
Page 159 of 546

INSTRUMENTS AND CONTROLS
}}
157
Continuous wipersMove the lever upward for the wipers to operate at normal speed.
NOTE
Before using the wipers, be sure that the wiper blades are not frozen onto the wind-shield and that any ice or snow on the wind-shield has been removed.
Move the lever upward to the next posi- tion for maximum wiper speed.
Related information
•Tailgate window wiper and washer (p. 159)
• Activating/deactivating the rain sensor (p. 157)
• Windshield and headlight washers (p. 158)
Activating/deactivating the rain sensor
The rain sensor monitors the amount of water on the windshield and automatically regulates wiperspeed.
Right-side steering wheel lever
Rain sensor button
Thumb wheel for adjusting sensitivity/interval wiper speed
When the rain sensor is activated, the
symbol will illuminate in the instrument panel.
Activating the rain sensorWhen activating the rain sensor, the engine must be running or the ignition must be in mode I or II.
The windshield wiper lever must also be in posi-tion 0 or in the single sweep position. Activate the rain sensor by pressing the
button. The wipers will make one sweep. If the lever is pressed down, the wipers will make additional sweeps across the windshield. Move the thumb wheel upward for increased sen- sitivity or downward for decreased sensitivity. Thewipers will make one extra sweep if the thumbwheel is moved upward.
Deactivating the rain sensor
Deactivate the rain sensor by pressing the button or by moving the lever upward to another wiper position. The rain sensor is automatically deactivated in ignition mode
0.
The rain sensor is also automatically deactivated when the wipers blades are put in the serviceposition and will reactivate when the wipers havebeen returned to the normal operating position.
CAUTION
Deactivate the rain sensor when washing the vehicle in an automatic car wash if the engine is running or if the ignition is left in mode I or
II . The symbol in the instrument panel will go
out. If the rain sensor is not deactivated, the wipers may start inadvertently in the car washand could be damaged.