2016 VOLVO XC90 T8 trailer
[x] Cancel search: trailerPage 313 of 546
DRIVER SUPPORT
}}
* Option/accessory, for more information, see Introduction.311
Park Assist Camera (PAC)*
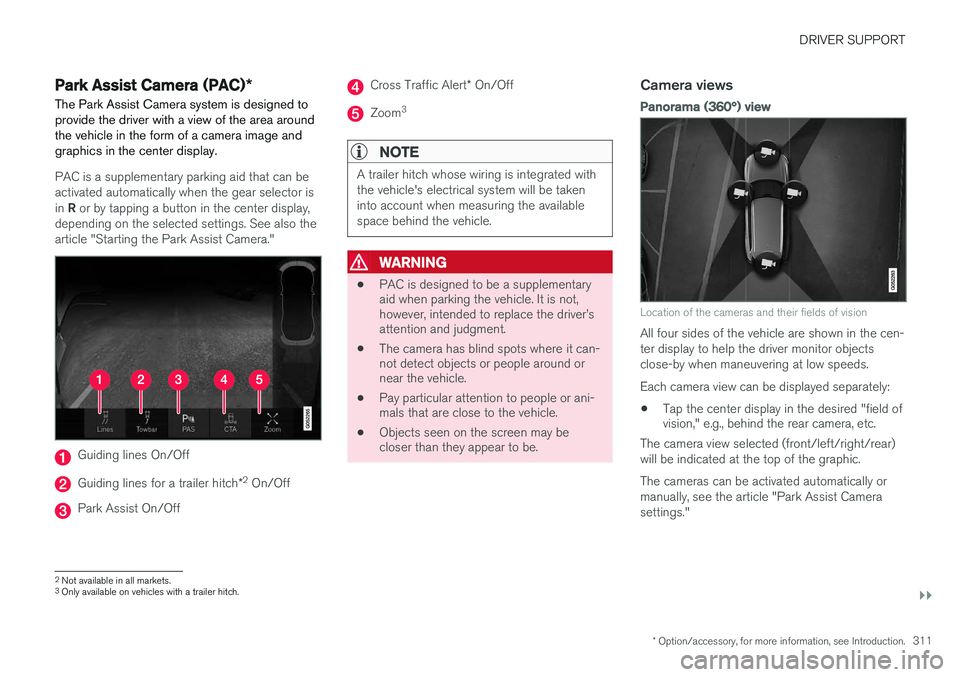
The Park Assist Camera system is designed to provide the driver with a view of the area aroundthe vehicle in the form of a camera image andgraphics in the center display.
PAC is a supplementary parking aid that can be activated automatically when the gear selector is in R or by tapping a button in the center display,
depending on the selected settings. See also the article "Starting the Park Assist Camera."
Guiding lines On/Off
Guiding lines for a trailer hitch *2
On/Off
Park Assist On/Off
Cross Traffic Alert * On/Off
Zoom 3
NOTE
A trailer hitch whose wiring is integrated with the vehicle's electrical system will be takeninto account when measuring the availablespace behind the vehicle.
WARNING
•
PAC is designed to be a supplementary aid when parking the vehicle. It is not,however, intended to replace the driver
Page 314 of 546
||
DRIVER SUPPORT
* Option/accessory, for more information, see Introduction.
312
Backing up
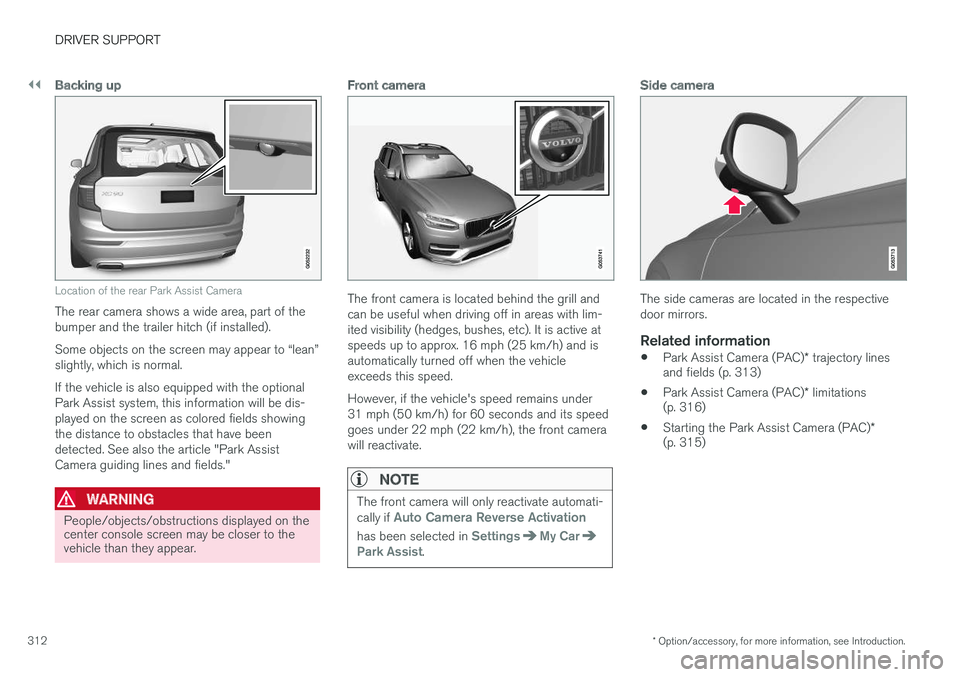
Location of the rear Park Assist Camera
The rear camera shows a wide area, part of the bumper and the trailer hitch (if installed). Some objects on the screen may appear to “lean” slightly, which is normal. If the vehicle is also equipped with the optional Park Assist system, this information will be dis-played on the screen as colored fields showingthe distance to obstacles that have beendetected. See also the article "Park AssistCamera guiding lines and fields."
WARNING
People/objects/obstructions displayed on the center console screen may be closer to thevehicle than they appear.
Front camera
The front camera is located behind the grill and can be useful when driving off in areas with lim-ited visibility (hedges, bushes, etc). It is active atspeeds up to approx. 16 mph (25 km/h) and isautomatically turned off when the vehicleexceeds this speed. However, if the vehicle's speed remains under 31 mph (50 km/h) for 60 seconds and its speedgoes under 22 mph (22 km/h), the front camerawill reactivate.
NOTE
The front camera will only reactivate automati- cally if Auto Camera Reverse Activation
has been selected in SettingsMy CarPark Assist.
Side camera
The side cameras are located in the respective door mirrors.
Related information
• Park Assist Camera (PAC)
* trajectory lines
and fields (p. 313)
• Park Assist Camera (PAC)
* limitations
(p. 316)
• Starting the Park Assist Camera (PAC)
*
(p. 315)
Page 315 of 546
DRIVER SUPPORT
}}
* Option/accessory, for more information, see Introduction.313
Park Assist Camera (PAC)*
trajectory lines and fields
The Park Assist Camera system uses trajectory and lines and fields to indicate the vehicle'sposition in relation to its immediate surround-ings.
Trajectory lines
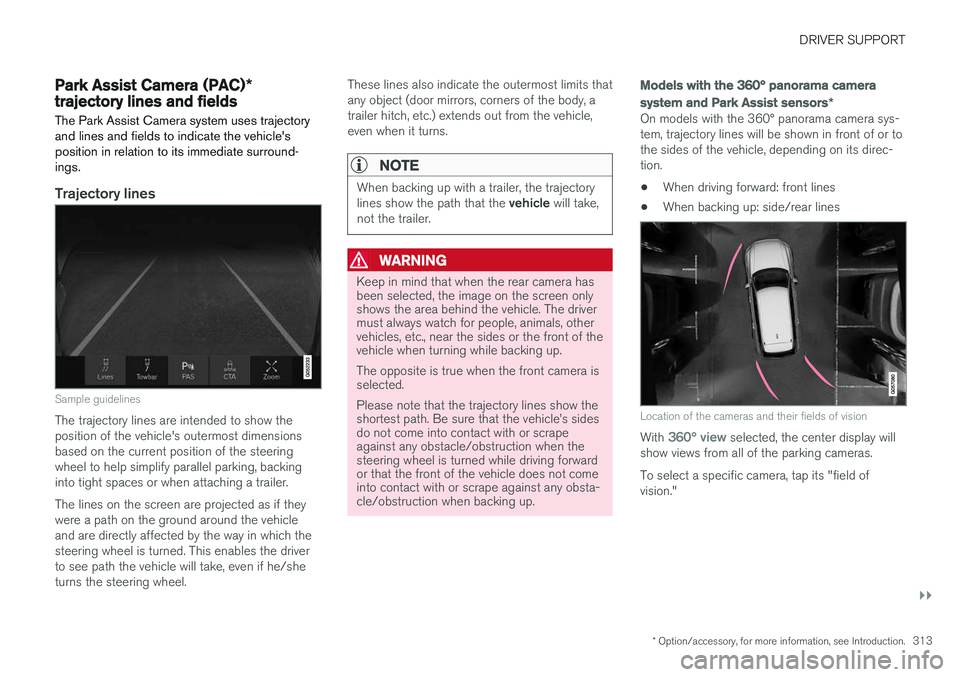
Sample guidelines
The trajectory lines are intended to show the position of the vehicle's outermost dimensionsbased on the current position of the steeringwheel to help simplify parallel parking, backinginto tight spaces or when attaching a trailer. The lines on the screen are projected as if they were a path on the ground around the vehicleand are directly affected by the way in which thesteering wheel is turned. This enables the driverto see path the vehicle will take, even if he/sheturns the steering wheel. These lines also indicate the outermost limits thatany object (door mirrors, corners of the body, atrailer hitch, etc.) extends out from the vehicle,even when it turns.
NOTE
When backing up with a trailer, the trajectory lines show the path that the
vehicle will take,
not the trailer.
WARNING
Keep in mind that when the rear camera has been selected, the image on the screen onlyshows the area behind the vehicle. The drivermust always watch for people, animals, othervehicles, etc., near the sides or the front of thevehicle when turning while backing up. The opposite is true when the front camera is selected. Please note that the trajectory lines show the shortest path. Be sure that the vehicle
Page 316 of 546

||
DRIVER SUPPORT
* Option/accessory, for more information, see Introduction.
314
Trajectory lines for a trailer hitch (towbar)
Towbar: activate trajectory lines for a trailer
hitch
Zoom: zoom in/out
The camera can help make hitching a trailer eas- ier by showing the "line" that the trailer hitch willtake toward the trailer. 1. Tap
Towbar (1).
> The trajectory lines will be displayed and the trajectory lines for the vehicle will dis- appear.
2. Tap
Zoom (2) for a close-up view.
> The camera will zoom in.
trajectory lines for the trailer hitch and the vehicle cannot be shown at the same time.
Front and rear sensor fields
Front and rear sensors
The screen can display colored sensor fields on the car symbol at the right
The front and rear fields change colors (yellow- orange-red) as the vehicle moves closer to anobject.
Front/rear field colorsDistance to the object
Yellow2–4.9 ft (06.–1.5 m )
Orange1.3–2 ft (0.4–0.6 m)
Red0–1.3 ft (0–0.4 m)
Side sensors
The side fields will only be shown in orange.
Side field colorDistance to the object
Orange0–1 ft (0–0.3 m)
Related information
• Park Assist Camera (PAC)
* (p. 311)
• Starting the Park Assist Camera (PAC)
*
(p. 315)
Page 320 of 546

DRIVER SUPPORT
* Option/accessory, for more information, see Introduction.
318
Using Park Assist Pilot (PAP) *
Park Assist Pilot (PAP) gives the driver instruc- tions during the parking procedure.
Symbols, images and text in the center display indicate when the various steps in the parkingprocedure will be carried out. PAP can be activated if the following conditions are met after the engine has started:
• The vehicle may not be towing a trailer.
• The vehicle's speed must be below approx. 30 mph (50 km/h).
NOTE
If a trailer hitch is configured in the vehicle's electrical system, PAP will take the trailerhitch into consideration when determining thenecessary size of a parking space.
ParkingProcedure for parking:
1. The system searches for and measures a
possible parking space.
2. The vehicle is steered while it is backing into the parking space.
3. The vehicle's position is adjusted in the park- ing space by moving forward and rearward.
1: Searching and measuring
Parallel parking
Perpendicular parking
PAP searches for a potential parking space and measures it to see if there is sufficient space foryour vehicle. To start this procedure: 1. Tap the
Park Assist button
in the center display's Function view. If necessary, slow down toa speed below 20 mph (30km/h) for parallel parking orapprox. 12 mph ( 20 km/h) forperpendicular parking.
2. Keep an eye on the display and be prepared to stop the vehicle when you are instructed by PAP to do so.
3. Select
Parallel parking or Perpendicular
parking and put the transmission in reverse.
4. Keep an eye on the display and be prepared to stop the vehicle when you are instructed by PAP to do so.
5. Stop the vehicle when instructed to do so.
NOTE
PAP normally searches for available parking spaces along the curb on the right (passeng-er's) side of the vehicle. However, it can alsoassist in finding and parking in spaces on thedriver's side. To do so:
• Activate the left turn signal. PAP will then search for a parking space on the leftside of the vehicle.
Page 325 of 546
DRIVER SUPPORT
}}
* Option/accessory, for more information, see Introduction.323
Adjustable steering force*
Steering force increases with the speed of the vehicle to give the driver an enhanced sense ofcontrol and stability. At low speed the vehicle iseasier to steer in order to facilitate parking, etc.
Changing the steering force levelTo change the level of steering force, see theinformation under the heading "individual" in arti-cle "Drive modes" for additional information.
NOTE
•This steering force level menu function cannot be accessed when the vehicle isin motion.
• In certain situations, the power steeringfunction may become too hot and mustbe temporarily cooled. During cooling,power steering effect will be reduced andmore force may be necessary to turn thesteering wheel and a message will bedisplayed in the instrument panel.
Related information
• Driver support systems (p. 252)
• Drive modes (p. 390)
Electronic Stability Control (ESC)
Electronic Stability Control (ESC) helps reduce wheel spin, counteract skidding and to generallyhelp improve directional stability.
A pulsating sound will be audi- ble when the system is activelyoperating and is normal. Accel-eration may also be slightlyslower than normal.
WARNING
ESC is a supplementary aid and cannot deal with all situations or road conditions. The driver is always responsible for operating the vehicle in a safe manner in accordancewith current traffic regulations.
ESC consists of the following functions: • Traction control
• Spin control
• Active Yaw Control
• Engine Drag Control
• Trailer Stability Assist
Traction controlThis function is designed to help reduce wheel spin by transferring power from a drive wheel that begins to lose traction to the wheel on the oppo-site side of the vehicle (on the same axle).
Spin controlThis function is designed to help prevent thedrive wheels from spinning while the vehicle isaccelerating.
Active Yaw ControlAt low speeds, this function helps maintain direc-tional stability by braking one or more of thewheels if the vehicle shows a tendency to skid orslide laterally.
Engine Drag Control EDCEDC helps keep the engine running if the wheelsshow a tendency to lock, e.g., when shifting downin the manual shifting mode or while using theengine's braking function on a slippery surface. Ifthe wheels were to lock, the vehicle wouldbecome more difficult to steer.
Trailer Stability Assist
*4TSA helps stabilize a vehicle that is towing atrailer when the vehicle and trailer have begun tosway. This system is automatically deactivated if the driver selects
Sport mode.
Related information
•Detachable trailer hitch (p. 368)
• Driving with a trailer (p. 367)
4
This function is included if the vehicle is equipped with a Volvo original trailer hitch.
Page 326 of 546
DRIVER SUPPORT
324•
Trailer Stability Assist (TSA) (p. 369)
• Electronic Stability Control (ESC) sport mode (p. 324)
• Electronic Stability Control (ESC) symbolsand messages (p. 325)
Electronic Stability Control (ESC) sport mode
ESC is always activated and cannot be switched off.
However, the driver can select Sport mode,
which offers more active driving characteristics. In Sport mode, the engine management system
monitors movement of the accelerator pedal and steering wheel for sportier driving and allowsmore lateral movement of the rear wheels beforeESC is triggered. Under certain circumstances, such as when driv- ing with snow chains, or driving in deep snow orloose sand, it may be advisable to temporarily use Sport mode for maximum tractive force.
If the driver releases pressure on the accelerator pedal, ETC will also activate to help stabilize thevehicle.
Activating/deactivating Sport modeIn the center display's Function view, tap ESC Sport Mode.
The green indicator light in the button will illuminate to showthat the function has been acti-vated or gray when the functionis deactivated.
When Sport mode is activated, this
symbol will illuminate in the instrument panel. It will remain on until the driverdeactivates the function. ETC will also
return to normal mode when the engine is restar-ted.
Related information
• Electronic Stability Control (ESC) (p. 323)
Page 334 of 546

DRIVER SUPPORT
* Option/accessory, for more information, see Introduction.
332
Blind Spot Information (BLIS) *
On/Off The Blind Spot Information function can be acti- vated/deactivated.
Blind Spot Information indicators
Indicator light
Blind Spot Information symbol
Blind Spot Information can be activated/deacti- vated in the center display's Function view.
–In Function view, tap BLIS.
> When Blind Spot Information is activated/ deactivated, the indicator light in the but- ton will be green/gray.
If BLIS is activated when the engine is started,the indicator lights in the door mirrors will flashonce. If BLIS is deactivated when the engine isswitched off, it will remain off the next time theengine is started and the indicator lights in thedoor mirrors will not illuminate.
Related information
•
Blind Spot Information (BLIS)
* (p. 330)
Blind Spot Information (BLIS) *
limitations
Blind Spot Information functionality may be reduced in certain situations.
• Dirt, ice and snow on the sensors may reduce functionality and prevent the systemfrom providing warnings.
• Do not attach any objects, tape, decals, etc.,on the surface of the sensors.
• BLIS is deactivated if a trailer is attached tothe vehicle's electrical system.