2016 VOLVO XC90 T8 ignition
[x] Cancel search: ignitionPage 104 of 546
||
INSTRUMENTS AND CONTROLS
102
Gate Operator/Canadian Programming
Canadian radio-frequency laws require transmit- ter signals to “time-out” (or quit) after severalseconds of transmission – which may not be longenough for HomeLink to pick up the signal dur-ing programming. Similar to this Canadian law,some U.S. gate operators are designed to “time-out” in the same manner. If you live in Canada or you are having difficulties programming a gate operator or garage dooropener by using the “Programming” procedures, replace “Programming HomeLink” step 3 with the following:
• Continue to press and hold the HomeLink button while you
press and release - every
two seconds (“cycle”) your hand-held trans-
mitter until the HomeLink indicator light changes from a slow to a rapidly blinkinglight. Now you may release both the Home-Link and hand-held transmitter buttons.
Proceed with “Programming” step 4 to complete.
Using HomeLink ®When programming has been completed, HomeLink
®
can be used instead of the original
remote controls. To operate, press and hold the programmed HomeLink ®
button until the trained device begins
to operate 3
(this may take several seconds). The indicator light will glow steadily or flash when the button has been pressed. Activation will nowoccur for the trained device (i.e., garage dooropener, gate operator, security system, entry doorlock, home/office lighting, etc.).
NOTE
If the ignition is switched off, HomeLink will function for 30 minutes after the driver's doorhas been opened.
For convenience, the hand-held transmitter of the device may also be used at any time. In the event that there are still programming diffi- culties or questions, contact HomeLink at:www.HomeLink.com, www.youtube.com/HomeLinkGentex or by phoning the hotline at 1–800–355–3515.
Resetting HomeLink
®
buttonsUse the following procedure to reset (erase pro- gramming) from the three HomeLink ®
buttons
(individual buttons cannot be reset but can be “reprogrammed” as outlined in the following sec-tion): 1. Press and hold HomeLink ®
buttons 1 and 3
for approx. 10 seconds until the indicator light begins to flash green. 2. Release both buttons.
>HomeLink ®
is now in the training (or
learning) mode and can be programmedat any time beginning with “To program HomeLink ®
" above.
Reprogramming a single HomeLink ®
button
To reprogram an individual HomeLink ®
button:
1. Press and hold the desired HomeLink ®
but-
ton. DO NOT release the button.
2. The yellow indicator light will begin to flash after 20 seconds. Without releasing the HomeLink button, proceed with “To program HomeLink ®
" step 1 above.
For questions or comments, contact HomeLink at: www.HomeLink.com, www.youtube.com/HomeLinkGentex or by phoning the hotline at 1–800–355–3515.
FCC (USA) and IC (Canada)This device complies with FCC rules part 15 andIndustry Canada RSS-210. Operation is subjectto the following two conditions: (1) This devicemay not cause harmful interference, and (2) Thisdevice must accept any interference that may bereceived including interference that may causeundesired operation. WARNING: The transmitterhas been tested and complies with FCC and IC
3 Do not hold the button for more than 20 seconds as this will clear the programming of the button.
Page 107 of 546
INSTRUMENTS AND CONTROLS
}}
* Option/accessory, for more information, see Introduction.105
Adjusting the power door mirrors
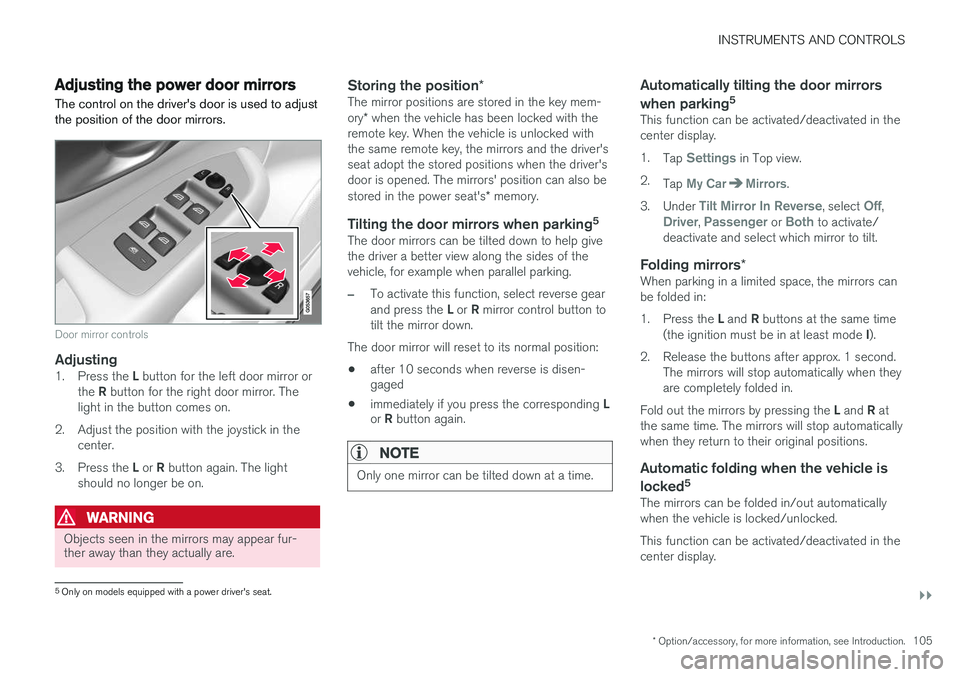
The control on the driver's door is used to adjust the position of the door mirrors.
Door mirror controls
Adjusting1. Press the L button for the left door mirror or
the R button for the right door mirror. The
light in the button comes on.
2. Adjust the position with the joystick in the center.
3. Press the L or R button again. The light
should no longer be on.
WARNING
Objects seen in the mirrors may appear fur- ther away than they actually are.
Storing the position *The mirror positions are stored in the key mem- ory* when the vehicle has been locked with the
remote key. When the vehicle is unlocked with the same remote key, the mirrors and the driver'sseat adopt the stored positions when the driver'sdoor is opened. The mirrors' position can also be stored in the power seat's * memory.
Tilting the door mirrors when parking 5The door mirrors can be tilted down to help give the driver a better view along the sides of thevehicle, for example when parallel parking.
–To activate this function, select reverse gear and press the
L or R mirror control button to
tilt the mirror down.
The door mirror will reset to its normal position:
• after 10 seconds when reverse is disen- gaged
• immediately if you press the corresponding
L
or R button again.
NOTE
Only one mirror can be tilted down at a time.
Automatically tilting the door mirrors when parking 5
This function can be activated/deactivated in the center display. 1.
Tap
Settings in Top view.
2. Tap
My CarMirrors.
3. Under
Tilt Mirror In Reverse, select Off,Driver, Passenger or Both to activate/
deactivate and select which mirror to tilt.
Folding mirrors *When parking in a limited space, the mirrors can be folded in: 1.
Press the L and R buttons at the same time
(the ignition must be in at least mode I).
2. Release the buttons after approx. 1 second. The mirrors will stop automatically when they are completely folded in.
Fold out the mirrors by pressing the L and R at
the same time. The mirrors will stop automaticallywhen they return to their original positions.
Automatic folding when the vehicle is
locked 5
The mirrors can be folded in/out automaticallywhen the vehicle is locked/unlocked. This function can be activated/deactivated in the center display.
5
Only on models equipped with a power driver's seat.
Page 108 of 546
||
INSTRUMENTS AND CONTROLS
* Option/accessory, for more information, see Introduction.
106 1.
Tap
Settings in Top view.
2. Tap
My CarMirrors.
3. Select
Fold Mirrors When Locking to acti-
vate/deactivate.
Resetting the mirrors' positionA mirror that has been moved manually (e.g., bumped into in a parking lot, etc.) has to bereturned to its normal position electrically beforeautomatic folding will function correctly. 1. Fold in the mirrors with the L and R buttons.
2. Fold out the mirrors with the L and R buttons.
The mirrors have now been reset to their original positions.
Auto-dim *Settings can be made for the auto-dim functionin the rearview and door mirrors. The auto-dim function is always active while the vehicle is being driven except when the reversegear has been selected. The level of sensitivityfor this function can be set to three levels, whichaffect the rearview mirror and door mirrors.
NOTE
When the level of sensitivity is changed, this change will not be noticeable immediately butwill take effect after a short period of time.
The level of sensitivity is set from the center dis- play: 1.
Tap
Settings in Top view.
2. Tap
My CarMirrors.
3. Under
Auto Dim Mirrors, select Normal,Dark or Light.
Related information
• Using the power seat memory function
*
(p. 164)
• Rearview mirror (p. 110)
Laminated panoramic roof
*
The laminated panoramic roof is divided into two sections and only the front section can beopened; it can be slid horizontally to the open orclosed positions or its rear edge can be raisedand lowered to allow ventilation.
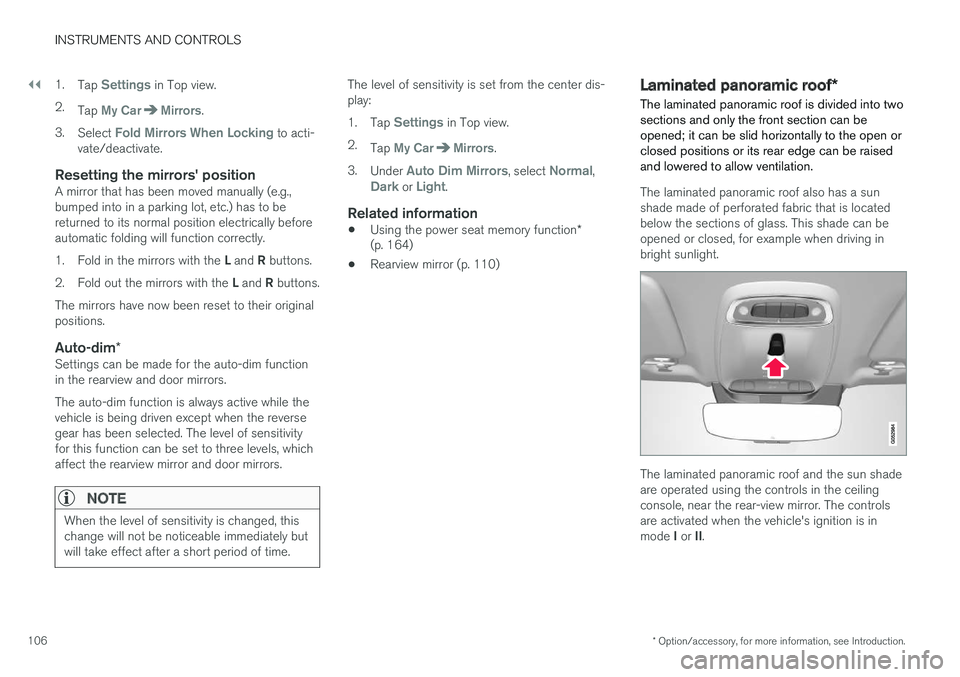
The laminated panoramic roof also has a sun shade made of perforated fabric that is locatedbelow the sections of glass. This shade can beopened or closed, for example when driving inbright sunlight.
The laminated panoramic roof and the sun shade are operated using the controls in the ceilingconsole, near the rear-view mirror. The controlsare activated when the vehicle's ignition is in mode I or II.
Page 109 of 546
INSTRUMENTS AND CONTROLS
}}
* Option/accessory, for more information, see Introduction.107
CAUTION
•Remove ice and snow before opening the laminated panoramic roof.
• Do not operate the laminated panoramicroof if it is frozen closed.
• Never place heavy objects on the lamina-ted panoramic roof.
Wind blocker
The laminated panoramic roof is equipped with a wind blocker that folds up when the roof is open.
Related information
•
Operating the laminated panoramic roof
*
(p. 107)
Operating the laminated panoramic roof *
When opened automatically, the sun shade and roof open completely. In the ventilation position, the rear edge of the front section of the roof is raised.
Operation
WARNING
• During manual closing, if the laminated panoramic roof is obstructed, immediatelyopen it again.
• Never open or close the laminated panor-amic roof if it is obstructed in any way.
• Never allow a child to operate the lamina-ted panoramic roof.
• Never leave a child alone in a vehicle.
• When leaving the vehicle, ensure that the ignition is in mode
0. Never leave a
remote key in the vehicle.
• Never extend any object or body part though the open laminated panoramicroof, even if the vehicle's ignition is com-pletely switched off.
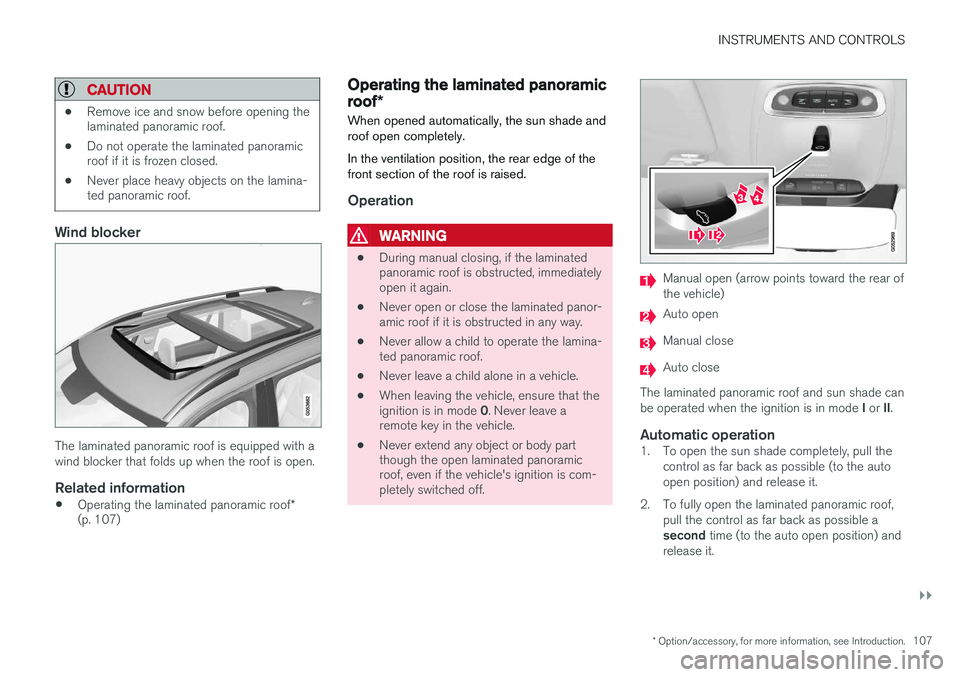
Manual open (arrow points toward the rear of the vehicle)
Auto open
Manual close
Auto close
The laminated panoramic roof and sun shade can be operated when the ignition is in mode I or II.
Automatic operation1. To open the sun shade completely, pull the
control as far back as possible (to the auto open position) and release it.
2. To fully open the laminated panoramic roof, pull the control as far back as possible a second time (to the auto open position) and
release it.
Page 111 of 546
INSTRUMENTS AND CONTROLS
}}
* Option/accessory, for more information, see Introduction.109
point at which it was blocked (or will open fully to the tilt position). The auto-stop feature also functions when the laminated panoramic roof or sun shade is beingopened. The auto-stop feature can be overridden if the closing procedure has been interrupted (e.g., dueto ice around the laminated panoramic roof) bypressing and holding the control forward/downuntil the roof is closed.
Power windows
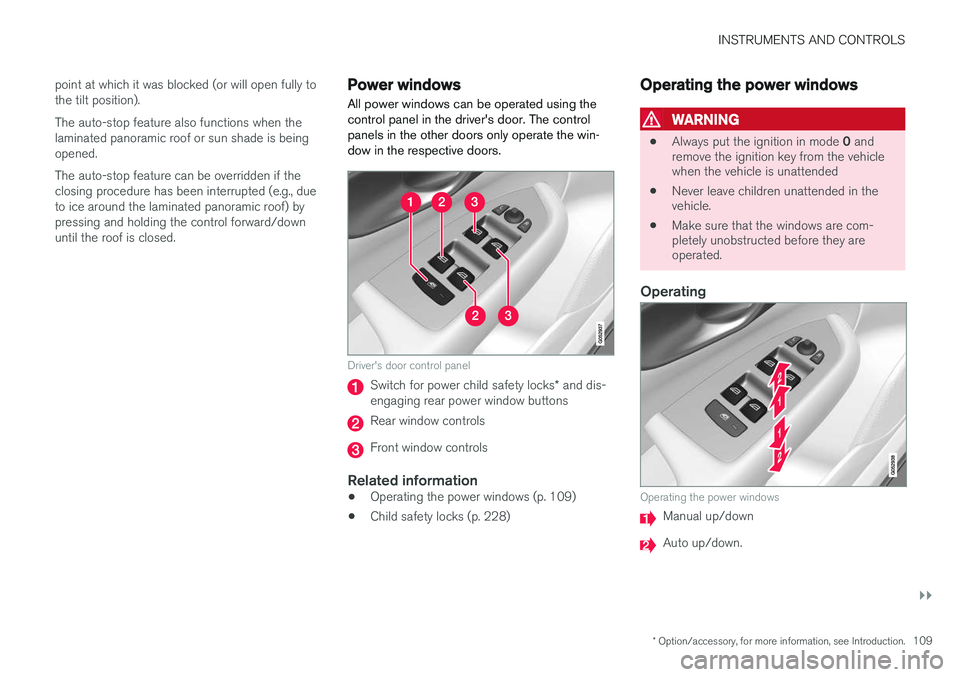
All power windows can be operated using the control panel in the driver's door. The controlpanels in the other doors only operate the win-dow in the respective doors.
Driver's door control panel
Switch for power child safety locks * and dis-
engaging rear power window buttons
Rear window controls
Front window controls
Related information
• Operating the power windows (p. 109)
• Child safety locks (p. 228)
Operating the power windows
WARNING
•
Always put the ignition in mode
0 and
remove the ignition key from the vehicle when the vehicle is unattended
• Never leave children unattended in thevehicle.
• Make sure that the windows are com-pletely unobstructed before they areoperated.
Operating
Operating the power windows
Manual up/down
Auto up/down.
Page 112 of 546

||
INSTRUMENTS AND CONTROLS
110For the power windows to function, the ignition must be in at least mode
I. When the vehicle has
been running, the power windows can be oper- ated for several minutes after the ignition hasbeen switched off, or until a door has beenopened.
NOTE
• Movement of the windows will stop if they are obstructed in any way. If this happenstwice in succession, the automatic func-tion will not work for several minutes andthe window can be closed by holding thebutton up.
• To reduce buffeting wind noise if the rearwindows are opened, also open the frontwindows slightly.
Manual up/down
–Move one of the controls up/down slightly.
> The power windows move up/down as
long as the control is held in position.
Auto up/down
–Move one of the controls up/down as far as possible and release it.
> The window will open or close completely.
ResettingIf the battery has been disconnected, the auto open function must be reset so that it will workproperly
1. Gently raise the front section of the button to close the window and hold it for one second.
2. Release the button briefly.
3. Raise the front section of the button again for one second.
Related information
• Child safety locks (p. 228)
Rearview mirror The interior rearview mirror has an auto-dim function that helps reduce glare from followingvehicle's headlights.
Auto-dim functionThe auto-dim function is controlled by two sen- sors: one pointing forward (located on the for-ward-facing side of the mirror, which monitors theamount of ambient light) and one pointing rear-ward (located on the side of the mirror facing thedriver at the upper edge, which senses thestrength of following vehicles' headlights), andwork together to help eliminate glare.
NOTE
Obstructing the forward sensor with e.g., parking stickers, transponders, etc., or the rearsensor by loading the cargo area or the rearseat in such a way that light is prevented fromreaching the sensor will reduce the auto-dimfunction in the interior rearview mirror andoptional auto-dim function in the door mirrors.
The auto-dim function is always active while the vehicle is being driven except when the reversegear has been selected. The level of sensitivityfor this function can be set to three levels, whichaffect the rearview mirror and door mirrors.
Page 129 of 546

INSTRUMENTS AND CONTROLS
}}
127
SymbolExplanation
Lane keeping aid White symbol: lane keeping aid on and marker lines detected. Gray symbol: lane keeping aid on and no marker lines detected. Yellow symbol: lane keeping aid active
Lane keeping aid and rain sen- sor White symbol: lane keeping aid on and marker lines detected. Rainsensor on. Gray symbol: lane keeping aid on and no marker lines detected.Rain sensor on.
AUS models
B Canadian models
C XC90 T8 Twin Engine Plug-in Hybrid only.
Door/hood/tailgate/fuel filler door
reminder
If a door or the hood/tailgate/fuel filler door are not closed properly, the information or warningsymbol will illuminate and a graphic will be dis-played in instrument panel. Stop the vehicle in asafe place as soon as possible and close thedoor, etc.
Related information
• Instrument panel (p. 127)
• Warning symbols in the instrument panel (p. 137)
• Door and seat belt reminders (p. 67)
Instrument panel
The instrument panel displays vehicle- and driv- ing-related information.
The gauges, indicators, symbols and functions displayed in the instrument panel depend on theequipment/systems installed in the vehicle andwhich functions are currently activated. The instrument panel is available in two versions: 12" and 8". Some of the functions listed below are optional.
WARNING
• If the instrument panel is not functioning properly, information about e.g., brakes,airbags or other safety-related messagescannot be displayed and the driver cannotbe alerted to possible problems.
• If the instrument panel turns off, does notactivate when the ignition is switched onor is completely/partially not possible toread, do not drive the vehicle. Contact atrained and qualified Volvo service techni-cian.
Page 130 of 546

||
INSTRUMENTS AND CONTROLS
128
12" instrument panel
Left side
•Speedometer
• Trip odometer
• Odometer
• Cruise control/speed limiter information
• Road sign information
Center
•Indicator and warning symbols
• Ambient temperature sensor
• Clock
• Messages (and in certain cases also graph- ics)
• Distance to empty tank
• Distance to discharged hybrid battery (eDTE:electrical Distance to Empty) •
Door and seat belt status
• Hybrid battery charge information
• Compass
• Media player
• Navigation system map
• Cell phone
• Voice control
Right side
• Tachometer (depending on current driving mode)
• Fuel gauge
• Battery gauge
• Gear indicator
• Current driving mode (Hybrid, Off Road, Save,Pure, Power and AWD)
• ECO gauge (depending on current drivingmode)
• Current fuel consumption
• Hybrid battery's charge level
• App menu (activated using the right-sidesteering wheel keypad)
Activating the instrument panelThe instrument panel is activated as soon as a door is opened (i.e., ignition mode
0). After a
short period, the panel will go out if it is not used. To reactivate it, do one of the following: •
Press the brake pedal
• Turn the start knob to
START and release it
(without pressing the brake pedal). This acti- vates ignition mode I
• Open one of the doors