2016 VOLVO XC90 T8 engine
[x] Cancel search: enginePage 395 of 546
STARTING AND DRIVING
* Option/accessory, for more information, see Introduction.393
INDIVIDUAL
This setting allows you to adapt a driving mode to your personal preferences. Select one of the other driving modes as a basis and change the settings to provide the drivingcharacteristics that you prefer. This driving modeis only available if it has been activated in thecenter display. INDIVIDUAL is only available if it has been acti- vated in the center display.
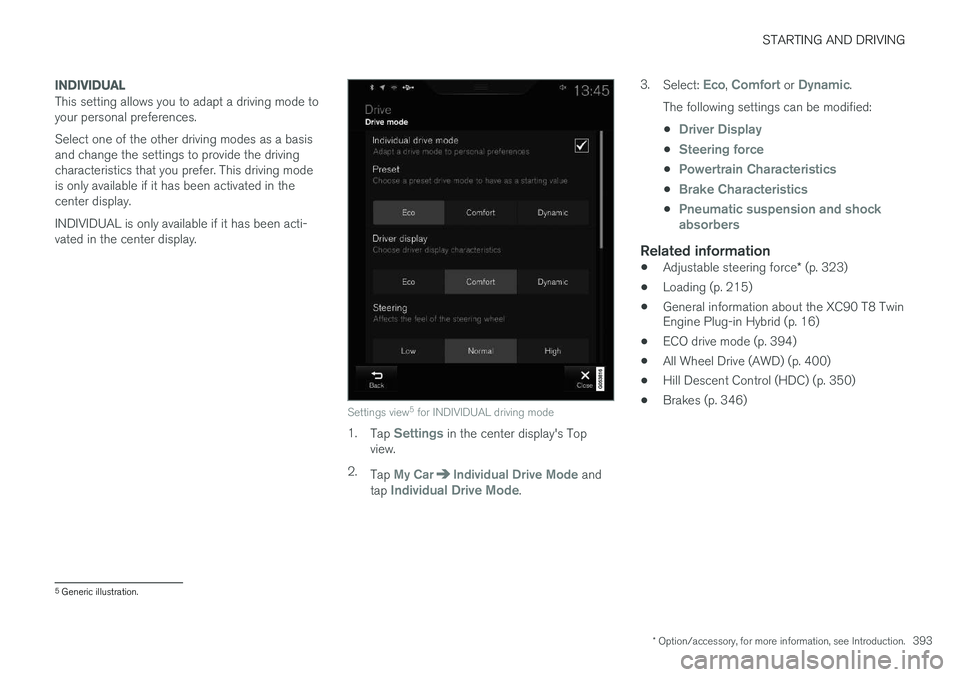
Settings view5
for INDIVIDUAL driving mode
1. Tap Settings in the center display's Top
view.
2. Tap
My CarIndividual Drive Mode and
tap Individual Drive Mode. 3.
Select:
Eco, Comfort or Dynamic.
The following settings can be modified: •
Driver Display
•Steering force
•Powertrain Characteristics
•Brake Characteristics
•Pneumatic suspension and shock absorbers
Related information
• Adjustable steering force
* (p. 323)
• Loading (p. 215)
• General information about the XC90 T8 Twin Engine Plug-in Hybrid (p. 16)
• ECO drive mode (p. 394)
• All Wheel Drive (AWD) (p. 400)
• Hill Descent Control (HDC) (p. 350)
• Brakes (p. 346)
5
Generic illustration.
Page 396 of 546
STARTING AND DRIVING
* Option/accessory, for more information, see Introduction.
394
ECO drive mode
The Eco drive mode is a function designed to give the driver the opportunity to drive more eco-nomically and to help reduce fuel consumption.
When this mode is activated, the following cha- racteristics are modified:
• The automatic transmission's shifting points
• The engine management system and accel- erator pedal response
• Climate system settings: certain functionswill be temporarily reduced or deactivated
• The suspension's self-leveling function
* low-
ers ground clearance to help reduce windresistance
• Information is shown in an ECO gauge in theinstrument panel to help promote more eco-nomical driving
NOTE
When Eco is activated, several climate system parameters are changed and the function ofcertain current-consuming systems will bereduced. Some of these functions can be restarted manually but full functionality will not berestored until Eco is deactivated.
Selecting ECO modeWhen the engine is switched off, ECO mode is deactivated and must be reactivated each time the engine is started.
ECO will appear in the
instrument panel when the function is activated.
Via Function view
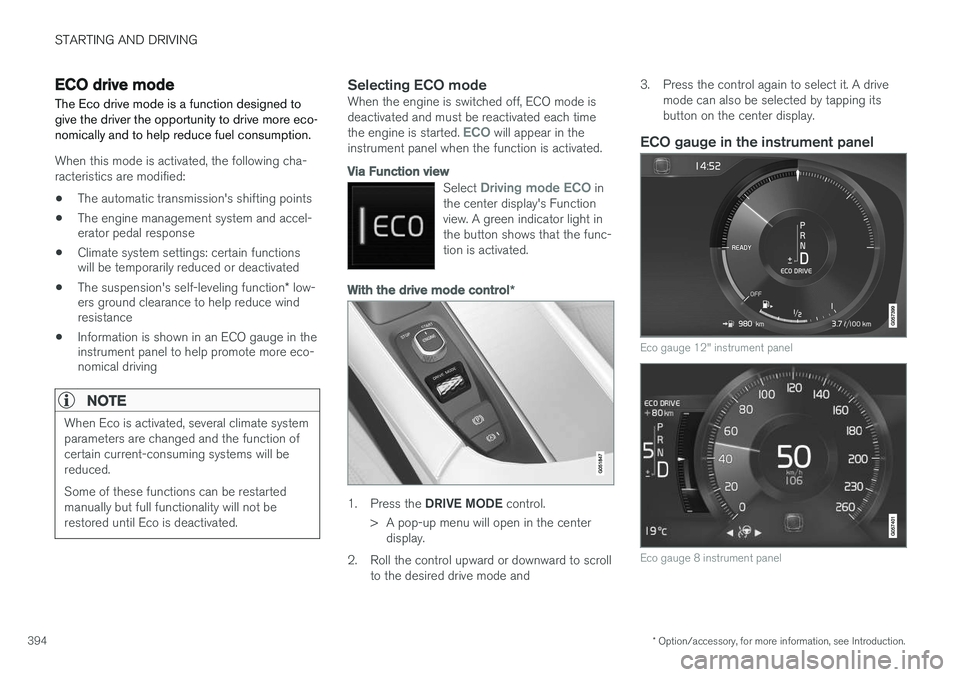
Select Driving mode ECO in
the center display's Function view. A green indicator light inthe button shows that the func-tion is activated.
With the drive mode control *
1.
Press the DRIVE MODE control.
> A pop-up menu will open in the center display.
2. Roll the control upward or downward to scroll to the desired drive mode and 3. Press the control again to select it. A drive
mode can also be selected by tapping its button on the center display.
ECO gauge in the instrument panel
Eco gauge 12" instrument panel
Eco gauge 8 instrument panel
Page 398 of 546
STARTING AND DRIVING
* Option/accessory, for more information, see Introduction.
396
Shiftlock The automatic transmission's shiftlock feature helps prevent inadvertently moving the gearselector between different positions.
Automatic shiftlock
From Park – P
In order to move the gear selector from the P
position, the brake pedal must be depressed and the ignition must be in mode II.
From neutral – N
If the gear selector is in N and the vehicle has
been stationary for more than 3 seconds (regard- less of whether or not the engine is running), theshiftlock feature will lock the gear selector in thisposition. In order to move the gear selector from the N
position, the brake pedal must be depressed and the ignition must be in mode II.
Messages in the instrument panelIf the gear selector is locked in position, a mes- sage such as: Gear lever Press brake pedal
to activate gear lever will be displayed.
There is no mechanical shiftlock function.
Related information
• Gear selector positions (p. 396)
• Automatic transmission (p. 395)
Gear shift indicator
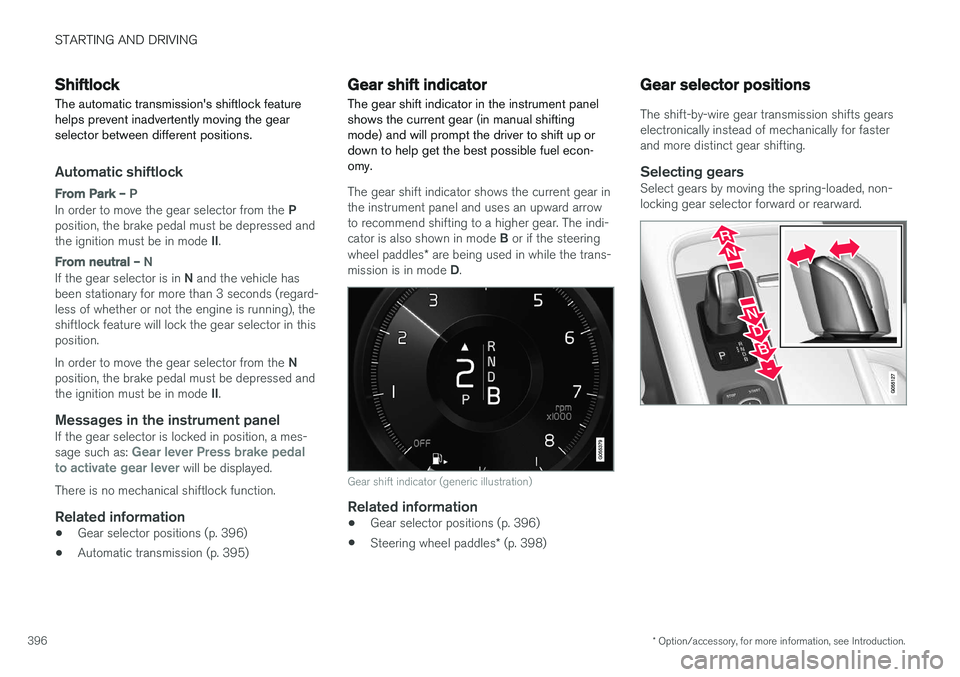
The gear shift indicator in the instrument panel shows the current gear (in manual shiftingmode) and will prompt the driver to shift up ordown to help get the best possible fuel econ-omy.
The gear shift indicator shows the current gear in the instrument panel and uses an upward arrowto recommend shifting to a higher gear. The indi- cator is also shown in mode B or if the steering
wheel paddles * are being used in while the trans-
mission is in mode D.
Gear shift indicator (generic illustration)
Related information
• Gear selector positions (p. 396)
• Steering wheel paddles
* (p. 398)
Gear selector positions
The shift-by-wire gear transmission shifts gears electronically instead of mechanically for fasterand more distinct gear shifting.
Selecting gearsSelect gears by moving the spring-loaded, non-locking gear selector forward or rearward.
Page 399 of 546
STARTING AND DRIVING
}}
397
Gear selector positions
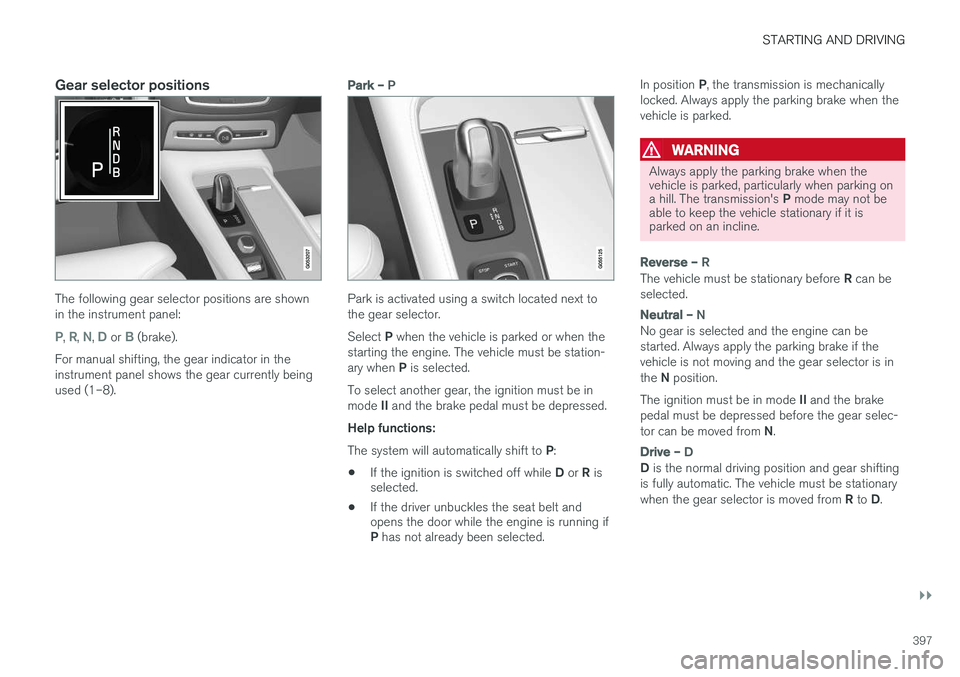
The following gear selector positions are shown in the instrument panel:
P, R, N, D or B (brake).
For manual shifting, the gear indicator in the instrument panel shows the gear currently beingused (1–8).
Park – P
Park is activated using a switch located next to the gear selector. Select P when the vehicle is parked or when the
starting the engine. The vehicle must be station- ary when P is selected.
To select another gear, the ignition must be inmode II and the brake pedal must be depressed.
Help functions: The system will automatically shift to P:
• If the ignition is switched off while
D or R is
selected.
• If the driver unbuckles the seat belt and opens the door while the engine is running if P
has not already been selected. In position
P, the transmission is mechanically
locked. Always apply the parking brake when the vehicle is parked.
WARNING
Always apply the parking brake when the vehicle is parked, particularly when parking on a hill. The transmission's P mode may not be
able to keep the vehicle stationary if it is parked on an incline.
Reverse – R
The vehicle must be stationary before R can be
selected.
Neutral – N
No gear is selected and the engine can be started. Always apply the parking brake if thevehicle is not moving and the gear selector is in the N position.
The ignition must be in mode II and the brake
pedal must be depressed before the gear selec-tor can be moved from N.
Drive – D
D is the normal driving position and gear shifting
is fully automatic. The vehicle must be stationary when the gear selector is moved from R to D.
Page 400 of 546
||
STARTING AND DRIVING
* Option/accessory, for more information, see Introduction.
398
Brake – B
B can be selected at any time during a drive. In
this mode, the engine braking function is acti- vated when the accelerator pedal is released,which helps charge the hybrid battery. Thismeans that the hybrid battery is charged even ifthe brake pedal is not depressed.
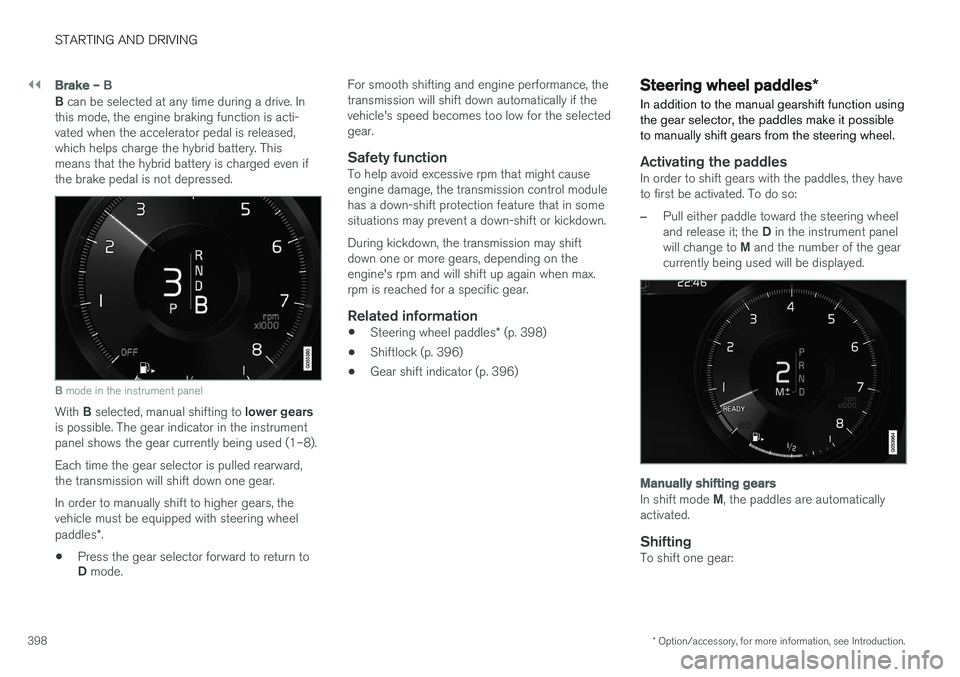
B mode in the instrument panel
With B selected, manual shifting to lower gears
is possible. The gear indicator in the instrument panel shows the gear currently being used (1–8). Each time the gear selector is pulled rearward, the transmission will shift down one gear. In order to manually shift to higher gears, the vehicle must be equipped with steering wheel paddles *.
• Press the gear selector forward to return to D
mode. For smooth shifting and engine performance, the transmission will shift down automatically if thevehicle's speed becomes too low for the selectedgear.
Safety functionTo help avoid excessive rpm that might causeengine damage, the transmission control modulehas a down-shift protection feature that in somesituations may prevent a down-shift or kickdown. During kickdown, the transmission may shift down one or more gears, depending on theengine's rpm and will shift up again when max.rpm is reached for a specific gear.
Related information
•
Steering wheel paddles
* (p. 398)
• Shiftlock (p. 396)
• Gear shift indicator (p. 396)
Steering wheel paddles
*
In addition to the manual gearshift function using the gear selector, the paddles make it possibleto manually shift gears from the steering wheel.
Activating the paddlesIn order to shift gears with the paddles, they have to first be activated. To do so:
–Pull either paddle toward the steering wheel and release it; the D in the instrument panel
will change to M and the number of the gear
currently being used will be displayed.
Manually shifting gears
In shift mode M, the paddles are automatically
activated.
ShiftingTo shift one gear:
Page 401 of 546
STARTING AND DRIVING
}}
399
–Pull either paddle toward the steering wheel and release it.
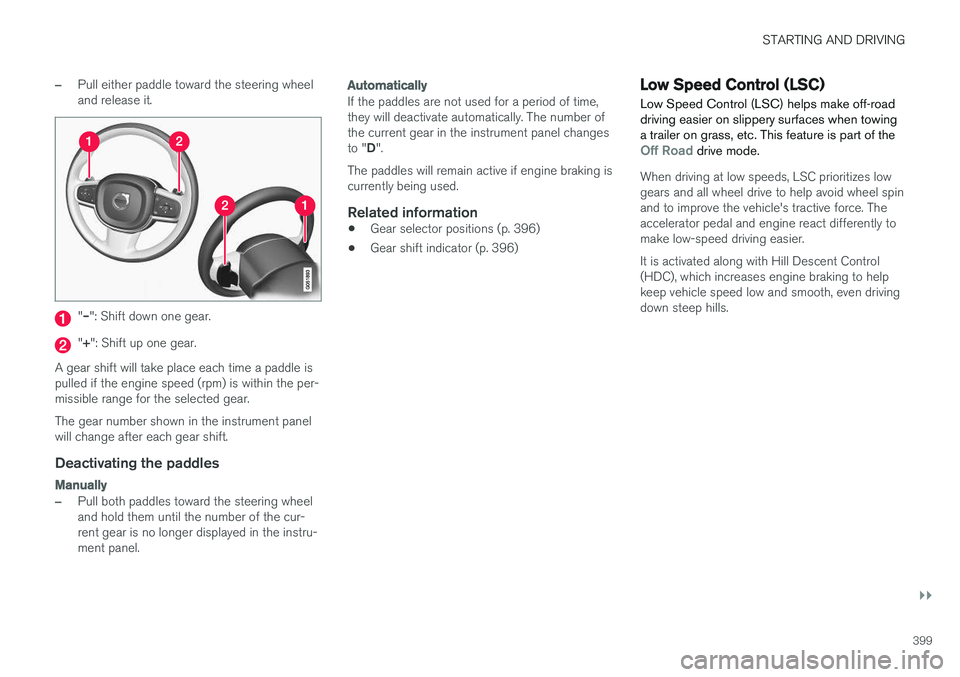
"– ": Shift down one gear.
"+ ": Shift up one gear.
A gear shift will take place each time a paddle is pulled if the engine speed (rpm) is within the per-missible range for the selected gear. The gear number shown in the instrument panel will change after each gear shift.
Deactivating the paddles
Manually
–Pull both paddles toward the steering wheel and hold them until the number of the cur-rent gear is no longer displayed in the instru-ment panel.
Automatically
If the paddles are not used for a period of time, they will deactivate automatically. The number ofthe current gear in the instrument panel changes to " D".
The paddles will remain active if engine braking is currently being used.
Related information
• Gear selector positions (p. 396)
• Gear shift indicator (p. 396)
Low Speed Control (LSC) Low Speed Control (LSC) helps make off-road driving easier on slippery surfaces when towinga trailer on grass, etc. This feature is part of the
Off Road drive mode.
When driving at low speeds, LSC prioritizes low gears and all wheel drive to help avoid wheel spinand to improve the vehicle's tractive force. Theaccelerator pedal and engine react differently tomake low-speed driving easier. It is activated along with Hill Descent Control (HDC), which increases engine braking to helpkeep vehicle speed low and smooth, even drivingdown steep hills.
Page 402 of 546
||
STARTING AND DRIVING
* Option/accessory, for more information, see Introduction.
400
Activating LSC
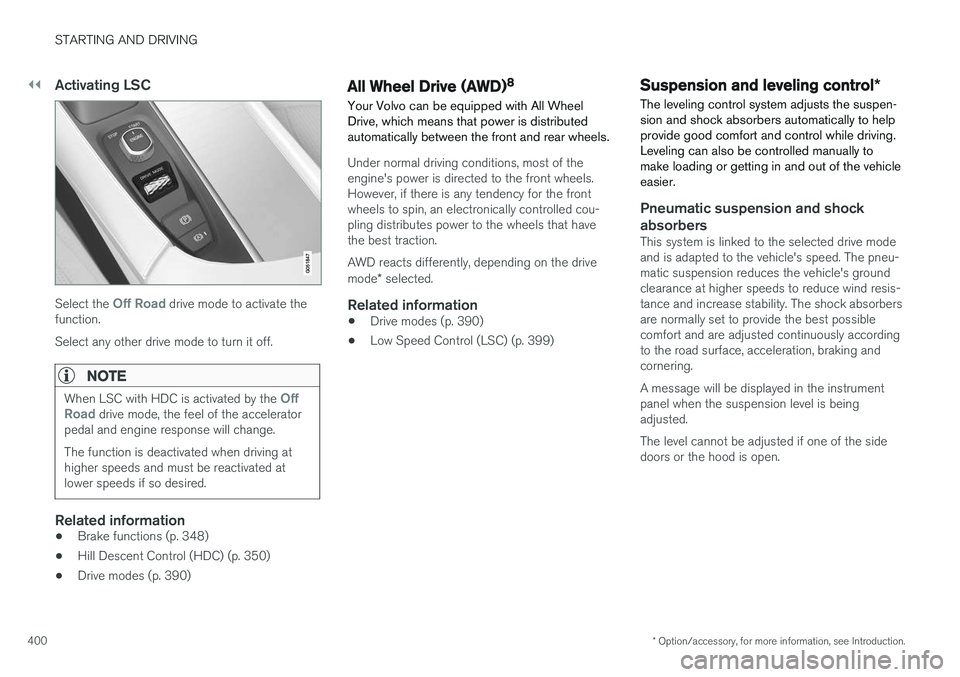
Select the Off Road drive mode to activate the
function. Select any other drive mode to turn it off.
NOTE
When LSC with HDC is activated by the Off
Road drive mode, the feel of the accelerator
pedal and engine response will change. The function is deactivated when driving at higher speeds and must be reactivated atlower speeds if so desired.
Related information
• Brake functions (p. 348)
• Hill Descent Control (HDC) (p. 350)
• Drive modes (p. 390)
All Wheel Drive (AWD) 8
Your Volvo can be equipped with All Wheel Drive, which means that power is distributedautomatically between the front and rear wheels.
Under normal driving conditions, most of the engine's power is directed to the front wheels.However, if there is any tendency for the frontwheels to spin, an electronically controlled cou-pling distributes power to the wheels that havethe best traction. AWD reacts differently, depending on the drive mode * selected.
Related information
• Drive modes (p. 390)
• Low Speed Control (LSC) (p. 399)
Suspension and leveling control
*
The leveling control system adjusts the suspen- sion and shock absorbers automatically to helpprovide good comfort and control while driving.Leveling can also be controlled manually tomake loading or getting in and out of the vehicleeasier.
Pneumatic suspension and shock absorbers
This system is linked to the selected drive mode and is adapted to the vehicle's speed. The pneu-matic suspension reduces the vehicle's groundclearance at higher speeds to reduce wind resis-tance and increase stability. The shock absorbersare normally set to provide the best possiblecomfort and are adjusted continuously accordingto the road surface, acceleration, braking andcornering. A message will be displayed in the instrument panel when the suspension level is beingadjusted. The level cannot be adjusted if one of the side doors or the hood is open.
Page 403 of 546

STARTING AND DRIVING
401
Suspension leveling settings
Easy entry
The vehicle can be lowered to entering and exit- ing easier. Select
SettingsVehicleEasy Entry/Exit
Control via the center display's Top view to lower
the vehicle when getting in or out. When the vehicle is parked and the engine is turned off, the level is lowered (if a side door isopened, the level adjustment will stop). When theengine is started and the vehicle begins to move,the level will be raised to the height set by theselected drive mode.
Turning off suspension and leveling control
In certain situations, this function has to be turned off, for example when lifting the vehicle ona jack or garage hoist. 1. Tap
Settings in the center display's Top
view.
2. Tap
My CarSuspension .
3. Select
Deactivate Suspension & Leveling
Control.
Changing suspension control
Three different levels of suspension control can be selected from the center display: 1. Tap
Settings in the center display's Top
view. 2.
Tap
My CarDrive Mode.
3. Under
Suspension Control, select Eco,Comfort or Dynamic.
Loading mode
Use the buttons in the cargo compartment to raise or lower the vehicle to make loading orunloading easier or when attaching a trailer.
Parking the vehicleWhen parking, be sure that there is adequatespace above and below the vehicle since itsground clearance may vary, e.g., depending onthe ambient temperature, how the vehicle is loa-ded, if loading mode is being used or the drivemode selected after the engine is started. The level may also be adjusted for a certain time after the vehicle has been parked to compensatefor possible height adjustments due to tempera-ture changes in the pneumatic suspension whenthe vehicle has cooled.
TransportWhen transporting the vehicle on a ferry, train ora tow truck, it may only be secured (lashed)around the tires, not using any other chassiscomponents. Changes in the pneumatic suspen-sion may occur during transport that could nega-tively affect the lashing and result in damage.
Related information
• Drive modes (p. 390)
• Driving with a trailer (p. 367)
• Loading (p. 215)
8
Standard equipment on certain models.