2016 TOYOTA LAND CRUISER tow
[x] Cancel search: towPage 3 of 608
3
1
8 7
6
5
4
3
2
LC200_OM_OM60M88U_(U)
9
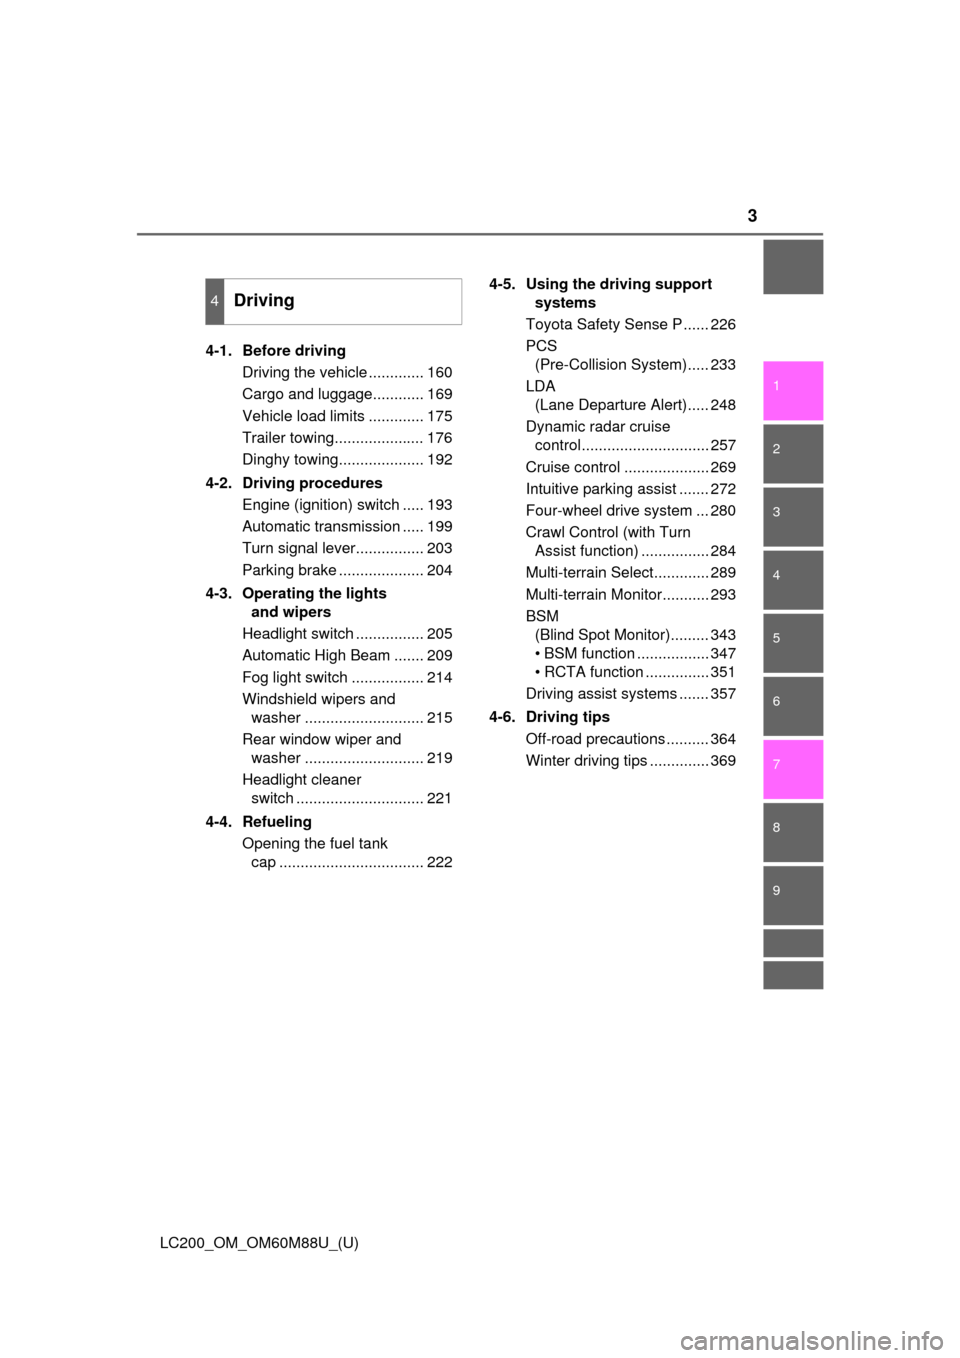
4-1. Before drivingDriving the vehicle ............. 160
Cargo and luggage............ 169
Vehicle load limits ............. 175
Trailer towing..................... 176
Dinghy towing.................... 192
4-2. Driving procedures Engine (ignition) switch ..... 193
Automatic transmission ..... 199
Turn signal lever................ 203
Parking brake .................... 204
4-3. Operating the lights and wipers
Headlight switch ................ 205
Automatic High Beam ....... 209
Fog light switch ................. 214
Windshield wipers and washer ............................ 215
Rear window wiper and washer ............................ 219
Headlight cleaner switch .............................. 221
4-4. Refueling Opening the fuel tank cap .................................. 222 4-5. Using the driving support
systems
Toyota Safety Sense P ...... 226
PCS (Pre-Collision System)..... 233
LDA (Lane Departure Alert)..... 248
Dynamic radar cruise control.............................. 257
Cruise control .................... 269
Intuitive parking assist ....... 272
Four-wheel drive system ... 280
Crawl Control (with Turn Assist function) ................ 284
Multi-terrain Select............. 289
Multi-terrain Monitor........... 293
BSM (Blind Spot Monitor)......... 343
• BSM function ................. 347
• RCTA function ............... 351
Driving assist systems ....... 357
4-6. Driving tips Off-road precautions .......... 364
Winter driving tips .............. 369
4Driving
Page 5 of 608
5
1
8 7
6
5
4
3
2
LC200_OM_OM60M88U_(U)
9
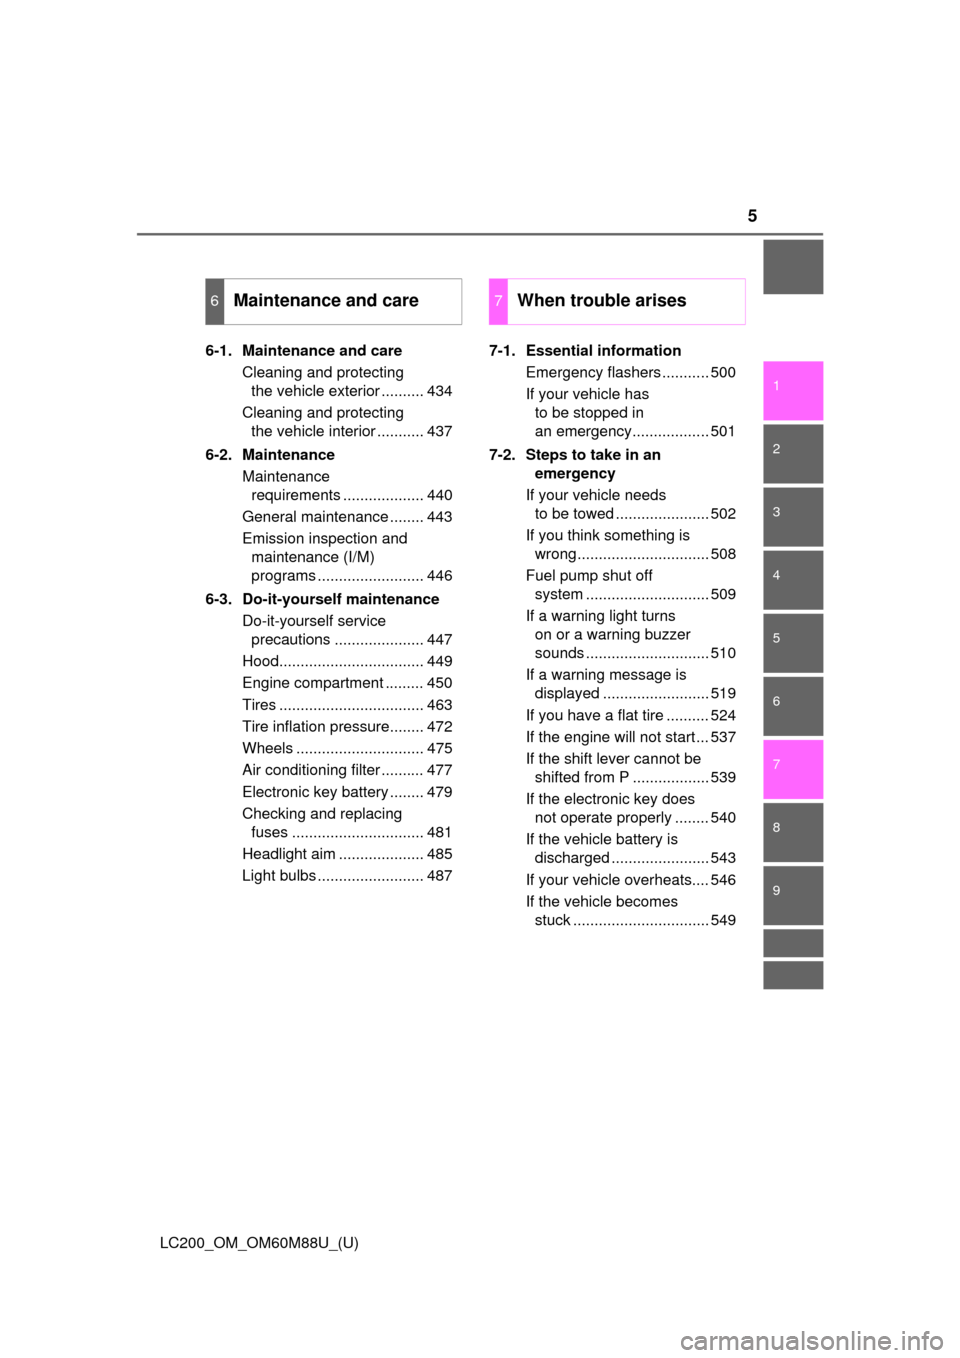
6-1. Maintenance and careCleaning and protecting the vehicle exterior .......... 434
Cleaning and protecting the vehicle interior ........... 437
6-2. Maintenance Maintenance requirements ................... 440
General maintenance ........ 443
Emission inspection and maintenance (I/M)
programs ......................... 446
6-3. Do-it-yourself maintenance Do-it-yourself service precautions ..................... 447
Hood.................................. 449
Engine compartment ......... 450
Tires .................................. 463
Tire inflation pressure........ 472
Wheels .............................. 475
Air conditioning filter .......... 477
Electronic key battery ........ 479
Checking and replacing fuses ............................... 481
Headlight aim .................... 485
Light bulbs ......................... 487 7-1. Essential information
Emergency flashers ........... 500
If your vehicle has to be stopped in
an emergency.................. 501
7-2. Steps to take in an emergency
If your vehicle needs to be towed ...................... 502
If you think something is wrong............................... 508
Fuel pump shut off system ............................. 509
If a warning light turns on or a warning buzzer
sounds ............................. 510
If a warning message is displayed ......................... 519
If you have a flat tire .......... 524
If the engine will not start ... 537
If the shift lever cannot be shifted from P .................. 539
If the electronic key does not operate properly ........ 540
If the vehicle battery is discharged ....................... 543
If your vehicle overheats.... 546
If the vehicle becomes stuck ................................ 549
6Maintenance and care7When trouble arises
Page 16 of 608
16Pictorial index
LC200_OM_OM60M88U_(U)
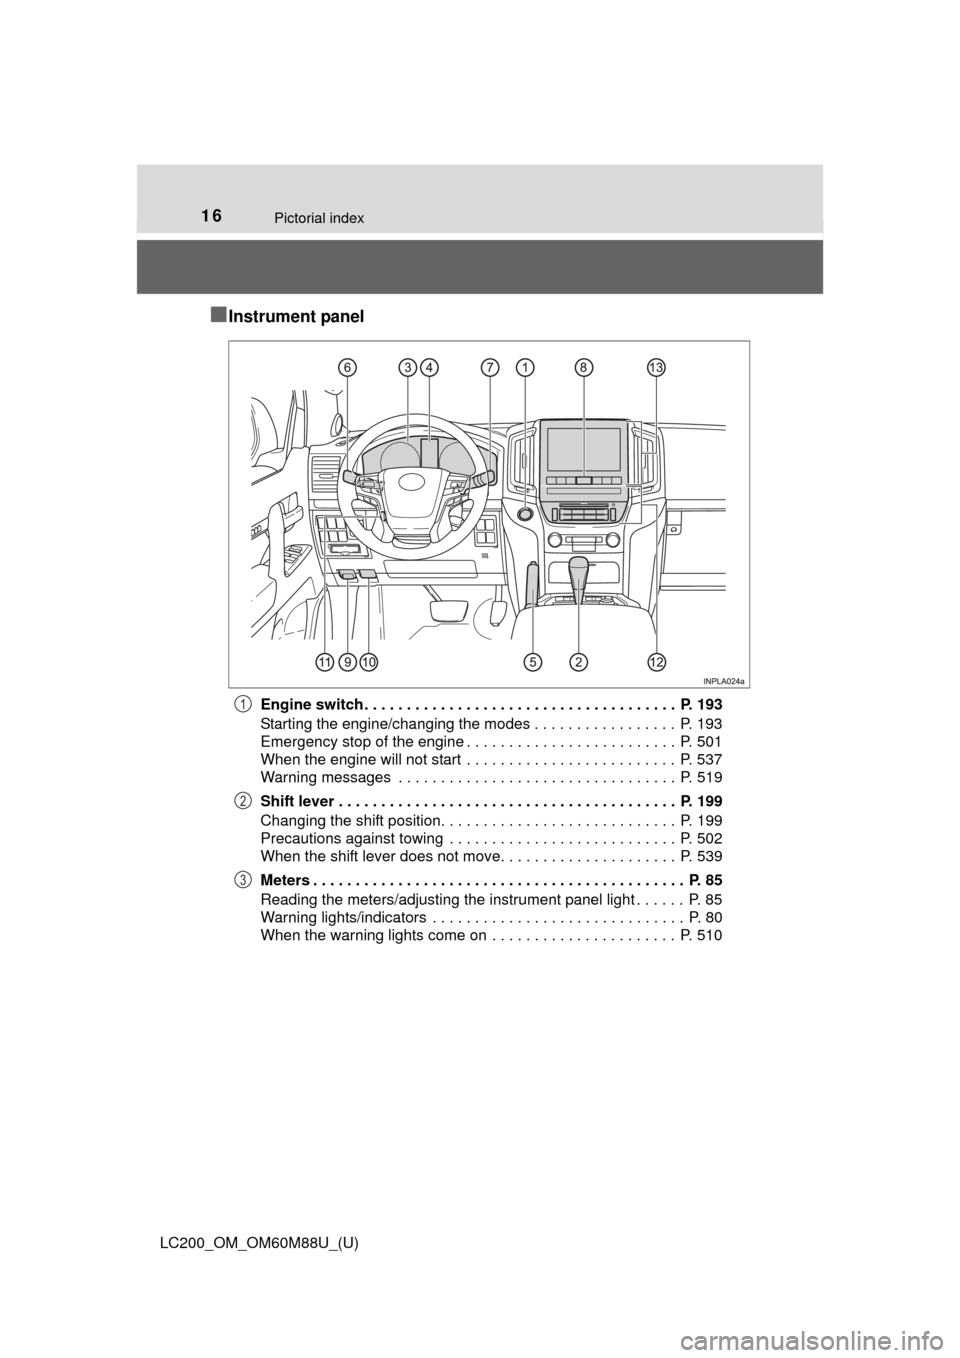
■Instrument panel
Engine switch. . . . . . . . . . . . . . . . . . . . . . . . . . . . . . . . . . . . . P. 193
Starting the engine/changing the modes . . . . . . . . . . . . . . . . . P. 193
Emergency stop of the engine . . . . . . . . . . . . . . . . . . . . . . . . . P. 501
When the engine will not start . . . . . . . . . . . . . . . . . . . . . . . . . P. 537
Warning messages . . . . . . . . . . . . . . . . . . . . . . . . . . . . . . . . . P. 519
Shift lever . . . . . . . . . . . . . . . . . . . . . . . . . . . . . . . . . . . . . . . . P. 199
Changing the shift position. . . . . . . . . . . . . . . . . . . . . . . . . . . . P. 199
Precautions against towing . . . . . . . . . . . . . . . . . . . . . . . . . . . P. 502
When the shift lever does not move. . . . . . . . . . . . . . . . . . . . . P. 539
Meters . . . . . . . . . . . . . . . . . . . . . . . . . . . . . . . . . . . . . . . . . . . . P. 85
Reading the meters/adjusting the instrument panel light . . . . . . P. 85
Warning lights/indicators . . . . . . . . . . . . . . . . . . . . . . . . . . . . . . P. 80
When the warning lights come on . . . . . . . . . . . . . . . . . . . . . . P. 5101
2
3
Page 32 of 608
321-1. For safe use
LC200_OM_OM60M88U_(U)
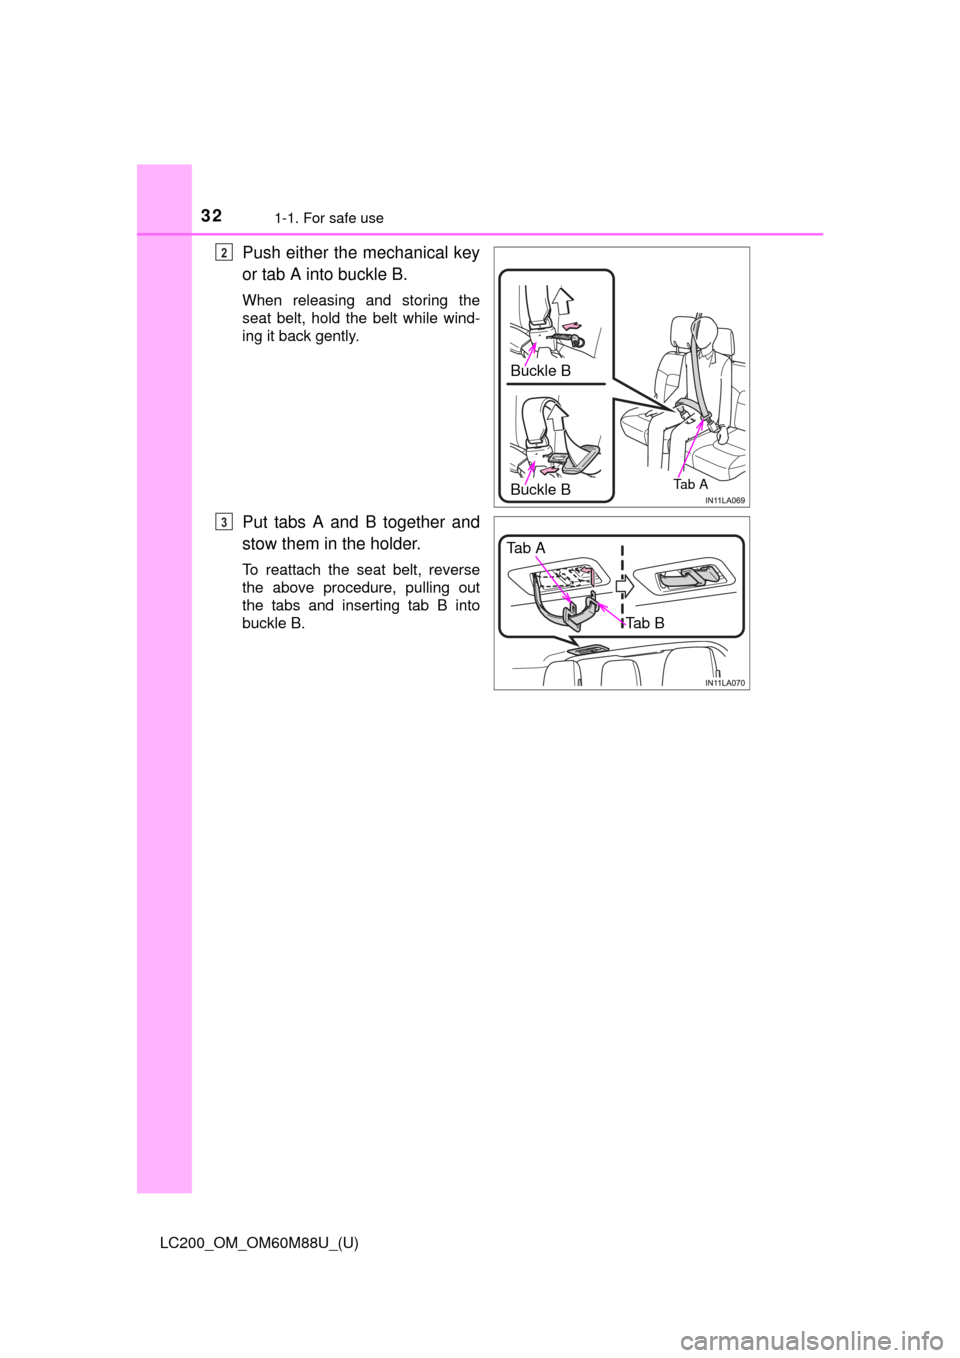
Push either the mechanical key
or tab A into buckle B.
When releasing and storing the
seat belt, hold the belt while wind-
ing it back gently.
Put tabs A and B together and
stow them in the holder.
To reattach the seat belt, reverse
the above procedure, pulling out
the tabs and inserting tab B into
buckle B.
Buckle B
Ta b ABuckle B
2
Tab A
Tab B
3
Page 41 of 608

411-1. For safe use
LC200_OM_OM60M88U_(U)
1
For safety and security
Your vehicle is equipped with ADVANCED AIRBAGS designed based
on the US motor vehicle safety standards (FMVSS208). The airbag
sensor assembly (ECU) controls airbag deployment based on infor-
mation obtained from the sensors et c. shown in the system compo-
nents diagram above. This informat ion includes crash severity and
occupant information. As the airbags deploy, a chemical reaction in
the inflators quickly fills the airbag s with non-toxic gas to help restrain
the motion of the occupants.
WARNING
■ SRS airbag precautions
Observe the following precautions regarding the SRS airbags.
Failure to do so may cause death or serious injury.
●The driver and all passengers in the vehicle must wear their seat belts
properly.
The SRS airbags are supplemental devices to be used with the seat belts.
● The SRS driver airbag deploys with considerable force, and can cause
death or serious injury especially if the driver is very close to the airbag.
The National Highway Traffic Safety Administration (NHTSA) advises:
Since the risk zone for the driver’s airbag is the first 2 - 3 in. (50 - 75 mm)
of inflation, placing yourself 10 in. (250 mm) from your driver airbag pro-
vides you with a clear margin of safety. This distance is measured from
the center of the steering wheel to your breastbone. If you sit less than 10
in. (250 mm) away now, you can change your driving position in several
ways:
• Move your seat to the rear as far as you can while still reaching the ped- als comfortably.
• Slightly recline the back of the seat. Although vehicle designs vary,
many drivers can achieve the 10 in. (250 mm) distance, even with the
driver seat all the way forward, simply by reclining the back of the seat
somewhat. If reclining the back of your seat makes it hard to see the
road, raise yourself by using a firm, non-slippery cushion, or raise the
seat if your vehicle has that feature.
• If your steering wheel is adjustable, tilt it downward. This points the air-
bag toward your chest instead of your head and neck.
The seat should be adjusted as recommended by NHTSA above, while
still maintaining control of the foot pedals, steering wheel, and your view
of the instrument panel controls.
Page 43 of 608
431-1. For safe use
LC200_OM_OM60M88U_(U)
1
For safety and security
WARNING
■SRS airbag precautions
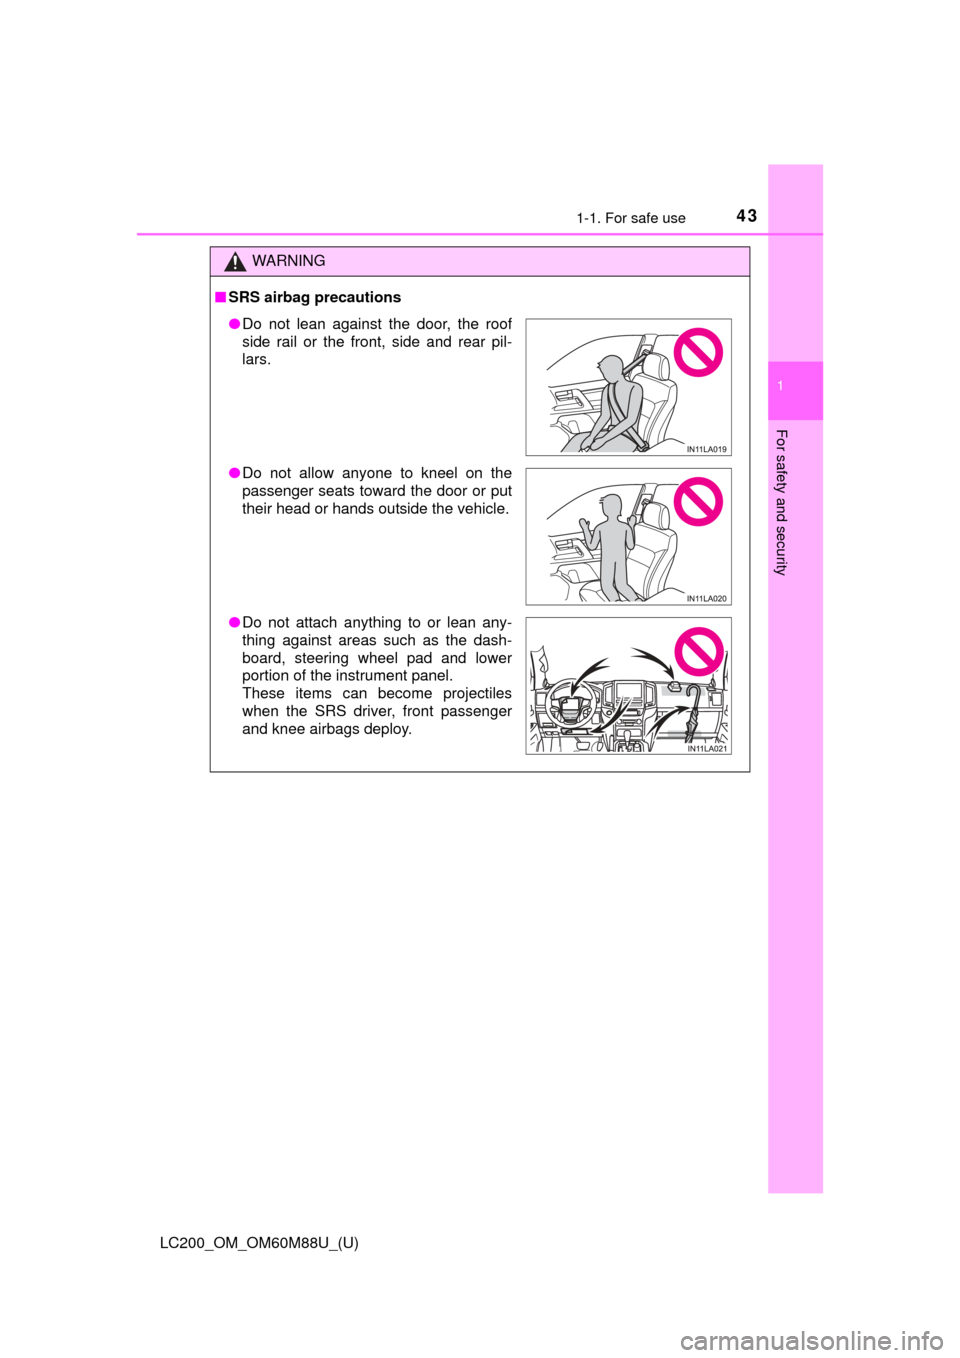
●Do not lean against the door, the roof
side rail or the front, side and rear pil-
lars.
● Do not allow anyone to kneel on the
passenger seats toward the door or put
their head or hands outside the vehicle.
● Do not attach anything to or lean any-
thing against areas such as the dash-
board, steering wheel pad and lower
portion of the instrument panel.
These items can become projectiles
when the SRS driver, front passenger
and knee airbags deploy.
Page 122 of 608
122
LC200_OM_OM60M88U_(U)
3-2. Opening, closing and locking the doors
■Battery-saving function
The battery-saving function will be activated in order to prevent the electronic
key battery and the battery from being discharged while the vehicle is not in
operation for a long time.
●In the following situations, the smart key system may take some time to
unlock the doors.
• The electronic key has been left in an area of approximately 6 ft. (2 m) of
the outside of the vehicle for 10 minutes or longer.
• The smart key system has not been used for 5 days or longer.
● If the smart key system has not been used for 14 days or longer, the doors
cannot be unlocked at any doors except the driver’s door. In this case, take
hold of the driver’s door handle, or use the wireless remote control or the
mechanical key, to unlock the doors.
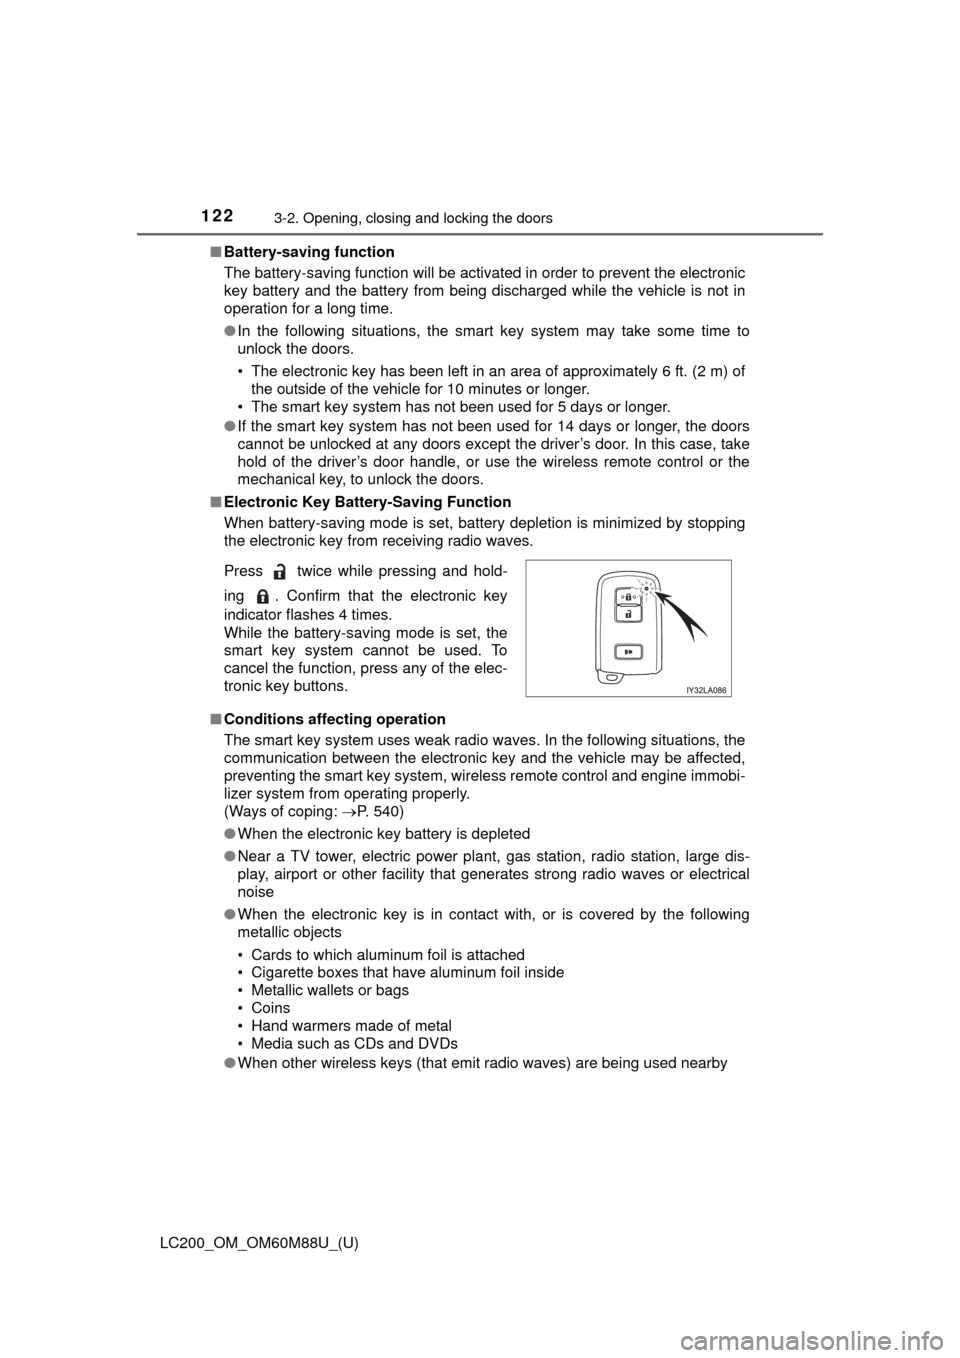
■ Electronic Key Battery-Saving Function
When battery-saving mode is set, battery depletion is minimized by stopping
the electronic key from receiving radio waves.
■ Conditions affecting operation
The smart key system uses weak radio waves. In the following situations, the
communication between the electronic key and the vehicle may be affected,
preventing the smart key system, wireless remote control and engine immobi-
lizer system from operating properly.
(Ways of coping: P. 540)
● When the electronic key battery is depleted
● Near a TV tower, electric power plant, gas station, radio station, large dis-
play, airport or other facility that generates strong radio waves or electrical
noise
● When the electronic key is in contact with, or is covered by the following
metallic objects
• Cards to which aluminum foil is attached
• Cigarette boxes that have aluminum foil inside
• Metallic wallets or bags
• Coins
• Hand warmers made of metal
• Media such as CDs and DVDs
● When other wireless keys (that emit radio waves) are being used nearby
Press twice while pressing and hold-
ing . Confirm that the electronic key
indicator flashes 4 times.
While the battery-saving mode is set, the
smart key system cannot be used. To
cancel the function, press any of the elec-
tronic key buttons.
Page 130 of 608
130
LC200_OM_OM60M88U_(U)
3-3. Adjusting the seats
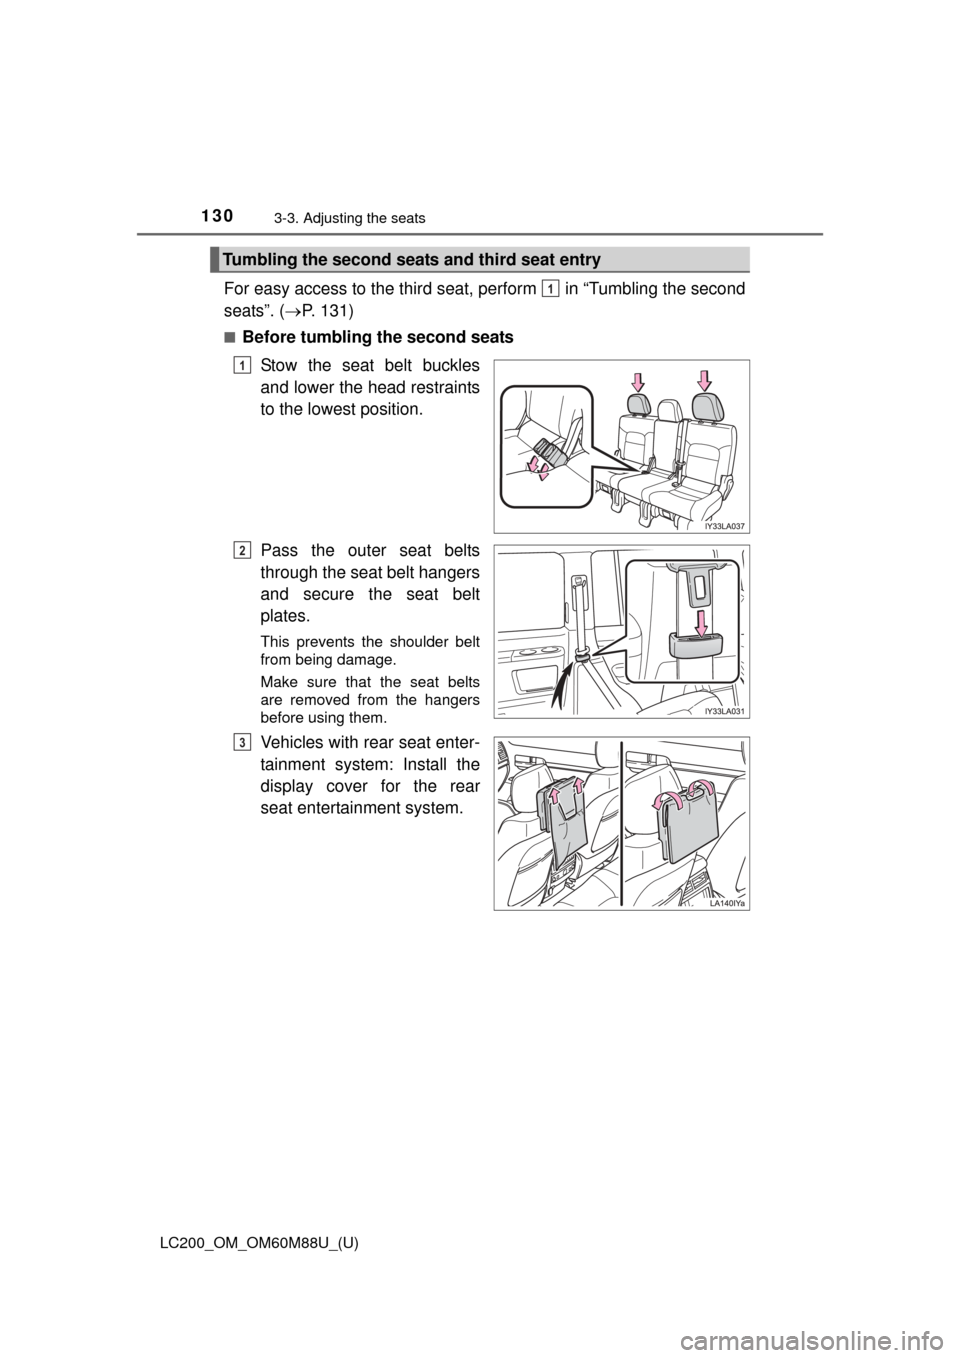
For easy access to the third seat, perform in “Tumbling the second
seats”. (P. 131)
■Before tumbling the second seats
Stow the seat belt buckles
and lower the head restraints
to the lowest position.
Pass the outer seat belts
through the seat belt hangers
and secure the seat belt
plates.
This prevents the shoulder belt
from being damage.
Make sure that the seat belts
are removed from the hangers
before using them.
Vehicles with rear seat enter-
tainment system: Install the
display cover for the rear
seat entertainment system.
Tumbling the second seats and third seat entry
1
1
2
3