2016 TOYOTA LAND CRUISER remote control
[x] Cancel search: remote controlPage 157 of 608
LC200_OM_OM60M88U_(U)
1573-5. Opening, closing the windows and moon roof
3
Operation of each component
WARNING
Observe the following precautions.
Failing to do so may cause death or serious injury.
■Opening the moon roof
●Do not allow any passengers to put their hands or heads outside the vehi-
cle while it is moving.
● Do not sit on top of the moon roof.
■ Closing the moon roof
●The driver is responsible for moon roof opening and closing operations.
In order to prevent accidental operation, especially by a child, do not let a
child operate the moon roof. It is possible for children and other passen-
gers to have body parts caught in the moon roof.
● Check to make sure that all passengers do not have any part of their bod-
ies in a position where it could be caught when the moon roof is being
operated.
● When using the wireless remote control or mechanical key and operating
the moon roof, operate the moon roof after checking to make sure that
there is no possibility of any passenger having any of their body parts
caught in the moon roof. Also, do not let a child operate moon roof by the
wireless remote control or mechanical key. It is possible for children and
other passengers to get caught in the moon roof.
● When exiting the vehicle, turn the engine switch off, carry the key and exit
the vehicle along with the child. There may be accidental operation, due to
mischief, etc., that may possibly lead to an accident.
■ Jam protection function
●Never use any part of your body to intentionally activate the jam protection
function.
● The jam protection function may not work if something gets caught just
before the moon roof fully closes.
Page 207 of 608

LC200_OM_OM60M88U_(U)
2074-3. Operating the lights and wipers
4
Driving
■Daytime running light system
●To make your vehicle more visible to other drivers during daytime driving,
the daytime running lights turn on automatically (at a reduced intensity)
whenever the engine is started and the parking brake is released. Daytime
running lights are not designed for use at night.
For the U.S.A.: Daytime running lights can be turned off by operating the
switch.
● Compared to turning on the headlights, the daytime running light system
offers greater durability and consumes less electricity, so it can help improve
fuel economy.
■ Headlight control sensor
■ Automatic light off system
●When the headlights are on: The headlights and tail lights turn off 30 sec-
onds after a door is opened and closed if the engine switch has been
switched to ACCESSORY or OFF mode.
● When only the tail lights are on: The tail lights turn off automatically if the
engine switch is switched to ACCESSORY or OFF mode and driver’s door
is opened.
To turn the lights on again, turn the engine switch to IGNITION ON mode, or
turn the light switch off once and then back to the or position.
■ Automatic headlight leveling system
The level of the headlights is automatically adjusted according to the number
of passengers and the loading condition of the vehicle to ensure that the
headlights do not interfere with other road users.
■ Welcome lighting
If the headlight switch is turned to and the surrounding area is dark,
unlocking the doors using the smart key system or wireless remote control
will turn the parking lights and tail lights on automatically.
■ If the automatic headlight level ing system warning light flashes
It may indicate a malfunction in the system. Contact your Toyota dealer.
■ Light reminder buzzer
A buzzer sounds when the engine switch is turned to ACCESSORY or OFF
mode and the driver’ door is opened while the tail lights are turned on. The sensor may not function properly if an
object is placed on the sensor, or anything
that blocks the sensor is affixed to the
windshield.
Doing so interferes with the sensor
detecting the level of ambient light and
may cause the automatic headlight sys-
tem to malfunction.
Page 422 of 608
422
LC200_OM_OM60M88U_(U)
5-4. Using the other interior features
Garage door opener
The garage door opener (HomeLink Universal Transceiver) is manufac-
tured under license from HomeLink.
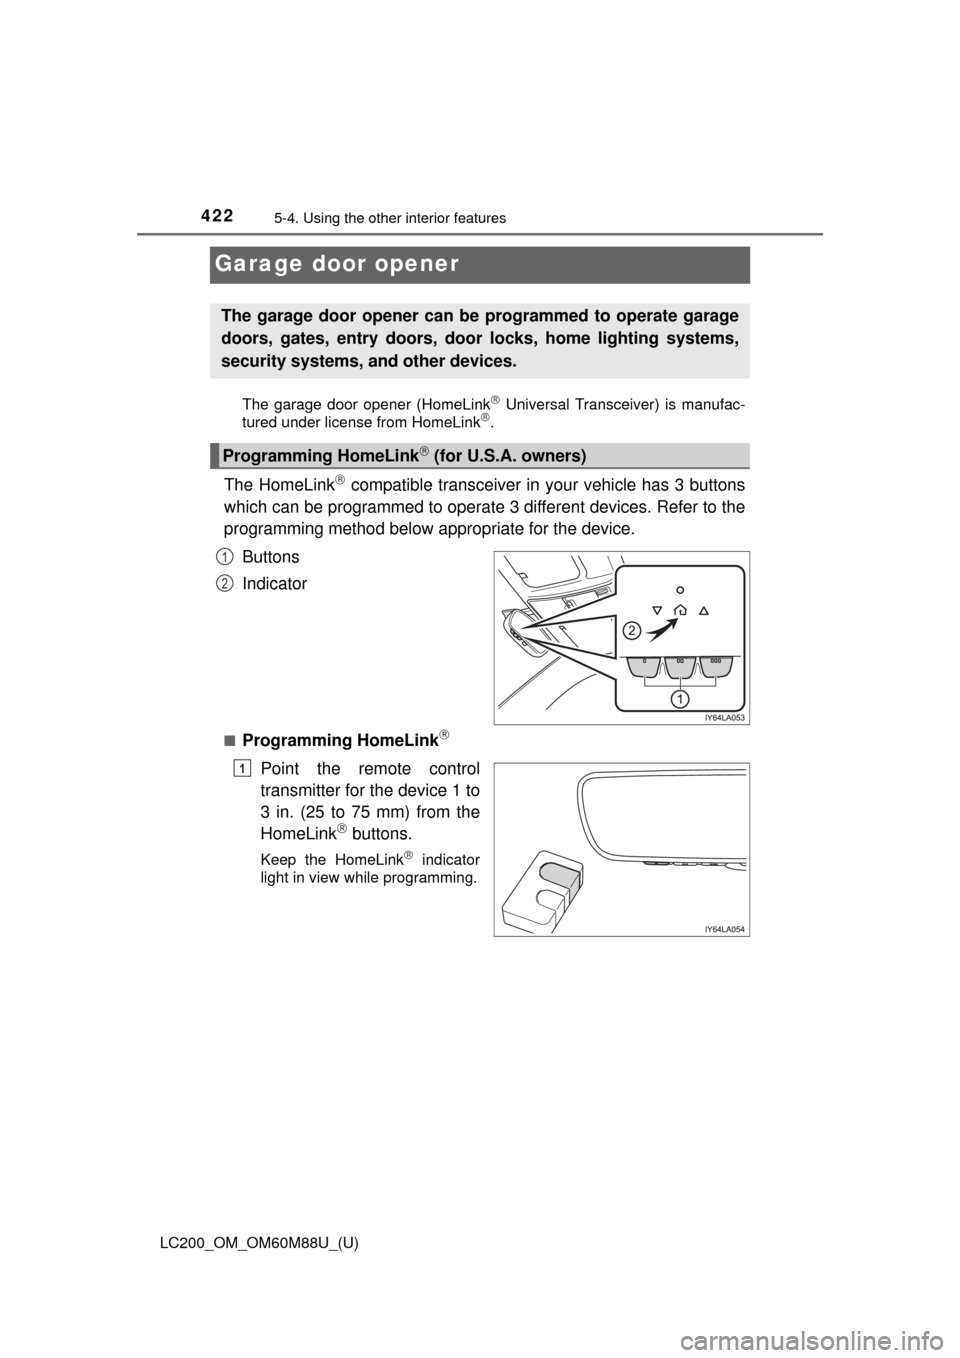
The HomeLink compatible transceiver in your vehicle has 3 buttons
which can be programmed to operate 3 different devices. Refer to the
programming method below appropriate for the device.
Buttons
Indicator
■Programming HomeLink
Point the remote control
transmitter for the device 1 to
3 in. (25 to 75 mm) from the
HomeLink
buttons.
Keep the HomeLink indicator
light in view while programming.
The garage door opener can be programmed to operate garage
doors, gates, entry doors, door locks, home lighting systems,
security systems, and other devices.
Programming HomeLink (for U.S.A. owners)
1
2
1
Page 423 of 608
LC200_OM_OM60M88U_(U)
4235-4. Using the other interior features
5
Interior features
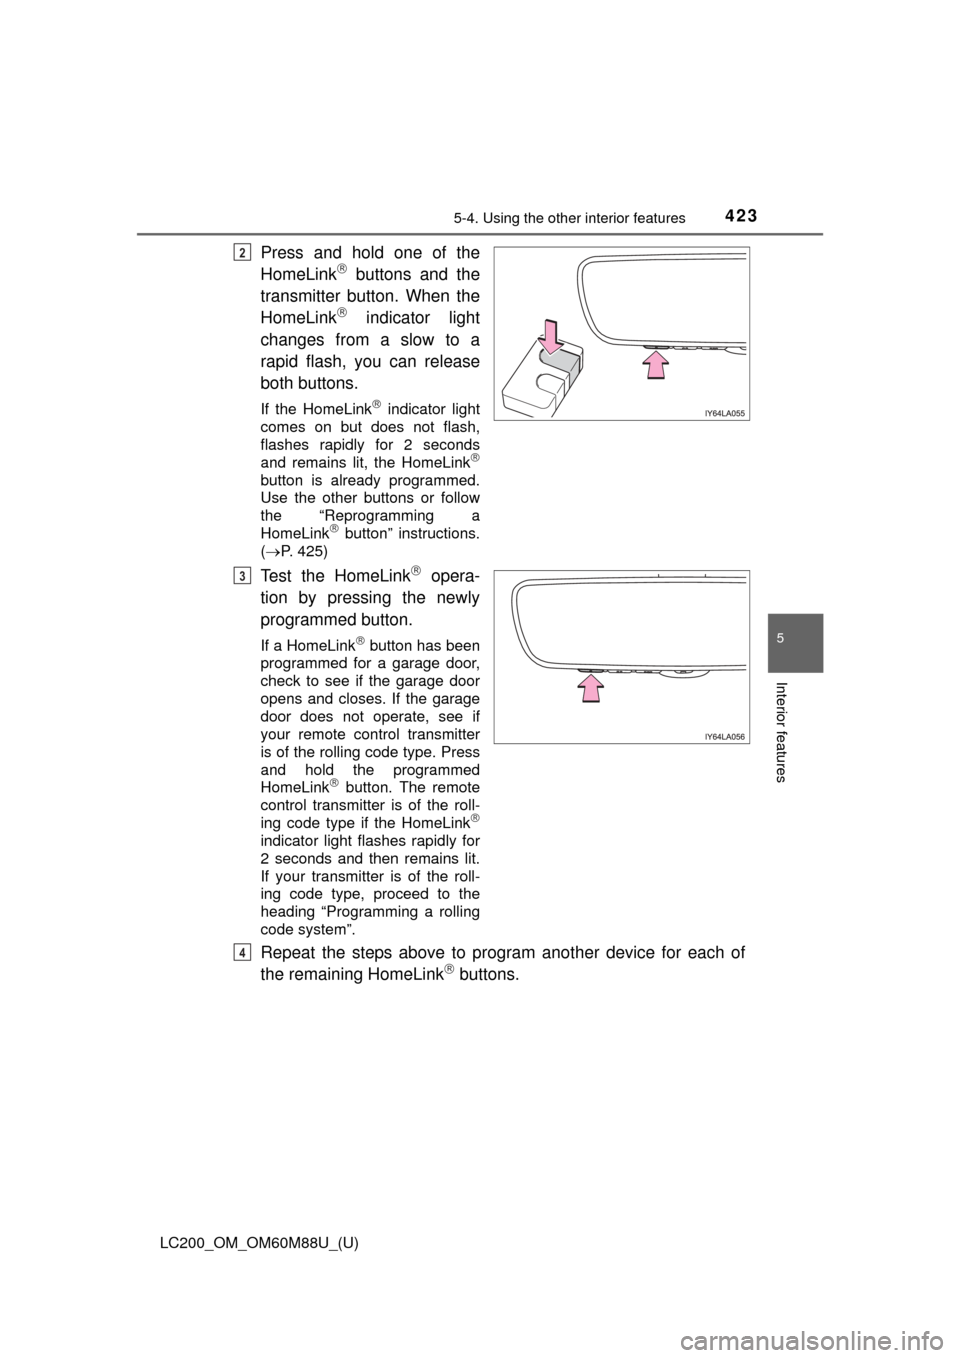
Press and hold one of the
HomeLink buttons and the
transmitter button. When the
HomeLink
indicator light
changes from a slow to a
rapid flash, you can release
both buttons.
If the HomeLink indicator light
comes on but does not flash,
flashes rapidly for 2 seconds
and remains lit, the HomeLink
button is already programmed.
Use the other buttons or follow
the “Reprogramming a
HomeLink
button” instructions.
( P. 425)
Test the HomeLink opera-
tion by pressing the newly
programmed button.
If a HomeLink button has been
programmed for a garage door,
check to see if the garage door
opens and closes. If the garage
door does not operate, see if
your remote control transmitter
is of the rolling code type. Press
and hold the programmed
HomeLink
button. The remote
control transmitter is of the roll-
ing code type if the HomeLink
indicator light flashes rapidly for
2 seconds and then remains lit.
If your transmitter is of the roll-
ing code type, proceed to the
heading “Programming a rolling
code system”.
Repeat the steps above to program another device for each of
the remaining HomeLink buttons.
2
3
4
Page 424 of 608

424
LC200_OM_OM60M88U_(U)
5-4. Using the other interior features
■Programming a rolling code system
If your device is rolling code equipped, follow the steps under the
heading “Programming HomeLink
” before proceeding with the
steps listed below.
Locate the learn button on the ceiling mounted garage door
opener motor. The exact location and color of the button may
vary by brand of garage door opener motor.
Refer to the operation manual supplied with the garage door opener
motor for the location of the learn button.
Press the learn button.
Following this step, you have 30 seconds in which to initiate below.
Press and hold the vehicle’s programmed HomeLink button for
2 seconds and release it. Repeat this step once again. The
garage door may open.
If the garage door opens, the programming process is complete. If the
door does not open, press and release the button a third time. This third
press and release will complete the programming process by opening
the garage door.
The ceiling mounted garage door opener motor should now recognize
the HomeLink
signal and operate the garage door.
Repeat the steps above to program another rolling code system
for any of the remaining HomeLink buttons.
■Programming an entry gate (for U.S.A. owners)/Programming
all devices in the Canadian market
Place your transmitter 1 to 3 in. (25 to 75 mm) away from the sur-
face of the HomeLink
.
Keep the HomeLink indicator light in view while programming.
Press and hold the selected HomeLink button.
Repeatedly press and release (cyc le) the device’s remote control
button for 2 seconds each until is completed.
When the indicator light on the HomeLink
compatible trans-
ceiver starts to flash rapidly, release the buttons.
Test the operation of the HomeLink
by pressing the newly pro-
grammed button. Check to see if the gate/device operates cor-
rectly.
Repeat the steps above to program another device for each of
the remaining HomeLink
buttons.
1
2
3
3
4
1
2
3
4
4
5
6
Page 426 of 608
426
LC200_OM_OM60M88U_(U)
5-4. Using the other interior features
■Before programming
●Install a new battery in the remote control transmitter.
● The battery side of the remote control transmitter must be pointed away
from the HomeLink
button.
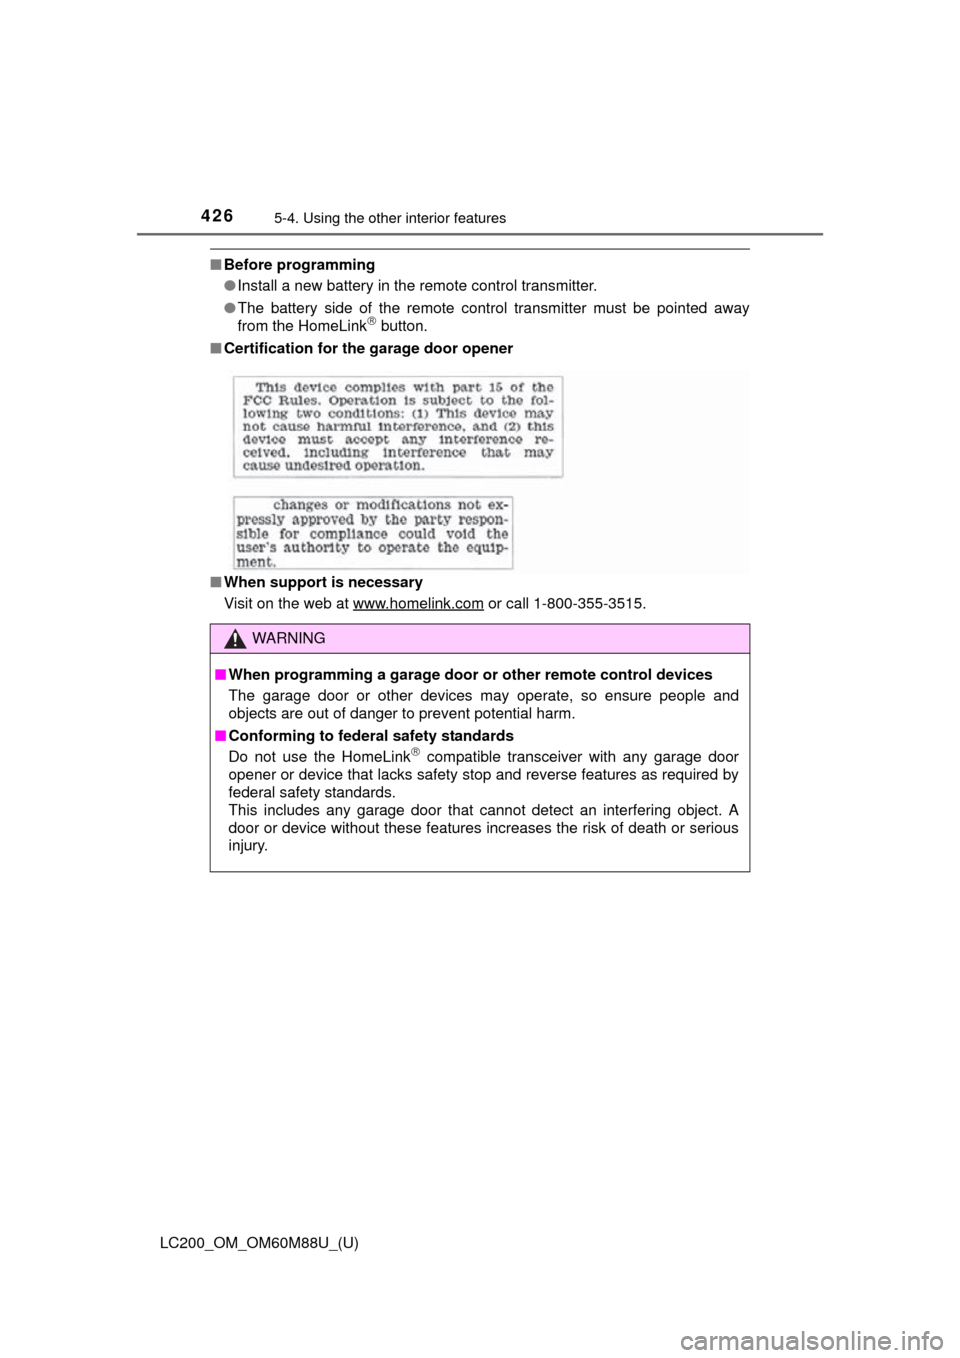
■ Certification for the garage door opener
■ When support is necessary
Visit on the web at www.homelink.com
or call 1-800-355-3515.
WARNING
■When programming a garage door or other remote control devices
The garage door or other devices may operate, so ensure people and
objects are out of danger to prevent potential harm.
■ Conforming to federal safety standards
Do not use the HomeLink
compatible transceiver with any garage door
opener or device that lacks safety stop and reverse features as required by
federal safety standards.
This includes any garage door that cannot detect an interfering object. A
door or device without these features increases the risk of death or ser\
ious
injury.
Page 460 of 608
460
LC200_OM_OM60M88U_(U)
6-3. Do-it-yourself maintenance
■Before recharging
When recharging, the battery produces hydrogen gas which is flammable and
explosive. Therefore, observe the following before recharging:
●If recharging with the battery installed on the vehicle, be sure to disconnect
the ground cable.
● Make sure the power switch on the charger is off when connecting and dis-
connecting the charger cables to the battery.
■ After recharging/reconnecting the battery
The engine may not start. Follow the procedure below to initialize the system.
Shift the shift lever to P
Open and close any of the doors.
Restart the engine.
● Unlocking the doors using the smart key system may not be possible imme-
diately after reconnecting the battery. If this happens, use the wireless
remote control or the mechanical key to lock/unlock the doors.
● Start the engine with the engine switch in ACCESSORY mode. The engine
may not start with the engine switch turned off. However, the engine will
operate normally from the second attempt.
● The engine switch mode is recorded by the vehicle. If the battery is recon-
nected, the vehicle will return the engine switch mode to the status it was in
before the battery was disconnected. Make sure to turn off the engine
before disconnect the battery. Take extra care when connecting the battery
if the engine switch mode prior to discharge is unknown.
If the engine will not start even after multiple attempts at both methods, con-
tact your Toyota dealer.
WARNING
■ Chemicals in the battery
Batteries contain poisonous and corrosive sulfuric acid and may produce
hydrogen gas which is flammable and explosive. To reduce the risk of death
or serious injury, take the following precautions while working on or near
battery:
●Do not cause sparks by touching the battery terminals with tools.
● Do not smoke or light a match near the battery.
● Avoid contact with eyes, skin and clothes.
● Never inhale or swallow electrolyte.
● Wear protective safety glasses when working near the battery.
● Keep children away from the battery.
■ Where to safely charge the battery
Always charge the battery in an open area. Do not charge the battery in a
garage or closed room where there is not sufficient ventilation.
1
2
3
Page 480 of 608
480
LC200_OM_OM60M88U_(U)
6-3. Do-it-yourself maintenance
■Use a CR2032 lithium battery
●Batteries can be purchased at your Toyota dealer, local electrical appliance
shops or camera stores.
● Replace only with the same or equivalent type recommended by the manu-
facturer.
● Dispose of used batteries according to the local laws.
■ If the electronic key battery is depleted
The following symptoms may occur:
●The smart key system and wireless remote control will not function properly.
● The operational range will be reduced.
WARNING
■ Removed battery and other parts
These parts are small and if swallowed by a child, they can cause choking.
Keep away from children. Failure to do so could result in death or serious
injury.
NOTICE
■For normal operation after replacing the battery
Observe the following precautions to prevent accidents:
●Always work with dry hands.
Moisture may cause the battery to rust.
● Do not touch or move any other component inside the remote control.
● Do not bend either of the battery terminals.