Page 445 of 608
LC200_OM_OM60M88U_(U)
4456-2. Maintenance
6
Maintenance and care
Vehicle exterior
ItemsCheck points
Doors• Do the doors operate smoothly?
Engine hood• Does the engine hood lock system work prop-erly?
Fluid leaks• There should not be any signs of fluid leakageafter the vehicle has been parked.
Tires
• Is the tire inflation pressure correct?
• The tires should not be damaged or exces-sively worn.
• Have the tires been rotated according to the
maintenance schedule?
• The wheel nuts should not be loose.
Windshield wipers/rear
window wiper
• The wiper blades should not show any signs
of cracking, splitting, wear, contamination or
deformation.
• The wiper blades should clear the windshield/
rear window without streaking or skipping.
WARNING
■If the engine is running
Turn off the engine and ensure that there is adequate ventilation before per-
forming maintenance checks.
Page 449 of 608
449
LC200_OM_OM60M88U_(U)
6-3. Do-it-yourself maintenance
6
Maintenance and care
Hood
Pull the hood lock release lever.
The hood will pop up slightly.
Lift the hood catch and lift the
hood.
Release the lock from the inside of the vehicle to open the hood.
1
2
WARNING
■Pre-driving check
Check that the hood is fully closed and locked.
If the hood is not locked properly, it may open while the vehicle is in motion
and cause an accident, which may result in death or serious injury.
Page 453 of 608

LC200_OM_OM60M88U_(U)
4536-3. Do-it-yourself maintenance
6
Maintenance and care
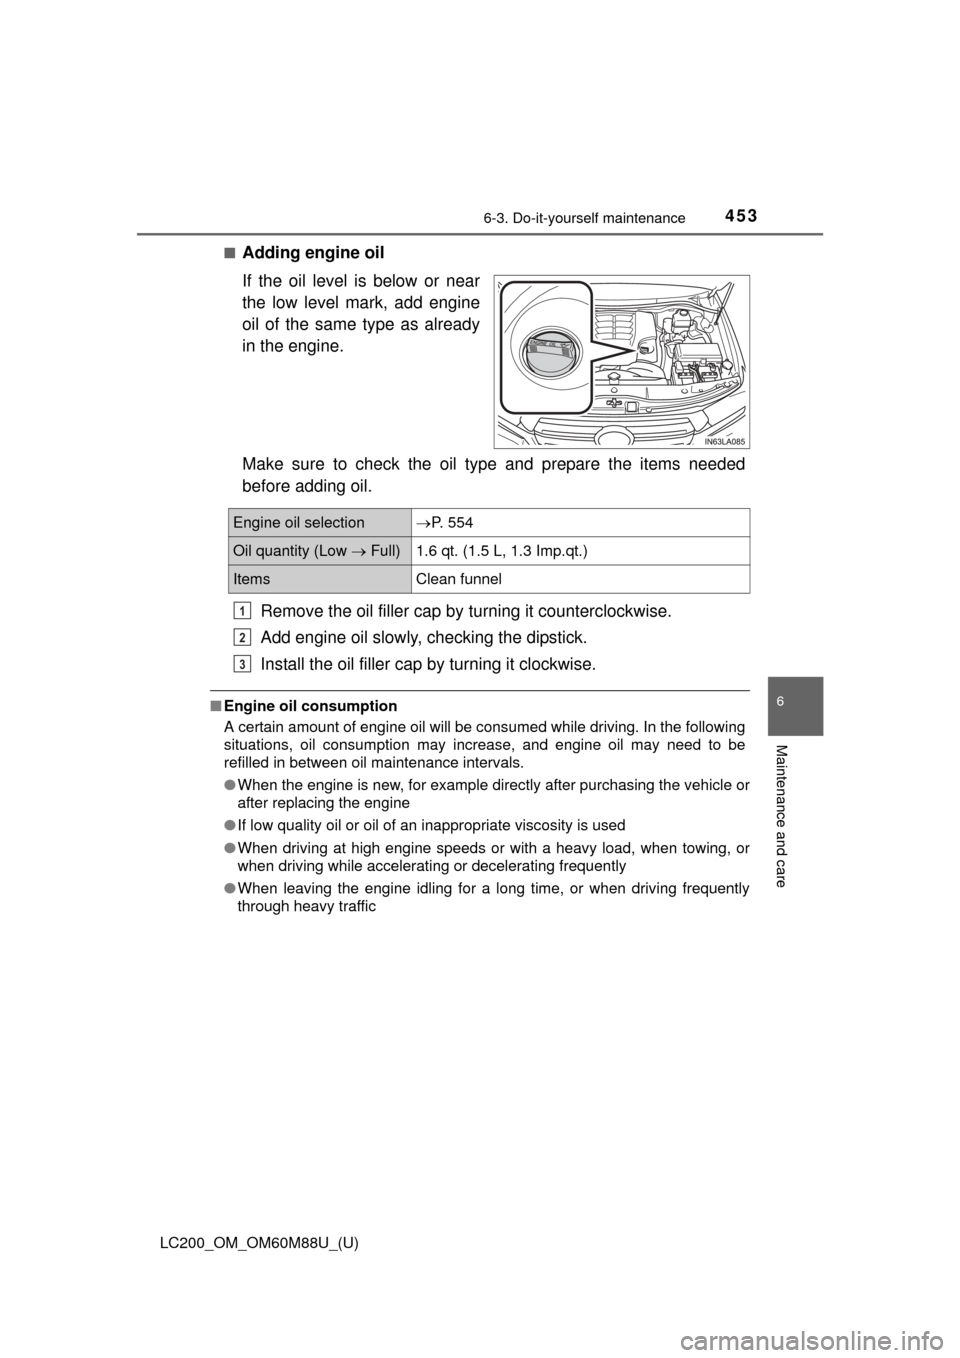
■Adding engine oil
If the oil level is below or near
the low level mark, add engine
oil of the same type as already
in the engine.
Make sure to check the oil type and prepare the items needed
before adding oil.Remove the oil filler cap by turning it counterclockwise.
Add engine oil slowly, checking the dipstick.
Install the oil filler cap by turning it clockwise.
■ Engine oil consumption
A certain amount of engine oil will be consumed while driving. In the following
situations, oil consumption may increase, and engine oil may need to be
refilled in between oil maintenance intervals.
●When the engine is new, for example directly after purchasing the vehicle or
after replacing the engine
● If low quality oil or oil of an inappropriate viscosity is used
● When driving at high engine speeds or with a heavy load, when towing, or
when driving while accelerating or decelerating frequently
● When leaving the engine idling for a long time, or when driving frequently
through heavy traffic
Engine oil selectionP. 554
Oil quantity (Low Full)1.6 qt. (1.5 L, 1.3 Imp.qt.)
ItemsClean funnel
1
2
3
Page 458 of 608
458
LC200_OM_OM60M88U_(U)
6-3. Do-it-yourself maintenance
■Fluid level
The fluid level should be within the appropriate range.Full (when hot)
Add fluid (when hot)
Full (when cold)
Add fluid (when cold)
Hot: The vehicles has been driven around 50 mph (80 km/h) for 20 minutes, or slightly longe r in frigid temperatures.
(Fluid temperature, 140 F - 175F [60C - 80 C]).
Cold: The engine has not been run for about 5 hours. (Room temperature, 50 F - 85F [10C - 30 C]).
■Checking the fluid level
Make sure to check the fluid type and prepare the necessary items.
Clean all dirt off the reservoir.
Remove the cap by turn ing it counterclockwise.
Wipe the dipstick clean.
Reinstall the cap and remove it again.
Check the fluid level.
Power steering fluid
1
2
3
4
Fluid typeAutomatic transmission fluid DEXRON® II or III
ItemsRag or paper, clean funnel (only for adding fluid)
1
2
3
4
5
Page 460 of 608

460
LC200_OM_OM60M88U_(U)
6-3. Do-it-yourself maintenance
■Before recharging
When recharging, the battery produces hydrogen gas which is flammable and
explosive. Therefore, observe the following before recharging:
●If recharging with the battery installed on the vehicle, be sure to disconnect
the ground cable.
● Make sure the power switch on the charger is off when connecting and dis-
connecting the charger cables to the battery.
■ After recharging/reconnecting the battery
The engine may not start. Follow the procedure below to initialize the system.
Shift the shift lever to P
Open and close any of the doors.
Restart the engine.
● Unlocking the doors using the smart key system may not be possible imme-
diately after reconnecting the battery. If this happens, use the wireless
remote control or the mechanical key to lock/unlock the doors.
● Start the engine with the engine switch in ACCESSORY mode. The engine
may not start with the engine switch turned off. However, the engine will
operate normally from the second attempt.
● The engine switch mode is recorded by the vehicle. If the battery is recon-
nected, the vehicle will return the engine switch mode to the status it was in
before the battery was disconnected. Make sure to turn off the engine
before disconnect the battery. Take extra care when connecting the battery
if the engine switch mode prior to discharge is unknown.
If the engine will not start even after multiple attempts at both methods, con-
tact your Toyota dealer.
WARNING
■ Chemicals in the battery
Batteries contain poisonous and corrosive sulfuric acid and may produce
hydrogen gas which is flammable and explosive. To reduce the risk of death
or serious injury, take the following precautions while working on or near
battery:
●Do not cause sparks by touching the battery terminals with tools.
● Do not smoke or light a match near the battery.
● Avoid contact with eyes, skin and clothes.
● Never inhale or swallow electrolyte.
● Wear protective safety glasses when working near the battery.
● Keep children away from the battery.
■ Where to safely charge the battery
Always charge the battery in an open area. Do not charge the battery in a
garage or closed room where there is not sufficient ventilation.
1
2
3
Page 489 of 608
LC200_OM_OM60M88U_(U)
4896-3. Do-it-yourself maintenance
6
Maintenance and care
■Front side marker lightFor the left side only:
Remove the securing clip
and move the washer fluid
filler opening.
Turn the bulb base counter-
clockwise.
Remove the light bulb.
When installing, reverse the steps listed.
Replacing light bulbs
1
2
3
4
Page 490 of 608
490
LC200_OM_OM60M88U_(U)
6-3. Do-it-yourself maintenance
■Front turn signal lightsFor the left side only:
Remove the securing clip
and move the washer fluid
filler opening.
To allow enough working
space, remove the bulb base
of the front side marker light.
Wrap the removed bulb base
with cloth to prevent damage to
the bulb base.
Unplug the connector while
depressing the lock release.
Turn the bulb base counter-
clockwise.
1
2
3
4
Page 492 of 608
492
LC200_OM_OM60M88U_(U)
6-3. Do-it-yourself maintenance
■Back-up lightOpen the back door and
remove the nuts and lamp
assembly.
Unplug the connector while
pressing the lock release.
Remove the cover.
Unclip the connector wire
and turn the bulb bases
counterclockwise.
1
2
3
4