2016 TESLA MODEL X warning
[x] Cancel search: warningPage 135 of 179

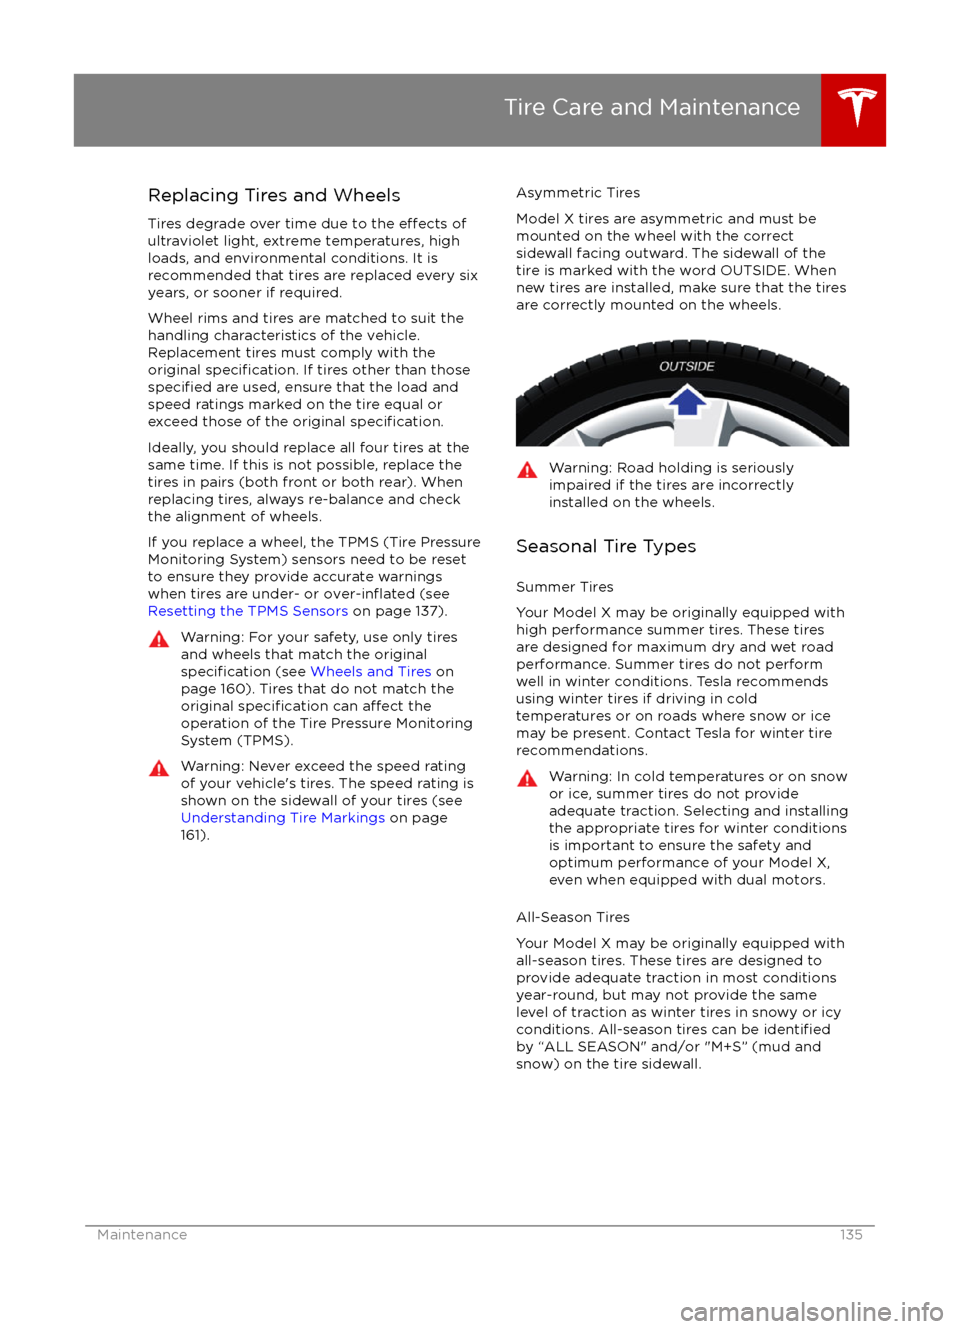
Replacing Tires and Wheels
Tires degrade over time due to the
effects of
ultraviolet light, extreme temperatures, high
loads, and environmental conditions. It is
recommended that tires are replaced every six
years, or sooner if required.
Wheel rims and tires are matched to suit the
handling characteristics of the vehicle.
Replacement tires must comply with the
original
specification. If tires other than thosespecified are used, ensure that the load and
speed ratings marked on the tire equal or
exceed those of the original
specification.
Ideally, you should replace all four tires at the same time. If this is not possible, replace the
tires in pairs (both front or both rear). When
replacing tires, always re-balance and check
the alignment of wheels.
If you replace a wheel, the TPMS (Tire Pressure
Monitoring System) sensors need to be reset to ensure they provide accurate warnings
when tires are under- or
over-inflated (see
Resetting the TPMS Sensors on page 137).
Warning: For your safety, use only tires
and wheels that match the original
specification (see Wheels and Tires on
page 160). Tires that do not match the
original
specification can affect the
operation of the Tire Pressure Monitoring System (TPMS).
Warning: Never exceed the speed rating
of your vehicle
Page 137 of 179

correct tire pressure, even if under- orover-inflation has not reached the level
for the TPMS to trigger the Tire Pressure
Warning on the instrument panel.
Resetting the TPMS Sensors
After replacing one or more wheels, the TPMS
sensors must be reset to ensure tire pressure
warnings are accurate. However, note that the
TPMS sensors do not need to be reset after
replacing a tire or rotating wheels.
Note: Do not reset the TPMS sensors in an attempt to clear tire pressure warnings.
To reset TPMS sensors:
1.
Inflate all tires to their recommended
pressures, as indicated on the Tire and
Loading Information label located on the
driver
Page 138 of 179

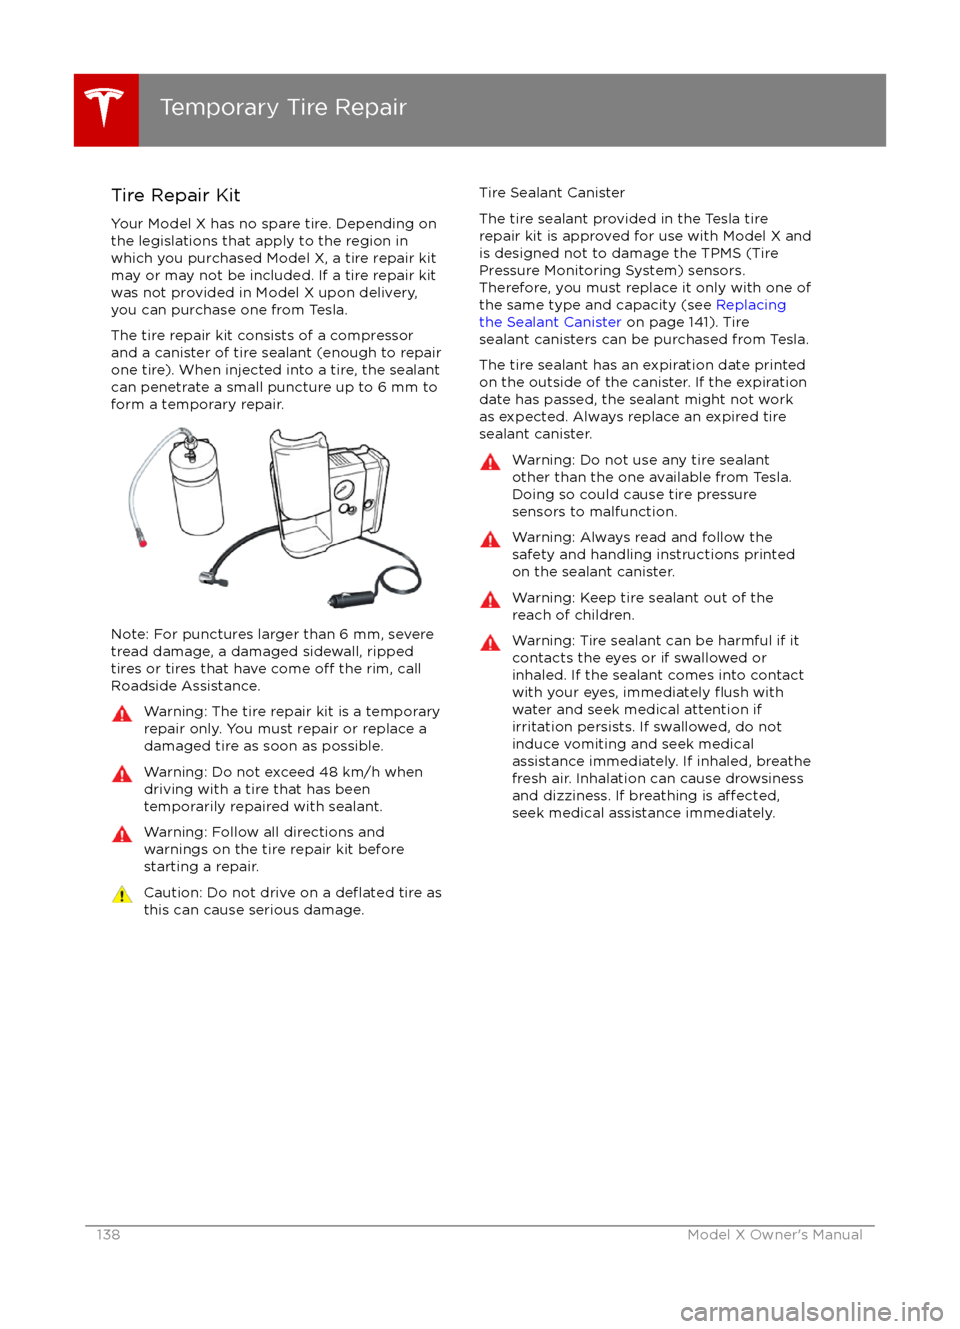
Tire Repair Kit
Your Model X has no spare tire. Depending on
the legislations that apply to the region in
which you purchased Model X, a tire repair kit
may or may not be included. If a tire repair kit
was not provided in Model X upon delivery,
you can purchase one from Tesla.
The tire repair kit consists of a compressor
and a canister of tire sealant (enough to repair
one tire). When injected into a tire, the sealant
can penetrate a small puncture up to 6 mm to form a temporary repair.
Note: For punctures larger than 6 mm, severe
tread damage, a damaged sidewall, ripped
tires or tires that have come
off the rim, call
Roadside Assistance.
Warning: The tire repair kit is a temporary
repair only. You must repair or replace a
damaged tire as soon as possible.Warning: Do not exceed 48 km/h when
driving with a tire that has been
temporarily repaired with sealant.Warning: Follow all directions and
warnings on the tire repair kit before
starting a repair.Caution: Do not drive on a deflated tire as
this can cause serious damage.Tire Sealant Canister
The tire sealant provided in the Tesla tire
repair kit is approved for use with Model X and is designed not to damage the TPMS (Tire
Pressure Monitoring System) sensors.
Therefore, you must replace it only with one of
the same type and capacity (see Replacing
the Sealant Canister on page 141). Tire
sealant canisters can be purchased from Tesla.
The tire sealant has an expiration date printed
on the outside of the canister. If the expiration
date has passed, the sealant might not work
as expected. Always replace an expired tire
sealant canister.Warning: Do not use any tire sealant
other than the one available from Tesla.
Doing so could cause tire pressure
sensors to malfunction.Warning: Always read and follow the
safety and handling instructions printed on the sealant canister.Warning: Keep tire sealant out of the
reach of children.Warning: Tire sealant can be harmful if it
contacts the eyes or if swallowed or
inhaled. If the sealant comes into contact with your eyes, immediately
flush with
water and seek medical attention if
irritation persists. If swallowed, do not
induce vomiting and seek medical assistance immediately. If inhaled, breathe
fresh air. Inhalation can cause drowsiness
and dizziness. If breathing is
affected,seek medical assistance immediately.
Temporary Tire Repair
138Model X Owner
Page 139 of 179

Inflating with Sealant and Air
If you have a Tesla tire repair kit, follow these
steps to temporarily repair a small tire
puncture (less than 6 mm).
1. Stop Model X in a safe place away from
traffic and ask passengers to wait in a safe
area.
2. Turn on the hazard warning
flashers to
alert other road users.
3. If possible, position the wheel with the puncture at the bottom.
4. Detach the power supply connector from
the back of the compressor and plug it
into the 12V power socket located on the
front of center console.
5. Release the clear plastic hose from the tire compressor.
6. Remove the red cap and screw the end of the hose onto the tire
Page 143 of 179

Cleaning the Interior
Frequently inspect and clean the interior to maintain its appearance and to prevent
premature wear. If possible, immediately wipe up spills and remove marks. For general
cleaning, wipe interior surfaces using a soft
cloth (such as micro
fiber) dampened with a
mixture of warm water and mild non-
detergent cleaner (test all cleaners on a
concealed area before use). To avoid streaks,
dry immediately with a soft lint-free cloth.
Interior Glass
Do not scrape, or use any abrasive cleaning
fluid on glass or mirrored surfaces. This can
damage the reflective surface of the mirror
and the heating elements in the rear window.
Airbags
Do not allow any substance to enter an airbag
cover. This could
affect correct operation.
Dashboard and Plastic Surfaces
Do not polish the upper surfaces of the
dashboard. Polished surfaces are
reflectiveand could interfere with your driving view.
Leather Seats
Leather is prone to dye-transfer which can
cause discoloration, particularly on light colored leather. White and tan leather iscoated with an anti-soiling treatment. Wipespills as soon as possible using a soft cloth
moistened with warm water and non-
detergent soap. Wipe gently in a circular
motion. Then wipe dry using a soft, lint-free
cloth. Using detergents or commercially
available leather cleaners and conditioners is
not recommended because they can discolor or dry out the leather.
Cloth Seats
Wipe spills as soon as possible using a soft
cloth moistened with warm water and non-
detergent soap. Wipe gently in a circular
motion. Then wipe dry using a soft, lint-free
cloth. Vacuum the seats as needed to remove
any loose dirt.
Carpets
Avoid over-wetting carpets. For heavily soiled
areas, use a diluted upholstery cleaner.
Seat Belts
Extend the belts to wipe. Do not use any type of detergent or chemical cleaning agent.
Allow the belts to dry naturally while
extended, preferably away from direct
sunlight.
Tesla Built-In Rear Facing Child Seats
Vacuum the seats to remove any loose dirt.
Wipe the seats with a soft cloth dampened
with warm water. You can also use an upholstery cleaner designed for automotive
use. Extend the belts to wipe. Allow the belts
to dry naturally, preferably away from direct
sunlight.
Touchscreen and Instrument Panel
Clean the touchscreen and instrument panel
using a soft lint-free cloth
specificallydesigned to clean monitors and displays. Do not use cleaners (such as a glass cleaner) and
do not use a wet wipe or a dry statically- charged cloth (such as a recently washed
microfiber). To wipe the touchscreen without
activating buttons and changing settings, you
can enable clean mode. Touch Controls > Displays > Clean Mode. The display darkens to
make it easy to see dust and smudges.
Chrome and Metal Surfaces
Polish, abrasive cleaners or hard cloths can
damage the
finish on chrome and metal
surfaces.
Cautions for Interior Cleaning
Warning: If you notice any damage on an
airbag or seat belt, contact Tesla
immediately.Warning: Do not allow any water,
cleaners, or fabric to enter a seat belt
mechanism.Caution: Using solvents (including alcohol), bleach, citrus, naphtha, orsilicone-based products or additives on
interior components can cause damage.
Cleaning
Maintenance143
Page 146 of 179

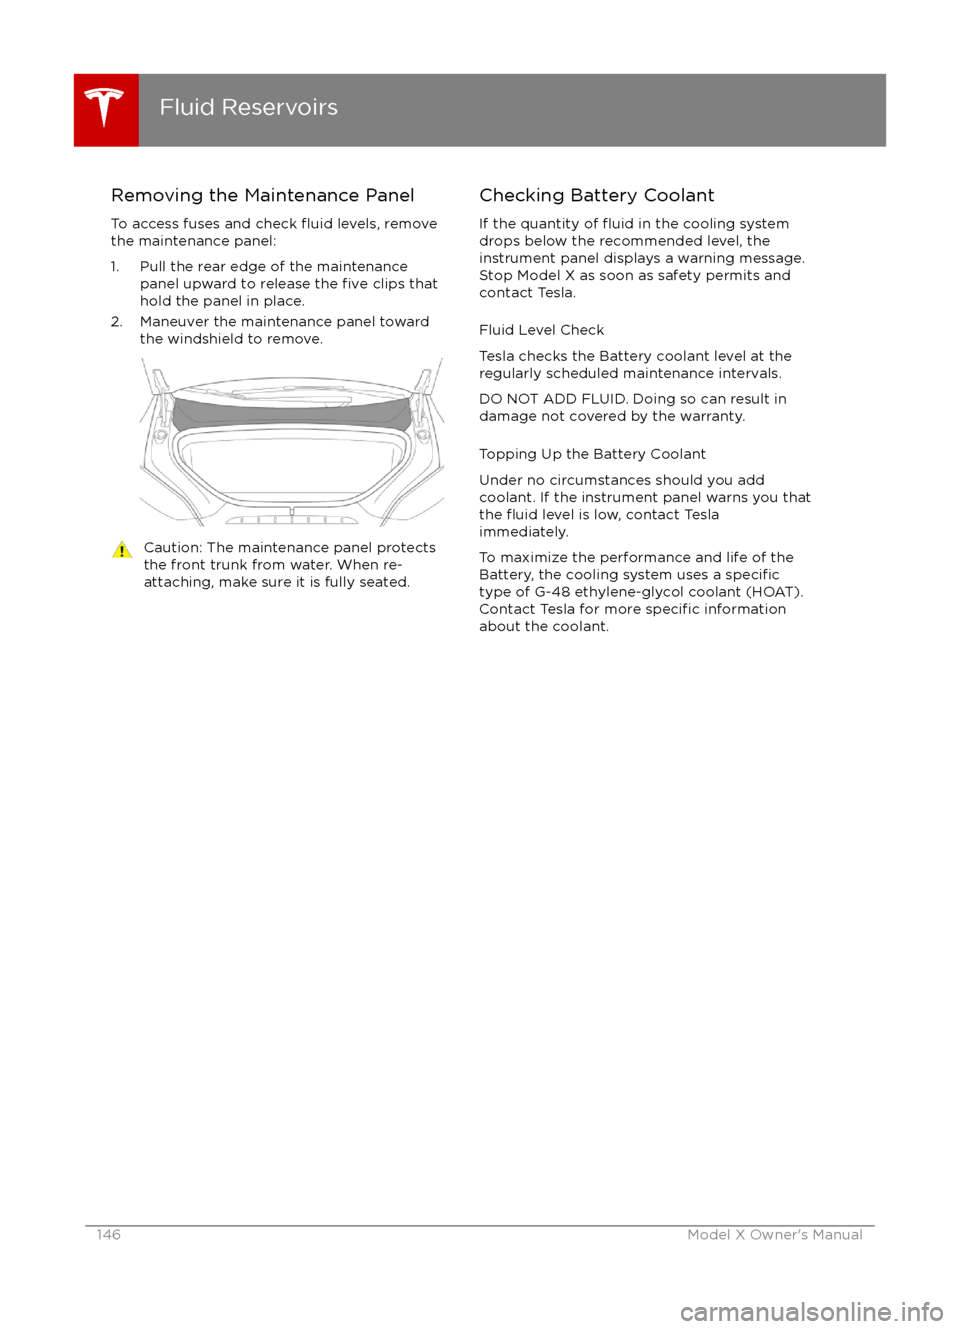
Removing the Maintenance Panel
To access fuses and check
fluid levels, remove
the maintenance panel:
1. Pull the rear edge of the maintenance panel upward to release the
five clips that
hold the panel in place.
2. Maneuver the maintenance panel toward the windshield to remove.
Caution: The maintenance panel protects
the front trunk from water. When re-
attaching, make sure it is fully seated.Checking Battery Coolant
If the quantity of
fluid in the cooling system
drops below the recommended level, the
instrument panel displays a warning message.
Stop Model X as soon as safety permits and
contact Tesla.
Fluid Level Check
Tesla checks the Battery coolant level at the
regularly scheduled maintenance intervals.
DO NOT ADD FLUID. Doing so can result in
damage not covered by the warranty.
Topping Up the Battery Coolant
Under no circumstances should you add
coolant. If the instrument panel warns you that
the
fluid level is low, contact Tesla
immediately.
To maximize the performance and life of the
Battery, the cooling system uses a
specifictype of G-48 ethylene-glycol coolant (HOAT).
Contact Tesla for more specific information
about the coolant.
Fluid Reservoirs
146Model X Owner
Page 147 of 179

Checking Brake FluidWarning: Contact Tesla immediately if you
notice increased movement of the brake
pedal or a
significant loss of brake fluid.Driving under these conditions can result in extended stopping distances or
complete brake failure.
The Brake indicator on the
instrument panel alerts you if the
quantity of
fluid in the brake
reservoir drops below the
recommended level. If it displays
while driving, stop as soon as safety
permits by gently applying the
brakes. Do not continue driving.
Contact Tesla immediately.
Fluid Level Check
Tesla checks the brake
fluid level at the
regularly scheduled maintenance intervals.
Topping Up the Brake Fluid
Do not top up your brake
fluid. Tesla service
does this when you bring Model X in for
regular servicing. The following instructions
are provided for information purposes and future reference only:
1. Clean the
filler cap before removing to
prevent dirt from entering the reservoir.
2. Unscrew the cap and remove.
3. Top up the reservoir to the MAX mark using brake
fluid meeting DOT3specifications.4. Replace the filler cap.
Warning: Only use new fluid from a sealed
air-tight container. Never use previously
used
fluid or fluid from a previously
opened container
Page 150 of 179

Parts, Accessories, and
Modifications
Use only genuine Tesla parts and accessories.
Tesla performs rigorous testing on parts to
ensure their suitability, safety, and reliability.
Purchase these parts from Tesla, where they
are professionally installed and where you can
receive expert advice about
modifications to
Model X.
Tesla is unable to assess parts manufactured
by other distributors and therefore accepts no
responsibility if you use non-Tesla parts on
Model X.
Warning: Installing non-approved parts
and accessories, or performing non- approved
modifications, can affect the
performance of Model X and the safety of
its occupants. Any damage caused by
using or installing non-approved parts, or by performing non-approved
modifications, is not covered by the
warranty.
Warning: Tesla does not accept liability
for death, personal injury or damage that
occurs if you use or install non-approved
accessories or make non-approved
modifications.
Body Repairs
If Model X is in a collision, contact Tesla to
ensure that it is repaired with genuine Tesla
parts. Tesla has selected and approved body
shops that meet strict requirements for
training, equipment, quality, and customer satisfaction.
Some repair shops and insurance companies
might suggest using non-original equipment
or salvaged parts to save money. However,
these parts do not meet Tesla